Table of Contents
Advertisement
Quick Links
HOMEOWNERS OPERATING MANUAL
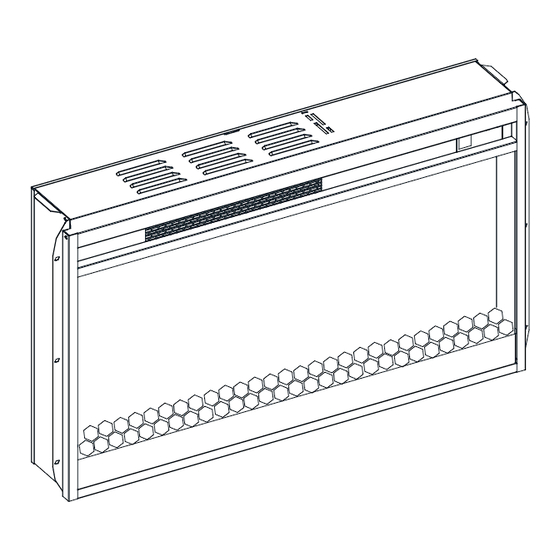
The actual appearance should be subject to the purchase model
MODELS:
261046
CONSUMER SAFETY INFORMATION: PLEASE READ THIS MANUAL BEFORE
INSTALLING AND OPERATING THIS APPLIANCE. FAILURE TO FOLLOW THESE
INSTRUCTIONS MAY RESULT IN A POSSIBLE ELECTRIC SHOCK, FIRE HAZARD, AND/OR
INJURY AND WILL VOID THE WARRANTY.
WARNING: IF THE INFORMATION IN THIS MANUAL IS NOT FOLLOWED, AN ELECTRIC
SHOCK OR FIRE MAY RESULT IN PROPERTY DAMAGE, PERSONAL INJURY, OR LOSS OF
LIFE.
THIS INSTRUCTION BOOKLET CONTAINS
PLEASE READ AND KEEP FOR FUTURE REFERENCE.
ELECTRIC FIREPLACE
RV18V80S-MT8
RV23V80S-MT8
RV26V80S-MT8
RV30V80S-MT8
RV33V80S-MT8
RV36V80S-MT8
RV42V80S-MT8
RV18V80L-MT8
RV23V80L-MT8
RV26V80L-MT8
RV30V80L-MT8
RV33V80L-MT8
RV36V80L-MT8
RV42V80L-MT8
IMPORTANT
01
RV23V80M-MT8
RV26V80M-MT8
RV28V80H-MT8
RV30V80H-MT8
RV33V80H-MT8
SAFETY INFORMATION.
Advertisement
Table of Contents

Subscribe to Our Youtube Channel
Related Manuals for BED BATH & Beyond RV18V80S-MT8


Summary of Contents for BED BATH & Beyond RV18V80S-MT8
- Page 1 ELECTRIC FIREPLACE HOMEOWNERS OPERATING MANUAL The actual appearance should be subject to the purchase model MODELS: RV18V80S-MT8 RV18V80L-MT8 RV23V80M-MT8 RV23V80S-MT8 RV23V80L-MT8 RV26V80M-MT8 RV26V80S-MT8 RV26V80L-MT8 RV28V80H-MT8 RV30V80S-MT8 RV30V80L-MT8 RV30V80H-MT8 RV33V80S-MT8 RV33V80L-MT8 RV33V80H-MT8 261046 RV36V80S-MT8 RV36V80L-MT8 RV42V80S-MT8 RV42V80L-MT8 CONSUMER SAFETY INFORMATION: PLEASE READ THIS MANUAL BEFORE INSTALLING AND OPERATING THIS APPLIANCE.
-
Page 2: Important Instructions
IMPORTANT INSTRUCTIONS When using electrical appliances, basic precautions should always be followed to reduce the risk of fire, electrical shock, and/or injury including the following: 1. Read all instructions before using this heater. 2. This heater is hot when in use. To avoid burns, do not let bare skin touch hot surfaces. If pro- vided, use handles when moving this heater. -
Page 3: Package Contents
PACKAGE CONTENTS 6 Screws 2 L-Brackets Remote Control Fireplace Acrylic Crystals 2 LED light bars 2 Hooks Manual INSTALLATION INSTRUCTION Position your completed mantel close to its final location. Make sure you can access the back of the mantel as your electric fireplace appliance will be installed from back. Unpack the electric fireplace appliance carefully. -
Page 4: Grounding Instructions
GROUNDING INSTRUCTIONS: Figure 2 This heater is for use on 120 volts. The cord has a plug as shown at (A) in figure 2. An adapter as shown at (C) is available for connecting three-blade grounding-type plugs to two-slot receptacles. The green grounding lug extending Grounding Pin from the adapter must be connected to a per- Cover of Grounded Outlet Box... -
Page 5: Electrical Specifications
INSTALLING THE SIDELIGHTS Take the 2 side lights from the package, then plug into the back panel of fireplace as below diagram. You can use 2 supplied hooks to secure the wire connecting the side lights. If the clearance distance of side panel of insert and mantel less than 3.4inch, fix the insert with furniture by L-Brackets on the back panel. - Page 6 Do not share a socket with other appliances when using electric fireplaces, please use a dedicated socket. × √ × Never use with an extension cord or relocatable power tap (outlet / power strip). ×...
-
Page 7: Cleaning Trim
COLD CLIMATE INSTALLATION RECOMMENDATION: When installing this unit against a Non-insulated exterior wall or chase, it is mandatory that outer walls be insulated to conform to applicable insulation codes. ELECTRICAL CONNECTION The unit comes standard with 6 feet (1.8M) three wire cord, exiting from the rear of the fire- place. - Page 8 OPERATING INSTRUCTION On the top-right of the electric firebox is the mechanical control panel. This panel contains the buttons to properly operate the electric fireplace. The functions of buttons on the remote control are the same as the control panel. The remote control has an effective range of up to 19 ft.. Digital Display POWER The POWER button turns the appliance on or off.
-
Page 9: Fcc Statement
TIMER The TIMER has adjustable setting with range from 1 hours to 9 hours and OFF. As shown the following: 1h-2h-3h-4h-5h-6h-7h-8h-9h-OFF. Once you have set the timer, and the timer is up, the ember bed will flash 6 timers and close all the functions and enter standby mode. In this mode, you should touch the power icon to restart the fireplace. -
Page 10: Batteries Replacement
BATTERIES REPLACEMENT NOTE: ·Do not mix old and new batteries. ·Do not mix alkaine, standard (carbon zinc), or rechargable (nicad, nimh, etc.) batteries. ·Do not ingest batteries. CAUTION: ·Always purchase the correct size and grade of battery most suitable for the intended use. ·Replace all batteries of a set at the same time. -
Page 11: Year Limited Warranty
1 YEAR LIMITED WARRANTY Electrical Fireplace Basic Warranty Our electrical fireplace is free from manufacturing and material defects for a period of one year from date of purchase, subject to the following conditions and limitations. 1. This electric fireplace must be installed and operated at all times in accordance with the installation and operating instructions furnished with the product, Any unauthorized repair, alteration, willful abuse, accident, or misuse of the product shall nullify this warranty.
Need help?
Do you have a question about the RV18V80S-MT8 and is the answer not in the manual?
Questions and answers