
Related Manuals for JONATHAN Y VAN1005


Summary of Contents for JONATHAN Y VAN1005
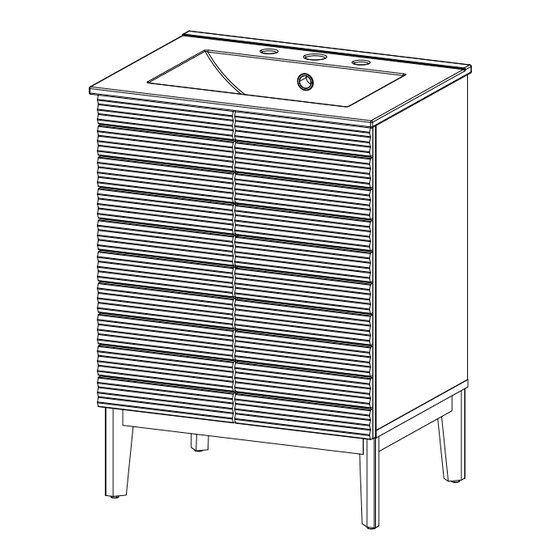
- Page 1 JONATHAN Y Model# VAN1005 Product Dimensions: 23”Wx18”Dx33”H WARNING : WEIGHT CAPACITY: 33 LBS SHELF LOAD CAPACITY: 18 LBS Warning : Do not stand on Vanity. Warning : Do not over torque bolts.
- Page 2 WARNING Inspect item carefully before a�emp�ng to install if there is any damage or obvious defect, do not install item may not be returned once it has been installed. CARE AND MAINTENANCE Always use felt pads under all ar�cles to prevent discolora�on or so�ening of the lacquer. Plas�c and rubber bases on items can discolor wood.
- Page 3 Hardware x 15 B x 15 C x 26 D x 2 H x 56 BC67 HS26A BC410 NUMBER OF PERSONS : 02 SET-UP TIME : 60 MINUTES TOOLS : Ver. 00 CALANDRE 24 VANITY 3 of 15...
- Page 4 Don't over �ghten ± 2 - 3 mm x 12 Don't over �ghten ± 2 - 3 mm Don't over �ghten ± 2 - 3 mm x 14 Ver. 00 CALANDRE 24 VANITY 4 of 15...
- Page 5 Ver. 00 CALANDRE 24 VANITY 5 of 15...
- Page 6 Ver. 00 CALANDRE 24 VANITY 6 of 15...
- Page 7 BC410 ±2 mm Don't over �ghten ± 2 mm x 12 BC410 Ver. 00 CALANDRE 24 VANITY 7 of 15...
- Page 8 ±2 mm Don't over �ghten ± 2 mm ±2 mm Don't over �ghten ± 2 mm Ver. 00 CALANDRE 24 VANITY 8 of 15...
- Page 9 Ver. 00 CALANDRE 24 VANITY 9 of 15...
- Page 10 Ver. 00 CALANDRE 24 VANITY 10 of 15...
- Page 11 BC67 NOTE : Tighten all the screw BC67 Ver. 00 CALANDRE 24 VANITY 11 of 15...
- Page 12 Note : Hammer, scher and screw not include ATTACHMENT OF FURNITURE This furniture may represent a danger for your security if it’s attachment on the wall has been done in an incorrect way. This attachment must be done by a person with great expertise who will make sure adequacy between the device of xing and the wall.
- Page 13 Apply a thin bead of silicone compound around the vanity base and set the vanity top carefully in place. Remove any excess silicone compound with a wet rag Sold Separately Silicone not included Waterpass Ver. 00 CALANDRE 24 VANITY 13 of 15...
- Page 14 HS26A HS26A HS26A Note : TWIST FOR ADJUST x 16 Ver. 00 CALANDRE 24 VANITY 14 of 15...
- Page 15 Ver. 00 CALANDRE 24 VANITY 15 of 15...
Need help?
Do you have a question about the VAN1005 and is the answer not in the manual?
Questions and answers