Table of Contents
Advertisement
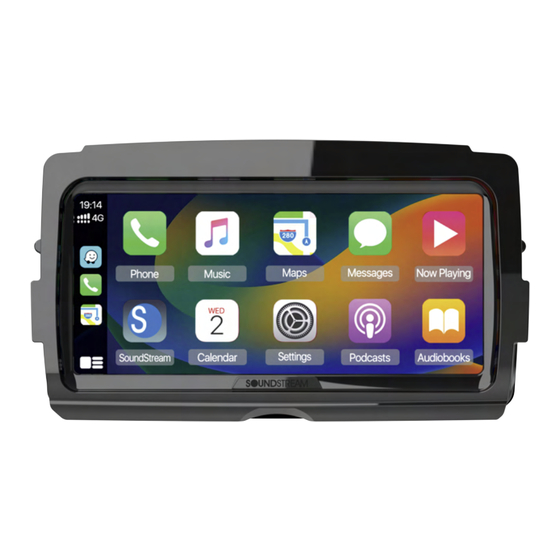
Head Unit for 2014+ Harley-Davidson
®
w/ iGo
GPS Navigation, Wireless Apple
Android Auto
SiriusXM
15-BAND
EQUALIZER
& CROSSOVERS
®
, iDataLink
®
®
Ready
Wireless
Headset
Integration
5-
VOLT
RCA AUDIO
OUTPUT
®
Touring Motorcycles
®
®
Maestro
, & 8.3" LCD Touchscreen
GPS
NAVIGATION
Rally
Mode
TM
Music Sharing
2-
OHM
4ch. SPEAKER
AMPLIFIER
Owner's Manual
®
CarPlay
, Wireless
®
Compatible,
Wide
8"
screen
IPx5
WATERPROOF
FACEPLATE
V2
EN
LCD
Advertisement
Table of Contents

Summary of Contents for RESERVE V2
- Page 1 Owner’s Manual ® Head Unit for 2014+ Harley-Davidson Touring Motorcycles ® ® ® w/ iGo GPS Navigation, Wireless Apple CarPlay , Wireless ® ® ® Android Auto , iDataLink Maestro Compatible, ® ® SiriusXM Ready , & 8.3” LCD Touchscreen NAVIGATION Rally Wide...
-
Page 2: Table Of Contents
Safety First Contents Safety Definitions Safety First Statements in this manual preceded by following Safety Definitions words are of special significance: Pre-Riding WARNING Check list Care and cleaning WARNING indicates a potentially hazardous situation which, if not avoided, could result Screen in death or serious injury. -
Page 3: Pre-Riding
7. Connect the iDataLink Maestro module for Motorcycle Info and Gauage information display. CARE AND CLEANING Use only V2 recommended products and methods to keep the radio, speakers, and other audio system components clean and in good condition. Do not use any abrasives, polishes, or rubbing compoundsto clean the screen or other components. -
Page 4: Accessories & Installation
Accessories and Installation Harness Included! Installation Use OEM head unit mounting locations & original screws... -
Page 5: Installation
Installation Note: Reinstall the OEM bracket after head unit installation Installation 1 USB Connector Connect the OEM USB cable for USB device, Android smart phone, iPhone. 2 GPS Connector Connect the GPS Antenna. 3 Radio Connector Connect the Radio Antenna. 4 Camera in Connect the Camera in. -
Page 6: Wiring
Connect the OEM GPS,USB and radio antenna cables disconnected during removal of the OEM head unit to matching SOCKETS on the back of V2. If all are difficult to connect, verify the orientation of the connector(s) is correct. If any afternarket audio amplifiers will be used in the audio system,take a moment to connect the RCA cables to the corresponding audio outputs. -
Page 7: Harness
Included Harness Harness! Connect to Motorcycle: Connect to V2 (Headunit): 3- Pin Connector 1. CAN- (Green/White) Black......Ground 8. RL-(Green/Black) Red......ACC 9. RL+ (Green) Yellow......Battery 10. RR+(Purple) 11. FL-(White/Black) 4- Pin Connector 12. FR+(Gray) Blue/White...UART-RX 13. CAN+( Purple/White) Gray/White..UART-TX 14. Remote Control(Blue) Black/White..UART-GND... -
Page 8: Main Menu
Main Menu Page 1 V2 is a headunit for 2014+ Harley-Davidson® Touring Motorcycles w/ iGo® GPS Navigation, Wireless Apple® CarPlay®, Wireless Android Auto®, iDataLink® Maestro® Compatible,Siri- usXM® Ready®, & 8.3” LCD Touchscreen Touch the corresponding Mode icon to enter playing mode. The Mode icon in gray means the corresponding function is not ready, or the proper device has not been connected. -
Page 9: Setting
Settings Tap to activate pop-up settings menu: In APPs page 2, press <Setting> icon to access to settings page. System settings as below: Language , Date & Time, Touch Feedback, Factory Reset,Camera View, GPS Signal, About. Language: Select the prefer language for operation. 1.Press to Mute or Un-Mute. - Page 10 Settings Display settings as below: Background wallpaper, Factory Reset: Brightness. Reset Factory Data, press it to pop-up dialog box, you can select “OK” or “Cancel”. Background Wallpaper: Camera View: Select the prefer preset wallpaer . Set the Camera View is Normal or Reverse. GPS Signal: Once receive the GPS signal, will display the signal / satellite number.
- Page 11 Settings About the Crossover Audio Setting This unit is equipped with an active crossover. The Below shown is the Audio serring Menu. crossover limits the frequencies delivered to the outputs. The crossover adjusts the HPF (high pass filter) or LPF (low pass filter) of speakers and subwoofer, and also the slope (how fast the filter rolls off...
- Page 12 Settings Front/ Rear Crossover: AMP Turn-on Delay: ON /OFF. User can set AMP Turn-on Delay is ON or OFF. Volume Settings: User can set Source Level / Maximum Volume / Defult Audio. Slope: 12dB / 24dB Set Font Crossover Set Low Pass Crossover Frequency &...
- Page 13 Settings Default Audio. Wi Settings: Touch the Wifi Settings from the setting menu will be shown as below: User can adjust the default audio (Main, BT Talking, Navi , Voice,) gain value. The gain can be adjusted from 0~40 seperatedly. Wi-Fi : On/Off...
-
Page 14: Apple Carplay/Android Auto
Apple CarPlay & Android Auto ® ® Apple CarPlay : Starting procedure of using Apple CarPlay You can operate iPhone applications with 1 Connect an Apple CarPlay compatible finger gestures such as tapping, dragging, device to this unit via USB. scrolling, or flicking on the screen of this 2 Touch the Apple CarPlay icon. - Page 15 Soundstream V2 search the available devices. Bluetoot Device(Sound- stream V2) . b. A Bluetooth Pairing Request will be displayed on the screen with a specific code which should match what is shown on. Tag “Pair” for connecting. c. Immediately following the Pairing notification, a new request to “Allow Contacts and favorites Sync”...
- Page 16 Apple CarPlay & Android Auto ® ® Note: • You can use Voice function by touching Operation Bar button once Android Auto is activated. Starts the application or displays informa- tion. • The Bluetooth connection with the Android Auto compatible device will be terminated How to connect Wireless Android Auto automatically if Android Auto is turned on.
- Page 17 Bluetooth , then follow the pop notice step by step to connect wireless Android Auto. 1. Turn on your phone’s Bluetooth and Wi-Fi, and connect to Soundstream V2. MagiCast_1104 a. Go to Settings > Bluetooth and the phone should be able to find a Bluetooth Device(-...
-
Page 18: Radio Operation
Radio Radio Touch “ ” in the main menu to enter the 1. Favorite list (Global preset), user can store radio interface. favorite AM/FM/SixiusXM station, then select it for playback directly. Once tap one station, will back to playback page. 2. -
Page 19: Siriusxm
Tuner and antenna, power on your SoundstreaM check the SiriusXM tuner connection. V2 and select SiriusXM mode. You should be able to hear the SiriusXM preview channel on Channel 1. If you cannot hear the preview channel, please check the installation instructions to make sure your SiriusXM Connect tuner is properly installed. - Page 20 Sirius XM 1. Tap to back to home page. Artist and Song Alert 2. Tap to playback previous channel While listening to SiriusXM Satellite Radio, user 3. Show current station ID can mark Artists and/or Songs for which you 4. Show current station information. wish to be alerted.
- Page 21 Sirius XM SXM List Change Pass Code > Touch " of the Change Passcode" to show the below screen. Input the passcode by using the keypad. My Alert Press the My Alerts key to view all stored artist & song title alerts. Press Artist / Song to show the stored the alerts.
- Page 22 Sirius XM SXM List Change Pass Code > Touch " of the Change Passcode" to show the below screen. Input the passcode by using the keypad. My Alert Press the My Alerts key to view all stored artist & song title alerts. Press Artist / Song to show the stored the alerts.
- Page 23 Sirius XM Info / Category / Channel Touch “Artist /Song/ ” button at top bar to display the channel detailed information. On-Screen Display Advisory Message Cause Explanation / Solution The radio has detected a fault with • Verify that the SiriusXM Connect Vehicle Tuner cable is securely connected to the radio SiriusXM connector/ cable.
-
Page 24: Usb Operation
USB picture playback: Bluetooth Pairing: Pairing screen will be shown as below: Turn on the Bluetooth of the Mobile phone/ Bluetooth device; you can see the "SOUND- STREAM V2." Select the "SOUNDSTREAM V2" for paring and connection. -
Page 25: Bluetooth Music
Bluetooth Audio Bluetooth Music Playback 1. Touch the icon to enter keypad screen. 2. Using the keypad, touch 0-9,*,#, enter the phone Touch BT Audio icon to enter music number you wish to dial. If you input an incorrect number, touch the icon on the keypad to delete the incorrect number. -
Page 26: Headsets
Headsets BT Settings Receive an incoming call If the Phone is connected with the source unit via Bluetooth, when an incoming call, below screen will be shown: Auto Answer On /OFF, incoming call auto answer. MIC Gain, Set MIC Gain is High/Mid/Low. Press to answer the incoming call. -
Page 27: Rally Mode
Rally Mode equipped head units and accessories. An unlimited number of users can pair with a principal broadcaster’s stream. V2 headunit indentify is DJ User can broadcast your playlists to group rider or Routing: Switch the media sound routing other accessories. - Page 28 2 Getting started 4. If needed, modify the time format and unit settings. Later you can change them in Region- Soundstream V2 is optimized for in-car use. You al settings . Tap continue. can use it easily by tapping the screen buttons and the map with your fingertips.
- Page 29 2.2 Screen controls The following sections describe the functionality and use of buttons, sliders, and other screen controls in Soundstream V2. 2.2.1 Using the buttons and other controls To operate Soundstream V2, tap the buttons on the touch screen. Type Example Description...
- Page 30 Entering a space, for Otherwise, V2 saves your selections and applies example between a the new settings without confirmation as soon as to button at the first name and a family...
- Page 31 iGo map Operation 2.2.4 Using touch gestures 2.2.5 Manipulating the map You usually need to tap the screen only once. If you tap the map anywhere during navigation, the However, some useful features can be accessed map stops following the current position (the blue with other gestures.
- Page 32 iGo map Operation 2.3 Navigation view You can perform the following actions on the map: The navigation view is the main screen of Epsilon Action Function Linux device that shows the planned route on a map. /Buttons Epsilon Linux device works with digital maps which are not simply the computerized versions of tradition- Change the vertical view angle of Tilting...
- Page 33 iGo map Operation Number Name Description Current position marker The dot near the arrow shows the GPS position as perceived by the GPS GPS position receiver. Planned route The planned route is displayed as an orange line. Three data fields show the following information: The estimated time of the arrival at the destination.
- Page 34 The planned route is the currently navigated route. Whenever the destination is set, the route is active V2 device shows the streets similarly to paper road until you delete it, reach your destination or suspend maps. Their width and colors correspond to their navigation.
- Page 35 iGo map Operation 2.3.5 Maneuver icons 2.3.6 Lane information During navigation the next maneuver is displayed in When navigating on multi-lane roads, it is important the top left corner. Most of the maneuver icons are to take the appropriate lane in order to follow the intuitive.
- Page 36 iGo map Operation Tap any of them to display the exit area on the map. You can now easily add this service station as a waypoint to your route if necessary. If you want to display other types of Places at the next few service stations, you can change the icons in You can see the following menu options when you 2.3.9 3D object types...
- Page 37 It is displayed if there is a multipoint 3 Using the navigation route. By default, V2 device calculates routes using the road In the navigation menu, you have the following network of the maps provided with the product. You...
- Page 38 iGo map Operation 3.1 Selecting a destination 4. (optional) To search in a different area, tap the You can choose your destination by selecting one of input field with the search area, and start entering the the following options: name of the new search area on the keyboard. * Using combined search to search among different destination types at once.
- Page 39 iGo map Operation 9. Check the settings for road types and change them if necessary. 7. If necessary, tap on the right side of the list and then tap the corresponding button to narrow the list of search results by type (the number on the to enable or avoid freeways, tap related icon shows the number of the matching results):...
- Page 40 iGo map Operation 3.1.2 Selecting an address b. Tap to open the list of results and If you know at least a part of the address, this is the select one country from the list. quickest way to select your destination. Using the same screen, you can find an address by entering 4.
- Page 41 iGo map Operation 5. Enter the street name. 7.Check the settings for road types and change them if necessary. a. Tap the Street field. b. (optional) On the Select Street screen, you can immediately select a street from the list of suggestions. to enable or avoid freeways, tap roads with Period Charge or Per-use Toll, tap ferries, or tap...
- Page 42 iGo map Operation 1. Tap on the Navigation view to access the Navigation menu. 2. Tap 5. Enter the street name. a. Tap the Street field. b. (optional) On the Select Street screen, you can a. In the Select Country screen, you can immediately immediately select a street from the list of sugges- select a country from the list below the input field or tions.
- Page 43 iGo map Operation 3.1.2.3 Selecting a town center 6. A full screen map appears with the selected point in the middle. If necessary, tap the map somewhere else The town center is not the geometric center of the town but an arbitrary point the map creators have to modify the destination.
- Page 44 iGo map Operation 3.1.2.5 Selecting an intersection in a town 1. Go to , , and select the country and To navigate to an intersection, perform the following town as described earlier. The Select Street screen steps: appears. 1. Go to , and select the country and city 2.
- Page 45 iGo map Operation 3. Tap the House number or crossing street field and 3.1.3 Selecting a Place of Interest browse the list of crossing streets or start entering the You can search for Places of Interest (Places) in the street name in the field. Select one from the list. menu.
- Page 46 iGo map Operation 3. Tap any of the quick search buttons to get an instant list of Places. 10. Tap to confirm the destination. 4. The Places in the list can be ordered by their You can also select a nearby point on the map distance from the current or last known position, from the destination, or by the length of the necessary or tap...
- Page 47 iGo map Operation to search along the planned route, and not around a given point. This is useful when you search for a later stopover that results in a minimal detour only, such as searching for upcoming gas stations or restaurants. (The result list is ordered by the length of the necessary detour.) 7.
- Page 48 iGo map Operation 3.1.3.3 Searching by name 5. (optional) If you have selected , select the town to To search for a Place by name, browse the various Place categories, or use the mixture of the two search types, search in perform the following steps: 1.
- Page 49 iGo map Operation 4. (optional) The Places in the list can be ordered 3.1.3.4 Finding help nearby by the following criteria: To quickly search for nearby assistance, perform the * By their distance from the current or last known following steps: position * By name.
- Page 50 iGo map Operation 8. Check the settings for road types and change them if necessary. 1. Tap on the Navigation view to access the Navigation menu. to enable or avoid freeways, tap 2. Tap . Two of the Smart History Items are roads with Period Charge or Per-use Toll, tap displayed in the New Route to...
- Page 51 iGo map Operation 7. Tap to confirm the destination. 3. The list of saved routes appears. If necessary, scroll You can also select a nearby point on the map the list to see earlier routes. 4. Select a route and the Multipoint Route screen or tap to select a different destination.
- Page 52 iGo map Operation 6. Tap to confirm the destination. You can also select a nearby point on the map or tap to select a different destination. 7. The route is calculated and the map appears showing the entire route, where you can check route information and route alternatives.
- Page 53 iGo map Operation Note. 4. Tap to select the destination. If you already have a planned route, tap 5. The New Route to... screen appears, where you can add the selected location to your select the destination of the route the same way as route.
- Page 54 iGo map Operation 3.2 Checking route information and alternatives By tapping , your can see a list To get a map overview of the planned route and check different parameters of the planned route, of route alternatives and select the most suitable perform the following steps: route.
- Page 55 iGo map Operation 3.2 Checking route information and alternatives By tapping , your can see a list To get a map overview of the planned route and check different parameters of the planned route, of route alternatives and select the most suitable perform the following steps: route.
- Page 56 iGo map Operation 3.3.2 Adding an additional destination If you already have a planned route and you select a new destination as described in the above sections, the route to the previous destination is deleted and a new route is calculated. To add a new intermediate destination to the planned route, perform one of the following actions: * Tap...
- Page 57 2. Tap 3. You can see the basic details of route alterna- tives. Tap any of them to see it on the map. By selecting a previously saved route, V2 device recalculates the route using the saved destination and/or the waypoints.
- Page 58 5. Select one of the route alternatives and 5. Select one of the route alternatives and to return to the previous screen. V2 to return to the previous screen. device recalculates the route. Tap V2 device replaces the original route.
- Page 59 iGo map Operation 3.3.9 Pausing guidance When you are driving a planned route but you do not need guidance for a certain part of the route, you can suspend it and continue when it is needed again. In the Navigation menu, tap to suspend guidance.
- Page 60 iGo map Operation 3.3.9 Pausing guidance When you are driving a planned route but you do not need guidance for a certain part of the route, you can suspend it and continue when it is needed again. In the Navigation menu, tap to suspend guidance.
- Page 61 iGo map Operation 3.Tap 3. Tap 4. Tap the location you want to edit, and enter the name of the l ocation on the keyboard, then tap Note: In Saved Locations, Home and Work cannot be 4. Scroll down the list and tap renamed.
- Page 62 iGo map Operation 3.7.1 Switching to off-road navigation To switch to off-road navigation, perform the 3. Tap following steps: 1. On the Navigation view, tap 2. Tap and select Most of the procedures described for on-road 4. Tap . The simulation starts from navigation also apply to off-road navigation.
- Page 63 iGo map Operation When you reach the final destination, the navigation 4.1.3 Road safety cameras and other proximity Alert Points There is a special proximity warning for ends. road safety cameras (like speed or red light cameras) and other proximity Alert Points (like schools or Note: If you do not want to use off-road naviga- railroad crossings).
- Page 64 Route 4.1.7.1 Congestion detour on highways preferences settings. V2 device may offer a detour when you slow down on a highway due to a traffic jam. The Potential V2 device automatically recalculates the route if you congestion detour window appears and shows the deviate from the proposed itinerary.
- Page 65 4.1.7.2 Real-time alternative routes V2 device may offer an alternative route on normal roads in case of a traffic jam. The possible alternative route window appears and shows the length and By tapping and , duration of the detour.
- Page 66 iGo map Operation Button Description Shows information on the current position (latitude, longitude, nearest town, next crossing street, and so on) or the last known position if GPS reception is not available. Offers assistance near your current *By tapping the current street name if it is position.
- Page 67 iGo map Operation 4.2.2 Trip Monitor 4.3 Settings menu Trip Monitor logs information about your route. You can configure the navigation settings, and modify the behavior of Epsilon Linux device, by You can record a new trip by tapping tapping stop it by tapping Tap the arrows to view the content of other pages.
- Page 68 iGo map Operation Button Function Button Function Gives a quick route if you can Change the voice guidance travel at or near the speed limit on language, set the time zone, the roads. Usually, best measurement units, the time and selection for fast and normal cars.
- Page 69 iGo map Operation Button Description You might need to avoid freeways when you are driving a slow car or you are towing another vehicle. Charge roads are pay roads where you can purchase a pass or vignette to use the road for a longer period of time. They can be enabled or disabled separately from toll roads.
- Page 70 Button Description V2 is able to warn you if you exceed the current speed limit. This information may not be available in your region, or may not be fully correct for all roads on the map. This setting lets you decide whether you wish to receive visible and/or audible warnings.
- Page 71 iGo map Operation 4.3.4 Navigation View settings Button Function These settings allow you to fine-tune the appearance of the Navigation view. You can also adjust how the software helps you navigate with different kinds of Show or hide the 3D elevation of route-related information on the Navigation view.
- Page 72 iGo map Operation Button Function Button Function Select the service types displayed It displays the current written for the freeway exits. Choose from language of the user interface. the Places categories. Tap it to select a new language from the list of available languag- Zoom out and show an overview es.
- Page 73 1: Tap , and Solution 1: If the house number is not known or V2 cannot find it, select only the street name. This way, V2 2. Tap will navigate you to the midpoint of the street, where...
- Page 74 Some keyboard buttons are grayed out and cannot be used. Cause: V2 has a smart keyboard for address search, which means that only those buttons are active that can be used to type a name that is available on the map.
-
Page 75: Idata Link
For details on the function Soundstream V2 and iDatalink Maestro RR. available for each model refer to the informa- When your V2 receiver is installed in a compati- tion on our website. ble motorcycle using the iDatalink Maestro RR -For trouble shooting information about interface (sold separately), you’ll be able to... - Page 76 Tap the Gauges icon on the main menu, will CANBUS Integration Module display below: The V2 headunit can display up to 10 digital gauges, offering a selection from over 50 available options. You can receive pop-up warnings for oil pressure, fuel level, engine temperature, and more.
-
Page 77: Camera In
Left HandControl Cursor Camera View For connecting a camera. Displaying the picture from the Camera RightHandControls The camera view screen is displayed when you enter the Camra in. Note: V2 can support 720p high resolution camera in. Left Right Enter Down... -
Page 78: Speci Cation
Specification GENERAL GENERAL Power Requirement: Power Requirement: DC 10 - 16Volts, DC 10 - 16Volts, Power Requirement: Power Requirement: Negative ground Negative ground Current Drain: Current Drain: 15A (Max.) 15A (Max.) RMS Power Output: – Typ 4 x 30 W /4 Ω @ 14.4 V, 1 kHz THD = –... -
Page 79: Trouble Shooting
Trouble Shooting Problem Cause Correct action Check fuse Replace fuse No Power, Dead. Consult your Local Specialist. Incorrect wiring www.MotorcycleAudio.com/Spe cialist-Locator 1. Turn off the unit. 2. Remove all wires attached to the power antenna lead. No sound output when Power antenna lead is Check eachwire for a possible operating the unit with... -
Page 80: Fcc Notes
FCC Notes FCC Compliance This device complies with Part 15 of the FCC Rules. Operation is subject to the follow- ing two conditions: (1) this device may not cause harmful interference, and (2) this device must accept any interference received, including interference that may cause undesired operation.
Need help?
Do you have a question about the V2 and is the answer not in the manual?
Questions and answers
Is there a way to import a navigation route created in Harley ride planner into the v2?
1 How do I mute the music quickly. 2. How do I turn off, you are over the speed limit, voice notice.