Table of Contents
Advertisement
Quick Links
Advertisement
Table of Contents

Summary of Contents for BLAM POWER DSP 4
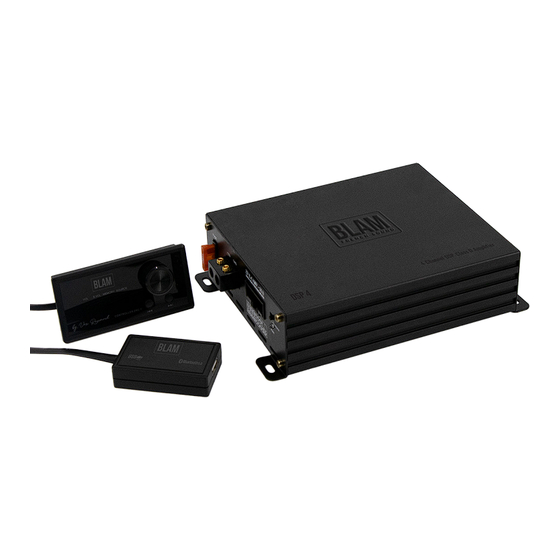
- Page 1 POWER DSP 4 USER MANUAL blam-audio.com...
- Page 2 CAUTION To prevent unit be short circuit, please do not put it in the wet or damping places. If unit catch water and any liquid that please turn off power immediately and do not open cover by yourself. Please contact with professional engineer for checking to avoid accident happen.
-
Page 3: Table Of Contents
CONTENTS 1. Features 1.1 Audio specification, main audio signal process diagram 1.2 Input and output side panel 1.3 Software introduction 1.4 Function introduction 2. Installation 2.1 System classic connecting reference 2.2 Unit connection 2.3 Low level RCA input/output 2.4 USB2.0 Port 2.5 The remote control function is introduced 3. -
Page 4: Audio Specification, Main Audio Signal Process Diagram
1. FEATURE 1.1 Audio specification, main audio signal process diagram This equipment adopts the audio extraction method with high sampling rate of 48KHz. The core processor is the digital signal processor (DSP) with high resolution 64 bit double precision floating point and 170 section 31 parametric equalizer or graphic equalizer, delay and frequency device (low shear and high cut filter, the types of specialized division include: Ning g / Bessel / Butterworth, CH1-CH6 nine slope 6dB and 12dB /18dB/ 24dB/30dB /36dB/ 42dB/ 48dB/off optional) etc.. -
Page 5: Input And Output Side Panel
1.2 Input and output side panel 1.2 Input and output side panel Figure 1.2.1 Head unit connecting port HI-L /REM IN convertor Power LED indicator Power input Fuse Bluetooth port USB 2.0 PC Connect Remote Control Low level input Low level RCA output 1.3 Software Introduction DSP 4 PC software control: (please check 3. Software Operation detail) 1) Autometically detect whatever the hardware is connecting with USB... - Page 6 Function Choice: 4ch high level, 2ch low level, Input signal type Bluetooth, USB RCA output location Freely definable output sound position and speaker type Output signal gain Gain range: Mute, -59.9dB to 0dB Output signal 1-6 Each output channel 31 band equalizer en- equalizer gine: 1. Equalizer type: 1st equalizer for Q and low pass option. 2nd equalizer for Q and high pass option ot- hers for Q balance 2.Frequency range: 20Hz~20KHz, resolution...
-
Page 7: System Classic Connecting Reference
2. SYSTEM CONNECTIONS 2.1 System classic connecting reference Figure 2.1 this connecting method is for two units input, please refer below: 1. Please use Plug & Play cable to connect original car unit and DSP 4 for upgrade audio system effects. Please use OUT5 and OUT6 RCA output when Install bass amplifier or subwoofer 2. with the player, using RCA low level input connection, mobile phone use standard AUX special line. -
Page 8: Unit Connection
2.2 Unit connection Figure 2.2 Indication“1”is the plug connecting position and assort with connecting cable which is matching unit.(figure 2.2) Connecting wire specifically de- fined in the following table: Direction: 1. only for the original Plug & Play cables, or user using others directly. 2. REM input, when the toggle switch to ACC, only ACC input; When the toggle switch is switched to HOST, the two high level input lines of FL+/ FL- are defined. -
Page 9: Usb2.0 Port
2.4 USB 2.0 Port As shown in figure 1.2.1, the ”7” indicator bit is the ”USB2.0” position. Figure 2.3 Use Random accessories USB cable into this hole on a computer conne- cted to the PC, open tuning software to debug the sound system. 2.5 The remote control function is introduced 1. Choose the total volume /sub volume / memory / source and other functions 2. VOL LED: Rotate the knob to increase or decrease Volume. -
Page 10: Software Operation
3. SOFTWARE OPERATION 3.1 Software Installation PC tuning software is no need to install drive program, plug and play. Operating environment: Suitable for Windows XP / Vista / WIN7 / WIN8 / WIN10 operating system. The installation procedure describes: After you install the software and downloading, double-click the installa- tion file, step down can be achieved by tuning the software is installed. 3.2 Turn on and turn off Double-click the DSP 4 icon to open the software, and the main interface before online is shown in figure 3.2.1: (the upper right corner refers to the unconnected state) -
Page 11: Software Interface
3.3 Software interface Figure 3.2.2 Software interface DSP 4 unit divided into the following functional: as shown in figure 3.2.2, ”1”, input signal selection:High level, AUX, Bluetooth, USB. as shown in figure 3.2.2 ”2”, shows the main menu and connection status. as shown in figure 3.2.2 ”3”, the high-pass and low-pass Settings as shown in figure 3.2.2, ”4”, area is output channel EQ setting of the divider. as shown in figure 3.2.2, ”5”, shows the setting of delay space. as shown in figure 3.2.2, ”6”, output channel configuration and common parameter adjustment area. as shown in figure 3.2.2, ”7”, shows the setting of Mixer space. 3.3.1 Input signal select In the online mode, in Figure 3.2.2 ”1”, click the appropriate input source, you can switch the audio input signal. 8. Optional: High level,Aux, Bluetooth, USB. The default audio source can be selected in the option of ”2”... -
Page 12: Output Voice, Delay, Type, Mute And Phase Setting
3.3.3 Output volume, delay, type, mute and phase setting In Figure 3.3.1, there are six output channels commonly used parame- ters are displayed, the user can quickly adjust the parameters directly here. Of course, users can also customize the horn type of each output channel. -
Page 13: Output Signal Equalizer And Crossover Operation
4. The output delay adjustment, is set in the delay space area to the left of the illustrated adjustment, as follows (Figure 3.3.4), click on the value of the input box next to the corresponding speaker can be entered after the delay value corresponding units. - Page 14 Figure 3.3.6 Straight balanced: the button shown in Figure 3.3.4, the current channel as long as there is an equalizer in the open state, this button will ap- pear highlighted in green state, indicating that you can click this button to make all the equalizer current channel change to not start moving (direct- ly).
- Page 15 3.3.5 Output signal equalizer and crossover operation Reset EQ button: It is used to restore the parameters of the 31- band equalizer to the original pass-through mode (the frequency of the equalizer, the Q value and the gain are restored to the initial value).
-
Page 16: Setting Introduce
3.4 Setting introduce Figure 3.4.1 As shown in Figure 3.4.1 DSP 4 software of the scene in three major types of actions: the machine stored scene data, computer data stored scene and the whole scene data manipulation. 1. The machine data stored scene operation: refers to the scene data is now running the machine and set aside six in one scene between the data stored load, save, and delete operations Note: the choice of input signal sources, the output signal and the output channel type configuration for the machine stored total volume not save... -
Page 17: Load And Save To Store Scene Files On Your Computer
Step 3: Right click the blank box and a menu will pop up. Select and input the file name to be saved, such as (1234), and it will be saved directly.(Figure 3.4.3). Figure 3.4.3 2. Loading machine preset scenarios This feature is to preset scene previously saved machine data (saved as a machine preset) out of tune as the machine is currently running scene. -
Page 18: Load And Save The Whole Store A Scene
Figure 3.4.5 Step 1: Enter the file name in the pop-up window you want, save point on it. 2.loading scene files on your computer This function is previously stored in the scene file on the computer the machine work load for the current scene. Step 1: Click on the main interface to the top menu ”File” button will pop up all the scenes action item (see Figure 3.4.1) Step 2: Click ”Load” after entry window will pop open file dialog box (Figure 3.4.6). -
Page 19: Options Introduction
Action does not change any data now on-line machine Specific methods of operation and the ”Save the scene file on the computer is” basically the same, please refer to the operation on their own. 2. Load the whole scene This function is to load previously saved on the computer the whole machine to machine data files (data file of the whole machine, including the current job scenario, six groups of preset machine all the scenes, the output channel configuration data scenario, six groups of preset machine all the scenes, the output channel configuration data and advanced data and other options data). -
Page 20: Information About The Inquiry
3.5.4 Information about the inquiry In the Options menu, use the mouse to click on the ”About” option the system will pop up a message Query dialog box, in which you can query to: SEQ ID letter version information of the device, the software version information and device information. 4. COMMON TROUBLESHOOTING Before applying power, carefully check the cable is normal, we must en- sure that all interfaces as a normal connection. - Page 21 page 21...
-
Page 22: International Guarantee
Conditions de garantie En cas de problème, adressez-vous en premier lieu à votre re- vendeur BLAM. La garantie pour la France sur tout matériel BLAM est de 2 ans. En cas de matériel défectueux, celui-ci doit être expédié à vos frais, dans son emballage d’origine auprès du revendeur, lequel analysera le matériel et déterminera la nature de la panne. - Page 23 Garantievoorwaarden Alle BLAM luldsprekers vallen onder en garantie die door de offi- ciele BLAM -distributeur in uw land is opgesteld. Uw distributeur kan u alle details leveren met betrekking tot de garantlevoorwaar- den. Garantledekking geldt ten minste voor de wettellke toege- kende garantie die van kracht is in het land waar de originele aankoopbon is ultgegeven.
- Page 24 24...
Need help?
Do you have a question about the POWER DSP 4 and is the answer not in the manual?
Questions and answers
I bought a blam dsp4 power and downloaded the Apple app, but I can't access the advanced page. What is the password?