Chapters
Table of Contents

Related Manuals for Medion MD 10169


Summary of Contents for Medion MD 10169
- Page 1 Kurzanleitung Guía rápida Guide de démarrage rapide Guida rapida Korte handleiding Quick Start Guide Eismaschine Sorbetière IJsmachine Heladora Gelatiera Ice-cream maker MEDION (MD 10169)
-
Page 2: Table Of Contents
Inhaltsverzeichnis Informationen zu dieser Kurz anleitung ............ 4 Bestimmungsgemäßer Gebrauch ..............5 Sicherheitshinweise ..................6 Lieferumfang ....................12 Geräteübersicht ..................13 5.1. Gerät .........................13 5.2. Bedienelemente ....................14 Eismaschine verwenden ................14 6.1. Vor dem ersten Gebrauch .................14 6.2. Betriebsmodus auswählen ................15 6.3. -
Page 3: Informationen Zu Dieser Kurz Anleitung
. Informationen zu dieser Kurz anleitung Bei dieser Kurzanleitung handelt es sich um eine verkürzte Druckausgabe der voll- ständigen Bedienungsanleitung. WARNUNG! Lesen Sie vor Inbetriebnahme die Sicherheitshinweise und die vollstän- dige Bedienungsanleitung aufmerksam durch. Beachten Sie die War- nungen auf dem Gerät und in der Bedienungsanleitung, um Personen- und Sachschäden zu vermeiden. -
Page 4: Bestimmungsgemäßer Gebrauch
Auszuführende Sicher- Schutzklasse I heitshinweise Elektrogeräte der Schutz- klasse I sind Elektrogerä- In der EU verwendetes te, die durchgehend min- Symbol zur Kennzeich- destens Basisisolierung nung von Materialien mit haben und entweder Lebensmittelkontakt wie einen Gerätestecker mit z. B. Verpackungen oder Schutzkontakt oder eine Geräteoberflächen. -
Page 5: Sicherheitshinweise
Beachten Sie alle Informationen in dieser Bedienungsanlei- tung, insbesondere die Sicherheitshinweise. Jede andere Be- dienung gilt als nicht bestimmungsgemäß und kann zu Per- sonen- oder Sachschäden führen. . Sicherheitshinweise WARNUNG! Verletzungsgefahr! Verletzungsgefahr für Kinder und Personen mit ver- ringerten physischen, sensorischen oder mentalen Fähigkeiten (beispielsweise teilweise Behinderte, ältere Personen mit Einschränkung ihrer physischen und mentalen Fähigkeiten) oder Mangel an Erfahrung und... - Page 6 WARNUNG! Risiko eines Stromschlags/Kurzschlusses! Es besteht die Gefahr eines elektrischen Schlags durch stromführende Teile. Schließen Sie das Gerät nur an eine ordnungsgemäß instal- lierte Steckdose an. Die Netzspannung muss den technischen Daten des Gerätes entsprechen. Für den Fall, dass Sie das Gerät schnell vom Netz nehmen müssen, muss die Steckdose frei zugänglich sein.
- Page 7 Setzen Sie das Gerät keinen extremen Bedingungen aus. Zu vermeiden sind: – Hohe Luftfeuchtigkeit oder Nässe, – extrem hohe oder tiefe Temperaturen, – direkte Sonneneinstrahlung, – offenes Feuer. Das Gerät darf nicht in Wasser oder andere Flüssigkeiten ge- taucht oder unter fließendes Wasser gehalten werden oder in feuchten Räumen verwendet werden, da dies zu einem Stromschlag führen kann.
- Page 8 Halten Sie ebenfalls Haare, Kleidung und andere Gegenstän- de fern. WARNUNG! Belüftungsöffnungen im Gerätegehäuse oder Ein- baugehäuse nicht verschließen. Halten Sie das Gerät in allen Richtungen min. 8 cm von ande- ren Gegenständen oder Wänden entfernt, um eine ordnungs- gemäße Belüftung zu gewährleisten.
- Page 9 Sollte das Kühlsystem dennoch beschädigt worden sein, be- lüften Sie den Raum. Vermeiden Sie offene Flammen und Zündquellen. Lassen Sie das Gerät vor einer weiteren Verwen- dung von einer Fachkraft reparieren. Haut- oder Augenkontakt mit Kältemittel kann zu Verletzun- gen führen.
- Page 10 VORSICHT! Gesundheitsgefahr! Es besteht Gesundheitsgefährdung durch mangelnde Hygiene. Halten Sie alle Arbeitsgeräte bei der Eiszubereitung sauber. Bewahren Sie die vorbereitete Eismasse im Kühlschrank auf, jedoch nicht länger als 24 Stunden. Frisches Speiseeis sollte sofort verzehrt werden. Lagern Sie es bei -18 °C max.
-
Page 11: Lieferumfang
Chemische Zusätze in Möbelbeschichtungen können das Ma- terial der Gerätefüße angreifen und Rückstände auf der Möbel- oberfläche verursachen. Stellen Sie das Gerät ggf. auf eine geeignete Unterlage. Verwenden Sie das Gerät nicht im Freien. WARNUNG! Explosions- und Feuergefahr durch Cyclopentan! Die Isolierung enthält Cyclopentan. -
Page 12: Geräteübersicht
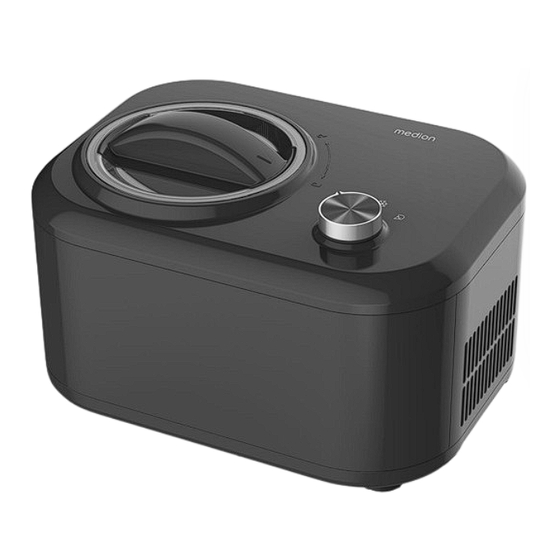
. Geräteübersicht .. Gerät Abb. 1 – Gerät Motorblock Ein-/Ausschalter, Drehknopf 2. Antriebswelle 8. Gehäuse 3. Deckel 9. Lüftungsschlitze 4. Rührwerkzeug 10. Standfüße 5. Aluminiumbehälter 11. Eislöffel 6. Kühlschale 12. Messbecher... -
Page 13: Eismaschine Verwenden
.. Bedienelemente Abb. 2 – Bedienelemente 13. Gerät ist eingeschaltet: 15. Gerät ist eingeschaltet: Einzel-Mischmodus Einzel-Kühlmodus 14. Gerät ist ausgeschaltet 16. Gerät ist eingeschaltet: (Stellung: 0) Eiscreme-Modus . Eismaschine verwenden .. Vor dem ersten Gebrauch Entfernen Sie sämtliches Verpackungsmaterial. ... -
Page 14: Betriebsmodus Auswählen
Schließen Sie das Gerät an eine ordnungsgemäß installierte Steckdose an. Die örtliche Netzspannung muss den technischen Daten des Geräts entsprechen. Sobald das Gerät an eine Steckdose angeschlossen wurde, ertönt ein Piepton. Das Gerät ist betriebsbereit. .. Betriebsmodus auswählen ... Einzel-Mischmodus ... -
Page 15: Eiscreme Herstellen
Im Einzel-Mischmodus und Eiscreme-Modus, wenn der Motorblock nicht richtig eingesetzt wurde, ertönen alle 30 Sekunden jeweils 10 Piep- töne. Der Alarm wird 10 Mal wiederholt. In diesem Fall müssen Sie den Motorblock und den Deckel wieder richtig einsetzen. Andernfalls geht das Gerät in den Standby-Modus. - Page 16 Sorgen Sie für eine ausreichende Belüftung. Drehen Sie den Deckel ab, indem Sie ihn in Richtung drehen. Füllen Sie die vorbereiteten Zutaten in den Aluminiumbehälter. Verwenden Sie den mitgelieferten Messbecher zur Dosierung der Zutaten (siehe Abb. 3). Abb.
- Page 17 Schließen Sie das Gerät an eine ordnungsgemäß installierte Steckdose an. Die örtliche Netzspannung muss den technischen Daten des Geräts entsprechen. Montieren Sie den Motorblock auf dem Deckel (siehe Abb. 5). Abb. 5 Montieren Sie das Rührwerkzeug auf der Antriebswelle des Motorblocks (siehe Abb.
- Page 18 Abb. 8 Stecken Sie den Netzstecker in die Steckdose ein und drehen Sie den Drehknopf in Richtung , um den Eiscreme-Modus zu starten. Nach dem Start wird die Temperatur im Aluminiumbehälter automatisch durch das Gerät aktiv herunter gekühlt. Die Zubereitungszeit hängt von der Rezeptur und der Außentemperatur ab.
-
Page 19: Entsorgung
Abb. 9 Entnehmen Sie das Rührwerkzeug und den Aluminiumbehälter mit der fertigen Eiscreme aus der Eismaschine. Verwenden Sie den mitgelieferten Eislöffel, um die Eiscreme aus dem Alumi- niumbehälter zu entnehmen. Warten Sie, bis die Eismaschine Raumtemperatur erreicht hat, bevor Sie die Eis- maschine erneut in Betrieb nehmen. - Page 20 GERÄT (nur für Deutschland) Alle mit dem nebenstehenden Symbol gekennzeichneten Elektro- bzw. Elektronikgeräte dürfen nicht im normalen Hausmüll entsorgt werden, sondern sind vom Endnutzer am Ende ihrer Lebenserwartung einer vom unsortierten Siedlungsabfall getrennten Erfassung zuzuführen. Die Endnutzer haben Altbatterien und Altakkumulatoren, die nicht vom Altgerät umschlossen sind, sowie Lampen, die zerstörungsfrei aus dem Altgerät entnommen werden können, vor der Abgabe an einer Erfas- sungsstelle vom Altgerät zerstörungsfrei zu trennen und einer separaten...
-
Page 21: Technische Daten
Kältemittel: R600a / 18 g Abmessungen Abmessungen Gerät 35,7 x 22 x 26 (B x H x T) Gewicht Gerät inkl. Zubehör (ohne Speise) ca. 7,2 kg Der vollständige Text der EU-Konformitätserklärung ist unter der folgen- den Internetadresse verfügbar: www.medion.com/conformity.. - Page 22 Sommaire Informations sur ce guide de démarrage rapide ........24 Utilisation conforme ..................25 Consignes de sécurité.................26 Contenu de la livraison................33 Vue d’ensemble de l’appareil ..............34 5.1. Appareil ........................34 5.2. Éléments de commande ................... 35 Utilisation de la sorbetière ................35 6.1. Avant la première utilisation ................35 6.2.
-
Page 23: Informations Sur Ce Guide De Démarrage Rapide
. Informations sur ce guide de démarrage rapide Ce guide de démarrage rapide est une version imprimée abrégée du mode d’emploi complet. AVERTISSEMENT ! Avant la mise en service, lisez attentivement les consignes de sécurité et le mode d’emploi complet. Respectez les avertissements figurant sur l’appareil et dans le mode d’emploi afin d’éviter tout dommage corporel ou matériel. -
Page 24: Utilisation Conforme
Symbole utilisé dans Classe de protection I l’Union européenne pour Les appareils électriques le marquage de maté- de la classe de protec- riaux en contact avec des tion I sont des appareils aliments tels que les em- électriques possédant au ballages ou les surfaces moins une isolation de d’appareils. -
Page 25: Consignes De Sécurité
Tenez compte de toutes les informations figurant dans cette notice d’utilisation, en particulier des consignes de sécurité. Toute autre utilisation est considérée comme non conforme et peut entraîner des dommages corporels ou matériels. . Consignes de sécurité AVERTISSEMENT ! Risque de blessure ! Risque de blessure pour les enfants et les personnes présentant des capacités physiques, sensorielles ou mentales restreintes (p. - Page 26 AVERTISSEMENT ! Risque d’électrocution/de court-circuit ! Il existe un risque de choc électrique dû aux pièces sous tension. Branchez l’appareil uniquement sur une prise de courant ré- glementaire. La tension secteur doit correspondre à celle indi- quée dans les caractéristiques techniques de l’appareil. ...
- Page 27 En cas d’orage, les appareils raccordés au réseau électrique peuvent être endommagés. Débranchez donc toujours la fiche d’alimentation de la prise de courant en cas d’orage. N’exposez pas l’appareil à des conditions extrêmes. À éviter : – Humidité de l’air élevée ou pluie, –...
- Page 28 AVERTISSEMENT ! Risque de blessure en cas de manipulation incor- recte ! Toute manipulation incorrecte peut endommager votre appareil et nuire à votre santé. Respectez impérativement les consignes suivantes : Ne mettez pas les mains dans la sorbetière lorsqu’elle est en marche. ...
- Page 29 N’allumez/n’éteignez pas l’appareil trop souvent. Attendez au moins 5 minutes pour éviter d’endommager le compresseur. Après avoir congelé les ingrédients et les composants (bras mélangeur, bol en aluminium), il est interdit de retirer le bloc-moteur et le couvercle pendant le fonctionnement. AVERTISSEMENT ! Risque de blessure par le réfrigérant ! Le système de refroidissement de l’appareil contient le...
- Page 30 ATTENTION ! Risque de blessure ! Une utilisation et une installation imprudentes repré- sentent un risque de blessure. Disposez le cordon d’alimentation de manière à éviter tout risque de trébuchement. N’utilisez pas de rallonge. Installez l’appareil sur une surface stable et plane. ...
- Page 31 AVIS ! Dommages matériels possibles ! L’appareil peut être endommagé en cas d’utilisation incorrecte. N’utilisez pas de produits d’entretien ni d’objets agressifs ou abrasifs pour nettoyer l’appareil, car ceux-ci peuvent endom- mager les surfaces. Ne dépassez pas la contenance maximale de 600 ml. ...
-
Page 32: Contenu De La Livraison
. Contenu de la livraison DANGER ! Risque de suffocation ! L’ingestion ou l’inhalation de petites pièces ou de films présente un risque de suffocation. Conservez le film d’emballage hors de portée des enfants. Retirez le produit de l’emballage et enlevez tout le matériel d’emballage. ... -
Page 33: Vue D'ensemble De L'appareil
. Vue d’ensemble de l’appareil .. Appareil Fig. 1 - Appareil Bloc-moteur Interrupteur marche/arrêt, bouton rotatif 2. Arbre d’entraînement 8. Boîtier 3. Couvercle 9. Fentes de ventilation 4. Bras mélangeur 10. Pieds 5. Bol en aluminium 11. Cuillère à glace 6. -
Page 34: Utilisation De La Sorbetière
.. Éléments de commande Fig. 2 – Éléments de commande 13. L’appareil est en marche : 15. L’appareil est en marche : Mode de mélange simple Mode de refroidissement simple 14. L’appareil est éteint (position : 0) 16. L’appareil est allumé : Mode crème glacée . -
Page 35: Sélectionner Le Mode De Fonctionnement
Tournez le couvercle dans le sens jusqu’à ce qu’il soit verrouillé. Branchez l’appareil sur une prise de courant réglementaire. La tension secteur locale doit correspondre à celle indiquée dans les caractéristiques techniques de l’appareil. Dès que l’appareil est branché sur une prise de courant, un bip retentit. L’appareil est prêt à... -
Page 36: Préparation De Crème Glacée
Si la crème glacée durcit, l’arbre d’entraînement du bloc-moteur risque de se bloquer. Dans ce cas-là, la fonction de protection du moteur dé- sactive l’entraînement pour éviter d’endommager l’appareil. Si, en mode de mélange simple et en mode crème glacée, le bloc-mo- teur n’a pas été... - Page 37 le bloc-moteur. Le moteur se coupe alors automati- quement et la préparation de la glace est terminée. L’appareil est entraîné par un moteur électrique. Il est possible que ce- lui-ci dégage une certaine odeur lors de la première mise en service. Ce dégagement d’odeur est normal et ne signifie pas que l’appareil est dé- fectueux.
- Page 38 Il n’est pas nécessaire de refroidir le bol en aluminium avant de préparer la glace. L’appareil dispose d’un compresseur intégré qui refroidit les in- grédients pendant la préparation de la glace. Branchez l’appareil sur une prise de courant réglementaire. La tension secteur locale doit correspondre à...
- Page 39 Tournez le couvercle dans le sens jusqu’à ce qu’il soit verrouillé (voir fig. 8). Fig. 8 Branchez la fiche d’alimentation dans la prise de courant et tournez le bouton rotatif dans le sens pour lancer le mode crème glacée. Après le démarrage, la température du bol en aluminium est automati- quement refroidie par l’appareil.
-
Page 40: Recyclage
Fig. 9 Retirez le bras mélangeur et le bol en aluminium contenant la glace de la sorbe- tière. Utilisez la cuillère à glace fournie pour retirer la crème glacée du bol en alumi- nium. Attendez que la sorbetière ait atteint la température ambiante avant de remettre celle-ci en marche. -
Page 41: Caractéristiques Techniques
1 000 ml Isolation : Cyclopentane (C Réfrigérant : R600a/18 g Dimensions Dimensions de l’appareil 35,7 x 22 x 26 (l x H x P) Poids de l’appareil, accessoires incl. (sans env. 7,2 kg aliments) La déclaration de conformité UE intégrale est disponible à l’adresse In- ternet suivante : www.medion.com/conformity. - Page 42 Inhoudsopgave Informatie over deze beknopte gebruiksaanwijzing ......44 Gebruiksdoel ....................45 Veiligheidsvoorschriften ................46 Inhoud van de levering ................52 Overzicht van het apparaat ...............53 5.1. Apparaat ......................... 53 5.2. Bedieningselementen ..................54 IJsmachine gebruiken ................54 6.1. Vóór het eerste gebruik ..................54 6.2. Gebruiksmodus selecteren ................
-
Page 43: Informatie Over Deze Beknopte Gebruiksaanwijzing
. Informatie over deze beknopte gebruiks- aanwijzing Deze beknopte handleiding is een verkorte gedrukte versie van de volledige ge- bruiksaanwijzing. WAARSCHUWING! Lees de veiligheidsinstructies en de volledige gebruiksaanwijzing zorgvuldig door voordat u het apparaat in gebruik neemt. Neem de waarschuwingen op het apparaat en in de gebruiksaanwijzing in acht om persoonlijk letsel en materiële schade te voorkomen. -
Page 44: Gebruiksdoel
Veiligheidsvoorschrif- Veiligheidsklasse I ten die in acht moeten Elektrische apparaten worden genomen van veiligheidsklasse I zijn elektrische appara- In de EU gebruikt sym- ten die minimaal basi- bool voor de aanduiding sisolatie hebben en die van materialen die in zijn uitgerust met een contact komen met apparaatstekker met een... -
Page 45: Veiligheidsvoorschriften
Gebruik uitsluitend door ons geleverde of goedgekeurde re- serveonderdelen en accessoires. Neem alle informatie in deze gebruiksaanwijzing in acht en houd u in het bijzonder aan de veiligheidsvoorschriften. Ie- dere andere vorm van gebruik geldt als niet in overeenstem- ming met het gebruiksdoel en kan letsel of materiële schade tot gevolg hebben. - Page 46 WAARSCHUWING! Gevaar voor elektrische schokken / kortsluiting! Er bestaat gevaar voor een elektrische schok door on- derdelen die onder spanning staan. Sluit het apparaat alleen aan op een volgens de voorschriften geïnstalleerd stopcontact. De netspanning moet overeenko- men met de technische gegevens van het apparaat. ...
- Page 47 Stel het apparaat niet bloot aan extreme omstandigheden. Vermijd: – hoge luchtvochtigheid of vocht; – extreem hoge en lage temperaturen; – direct zonlicht; – open vuur. Het apparaat mag niet worden ondergedompeld in water of andere vloeistoffen of onder stromend water worden gehou- den en mag niet in vochtige ruimtes worden gebruikt, omdat dit een elektrische schok tot gevolg kan hebben.
- Page 48 WAARSCHUWING! Gevaar voor letsel door onjuiste bediening! Bij onjuist gebruik kan het apparaat beschadigd raken en kan uw gezondheid in gevaar komen. Neem de volgende in- structies beslist in acht: Grijp niet in de ijsmachine wanneer deze in bedrijf is. ...
- Page 49 WAARSCHUWING! Gevaar voor letsel door koelmiddel! Het koelsysteem van het apparaat bevat het koelmid- del R600a. Als er koelmiddel vrijkomt, bestaat er gevaar voor letsel. Zorg dat het koelmiddelcircuit niet beschadigd raakt. Ventileer de ruimte als het koelsysteem toch beschadigd is geraakt.
- Page 50 Plaats het apparaat op een stabiele, vlakke ondergrond. Zet het apparaat niet ondersteboven en houd het tijdens ge- bruik niet onder een hoek van meer dan 45°. Zet het apparaat niet op de rand van een tafel, omdat het dan kan kantelen en vallen.
-
Page 51: Inhoud Van De Levering
Gebruik het apparaat uitsluitend met de meegeleverde net- adapter. Zorg ervoor dat zich tijdens het gebruik geen vreemde voor- werpen (zoals lepels en spatels) in de koelkom bevinden. Gebruik alleen accessoires die door de fabrikant worden mee- geleverd en aanbevolen. -
Page 52: Overzicht Van Het Apparaat
. Overzicht van het apparaat .. Apparaat Afb. 1 – Apparaat Motorblok Aan-uitschakelaar, draaiknop 2. Aandrijfas 8. Behuizing 3. Deksel 9. Ventilatieopeningen 4. Menghaak 10. Pootjes 5. Aluminium bak 11. Ijsschep 6. Koelkom 12. Maatbeker... -
Page 53: Ijsmachine Gebruiken
.. Bedieningselementen Afb. 2 – Bedieningselementen 13. Apparaat is ingeschakeld: 15. Apparaat is ingeschakeld: Mengmodus Koelmodus 14. Apparaat is uitgeschakeld 16. Apparaat is ingeschakeld: (stand: 0) IJsbereidingsmodus . IJsmachine gebruiken .. Vóór het eerste gebruik Verwijder al het verpakkingsmateriaal. ... -
Page 54: Gebruiksmodus Selecteren
Zodra u het apparaat aansluit op een stopcontact, klinkt er een piep- toon. Het apparaat is gebruiksklaar. .. Gebruiksmodus selecteren ... Mengmodus Draai de draaiknop naar De menghaak begint met mengen zonder de levensmiddelen te koelen. De standaardtijd is 30 minuten. Nadat de standaardtijd is verstreken of als de inhoud te hard wordt, klinken er 10 pieptonen. -
Page 55: Ijs Bereiden
Als het motorblok niet goed is geplaatst, klinken er om de 30 seconden 10 pieptonen wanneer de mengmodus of ijsbereidingsmodus geacti- veerd is. Het alarm wordt 10 keer herhaald. In dit geval moeten het mo- torblok en deksel goed worden geplaatst. Zo niet, wordt de stand-by- modus geactiveerd. - Page 56 Zorg voor voldoende ventilatie. Draai het deksel los (naar Doe de voorbereide ingrediënten in de aluminium bak. Gebruik voor het afme- ten van de ingrediënten de meegeleverde maatbeker (zie afb. 3). Afb. 3 Meng daarna de ingrediënten met behulp van de ijsschep. Let op de maximale vulhoeveelheid van de aluminium bak (600 ml).
- Page 57 Sluit het apparaat aan op een volgens de voorschriften geïnstalleerd stopcon- tact. De lokale netspanning moet overeenkomen met de technische gegevens van het apparaat. Monteer het motorblok op het deksel (zie afb. 5). Afb. 5 Monteer de menghaak op de aandrijfas van het motorblok (zie afb. 6). Afb.
- Page 58 Afb. 8 Steek de stekker in het stopcontact en draai de draaiknop naar om de ijsbe- reidingsmodus te starten. Nadat de machine is gestart, wordt de temperatuur in de aluminium bak automatisch actief verlaagd door het apparaat. De bereidingstijd hangt af van het recept en de buitentemperatuur.
- Page 59 Afb. 9 Haal de menghaak en de aluminium bak met het gebruiksklare ijs uit de ijsma- chine. Gebruik de meegeleverde ijsschep om het ijs uit de aluminium bak te halen. Wacht tot de ijsmachine op kamertemperatuur is voordat u de ijsmachine weer in gebruik neemt.
-
Page 60: Afvalverwerking
. Afvalverwerking VERPAKKING Het apparaat zit ter bescherming tegen transportschade in een verpakking. Verpakkingen zijn gemaakt van materialen die milieuvriendelijk kunnen worden afgevoerd en vakkun- dig kunnen worden gerecycled. Let op de volgende markering van verpakkingsmateriaal bij het schei- den van afval met de afkortingen (a) en (b): 1-7: kunststoffen/20–22: papier en karton/80-98: composietmaterialen (Alleen voor Frankrijk) Met het 'Triman'-symbool wordt de gebruiker geïnformeerd dat het pro-... -
Page 61: Technische Gegevens
Afmetingen van apparaat 35,7 x 22 x 26 (b x h x d) Gewicht van apparaat inclusief accessoires ca. 7,2 kg (zonder levensmiddelen) De volledige tekst van de EU-verklaring van overeenstemming is te vin- den op de volgende website: www.medion.com/conformity. - Page 62 Índice Información acerca de esta guía breve ............ 64 Uso conforme a lo previsto ..............65 Indicaciones de seguridad ................ 66 Volumen de suministro ................73 Vista general del aparato ................74 5.1. Aparato ........................74 5.2. Elementos de control ..................75 Uso de la heladora ..................75 6.1.
-
Page 63: Información Acerca De Esta Guía Breve
. Información acerca de esta guía breve Esta guía breve es una edición impresa resumida del manual de instrucciones com- pleto. ¡ADVERTENCIA! Lea atentamente las instrucciones de seguridad y el manual de ins- trucciones completo antes de la puesta en servicio. Preste atención a las advertencias que aparecen en el propio aparato y en el manual de instrucciones para evitar daños personales y materiales. -
Page 64: Uso Conforme A Lo Previsto
Instrucción operativa Clase de protección I que debe ejecutarse. Los aparatos eléctricos de la clase de protec- Indicaciones de seguri- ción I son aparatos que dad que deben ejecu- disponen al menos de tarse. un aislamiento básico Símbolo utilizado en la continuo y un enchufe UE para identificar mate- con contacto de puesta a... -
Page 65: Indicaciones De Seguridad
Utilice exclusivamente accesorios y recambios suministrados o autorizados por nosotros. Tenga en cuenta toda la información contenida en este ma- nual de instrucciones, especialmente las indicaciones de seguridad. Cualquier otro uso se considerará contrario al uso previsto y puede provocar daños materiales o personales. . - Page 66 ¡ADVERTENCIA! ¡Riesgo de descarga eléctrica/cortocircuito! Existe peligro de descarga eléctrica a causa de las pie- zas conductoras de electricidad. Conecte el aparato solamente a una toma de corriente debi- damente instalada. La tensión de red debe corresponderse con los datos técnicos del aparato. ...
- Page 67 No exponga el aparato a condiciones extremas. Se debe evi- tar lo siguiente: – una alta humedad del aire o humedad en general; – temperaturas extremadamente altas o bajas; – la radiación solar directa; – llamas abiertas. El aparato no se debe sumergir en agua ni otros líquidos, en- juagarse con agua ni utilizarse en espacios húmedos, dado que se podría producir una descarga eléctrica.
- Page 68 No manipule la heladora mientras se halle en funcionamiento. Mantenga el cabello, la ropa y otros objetos alejados de la he- ladora. ¡ADVERTENCIA! No cubra los orificios de ventilación de la car- casa del aparato o de la carcasa de montaje. ...
- Page 69 ¡ADVERTENCIA! ¡Riesgo de lesiones por el refrigerante! El sistema de refrigeración del aparato contiene el refri- gerante R600a. En caso de vertido de refrigerante existe peligro de lesiones. No dañe el circuito de refrigerante. Si, pese a todo, el sistema de refrigeración resultara dañado, ventile el espacio.
- Page 70 ¡ATENCIÓN! ¡Peligro de lesiones! Existe riesgo de lesiones por uso e instalación descuida- dos. Asegúrese de que no se pueda tropezar con el cable de ali- mentación; no utilice cables de prolongación. Coloque el aparato sobre una superficie firme y plana. ...
- Page 71 No sobrepase la cantidad máx. de llenado de 600 ml. Los objetos duros y puntiagudos (p. ej., cucharas metálicas) pueden dañar las superficies del recipiente de aluminio. Utili- ce la cuchara para helado suministrada o cubiertos de madera para sacar el helado terminado. ...
-
Page 72: Volumen De Suministro
. Volumen de suministro ¡PELIGRO! ¡Peligro de asfixia! Existe peligro de asfixia por la ingestión o inhalación de piezas pequeñas o láminas de plástico. Mantenga la lámina de plástico del embalaje alejada de los niños. Extraiga el producto del embalaje y retire todo el material de embalaje. ... -
Page 73: Vista General Del Aparato
. Vista general del aparato .. Aparato Fig. 1: Aparato Bloque del motor Interruptor de encendido / apagado, botón giratorio 2. Eje de accionamiento 8. Carcasa 3. Tapa 9. Ranuras de ventilación 4. Accesorio de batir 10. Patas 5. Recipiente de aluminio 11. -
Page 74: Uso De La Heladora
.. Elementos de control Fig. 2: Elementos de mando 13. El aparato está encendido: 15. El aparato está encendido: Modo de mezcla simple Modo de refrigeración simple 14. El aparato está apagado 16. El aparato está encendido: (posición: 0) Modo de helado . -
Page 75: Selección Del Modo Operativo
Gire la tapa hacia hasta que encaje. Conecte el aparato a una toma de corriente debidamente instalada. La tensión de alimentación local debe corresponderse con los datos técnicos del aparato. En cuanto el aparato se conecta a una toma de corriente, suena un piti- El aparato está... -
Page 76: Elaboración De Helado
Si el helado se endurece, el eje de accionamiento del bloque del motor se puede atascar. En este caso, la función de protección del motor des- conecta el accionamiento para evitar daños en el aparato. En el modo de mezcla simple y en el modo de helado, si el bloque del motor no está... - Page 77 El aparato funciona con un motor eléctrico. Por ello, es posible que des- prenda olor durante la primera puesta en funcionamiento. Estos olores son normales y no son un indicio de defecto en el aparato. Procure que haya siempre una ventilación suficiente. ...
- Page 78 Fig. 4 No es necesario que refrigere adicionalmente el recipiente de aluminio antes de preparar el helado. El aparato dispone de un compresor inte- grado que enfría los ingredientes durante la preparación del helado. Conecte el aparato a una toma de corriente debidamente instalada. La tensión de alimentación local debe corresponderse con los datos técnicos del aparato.
- Page 79 Coloque los componentes montados en el paso anterior en el aparato o en la bandeja de refrigeración (véase fig. 7). Fig. 7 Gire la tapa hacia hasta que encaje (véase fig. 8). Fig. 8 Enchufe el aparato en la toma de corriente y gire el botón giratorio hacia para iniciar el modo de helado.
- Page 80 Desenrosque la tapa girando en dirección (véase fig. 9). Si la tapa permanece abierta durante demasiado tiempo, se puede pro- ducir un aumento de temperatura en la bandeja de refrigeración. Esto puede hacer que el helado pierda consistencia. Fig. 9 Extraiga el accesorio de batir y el recipiente de aluminio con el helado termina- do de la heladora.
-
Page 81: Eliminación
. Eliminación EMBALAJE El aparato se envía embalado para protegerlo de posibles daños durante el transporte. Los embalajes están hechos con materiales que pueden desecharse de forma respetuosa con el medioambiente y llevarse a un punto de reciclaje. Observe la siguiente indicación de los materiales de embalaje al separar los residuos con las abreviaturas (a) y los números (b): 1-7: plásticos/20-22: papel y cartón/80-98: materiales compuestos. -
Page 82: Datos Técnicos
Dimensiones del aparato 35,7 x 22 x 26 (An × Al × Pr) Peso del aparato con accesorios incluidos aprox. 7,2 kg (sin alimentos) El texto completo de la declaración de conformidad UE está disponible en la siguiente dirección de Internet: www.medion.com/conformity. - Page 84 Indice Informazioni relative a questa guida rapida ........... 86 Utilizzo conforme ..................87 Indicazioni di sicurezza ................88 Contenuto della confezione ..............94 Panoramica dell’apparecchio ..............95 5.1. Apparecchio ......................95 5.2. Elementi di comando..................96 Utilizzo della gelatiera ................96 6.1. Prima del primo utilizzo ..................96 6.2.
-
Page 85: Informazioni Relative A Questa Guida Rapida
. Informazioni relative a questa guida rapida Questa guida rapida è una versione cartacea riassuntiva delle istruzioni per l’uso complete. AVVERTENZA! Prima della messa in funzione, leggere attentamente le istruzioni per l’u- so complete e gli avvisi di sicurezza. Per evitare danni a persone e cose, osservare le avvertenze riportate sull’apparecchio e nelle istruzioni per l’uso. -
Page 86: Utilizzo Conforme
Simbolo usato nell’UE Classe di protezione I per indicare materiali a Gli apparecchi elettrici contatto con gli alimenti, della classe di protezio- quali ad esempio imbal- ne I possiedono almeno laggi o superfici di appa- un isolamento di base recchi. permanente e hanno un connettore con contat- Marchio CE to di terra o un cavo di... -
Page 87: Indicazioni Di Sicurezza
. Indicazioni di sicurezza AVVERTENZA! Pericolo di lesioni! Pericolo di lesioni per bambini e persone con ridotte capacità fisiche, sensoriali o intellettive (ad esempio persone parzialmente disabili, anziani con capacità fisi- che o intellettive ridotte) o con carenza di esperienza e di conoscenze (ad esempio bambini grandi). - Page 88 Prima di utilizzare l’apparecchio per la prima volta, e in segui- to dopo ogni uso, verificare che l’apparecchio e il cavo di ali- mentazione non siano danneggiati. Non mettere in funzione l’apparecchio se lo stesso o il cavo di alimentazione presentano danni visibili.
- Page 89 nerlo sotto acqua corrente e non collocarlo in ambienti umidi. Ciò può provocare scosse elettriche. Estrarre la spina di alimentazione dell’apparecchio dalla presa elettrica: – quando si pulisce l’apparecchio, – quando l’apparecchio è umido o bagnato, – quando l’apparecchio è incustodito, –...
- Page 90 Non conservare sostanze esplosive, come per esempio conte- nitori per aerosol con gas propellente infiammabile all’interno o in prossimità dell’apparecchio. Non utilizzare l’apparecchio in prossimità di fiamme, fornelli o forni. AVVERTENZA! Assicurarsi che non vi sia il rischio di inciampare nel cavo di alimentazione.
- Page 91 All’interno della ciotola di raffreddamento non utilizzare ap- parecchi elettrici non approvati dal produttore. Per velocizzare la procedura di sbrinamento non utilizzare dispositivi meccanici o mezzi diversi da quelli consigliati dal produttore. Posizionare l’apparecchio in un locale asciutto e aerato. Il locale dovrebbe presentare una superficie di circa 4 m²...
- Page 92 Si consiglia di consumare il gelato fresco immediatamente. Conservarlo in congelatore a -18 °C per max. 1 settimana. Il gelato parzialmente o completamente sciolto non deve es- sere congelato nuovamente. Al termine della preparazione del gelato pulire accuratamente la gelatiera e tutti gli attrezzi di lavoro. ...
-
Page 93: Contenuto Della Confezione
AVVERTENZA! Pericolo di esplosione e di incendio dovuto al ciclo- pentano! L’isolamento contiene ciclopentano. L’eventuale danneggiamen- to dell’isolamento può sprigionare una miscela infiammabile di gas e aria e causare esplosioni. Evitare le fiamme libere e le fonti di accensione. . -
Page 94: Panoramica Dell'apparecchio
. Panoramica dell’apparecchio .. Apparecchio Fig. 1 – Apparecchio Blocco motore Interruttore On/Off, manopola 2. Albero di trasmissione 8. Involucro dell’apparecchio 3. Coperchio 9. Fessure di aerazione 4. Pala 10. Piedini di appoggio 5. Contenitore di alluminio 11. Paletta per gelato 6. -
Page 95: Utilizzo Della Gelatiera
.. Elementi di comando Fig. 2 – Comandi 13. L’apparecchio è acceso: 15. L’apparecchio è acceso: Modalità di sola miscelazione Modalità di solo raffreddamento 14. L’apparecchio è spento 16. L’apparecchio è acceso: (posizione: 0) Modalità gelato . Utilizzo della gelatiera .. Prima del primo utilizzo ... -
Page 96: Selezione Della Modalità Di Funzionamento
Ruotare il coperchio in direzione fino a farlo scattare in posizione. Collegare l’apparecchio a una presa elettrica installata a regola d’arte. La tensio- ne di rete locale deve corrispondere a quella indicata nei dati tecnici dell’appa- recchio. Non appena l’apparecchio viene collegato a una presa, viene emesso un segnale acustico. -
Page 97: Produzione Di Gelato
Se il gelato si indurisce, l’albero di trasmissione del blocco motore può bloccarsi. In questo caso, la funzione di protezione del motore spegne l’unità per evitare danni all’apparecchio. In modalità di sola miscelazione e in modalità gelato, se il blocco motore non è... - Page 98 conseguenza, il motore si spegne automaticamente e la produzione di gelato viene terminata. L’apparecchio è azionato da un motore elettrico. Questo può causare l’e- missione di odori al primo utilizzo. Questa emissione di odori è del tutto normale e non indica un eventuale difetto dell’apparecchio. ...
- Page 99 Fig. 4 Non raffreddare il contenitore di alluminio prima della preparazione del gelato. L’apparecchio dispone di un compressore integrato che raffredda gli ingredienti durante la preparazione del gelato. Collegare l’apparecchio a una presa di corrente installata a regola d’arte. La ten- sione di rete locale deve corrispondere a quella indicata nei dati tecnici dell’ap- parecchio.
- Page 100 Inserire i componenti montati nella fase precedente nell’apparecchio o nella cio- tola di raffreddamento (vedere la fig. 7). Fig. 7 Ruotare il coperchio in direzione fino a farlo scattare in posizione (vedere la fig. 8). Fig. 8 Inserire la spina di alimentazione nella presa elettrica e ruotare la manopola in direzione per avviare la modalità...
- Page 101 Quando il gelato è pronto, ruotare la manopola in direzione per spegnere l’apparecchio. Staccare la spina di alimentazione dalla presa elettrica. Aprire il coperchio ruotandolo in direzione . (vedere la fig. 9). L’apertura prolungata del coperchio può portare a un aumento della temperatura nella ciotola di raffreddamento.
-
Page 102: Smaltimento
. Smaltimento IMBALLAGGIO L’imballaggio protegge l’apparecchio da eventuali danni du- rante il trasporto. Gli imballaggi sono prodotti con materiali che possono essere smaltiti nel rispetto dell’ambiente e de- stinati a un corretto riciclaggio. Attenersi alla seguente etichettatura dei materiali di imballaggio per la separazione dei rifiuti con abbreviazioni (a) e codici numerici (b): 1–7: plastiche/20–22: carta e cartone/80–98: materiali compositi (Solo per la Francia) -
Page 103: Dati Tecnici
R600a / 18 g Dimensioni Dimensioni dell’apparecchio 35,7 x 22 x 26 (L x A x P) Peso dell’apparecchio incl. accessori (sen- ca. 7,2 kg za ingredienti) Il testo completo della dichiarazione di conformità UE è disponibile al seguente indirizzo Internet: www.medion.com/conformity. - Page 104 Contents Information about this short manual .............106 Proper use ....................107 Safety instructions ...................108 Package contents ..................114 Appliance overview ...................115 5.1. Appliance ......................115 5.2. Controls........................116 Using the ice-cream maker ..............116 6.1. Before using the appliance for the first time ..........116 6.2.
-
Page 105: Information About This Short Manual
. Information about this short manual This short manual is an abridged print version of the full user manual. WARNING! Read the safety instructions and the full user manual carefully before using the appliance for the first time. Observe the warnings on the ap- pliance and in the user manual to avoid personal injury and damage to property. -
Page 106: Proper Use
Symbol used in the EU Protection class I to indicate materials that Electrical appliances in come into contact with protection class I are food such as packaging electrical appliances that or appliance surfaces. permanently have at least basic insulation and CE labelling either have a plug with Products that feature earth contact or a fixed... -
Page 107: Safety Instructions
. Safety instructions WARNING! Risk of injury! Risk of injury to children and persons with limited phys- ical, sensory or mental abilities (for example, partially disabled people or older people with limited physical and mental abilities) or to those without experience and knowledge (such as older children). - Page 108 Contact our Service team without delay if the appliance has been damaged during transport. Do not, under any circumstances, make any unauthorised modifications to the appliance or try to open and/or repair a component yourself. To avoid risks, the mains cable should only be repaired by an authorised repair workshop.
- Page 109 Do not let the appliance come into contact with water or oth- er liquids. Keep the appliance, the mains cable and the mains plug away from wash basins, sinks and similar. Do not place any objects filled with liquid (e.g. vases or drinks) on or near the appliance.
- Page 110 plates clean and dry. In the event of a power failure, remove the mains plug from the socket, wipe off the water spots and restart the appliance. Do not switch the appliance on/off too frequently. Wait at least 5 minutes to prevent damage to the compressor. ...
- Page 111 The refrigerant and insulation are flammable. Dispose of the appliance only at an authorised disposal point. CAUTION! Risk of injury! Injuries may result from careless use and set-up. Ensure the mains cable does not become a tripping hazard – do not use an extension cable.
- Page 112 Hard and sharp objects (such as metal spoons) may damage the surface of the aluminium container. Use the ice cream scoop supplied, or wooden utensils, to remove the ice cream once ready. Only operate this appliance with the mains cable supplied. ...
-
Page 113: Package Contents
. Package contents DANGER! Risk of choking and suffocation! There is a risk of choking and suffocation due to swal- lowing or inhaling small parts or plastic wrap. Keep the plastic packaging out of the reach of chil- dren. ... -
Page 114: Appliance Overview
. Appliance overview .. Appliance Fig. 1 – Appliance Motor block On/off switch, dial 2. Drive shaft 8. Housing 3. Lid 9. Ventilation slots 4. Stirrer 10. Feet 5. Aluminium container 11. Ice cream scoop 6. Cooling chamber 12. Measuring cup... -
Page 115: Using The Ice-Cream Maker
.. Controls Fig. 2 – Controls 13. Appliance is switched on: 15. Appliance is switched on: Mixing only mode Cooling only mode 14. Appliance is switched off 16. Appliance is switched on: (position: 0) Ice cream mode . Using the ice-cream maker .. -
Page 116: Selecting The Operating Mode
A beep sounds as soon as the appliance has been connected to a socket. The appliance is ready for use. .. Selecting the operating mode ... Mixing only mode Turn the dial The stirrer begins the mixing process without cooling the food. The default time is 30 minutes. -
Page 117: Making Ice Cream
If the appliance is switched off after ice cream mode or cooling only mode, the protective function of the compressor is activated. Ice cream mode or mixing only mode can only be activated again after a waiting time of approx. 3 minutes. However, if you remove the mains plug from the socket after the process ends, the appliance restarts. - Page 118 Fig. 3 Then mix the ingredients using the ice cream scoop. Observe the maximum fill quantity of the aluminium container (600 ml). The ice cream expands during preparation, meaning that the contents of the aluminium container increase. Place the aluminium container into the cooling chamber, with both ends of the aluminium container handle inserted in the recesses on the upper ring of the cooling chamber (see Fig.
- Page 119 Mount the motor block on the lid (see Fig. 5). Fig. 5 Mount the stirrer on the drive shaft of the motor block (see Fig. 6). Fig. 6 Place the components assembled in the previous step into the appliance, more specifically into the cooling chamber (see Fig.
- Page 120 Fig. 8 Insert the mains plug into the socket and turn the dial towards to start ice cream mode. Once the appliance has been switched on, it will cool down the temper- ature in the aluminium container automatically. The preparation time depends on the recipe and the external temperature.
- Page 121 Fig. 9 Remove the stirrer and the aluminium container with the finished ice cream from the ice-cream maker. Use the supplied ice cream scoop to remove the ice cream from the aluminium container. Wait until the ice-cream maker has reached room temperature before using it again.
-
Page 122: Disposal
. Disposal PACKAGING Your appliance has been packaged to protect it from dam- age in transit. The packaging is made of materials that can be recycled in an environmentally friendly manner. Observe the following labels on the packaging materials regarding waste separation with the abbreviations (a) and numbers (b): 1–7: plastics/20–22: paper and cardboard/80–98: composite materials (France only) -
Page 123: Technical Specifications
. Technical specifi cations Model: MD 10169 Rated voltage: 220–240 V~ 50 Hz Output: 100 W Protection class: Filling capacity (ingredients): Max. 600 ml Capacity (ice cream): Approx. 1000 ml Insulation: Cyclopentane (C Refrigerant: R600a / 18 g Dimensions Appliance dimensions 35.7 x 22 x 26 (W x H x D) Appliance weight incl. - Page 124 Prodott o in Cina...
Need help?
Do you have a question about the MD 10169 and is the answer not in the manual?
Questions and answers