Subscribe to Our Youtube Channel
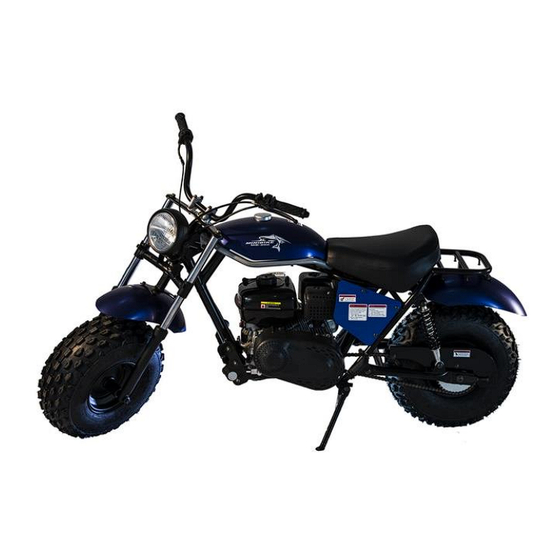
Summary of Contents for Linhai Mudstar 200 2016
- Page 1 MINI BIKE-2016 MB 200 Set-up Instruction 2016-06-01 !THIS INSTRUCTION IS FOR AUTHORIZED OR TRAINED MECHANIC USE ONLY!
- Page 2 1. Install rear shocks: open the crate and install the rear shocks with bolt M10x1.25x40 and self-locking nut M10x1.25. The requested torque is 37-44N.m (1N.m = 0.74 ft lb) 2. Install the front fender: Install the front fender between the fork using bolt M6x16 and nut M6 (The fender is to install in the middle of the fork, the space to left and right side of the fork should be the same.)
- Page 3 3. Install the front wheel: determinate the rotate direction of the front wheel, install it with the front wheel axle M14*1.5*310 and the self-locking nut M14*1.5. The requested torque is 56-62N.m. 4. Refill the engine oil: (note: if your mini bike with an assembled engine on the frame, you still need to do change oil for first time...
- Page 4 operation!) SAE 10W-30(SG or above) can be used, the refill amount is 1 pint. (Caution: only engine oil for 4 stroke engine can be used!) 5. Install the clutch jackshaft plate 58200-L: (note: if your mini bike comes with pre-assembled engine, you may skip this step), attach the jackshaft 58200-L on the engine using M8x16 bolt, please do not tighten all the bolts at this step.
- Page 5 engine, you may skip this step), A) As shown put the engine on the frame engine mount place B) Put 2 M8x55 front mounting bolts upside down through the engine mount and engine front mounting holes, then put flat washer φ8 and spring washer φ8 on the bolt, put on the M8 nut with hand (not tighten the nuts at this step) C) Same as B) put on the other 2 rear mounting bolts through the rear mounting holes of the engine mount plate, screw into the...
- Page 6 7. Install the flat key and 10 teeth sprocket (note: if your mini bike comes with pre-assembled engine, you may skip this step)
- Page 7 8. Install the drive chain: (note: if your mini bike comes with pre-assembled engine, you may skip this step) open the master link, put the chain around the sprockets, lock the master link (Caution: the direction of the master link opening is opposite to the chain forward movement direction) 9.
- Page 8 B) Adjust the chain adjuster bolt to chain has up to 3/8 inch tension space in vertical direction. The adjustment on left and right side of the chain adjuster should be equal. C) Tighten the adjuster bolt...
- Page 9 D) Tighten the rear axle nut with torque 56-62N.m E) Tighten the bolt which is loosen by step A) 10. Install the CVT clutch: (note: if your mini bike comes with pre-assembled engine, you may skip this step) A) Install the rear driven pulley...
- Page 10 B) Put 12.5mm bushing, 1pc of 3.5mmwahser and 4pc of 1mm washer in turn onto the engine output shaft (remark: the reason to have the washers is to make the alignment of front clutch to the rear driven pulley, so you may need change the quantity of the washers you put in there) C) Put on the inside piece of the front clutch and check the alignment (adjust the washer to make it straight)
- Page 11 D) Install the belt: (plain side is inside, and angled side is outside)
- Page 12 E) Install the front clutch bushing, front clutch cover. Tighten the M8x55 bolt with torque 22-29Nm F) Tighten the M16x1.5self-locking nut on the driven pulley with torque 75-83Nm...
- Page 13 11. Install the clutch cover: (note: if your mini bike comes with pre-assembled engine, you may skip this step) 12. Install the throttle cable: (note: if your mini bike comes with pre-assembled engine, you may skip this installation, but always check the throttle function!) A) Insert the throttle cable between the front right shock and the frame.
- Page 15 F) Install the other end of the throttle cable on the throttle handle; check when turn the throttle handle if the throttle cable moves freely back and forth. Re-adjust it when necessary, it’s very important! G) Turn the bolt of the throttle cable handle piece on the engine to the position that the cable handle can spring back freely.
- Page 16 14. Connect the wiring on the engine: (note: if your mini bike comes with pre-assembled engine, you may skip this step) 15. Zip-tie the brake cable, throttle cable, kill switch cable: (note: if your mini bike comes with pre-assembled engine, you may skip this installation 16.


Need help?
Do you have a question about the Mudstar 200 2016 and is the answer not in the manual?
Questions and answers