Advertisement
Quick Links
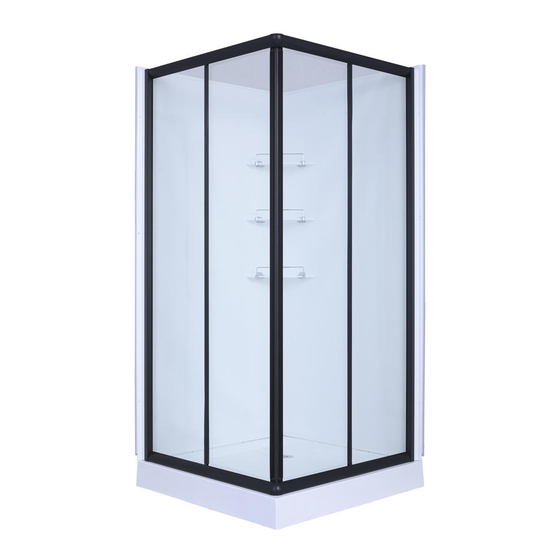
This installation guide covers the following SKU numbers:
6692969, 6692970, 6692971, 6692972, 6692973, 6692974, 6692975, 6692976,
6692977, 6712943, 6712944, 6712945, 6712946, 6712947, 6712948
*Be sure to follow all local plumbing codes.*Be sure to follow all local plumbing codes.
Purchase date:
Before returning to your retailer, call our customer service department at
Questions, problems, missing parts?
001(630)350-0101,
9 a.m. - 5 p.m., EST, Monday - Friday
Superior Brands Corp. 1325 W.
Irving Park Rd. Bensenville,IL
60106 U.S.A.
Product SKU :
1
Advertisement

Subscribe to Our Youtube Channel
Related Manuals for Tuscany 6692969

Summary of Contents for Tuscany 6692969
- Page 1 This installation guide covers the following SKU numbers: 6692969, 6692970, 6692971, 6692972, 6692973, 6692974, 6692975, 6692976, 6692977, 6712943, 6712944, 6712945, 6712946, 6712947, 6712948 *Be sure to follow all local plumbing codes.*Be sure to follow all local plumbing codes. Product SKU :...
- Page 2 GENERAL INFORMATION CAUTION Please inspect the product immediately upon receipt for transit damage, missing packs/parts or manufacturing fault. Damage reported later cannot be accepted.Please handle the product with care avoiding knocks and shock loading to all sides and edges of the glass. Notes: Safety glass can not be re-worked.
-
Page 3: Package Content
PACKAGE CONTENT THESE #NUMBER STICK ON THE OUTSIDE OF EACH PACKAGE. -
Page 4: Tools Required
TOOLS REQUIRED Drill Silicone Adjustable Measuring Tape wrench Level Utility knife Phillips #2 Rubber mallet Screw driver 3/16” Drill bit Allen key Pencil... - Page 5 1:SQUARE SHOWER BASE INSTALLATION Preparing the base for installation 1. Ensure the floor and walls are square. Provide a 5”x5” opening in the sub-floor for the drain. The 2” PVC waste pipe should extend above the surface according to the drain installation instructions and the height of the shower base.
- Page 6 2. Install the shower drain (included) according to the drain installation manual supplied with the drain. Fig 2 3. Adjust the base: Place a level on the base checking in all directions, then adjust the corner feet accordingly. Rotate clockwise or counterclockwise and make sure each foot is contacting the floor and the level’s bubble is in the...
- Page 7 4. Place the shower base into the designated position so that the drain cutout drops around the drain pipe and butt the shower base up against the wall. Fig 4 5.1. Level the tray and place marks on the wall above the upper edge of the tile flange to mark your spot.
- Page 8 2:BACK PANELS INSTALLATION INSTRUCTIONS 2.1)TWO BACK PANELS CONNECT NOTE: EACH ACCESSORIES PACKAGE HAS #NUMBER STICKER FOR EASY FIND. Installation of back walls 1. Connect two back panels. Use Screws #17 on Page 3 M4X20 bolts to install two panels together. 2.
- Page 9 2.2) TWO BACK PANELS CONNECT TO THE WALL (FRONT VIEW) Connect back panel to walls 1. First, drill holes in the wall set to fasten shower to walls. Punch the #21 M4X35 screws through the back panel flange. Pass through the inner ring of the decorative cap and then connect with the wall through the back plate. After the installation is completed, install the decorative caps.
-
Page 10: Shelf Installation
3:SHELF INSTALLATION Shelf installation 1. Use #18 M4X16 screws to install the shelf brackets. 2. Insert the shelf (#22) into the bracket. Tighten the set screws on the bottom shelf brackets. 3. Put up the shelf rails. The rail brackets can be adjusted for proper fit to shelves. Tighten the rail brackets. - Page 11 4:SHOWER ENCLOSURE INSTALLATION 4.1) INSTALLING SIDE COLUMNS (4B) ON THE WALLS Installing the Shower Enclosure Frame Connect side columns( 4B) to back panel by first drill five 3/16" holes in the back panel through the aluminum side column, then using ten M4*16 (19) round head screws securely fasten to the walls being careful not to over-tighten.
- Page 12 4.2) INSTALLING TOP & BOTTOM RAILS WITH RAIL (3) CONNECTORS (5) TO SIDE COLUMN (4A) Install the aluminum shower enclosure framing 1. Connect two rails (3) using the corner connectors (5) on the picture together at 90 degree angle. Using four M4*8 screws (13), tighten each accordingly. 2.
- Page 13 4.3) INSTALLING THE SIDE COLUMN (4A) INTO (4B) Secure enclosure to side wall column 1. Insert the profile part (4A) into (4B) 2. Adjust the distance in or out accordingly for best fit. 3. Drill four 3/16" screw holes on each side of side column (4B).
- Page 14 4.4) NSTALLATION OF FIXED GLASS PANELS *From inside to outside view* Installing the two fixed glass panels 1. Place the two glass panels (8) without holes into slot of side column (4A), then use M4x12 screws (6) to fasten the fixed glass panels. 2.
- Page 15 4.4) INSTALLING THE SLIDING DOOR GLASS PANELS Installation of door glass 1. Put the two pieces of glass with magnetic strips together to form a 90-degree angle and see the two doors will fit well. 2. install the 4 wheels (11) through the glass holes of (9.) Hang the glass wheels into the upper and bottom rail groove, Adjust the up wheels till the door open and close sliding smooth and no seam between two doors.
- Page 16 4:When the bellowing situation occurs, turn the middle eccentric wheel higher and lower on both sides, and when the following situation occurs, turn the middle wheel lower and turn the wheels on both sides higher till the doors no seam.
- Page 17 4.5) INSTALL THE LOCKING BLOCK Install the locating block Install all 8 of the locating blocks (12) on the top and bottom rails. Make sure the rounded part is facing the wheels and using M4*10...
Need help?
Do you have a question about the 6692969 and is the answer not in the manual?
Questions and answers
what are the directions for installing the drain
1. Install the shower drain according to the drain installation manual supplied with the drain.
2. Apply silicone to the connection between the drain and the shower base.
3. Place the shower base into the designated position so the drain cutout fits around the drain pipe and the base is against the wall.
4. Adjust the base using a level by rotating the corner feet until the base is level in all directions and each foot touches the floor.
5. Mark the wall above the upper edge of the tile flange.
6. Apply an even bead of silicone around the tile flange and wall material.
7. Drill pilot holes using a 3/16" drill bit through the flange into the studs.
8. Fasten the shower base to the studs using screws through the drilled holes.
This answer is automatically generated
Do you not fasten the bottom rails to the shower base?
what tool do you use to cut the hole in the shower wall for the water supply on/off
The tool used to cut a hole in the shower wall is a utility knife.
This answer is automatically generated