
Subscribe to Our Youtube Channel
Related Manuals for Club Car URBAN XR 2024

Summary of Contents for Club Car URBAN XR 2024
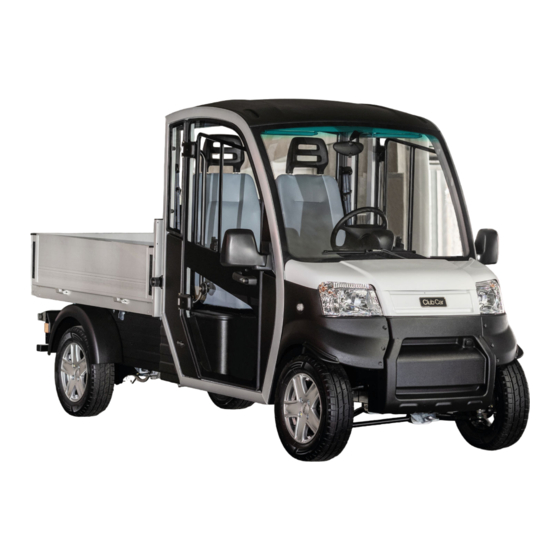
- Page 1 URBAN XR (STANDARD CHASSIS) LITHIUM-ION Operator Manual APPLICABLE TO VEHICLES WITH SERIAL PREFIX UG *TPCC01UGXX25XEN* *TPCC01UGXX25XEN* TPCC01UGXX25XEN_1...
- Page 2 Copyright © 2024 Club Car, LLC This manual effective January 01, 2024...
-
Page 3: Introduction
Read, understand, and obey all instructions and safety precautions in this manual to prevent the risk of personal injury or property damage. Club Car recommends owners that rent or loan vehicles make sure that operators read this manual before vehicle operation. - Page 4 P.O. Box 204658 Augusta, Georgia 30917-4658 United States Of America APPROVED DEALERS AND DISTRIBUTORS Club Car's customer support system gives fast and courteous service. Speak with your dealer or distributor for: URBAN XR (STANDARD CHASSIS) LITHIUM-ION Page ii Operator Manual...
- Page 5 • Accessories • Replacement Parts • Warranty Work • Publications • Technical Advice To find your nearest dealer or distributor: • Go to https://www.clubcardealer.com. • Scan the dealer locator Quick Response (QR) code TECHNICAL PUBLICATIONS SATISFACTION AND FEEDBACK SURVEY Let your voice be heard! URBAN XR (STANDARD CHASSIS) LITHIUM-ION Operator Manual Page iii...
- Page 6 Your feedback will help make our publications better. The survey is available in multiple languages and can be accessed through an internet- connected device with a web browser. • Visit https://bit.ly/3saBFvn • Scan the Technical Publication Satisfaction And Feedback Survey Quick Response (QR) code URBAN XR (STANDARD CHASSIS) LITHIUM-ION Page iv...
-
Page 7: Notices
240188-000001 LIABILITY AND VEHICLE DESIGN CHANGES Club Car is not liable for errors in this manual or for incidental or consequential damage that result from the use of the material in this manual. Club Car reserves the right to make design changes to vehicles without obligation to make these changes on units previously sold. - Page 8 This manual contains proprietary information that is protected by copyright. All rights are reserved. Express written consent of Club Car is necessary to photocopy, replicate, or translate this manual. The information contained in this publication is subject to change without notice.
-
Page 9: Table Of Contents
CONTENTS INTRODUCTION.........................I NOTICES........................... V SECTION 1 — SAFETY INFORMATION................11 General Safety Information.................... 12 Practice Safety......................12 Safety Signal Words....................12 Safety Committee....................13 Safety Information......................13 Vehicle Safety And Compliance Decals................ 14 Safety Features......................17 Battery Charging Interlock..................17 Multi-Purpose Buzzer....................18 Regenerative Braking.................... - Page 10 Tow Switch........................43 Turn Signal Lever......................44 Windshield Heater......................44 Windshield Wiper Switch....................44 SECTION 4 — VEHICLE FEATURES................... 47 Audio System.......................48 Bucket Seats........................48 Bucket Seat Adjustment................... 48 Cabin Heater/Fan......................48 Doors..........................49 Open the Doors....................... 49 Door Retainer Catch....................49 Open the Side Windows....................50 Electric Cargo Bed Lift....................
- Page 11 Tires........................... 66 Electric Motor.......................66 Battery........................66 Fluids..........................67 Weight And Load......................67 Weights And Load Zones...................67 Weights And Load Definitions..................68 SECTION 7 — VEHICLE OPERATION................69 Daily Pre-Operational Safety Checklist And Vehicle Performance Inspection......71 Daily Pre-Operational Safety Checklist................ 72 Vehicle Performance Inspection.................
- Page 12 SECTION 10 — TRANSPORT AND TOW................103 Prepare The Vehicle To Be Towed.................. 104 Towing A Trailer Or Vehicle................... 104 Vehicle Transport Preparation..................104 Vehicle Transport Recovery...................105 SECTION 11 — EXTENDED STORAGE................107 Extended Storage Preparation..................108 Return From Extended Storage..................109 SECTION 12 —...
-
Page 13: Section 1 - Safety Information
Safety Information SAFETY INFORMATION URBAN XR (STANDARD CHASSIS) LITHIUM-ION Operator Manual Page 11 TPCC01UGXX25XEN (Edition 1) -
Page 14: General Safety Information
Any vehicle can be used in a variety of usages outside of the manufacturer’s intent. Club Car cannot anticipate and warn for every possible usage condition. Therefore, the operator must use good sense and judgment and must operate the vehicle in an appropriate manner for the way in which the vehicle is being used. -
Page 15: Safety Committee
NOTICE property damage. SAFETY COMMITTEE If the vehicle is rented or part of a fleet, Club Car recommends a safety committee. The primary concern of this safety committee is safe vehicle operation. Safety committee objectives include: • Identifying and taking steps to mitigate hazards. -
Page 16: Vehicle Safety And Compliance Decals
Safety Information Safety Information UNINTENDED VEHICLE OPERATION CAN CAUSE SERIOUS WARNING INJURY OR DEATH. MAKE SURE THAT CHILDREN ARE ALWAYS SUPERVISED IN AND AROUND THE VEHICLE. DO NOT OPERATE THE VEHICLE UNDER THE INFLUENCE OF ALCOHOL, DRUGS, MEDICATIONS, OR WHILE DISTRACTED. ELECTRICAL SHORTS CAN CAUSE A FIRE, ELECTRICAL SHOCK, SERIOUS INJURY, OR DEATH. - Page 17 Safety Information Safety Information 240196-000005 WARNING • Always turn Main Power switch to “OFF” before removing or reconnecting batteries, battery wires or any other electrical components. Failure to do so may result in electrical art or battery explosion. • Modifying or tampering with this vehicle could result in SERIOUS INJURY or DEATH, as well as permanent damage to the vehicle.
- Page 18 Safety Information Safety Information WARNING • Always take the best safety precautions when releasing the parking brake. • Vehicle can roll unexpectedly at all times when parking brake is released, even on level grounds. This can cause SERIOUS INJURY or DEATH. •...
-
Page 19: Safety Features
Safety Information Safety Features CAUTION Frame is isolated from power system. Do not use as ground. 105124701 WARNING Do not ride in the cargo bed. 101553901_J 8. Ground Warning Decal 9. Bed Loading Warning Decal WARNING NOTICE MAXIMUM TONGUE WEIGHT 150 lb (68 kg) 1011553_P 47634681001... -
Page 20: Multi-Purpose Buzzer
Safety Information Safety Features MULTI-PURPOSE BUZZER The multi-purpose buzzer makes an audible tone when the vehicle is moving in reverse. REGENERATIVE BRAKING Regenerative braking helps maintain the downhill speed of the vehicle in relation to the accelerator pedal position. Regenerative braking performance decreases when the battery is fully charged. Regenerative braking cannot maintain the vehicle speed on excessive slopes (grades more than 20 percent (11.3 degrees)). - Page 21 Safety Information Safety Features PROPER USE OF SEAT BELTS FAILURE TO USE THE SEAT BELT CORRECTLY CAN CAUSE DANGER SERIOUS INJURY OR DEATH. MAKE SURE THAT THE TAB AND BUCKLE ARE LOCKED. MAKE SURE THAT THE BELT IS NOT TWISTED. IF THE VEHICLE STARTS TO ROLL OVER, DO NOT TRY TO GET OUT OF THE VEHICLE.
- Page 22 • Injured Persons - Consult your doctor for specific recommendations. • Seat Belt Extenders - Club Car does not recommend the use of seat belt extenders. LATCH A SEAT BELT Procedure: Pull the seat belt out of the retractor.
-
Page 23: Battery Safety Information
Safety Information Battery Safety Information UNLATCH A SEAT BELT Procedure: Make sure that the vehicle has come to a full stop and the park brake is engaged. Push the buckle release button and let the belt retract. Pull the belt out and visually look for kinks or twists if the belt does not retract smoothly. -
Page 24: Lithium-Ion Battery Recycling
Safety Information Battery Safety Information SYMBOL SIGNIFICANCE Battery acid hazard 280189-000005 Explosive gas hazard 280189-000006 LITHIUM-ION BATTERY RECYCLING LITHIUM-ION BATTERIES CONTAIN DANGEROUS MATERIALS WARNING THAT CAN CONTAMINATE THE WATER AND SOIL, CAUSE ENVIRONMENTAL DAMAGE, CAUSE PROPERTY DAMAGE, AND CAUSE SERIOUS INJURY. SPEAK WITH YOUR DEALER OR DISTRIBUTOR FOR INFORMATION ON HOW TO DISCARD A BATTERY CORRECTLY. -
Page 25: Section 2 - Indicators, Gauges, And Displays
Indicators, Gauges, And Displays INDICATORS, GAUGES, AND DISPLAYS URBAN XR (STANDARD CHASSIS) LITHIUM-ION Operator Manual Page 23 TPCC01UGXX25XEN (Edition 1) -
Page 26: Indicator, Gauges, And Display Locations
Indicators, Gauges, And Displays Indicator, Gauges, And Display Locations The vehicle features listed are standard and optional. INDICATOR, GAUGES, AND DISPLAY LOCATIONS 180196-000007 1. Dash Display Unit 2. Charger LED 3. Backup Camera Display DASH DISPLAY UNIT DASH DISPLAY FEATURES LOCATOR 03:16 316.6 TRIP... - Page 27 Indicators, Gauges, And Displays Dash Display Unit 5. High-Beam Headlight Indicator 6. Enter/Menu Button 7. Park Brake Indicator 8. Down Button 9. Parking Lights Indicator 10. Right Button 11. Speedometer 12. Rear Fog Light Indicator 13. Windshield Heater Indicator 14. Refrigerator Indicator 15.
- Page 28 Indicators, Gauges, And Displays Dash Display Unit DOWN BUTTON Down Button • Move cursor down • Refrigerator on/off 180189-000006 ECO MODE INDICATOR The eco mode indicator (yellow color) gives a visual indication that eco mode is engaged. 180189-000017 ELECTRICAL FAULT INDICATOR The electrical fault indicator (red color) gives a visual indication of any electrical fault conditions.
- Page 29 Indicators, Gauges, And Displays Dash Display Unit HIGH-BEAM HEADLIGHT INDICATOR The high-beam headlight indicator (blue color) gives a visual indication when the high-beam headlights are on. 180189-000010 LEFT BUTTON Left Button • Move cursor to left menu item 180189-000003 LOW-BEAM HEADLIGHT INDICATOR The low-beam headlight indicator (green color) gives a visual indication when the low-beam headlights are on.
- Page 30 Indicators, Gauges, And Displays Dash Display Unit PARK BRAKE INDICATOR The park brake indicator (red color) gives a visual confirmation when the park brake is engaged. 180189-000024 PARKING LIGHTS INDICATOR The parking lights indicator (green color) gives a visual confirmation when the parking lights are on.
- Page 31 Indicators, Gauges, And Displays Dash Display Unit RIGHT BUTTON Right Button • Move cursor to right menu item • Toggle sport mode/eco mode 180189-000007 SPEEDOMETER The speedometer shows the speed of the vehicle in miles per hour (mph) or kilometers per hour (km/h). 180189-000023 SPORT MODE INDICATOR The sport mode indicator (green color) gives a visual indication that sport mode...
-
Page 32: Navigation Buttons
Indicators, Gauges, And Displays Navigation Buttons UP BUTTON Up Button • Move cursor up • System information menus intended for the manufacturer's service purposes 180189-000004 WINDSHIELD HEATER INDICATOR The windshield heater indicator (orange color) gives a visual confirmation when the windshield heater is on. 180189-000013 NAVIGATION BUTTONS 03:45... -
Page 33: User Functions Menu
Indicators, Gauges, And Displays User Functions Menu Up Button • Move cursor up • Change setting selection item 180189-000004 • System information menus intended for the manufacturer's service purposes Down Button • Move cursor down • Change setting selection item 180189-000006 •... -
Page 34: Adjust Backlight Brightness
Indicators, Gauges, And Displays User Functions Menu Press the Enter button to open the Menu screen. OEM Settings Maintenance/Service User Functions Exit Menu Press the Down Button to select the User Functions option, if it is not already selected. Press the Enter button to open the User Functions menu. ADJUST BACKLIGHT BRIGHTNESS To adjust screen brightness: Press the Enter button to open the Menu screen. -
Page 35: Change Units Of Measurement
Indicators, Gauges, And Displays User Functions Menu Press the Enter button to open the Menu screen. Press the Down button to select the User Functions option, if it is not already selected. Press the Enter button to open the User Functions menu. Press the Enter button with Time &... -
Page 36: Reset Odometers
Indicators, Gauges, And Displays Cleaning The Dash Display Screen Select Save & Exit to confirm the selected values and exit back to the User Functions menu. Select Cancel to clear all changes without saving. Select Exit to exit back to the Menu screen. Select Exit Menu to exit the Menu screen. -
Page 37: Rear View Camera Screen
Indicators, Gauges, And Displays Rear View Camera Screen Use a dry microfiber cloth to lightly remove dust from the screen. Do not push hard, since that can damage the display. To remove smudges, use light circular movements with a microfiber cloth moistened with distilled water. - Page 38 (Page intentionally left blank.)
-
Page 39: Section 3 - Controls
Controls CONTROLS URBAN XR (STANDARD CHASSIS) LITHIUM-ION Operator Manual Page 37 TPCC01UGXX25XEN (Edition 1) -
Page 40: Controls Locator
Controls Controls Locator The vehicle features listed are standard and optional. CONTROLS LOCATOR 180196-000019 1. Accelerator Pedal 2. Brake Pedal 3. Hood Latch 4. Hazard Light Switch 5. Key Switch 6. Turn Signal Lever, Head Light Switch, Rear Fog Light Switch, and Horn Button 7. -
Page 41: Auto Park Brake
Controls Auto Park Brake The accelerator pedal is used to increase and maintain the speed of the vehicle. 080189-000001 AUTO PARK BRAKE FAILURE TO ENGAGE THE PARK BRAKE CAN CAUSE PROPERTY WARNING DAMAGE AND SERIOUS INJURY. AFTER THE VEHICLE STOPS, ENGAGE THE PARK BRAKE UNTIL IT IS FULLY ENGAGED AND PREVENTS THE VEHICLE FROM MOVING. -
Page 42: Brake Pedal
Controls Brake Pedal BRAKE PEDAL The brake pedal is used to decrease speed or stop the vehicle. 080189-000002 ELECTRIC CARGO BED LIFT SWITCH The electric cargo bed lift switch controls the movement of the cargo bed. 080989-000001 POSITION FUNCTION Lift Bottom Lower GEAR SELECTOR CONTROL... -
Page 43: Hazard Light Switch
Controls Hazard Light Switch HAZARD LIGHT SWITCH The hazard light switch controls the operation of the hazard lights. 180189-000033 POSITION FUNCTION Out (Top) In (Bottom) HEADLIGHT SWITCH The headlight switch controls the operation of the headlights. 180189-000034 POSITION FUNCTION On - Parking lights only On - Low beam headlights High Beams With the head light switch on, pull the lever toward you to turn the high beams on and off. -
Page 44: Horn
Controls Horn HORN The horn button is used to control the horn. The horn button is spring loaded to stay in the off position. Push and hold the horn button to operate the horn. 180189-000035 KEY SWITCH THE KEY SWITCH CAN BE USED TO STOP THE VEHICLE IN AN WARNING EMERGENCY. -
Page 45: Rear Fog Light Switch
Controls Rear Fog Light Switch The main power switch is used during maintenance and extended storage. Set the switch to ON for normal operation. Set the switch to OFF for maintenance and extended storage. Do not quickly operate the switch from ON to OFF and back to ON. Wait 10 seconds to set the switch to ON. -
Page 46: Turn Signal Lever
Controls Turn Signal Lever To activate the towing function the tow switch must be engaged. Use the additional tow switch key. Note: This key is not the same as the ignition key. It is recommended that the key is removed when not towing to prevent unauthorized removal of the vehicle. - Page 47 Controls Windshield Wiper Switch POSITION FUNCTION On - Speed 2 Windshield Washer Pull and hold the lever toward you to turn the windshield washer on. Release lever to turn off. URBAN XR (STANDARD CHASSIS) LITHIUM-ION Operator Manual Page 45 TPCC01UGXX25XEN (Edition 1)
- Page 48 (Page intentionally left blank.)
-
Page 49: Section 4 - Vehicle Features
Vehicle Features VEHICLE FEATURES URBAN XR (STANDARD CHASSIS) LITHIUM-ION Operator Manual Page 47 TPCC01UGXX25XEN (Edition 1) -
Page 50: Audio System
Vehicle Features Audio System The vehicle features listed are standard and optional. AUDIO SYSTEM Refer to the audio system manual for user instructions. BUCKET SEATS BUCKET SEAT ADJUSTMENT DO NOT ADJUST THE DRIVER-SIDE SEAT WHILE THE VEHICLE WARNING IS IN MOTION. Pull the seat adjustment handle (1) up. -
Page 51: Doors
Vehicle Features Doors DOORS OPEN THE DOORS Procedure: To open from the inside, push up on the door handle. To open from the outside, push the button on the door handle. DOOR RETAINER CATCH Open the door fully until it hits the door catch. Turn the inside door retainer catch release knob to disengage the catch mechanism. -
Page 52: Open The Side Windows
Vehicle Features Electric Cargo Bed Lift OPEN THE SIDE WINDOWS Procedure: Push the locking mechanism towards the handle. Slide window open. ELECTRIC CARGO BED LIFT THE ELECTRIC CARGO BED CAN LOWER WITHOUT POWER DANGER AND CAUSE PROPERTY DAMAGE, SERIOUS INJURY, OR DEATH. BEFORE YOU DO THE SERVICING OF THE BED LIFT SYSTEM, REMOVE THE ELECTRIC CARGO BED. -
Page 53: Lift The Electric Cargo Bed
Vehicle Features Refrigerator LIFT THE ELECTRIC CARGO BED Procedure: Push and hold the electric cargo bed lift switch in the top position. Release the electric cargo bed switch when cargo bed gets to the desired position. LOWER THE ELECTRIC CARGO BED Procedure: Push and hold the electric cargo bed switch in the bottom position. -
Page 54: Side Mirrors
Vehicle Features Side Mirrors Always clean the refrigerator after each use. Defrosting the Refrigerator Frost forming inside the refrigerator will reduce the cooling capacity. Defrost the refrigerator frequently. SIDE MIRRORS The side mirrors adjust for optimal viewing conditions and enhancing safety while driving. Do not adjust side mirrors while driving. -
Page 55: Switch Panel
Vehicle Features Switch Panel MODE MAX SPEED SPORT 20 MPH SWITCH PANEL 1. Interior Light 2. Strobe Lights 3. Strobe Light Pattern 4. Rear Working Light 5. Front Working Light 6. Cabin Heater/Fan 12-VOLT POWER RECEPTACLE The 12-Volt 6.5-amp power receptacle supplies electricity to power and charge accessories when the key switch is ON. - Page 56 (Page intentionally left blank.)
-
Page 57: Section 5 - Battery Charger
Battery Charger BATTERY CHARGER URBAN XR (STANDARD CHASSIS) LITHIUM-ION Operator Manual Page 55 TPCC01UGXX25XEN (Edition 1) -
Page 58: Introduction
Battery Charger Introduction See additional dangers, warnings, cautions, and notices in the Safety Information section. A BATTERY CHARGER, CORD, PLUG, OR VEHICLE CHARGER WARNING RECEPTACLE THAT HAS DAMAGE OR A BAD ELECTRICAL CONNECTION CAN CAUSE A FIRE, PROPERTY DAMAGE, SERIOUS INJURY, OR DEATH. DO NOT CONNECT THE DAMAGED BATTERY CHARGER TO AN AC POWER SOURCE. -
Page 59: Battery Charger Specifications
Battery Charger Battery Charger Specifications • More efficient, faster, and optimal charging through improved switch EFFICIENT mode high frequency design. • Decrease utility surcharges and optimize the use of AC line with a Power Factor of more than 0.99. RELIABLE •... -
Page 60: Dc Output
Battery Charger Governmental And Industry Certifications DC OUTPUT Voltage Not Available at Time of Print Current Not Available at Time of Print GOVERNMENTAL AND INDUSTRY CERTIFICATIONS FEDERAL COMMUNICATIONS COMMISSION CERTIFICATION The battery charger is Federal Communications Commission (FCC) certified. Note: This equipment has been tested and found to comply with the limits for a Class A digital device, pursuant to Part 15 of the FCC Rules. -
Page 61: Battery Charging Interlock
Battery Charger Battery Charger Features • The extension cord must be as short as possible and not exceed 12 ft (3.7 m). • The extension cord must be a three-wire No. 12-AWG (American Wire Gauge) or No. 14- SWG (British Standard Wire Gauge). •... -
Page 62: Inspection And Maintenance
Battery Charger Inspection And Maintenance SYMBOL LIGHT STATUS CONDITION Amber AC power sensed. (Constant) Amber Low AC Voltage. Check voltage and power cord length. (Flash On And Off) 210192-000037 Charger error. Reset charger power and refer to (Flash On And Off) troubleshooting instructions. -
Page 63: Clean The Electrical Plugs And Receptacles
Battery Charger Battery Charger Troubleshooting • Worn pins CLEAN THE ELECTRICAL PLUGS AND RECEPTACLES LUBRICATING THE PLUG AND RECEPTACLE WITH THE AC CORD WARNING CONNECTED TO A POWER SOURCE CAN CAUSE PROPERTY DAMAGE, ELECTRICAL SHOCK, SERIOUS INJURY, AND DEATH. DO NOT LUBRICATE THE PLUG AND VEHICLE CHARGER RECEPTACLE WITH THE AC CORD CONNECTED TO A POWER SOURCE. - Page 64 Battery Charger Battery Charger Troubleshooting NUMBER OF DESCRIPTION RECOMMENDED SOLUTION FLASHES Make sure that the correct batteries are installed. Replace batteries as necessary. High Voltage Sensed Reset the charger by removing electrical power for a minimum of 15 seconds. Make sure that the correct batteries are installed.
- Page 65 Battery Charger Battery Charger Troubleshooting NUMBER OF DESCRIPTION RECOMMENDED SOLUTION FLASHES Reset the charger by removing electrical power for a minimum of 15 seconds. Charger internal fault Return the charger to an approved service center if the fault continues. URBAN XR (STANDARD CHASSIS) LITHIUM-ION Operator Manual Page 63 TPCC01UGXX25XEN (Edition 1)
- Page 66 (Page intentionally left blank.)
-
Page 67: Section 6 - Vehicle Specifications
Vehicle Specifications 91.5 IN (232 CM) 68.5 IN (174 CM) VEHICLE SPECIFICATIONS URBAN XR (STANDARD CHASSIS) LITHIUM-ION Operator Manual Page 65 TPCC01UGXX25XEN (Edition 1) -
Page 68: Dimensions
Vehicle Specifications Dimensions DIMENSIONS Length 128.81 in (327.2 cm) Width 53.74 in (136.5 cm); 68.15 in (173.1 cm) - with mirrors Height 73.9 in (187.7 cm) - with cab Ground Clearance 9.33 in (23.7 cm) 43.31 in (110 cm) - front wheel Wheel Track 43.31 in (110 cm) - rear wheel Wheel Base... -
Page 69: Fluids
Vehicle Specifications Fluids FLUIDS Brake Fluid DOT 4 Transaxle 24.7 fl-oz (0.73 l) WEIGHT AND LOAD IF THE RATED CAPACITIES OF THE VEHICLE ARE EXCEEDED, WARNING PROPERTY DAMAGE, SERIOUS INJURY, OR DEATH CAN OCCUR. DO NOT EXCEED THE RATED CAPACITY OF THE VEHICLE. RATED CAPACITY IS FOR LEVEL SURFACES ONLY. -
Page 70: Weights And Load Definitions
Vehicle Specifications Weight And Load WEIGHTS AND LOAD DEFINITIONS TERM DEFINITION The vehicle dry weight is the weight of the vehicle with no Vehicle Dry Weight battery and without occupant or cargo. The vehicle curb weight is the weight of the vehicle with the Vehicle Curb Weight battery installed and without occupant or cargo. -
Page 71: Section 7 - Vehicle Operation
Vehicle Operation VEHICLE OPERATION URBAN XR (STANDARD CHASSIS) LITHIUM-ION Operator Manual Page 69 TPCC01UGXX25XEN (Edition 1) - Page 72 Vehicle Operation See additional dangers, warnings, cautions, and notices in the Safety Information section. FALLING OUT CAN CAUSE SERIOUS INJURY OR DEATH. WARNING OCCUPANTS MUST STAY SEATED AND ALWAYS HOLD ON TO HAND HOLDS OR HANDRAILS WHEN THE VEHICLE IS IN OPERATION.
-
Page 73: Daily Pre-Operational Safety Checklist And Vehicle Performance Inspection
Vehicle Operation Daily Pre-Operational Safety Checklist And Vehicle Performance Inspection UNINTENDED VEHICLE OPERATION CAN CAUSE SERIOUS WARNING INJURY OR DEATH. THE VEHICLE IS NOT SPECIALLY EQUIPPED FOR HANDICAPPED PERSONS. BEFORE VEHICLE OPERATION, MAKE SURE THAT ALL PERSONS OBEY THE WARNINGS AND OPERATING INSTRUCTIONS. -
Page 74: Daily Pre-Operational Safety Checklist
Vehicle Operation Daily Pre-Operational Safety Checklist And Vehicle Performance Inspection DAILY PRE-OPERATIONAL SAFETY CHECKLIST INSPECTION AREA INSPECTION CRITERIA • Make sure that all parts are correctly installed. • Make sure that all nuts, bolts, and screws are tight. • Replace missing, worn, or damaged items. General •... -
Page 75: Vehicle Performance Inspection
Vehicle Operation Daily Pre-Operational Safety Checklist And Vehicle Performance Inspection INSPECTION AREA INSPECTION CRITERIA • Examine the electrical cords for cracks, loose connections, and frayed wires. • Examine receptacle contacts and plug terminals. Clean as Battery Charger necessary. • Replace missing, worn, or damaged items. •... -
Page 76: Vehicle Movement
Vehicle Operation Vehicle Movement Set the gear selector to R. Release the brake pedal. Slowly push the accelerator pedal. Make sure the vehicle moves in reverse. Slowly push the brake pedal. Stop the vehicle. Set the gear selector to F. Release the brake pedal. -
Page 77: Reverse Movement
Vehicle Operation Vehicle Movement • Make sure that the front wheels are turned in the direction of travel. • Make sure that there are no obstructions are in the vehicles path. • The key switch is set to ON. • The vehicle is at a full stop. Procedure: Set the gear selector to D. -
Page 78: Park The Vehicle
Vehicle Operation Driving Conditions PARK THE VEHICLE Stop the vehicle. Set the gear selector to N. Turn the key to OFF. Remove the key. Keep the key in a safe area. DRIVING CONDITIONS DRIVING ON UNPAVED SURFACES Precautions for operation on unpaved or unimproved surfaces: •... -
Page 79: Sidehill Slope
Vehicle Operation Driving Conditions • Prevent driving at an offset angle. An offset angle will cause the vehicle to lean sharply to one side. • Continue at a stable rate of speed. Do not accelerate quickly. • Do not stop a vehicle with a load on a slope. If a vehicle with a load must stop on a slope, prevent backwards movement or sudden starts or stops. -
Page 80: Over Obstacles
Vehicle Operation Driving Conditions THE OPERATOR MUST CONTROL THE VEHICLE SPEED WHEN WARNING GOING DOWN A SLOPE. VEHICLE ROLLBACK WHEN STARTING ON AN INCLINE CAN CAUSE PROPERTY DAMAGE, SERIOUS INJURY, OR DEATH. USE THE BRAKE PEDAL TO HOLD THE VEHICLE UNTIL THE DRIVETRAIN IS FULLY ENGAGED. -
Page 81: Night Time
Vehicle Operation Driving Conditions • Look forward and learn to read the terrain. Be constantly alert for low hanging obstacles such as tree limbs. • Drive slowly and use caution when operating on unfamiliar terrain. Not all obstacles are immediately visible. NIGHT TIME DRIVING OPERATING THE VEHICLE AT NIGHT WITHOUT THE CORRECT WARNING... - Page 82 Vehicle Operation Driving Conditions A LOAD ON THE TAILGATE IN THE VERTICAL OR HORIZONTAL NOTICE POSITION CAN CAUSE PROPERTY DAMAGE. DO NOT PUT A LOAD ON THE TAILGATE. CLOSE THE TAILGATE WHILE THE VEHICLE OPERATES. Hauling cargo incorrectly can change the vehicles handling and may cause loss of control or brake instability, which can cause serious injury or death.
-
Page 83: Section 8 - Vehicle Maintenance
Vehicle Maintenance VEHICLE MAINTENANCE URBAN XR (STANDARD CHASSIS) LITHIUM-ION Operator Manual Page 81 TPCC01UGXX25XEN (Edition 1) - Page 84 Vehicle Maintenance See additional dangers, warnings, cautions, and notices in the Safety Information section. A WHEEL OR TIRE THAT HAS DAMAGE CAN CAUSE PROPERTY WARNING DAMAGE, SERIOUS INJURY, OR DEATH. DO NOT TRY TO REPAIR A WHEEL OR TIRE. SPEAK WITH YOUR LOCAL DEALER OR DISTRIBUTOR FOR REPAIRS.
-
Page 85: Disable The Vehicle
Vehicle Maintenance Disable The Vehicle CLUB CAR VEHICLES ARE NOT DESIGNED TO BE SUBMERGED WARNING IN WATER. DAMAGE TO INTERNAL COMPONENTS COULD OCCUR IF A VEHICLE IS SUBMERGED. SUCH DAMAGE MAY RESULT IN UNINTENDED OPERATION AND/OR THERMAL EVENTS, WHICH COULD LEAD TO PERSONAL INJURY AND/OR DEATH. -
Page 86: Interior Cleaning
Vehicle Maintenance Maintenance Schedule Use non-abrasive wax materials. Battery acid, fertilizers, tars, asphalt, creosote, paint, or chewing gum should be removed immediately to prevent possible stains. Discard the waste water correctly. CLEANING THE VEHICLE INTERIOR MOISTURE CAN CAUSE ELECTRICAL COMPONENT DAMAGE. DO NOTICE NOT USE A PRESSURE WASHER OR STEAM CLEANER TO CLEAN THE VEHICLE. - Page 87 Vehicle Maintenance Maintenance Schedule INTERVAL OR HOURS DESCRIPTION (WHICHEVER COMES FIRST) • Examine the battery and battery cables. Replace as necessary. • Make sure that the battery cables are tight. • Make sure the battery hold-downs are tight. Weekly • Examine the wiper blade. •...
- Page 88 Vehicle Maintenance Maintenance Schedule INTERVAL OR HOURS DESCRIPTION (WHICHEVER COMES FIRST) Have a trained technician: • Perform the monthly services. • Perform a discharge test. • Align the front wheels. • Adjust the head lights. • Check for loose hardware and connectors. •...
-
Page 89: Periodic Lubrication
Vehicle Maintenance Periodic Lubrication INTERVAL OR HOURS DESCRIPTION (WHICHEVER COMES FIRST) Have a trained technician: • Perform the 12 month / 360 hour services. 24 months / 720 hours • Replace the brake fluid. • Reset the service reminder on the instrument cluster. Have a trained technician: •... -
Page 90: Fill The Windshield Washer Fluid
Vehicle Maintenance Maintenance Tasks 040396-000001 FILL THE WINDSHIELD WASHER FLUID WINDSHIELD WASHER FLUID IS FLAMMABLE. DO NOT SMOKE. WARNING KEEP SPARKS AND OPEN FLAMES AWAY FROM THE VEHICLE AND SERVICING AREA. CORRECTLY CLEAN THE SPILLED WINDSHIELD WASHER FLUID. EXPOSURE TO WINDSHIELD WASHER FLUID MAY DAMAGE NOTICE ELECTRONIC COMPONENTS. -
Page 91: Lift The Vehicle
Vehicle Maintenance Maintenance Tasks 050198-000072 Add windshield washer fluid to the washer reservoir (2). Install the cap. LIFT THE VEHICLE LIFT THE FRONT OF THE VEHICLE BATTERIES DISCONNECTED OR CONNECTED WITH THE MAIN WARNING POWER SWITCH SET TO ON CAN CAUSE A BATTERY EXPLOSION AND SERIOUS INJURY. - Page 92 Vehicle Maintenance Maintenance Tasks 2.A. Remove the plug (1) covering the battery pack power button (2) below the passenger seat. 010298-000001 2.B. Push and hold the power button (2) until there is a click and the green LED turns off. Vehicle with Relion Blue: Turn off the battery pack.
- Page 93 Vehicle Maintenance Maintenance Tasks 220296-000001 Lift the front of the vehicle. Put jack stands under the frame rails. Lower the vehicle onto the jack stands. LIFT THE REAR OF THE VEHICLE BATTERIES DISCONNECTED OR CONNECTED WITH THE MAIN WARNING POWER SWITCH SET TO ON CAN CAUSE A BATTERY EXPLOSION AND SERIOUS INJURY.
- Page 94 Vehicle Maintenance Maintenance Tasks 010298-000001 2.B. Push and hold the power button (2) until there is a click and the green LED turns off. Vehicle with Relion Blue: Turn off the battery pack. 3.A. Push the power button (1) one time. 3.B.
-
Page 95: Lower The Vehicle
Vehicle Maintenance Maintenance Tasks 220296-000002 Lift the rear of the vehicle. Put jack stands under the frame rails. Lower the vehicle onto the jack stands. LOWER THE VEHICLE LOWER THE FRONT OF THE VEHICLE BATTERIES DISCONNECTED OR CONNECTED WITH THE MAIN WARNING POWER SWITCH SET TO ON CAN CAUSE A BATTERY EXPLOSION AND SERIOUS INJURY. - Page 96 Vehicle Maintenance Maintenance Tasks 220296-000001 Lift the front of the vehicle. Remove the jack stands from under the frame rails. Lower the vehicle to the ground. Remove the chocks. Vehicle with Relion Black: Turn on battery pack by pushing the power button and the green LED turns on.
-
Page 97: Tire Pressure Measurement
Vehicle Maintenance Maintenance Tasks 220296-000002 Lift the rear of the vehicle. Remove the jack stands from under the frame rails. Lower the vehicle to the ground. Remove the chocks. Vehicle with Relion Black: Turn on battery pack by pushing the power button and the green LED turns on. - Page 98 Vehicle Maintenance Maintenance Tasks WHEEL ASSEMBLY REMOVAL LIFT ONLY ONE END OF THE VEHICLE AT A TIME. USE A WARNING SUITABLE LIFTING DEVICE WITH 2000 LB. (907 KG) MINIMUM LIFTING CAPACITY. DO NOT USE THE LIFTING DEVICE TO HOLD THE VEHICLE IN THE LIFTED POSITION. USE APPROVED JACK STANDS OF PROPER WEIGHT CAPACITY TO SUPPORT THE VEHICLE AND CHOCK THE WHEELS THAT REMAIN ON THE FLOOR.
- Page 99 Vehicle Maintenance Maintenance Tasks 3.B. Push and hold the power button (1) a second time for 6 seconds until both LED indicator lights (2) are solid red. Note: Turn off all the batteries quickly and in pairs. Batteries will turn back on when they sense voltage on the other batteries.
- Page 100 Vehicle Maintenance Maintenance Tasks Vehicle with Relion Black: Turn on battery pack by pushing the power button and the green LED turns on. Vehicle with Relion Blue: Turn on battery pack by pushing the power button on any of the batteries and holding for at least 5 seconds until the LED flashes green before releasing button.
-
Page 101: Section 9 - Battery Maintenance
Battery Maintenance BATTERY MAINTENANCE URBAN XR (STANDARD CHASSIS) LITHIUM-ION Operator Manual Page 99 TPCC01UGXX25XEN (Edition 1) -
Page 102: Battery Maintenance Overview
The battery has no water or maintenance intervals. BATTERY CLEANING Club Car does not recommend the use of a garden hose or pressure washer to clean the battery and battery bucket area. Use a soft cloth to clean the battery and battery bucket area. - Page 103 Battery Maintenance Battery Charging When the vehicle starts to charge: 6.A. The charger indicator lamp on the dash will blink red-yellow-green when the vehicle starts to charge. Before vehicle operation, disconnect and retract the AC cord. URBAN XR (STANDARD CHASSIS) LITHIUM-ION Operator Manual Page 101 TPCC01UGXX25XEN (Edition 1)
- Page 104 (Page intentionally left blank.)
-
Page 105: Section 10 - Transport And Tow
Transport And Tow TRANSPORT AND TOW URBAN XR (STANDARD CHASSIS) LITHIUM-ION Operator Manual Page 103 TPCC01UGXX25XEN (Edition 1) -
Page 106: Prepare The Vehicle To Be Towed
Use only a Club Car approved tow kit. Procedure: Make sure the cargo bed is lowered and locked. Use a Club Car approved tow kit to tow the vehicle. Tow the vehicle less than 5 mph (8 km/h). VEHICLE TRANSPORT PREPARATION... -
Page 107: Vehicle Transport Recovery
Transport And Tow Vehicle Transport Recovery Before you begin: • The vehicle is not designed to be towed at speeds over 5 mph. • If movement over long distances or on public roads is necessary, transport the vehicle on a trailer. - Page 108 (Page intentionally left blank.)
-
Page 109: Section 11 - Extended Storage
Extended Storage EXTENDED STORAGE URBAN XR (STANDARD CHASSIS) LITHIUM-ION Operator Manual Page 107 TPCC01UGXX25XEN (Edition 1) -
Page 110: Extended Storage Preparation
Extended Storage Extended Storage Preparation See additional dangers, warnings, cautions, and notices in the Safety Information section. EXTENDED STORAGE PREPARATION This procedure will make sure that the lithium-ion battery has sufficient charge for extended storage intervals. The recommended extended storage temperature range is from -4° F (-20° C) to 113° F (45° C). Procedure: RELION BATTERY Turn off all electronic accessories. -
Page 111: Return From Extended Storage
Extended Storage Return From Extended Storage Vehicle with Relion Blue: Turn off the battery pack. 12.A. Push the power button (1) one time. 12.B. Push and hold the power button (1) a second time for 6 seconds until both LED indicator lights (2) are solid red. - Page 112 (Page intentionally left blank.)
-
Page 113: Section 12 - Warranties
Warranties WARRANTIES URBAN XR (STANDARD CHASSIS) LITHIUM-ION Operator Manual Page 111 TPCC01UGXX25XEN (Edition 1) -
Page 114: Vehicle Warranty
Vehicle Warranty VEHICLE WARRANTY Warranty information can be viewed at Club Car's Parts and Service website: https:// manuals.clubcar.com. No other expressed or implied warranties are contained herein. Your dealer or distributor examined the vehicle before it was delivered to you. The dealer or distributor will also supply you a copy of the completed vehicle warranty registration form. - Page 115 (Page intentionally left blank.)
- Page 116 Publication Part Number TPCC01UGXX25XEN Edition Code Club Car, LLC www.clubcar.com P.O. Box 204658 Phone 1 800 ClubCar Augusta, GA 30917-4658...
Need help?
Do you have a question about the URBAN XR 2024 and is the answer not in the manual?
Questions and answers