Table of Contents
Advertisement
Advertisement
Table of Contents

Related Manuals for CLIVET SINERGY CEC-T 10K

Summary of Contents for CLIVET SINERGY CEC-T 10K
- Page 1 Clivet SINERGY CEC-T 10K ENERGY STORAGE SYSTEM M0HP00002-01 08/2023...
- Page 2 Copyright Statement Please keep the manual properly and operate in strict accordance with all safety and operating instructions in this manual. Please do not operate the system before reading through the manual. Copyright Statement Contact the nearest hazardous waste disposal station when the products or components are discarded.
-
Page 3: Table Of Contents
CONTENTS 1. Introduction .............................. 5 System Introduction 1.2 Operation Modes: 1.3 Safety Introduction 1.4 Battery Safety Datasheet 1.5 General Precautions 1.6 Parts list 1.7 Accessory 1.8 System Appearance 1.9 Liability Limitation 2. Installation ..............................14 2.1 Installation Site and Environment 2.2 Restricted Locations 2.3 Protection in dangerous environments 2.4 Installation... - Page 4 7. Fault Diagnosis and Solutions ....................... 45 Battery Storage And Recharging 8. Product Specifications ..........................47 9. Routine Maintenance ..........................51 9.1 Maintenance Plan 9.2 Operating Environment 9.3 Equipment Cleaning 9.4 Cable, Terminal and Equipment Inspection 10. Quality Assurance ........................... 52...
-
Page 5: Introduction
User Manual 1. Introduction System Introduction 1.2 Operation Modes: CLIVET CEC-T 10K can be applied in DC-coupled systems (mo- There are three basic modes that end users can choose via stly new installation), AC-coupled systems (mostly retrofit) and inverter screen/APP. -
Page 6: Safety Introduction
User Manual – PEAK SHIFT: This mode is designed for time-use mode custo- related measuring equipment are required when the system is mer. The customer is able to set up the charging/discharging being connected or tested. time & power via inverter screen. Ensure that the connection and use matched specification to prevent electric arcs or shocks. -
Page 7: General Precautions
User Manual 1.5 General Precautions Inverter DANGER Danger to life due to high voltages of the PV array, battery and electric shock. When exposed to sunlight, the photovoltaic panels generates 5xST6.3*50 6xM5*12 3xCT and com cable 2xAC Collector 5xD10*50 dangerous DC voltage which will be present in the DC conduc- tors and the live components of the inverter. -
Page 8: Accessory
User Manual Accessory Cable (CAB10TX) Cable (CAB20TX) 00mm... - Page 9 User Manual Cable (CAB30TX)
- Page 10 User Manual Cable (CAB40TX)
- Page 11 User Manual Mechanical Top cover Floor stand support...
-
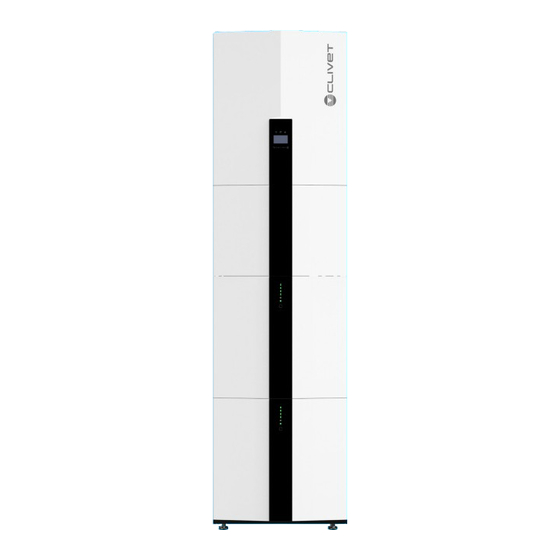
Page 12: System Appearance
User Manual 1.8 System Appearance Object Descripition Battery circuit breaker Output terminal block BACK UP DC isolation switch (direct current) Cable Box Part without Covers Object Descripition DVC class PV1, PV2 DVC C Object Descripition BACKUP DVC C Hybrid Inverter ON GRID DVC C EMS Display Screen... -
Page 13: Liability Limitation
– Modification of the product, aesthetics or replacement of parts without prior authorization from the manufacturer; – Changes, repair attempts and erasing of series number or seals by personnel not authorized by Clivet S.p.A.; – System design and installation are not in compliance with standards and regulations;... -
Page 14: Installation
User Manual 2. Installation This Manual introduces the basic steps to install and set up . b Within 600mm of any heat source, such as hot water unit, gas heater, air conditioning unit or any other appliance. Within 600mm of any exit; d Within 600mm of any window or ventilation opening;... -
Page 15: Installation
User Manual 2.4 Installation STEP 1 Remove the battery and inverter from the packaging box. Find the base accessory kit, Keep the base level and place the battery pack on the base. The installation distance between the base and the wall shall be 30mm. Note: the base is placed outward according to the silk screen arrow. - Page 16 User Manual STEP 4 Remove the debris baffle and secure the battery to the wall with screws and gaskets. Battery Installation – Mounting on the Wall Gasket ST6.3*50 STEP 5 To assemble the second (and all other) battery, repeat steps 6 and 7,respectively. Battery Installation Second Battery Installation Inverter Installation...
- Page 17 User Manual STEP 8 Please make AC cables on site. STEP 8-1 Please follow the AC cable requirements below. For backup connection, 12AWG or 4mm cable is required to be used. Cable required. Please make sure the resistance of the cable is lower than 1 ohm. If the wire is longer than 20m, it is recommended to use 10AWG or 6mm wire for backup and 8AWG or 8mm wire for mains.
- Page 18 User Manual STEP 8-2 Connect the Backup and Grid cables in advance according to the connector mode, and connect them to the Backup and Grid board connectors in turn. 5. Assembly the plug shell ,adapter as below picture, push the adapter and shell by hand until a “Click”...
- Page 19 User Manual STEP 10 STEP 12 Connect the power cables of the bottom battery from step 4 to Close the lid and tighten the screw. the side terminals of the top battery. Make sure that red connects to red and black connects to black. Captive screws STEP 13 Commissioning of the energy storage system...
-
Page 20: External Ct Connection
User Manual 2.5 External CT Connection The electricity meter should be mounted and connected at the grid transition point (feed-in point) so that it can measure the grid reference and feed-in power. 1. Loosen the nut, and untangle the single-aperture sealing ring. Descripition R phase CT positive electrode (White) R phase CT negative pole (Black) -
Page 21: Dred Port Connection (Optional, Only For Drm Function)
User Manual 2.6 DRED Port Connection (optional, only for DRM function) DRED means demand response enable device. The AS/NZS 4777.2:2015 required inverter need to support demand response mode(DRM). This function is for inverterthat comply with AS/NZS 4777.2:2015 standard. Inverter is fully comply with all DRM. A 8P terminal is used for DRM connection. -
Page 22: Meter+Dry Port Connections
User Manual 2.8 METER+DRY Port connections Note: The Smart Meter(SM4CSX) with CT is already configured; please do not change any settings on the Smart Meter. 2 One Smart Meter can be used with only one inverter. 3 three CTs must be used for one Smart Meter and must be connected on the same phase with the Smart Meter power cable. Smart Meter &... -
Page 23: Single Line Diagram
User Manual 2.9 Single Line Diagram The single line diagrams of DC-, AC- and Hybrid-coupled sysyem are as below: PACK PACK PACK PACK - PACK PACK PACK PACK... - Page 24 User Manual PACK PACK PACK PACK PV Panels PV Switch Hybrid Inverter Back up switch Back up load Normal load Grid meter Grid Router Grid switch Battery switch PV meter PV Inverter...
-
Page 25: Wiring Diagram
User Manual 2.10 Wiring diagram The N and PE wires are connected together in the shunt box. NOTE: The following lines apply to areas in Australia, New Zealand and South Africa Backup E-BAR E-BAR Photovoltaic module Battery Shunt box Backup loads Network Normal loads Network operation... - Page 26 User Manual The N and PE wires must not be connected together in the shunt box. NOTE: Ensure that the backup ground connection is correctly and firmly clamped. If not, the BACKUP function may be interrupted in the event of a power failure. In other areas, with the exception of Australia, New Zealand and South Africa, the following connection specifications apply: Backup E-BAR...
-
Page 27: System Operation
User Manual 3. System Operation Switch On 3.2 Switch Off When turning on the system, it is very important to follow the STEP 1 steps below to prevent damage to the system. Open cable box outer shell on the inverter, open the battery WARNING: Please check the installation again before turning on switch cover and turn off the battery switch. -
Page 28: Fire
User Manual 3.6 Fire If a fire breaks out in the place where the battery pack is installed, perform the following countermeasures: 3.7 Fire extinguishing media During normal operation, no respirator is required. Burning batteries can not be extinguished with a regular fire extinguisher, this requires special fire extinguishers. If the fire is not from a battery,normal ABC fire extinguishers can be used for extinguishing. - Page 29 User Manual LED Indicator Description LED working status indication ON/ OFF Power indicator LED Normal/Alarm / Status Instructions Protection ● ● ● ● ● ● ● ● ● Shut down dormancy All off Flash one Normal light standby mode time Standby According to battery indicator Flash...
-
Page 30: Display And Setting
User Manual Display and Setting General settings After the machine is installed, you can use it by following the steps below. If you have more requirements for setting, you can refer to Section “Configuration Menus Overview” Press ESC button to enter the setting interface and the default password is 00000. Menu Menu Menu... - Page 31 User Manual Menu Menu Menu Menu Menu Menu Menu Menu Default Selec- Comment Level 1 Level 2 Level 3 Level 4 Level 5 Level 6 Level 7 Level 8 tion Disable Allows the user to stop the system exporting to the Enable grid.
- Page 32 User Manual Menu Menu Menu Menu Menu Menu Menu Menu Default Selec- Comment Level 1 Level 2 Level 3 Level 4 Level 5 Level 6 Level 7 Level 8 tion 10. Greece 11. France 12. Bangkok 13. Thailand 14. South Africa 15.
- Page 33 User Manual CT self-check steps: Open the external CT wiring port, the arrow points to the direction of the power grid, put the wire into the external CT card slot, and buckle the buckle. 2 Disconnect the backup loads and the normal loads. 3 Connect the battery pack and Grid.
-
Page 34: Configuration Menus Overview
User Manual 4.2 Configuration Menus Overview Default Selec- Menu Level 1 Menu Level 2 Menu Level 3 Menu Level 4 Menu Level 5 Menu Level 6 Comment tion The energy generated by the solar panels will be used in the following order: Feed the home loads;... - Page 35 User Manual Default Selec- Menu Level 1 Menu Level 2 Menu Level 3 Menu Level 4 Menu Level 5 Menu Level 6 Comment tion Or, if enabled, to set the export Enable power limit. Set the If Enable is selected, the user export power Power will be prompted to enter the...
- Page 36 User Manual Default Selec- Menu Level 1 Menu Level 2 Menu Level 3 Menu Level 4 Menu Level 5 Menu Level 6 Comment tion Meter option is used for mea- Meter suring the system current Disable Allows the user to connect an external inverter to the system Disable Couple...
- Page 37 User Manual Default Selec- Menu Level 1 Menu Level 2 Menu Level 3 Menu Level 4 Menu Level 5 Menu Level 6 Comment tion The state of charge and depth Enable of discharge at the interval set. If time is selected the user will Time Set time be prompted to enter a value...
- Page 38 User Manual Default Selec- Menu Level 1 Menu Level 2 Menu Level 3 Menu Level 4 Menu Level 5 Menu Level 6 Comment tion 5. Spain 6. UK 7. Hungary 8. Belgium 9. New Zealand 10. Greece 11. France 12. Bangkok 13.
- Page 39 User Manual Default Selec- Menu Level 1 Menu Level 2 Menu Level 3 Menu Level 4 Menu Level 5 Menu Level 6 Comment tion set upper limit 280Vac voltage VOLT (S1) set protection 1000ms INV VOLT time set upper limit 285Vac voltage VOLT (S2)
- Page 40 User Manual Default Selec- Menu Level 1 Menu Level 2 Menu Level 3 Menu Level 4 Menu Level 5 Menu Level 6 Comment tion set voltage (If enabled,Once the AC output voltage is VOLT lower than this 200V set value, the output power will start to decrease.)
- Page 41 User Manual Default Selec- Menu Level 1 Menu Level 2 Menu Level 3 Menu Level 4 Menu Level 5 Menu Level 6 Comment tion 1. 2400bps Allows the user to select the Baud Rate 2. 4800bps 9600bps RS485 serial baud rate for the COM port.
- Page 42 User Manual Default Selec- Menu Level 1 Menu Level 2 Menu Level 3 Menu Level 4 Menu Level 5 Menu Level 6 Comment tion Run: Shows the user the hours run Grid: Time stat of Inverter and Grid con- nection. Unit: hours Shows the number of times Conne Time...
-
Page 43: Battery Storage And Recharging
User Manual 5. Battery Storage And Recharging Battery storage requirements 1. Storage environment requirements: – ambient temperature: -10°C +45°C; recommended storage temperature: 20°C -30°C; – relative humidity: 0%RH–90%RH (No condensation); – in a dry, ventilated and clean place; – no contact with corrosive organic solvents, gases and other substances; –... -
Page 44: Alarm Code And Error Code
User Manual 6. Alarm Code and Error Code Alarm Code Error Code Code Description Code Description Low supply voltage Soft Time Out High supply voltage INV Volt Short Low supply frequency GFCI sensor error High supply frequency Low level of BUS communication voltage Loss of photovoltaic input signal High level of BUS communication voltage Loss of battery pack input signal... - Page 45 User Manual 7. Fault Diagnosis and Solutions Battery Storage And Recharging The inverter is easy to maintain. When you encounter the following problems, please refer to the Solutions below, and contact the local distributor if the problem remains unsolved. The following table lists some of the basic problems that may occur during the actual operation as well as their corresponding basic solutions.
- Page 46 User Manual (1) Check if the local voltage and frequency is in compliance with the machine specifica- tion; Low supply voltage (2) If voltage and frequency are within the accepted range, then wait 2 minutes for the High supply voltage inverter to function normally;...
- Page 47 User Manual 8. Product Specifications The characteristics of only the versions with single and double battery pack are shown Battery Specifications CEC-S B 5K Electrical Energy capacity 5.12kWh Battery type LFP (LiFePO4) Depth of discharge (DoD) Rated voltage 51.2V Operating voltage range 44.8~56.5Vdc Operation Maximum charging current...
- Page 48 User Manual Model CEC-T 10K Electrical Connection section to the photovoltaic system Maximum applicable continuous voltage 1100Vd.c. Nominal continuous voltage 720Vd.c. MPPT voltage range 140~1000Vd.c. MPPT range (full load) 420~850Vd.c. MPPT tracker / strings Max. continuous PV input current 15Ad.c.(x 2 inputs) Photovoltaic short circuit current (Isc) 20Ad.c.×2 Maximum return current...
- Page 49 User Manual Backup load terminal parameter Rated voltage 230/400Vac Maximum continuous output current 20Aa.c. Rated frequency 50/60Hz Rated output Current 13.3Aa.c. Maximum Continuous Output Current 14.5Aa.c. Rated continious output power 9200W Maximum output apparent power 10000VA Max. output fault current 99Apeak Backup load overcurrent protection General parameter...
- Page 50 User Manual Table Grid specification (single-phase) Grid Output Voltage Output Frequency Boot wait time(S) Specification Range (Vac) Range (Hz) China 187-252 49.5-50.2 Germany 184-264 47.5-51.5 Australia-A 180-265 47-52 Australia-B 180-265 47-52 Australia-C 180-265 45-55 Italy (CEI0-21) 195-264 49.8-50.2 Italy (CEI0-21 ACEA) 195-264 49.8-50.2 Spain...
- Page 51 User Manual 9. Routine Maintenance Maintenance Plan – Check if wire connections are loose. – Check if cables are aged/damaged. – Check if cable insulating ribbon drops. – Check if cable terminal is loose, any overheat sign. – Check if ground connection is good. 9.2 Operating Environment (Every six months) Carefully observe whether the battery system equipment is in effective or damaged;...
- Page 52 User Manual 10. Quality Assurance When product faults occur during the warranty period, his partner will provide free service or replace the product with a new one. Evidence During the warranty period, the customer shall provide the product purchase invoice and date. In addition, the trademark on the pro- duct shall be undamaged and legible.
- Page 54 SUSTAINABLE COMFORT AND THE WELL- BEING OF PEOPLE AND THE ENVIRONMENT www.clivet.com sale and assistance CLIVET S.p.A. Via Camp Lonc 25, Z.I. Villapaiera 32032 - Feltre (BL) - Italy Tel. +39 0439 3131 - Fax +39 0439 313300 info@clivet.it www.clivet.com...
Need help?
Do you have a question about the SINERGY CEC-T 10K and is the answer not in the manual?
Questions and answers