Advertisement
- 1 PARTS
- 2 BEFORE FIRST USE: USING YOUR HEALTHY GRIDDLE XL
- 3 FEATURES AND BENEFITS
- 4 OPERATION
- 5 TIPS & HINTS
- 6 SUGGESTED TIME & TEMPERATURE CHART
-
7
TROUBLESHOOTING
- 7.1 Unit does not turn on
- 7.2 What oils can I use?
- 7.3 Can I use spray oils?
- 7.4 I do not know when preheat is complete
- 7.5 Light goes on and off during cooking
- 7.6 Not getting good cooking results
- 7.7 Oil/grease is spilling in the unit
- 7.8 Trying to cut food directly on the Griddle
- 7.9 Unsure of how to turn Griddle off
- 7.10 Uncertain about which pieces are dishwasher safe
- 7.11 Unsure of how to clean temperature control probe
- 7.12 Scratches on plate after constant daily use
- 8 CLEANING AND MAINTENANCE
- 9 IMPORTANT SAFEGUARDS
- 10 ADDITIONAL IMPORTANT SAFEGUARDS
- 11 Documents / Resources
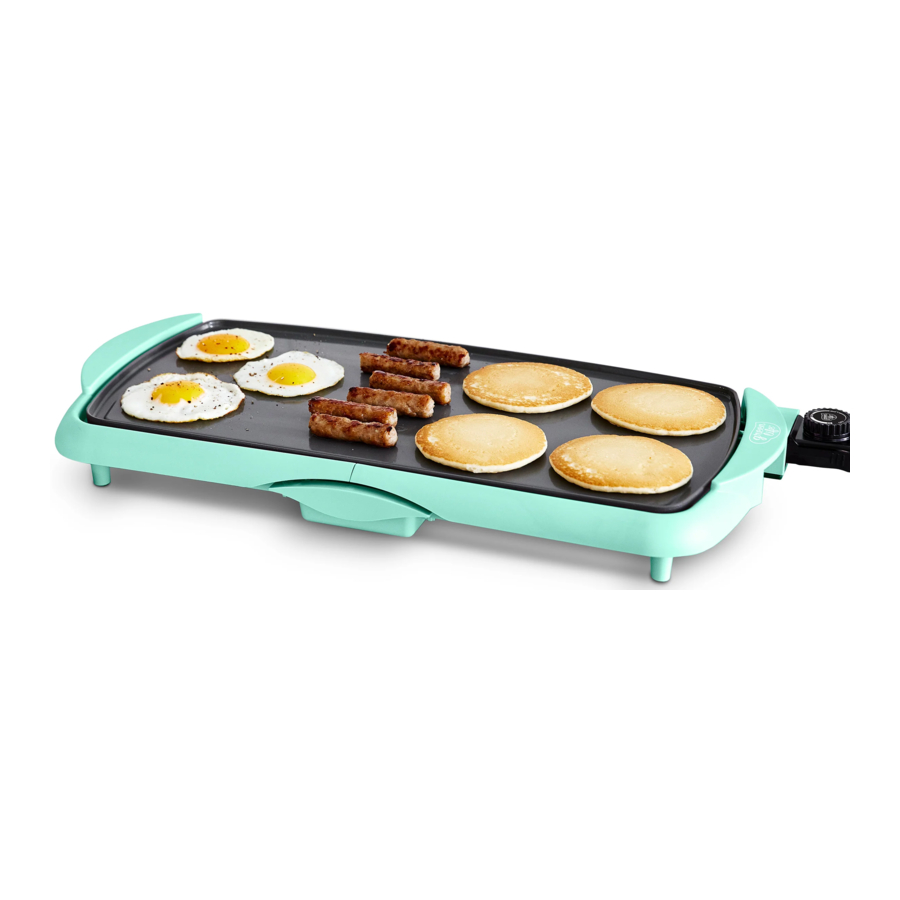
PARTS

- Healthy ceramic nonstick surface
- Removable temperature probe
- Temperature dial
- Stay-cool handles
- Pull out drip tray
BEFORE FIRST USE: USING YOUR HEALTHY GRIDDLE XL
- Carefully unpack the Griddle and remove all packaging materials.
- Place the ceramic nonstick Griddle on a clean, flat surface.
NOTE: Some surfaces are not designed to withstand the prolonged heat generated by this Griddle. We recommend placing a hot pad or trivet beneath the Griddle before use to avoid possible damage to the surface. Be sure the sides and back of the Griddle are at least 4" from any walls, cabinets, or objects on the counter or table. - Before cooking on the Griddle for the first time, wipe the non-stick Griddle in mild dishwashing soap, rinse and allow to dry.
NOTE: THIS GRIDDLE IS NOT DISHWASHER SAFE. - Insert drip tray into rails under the Griddle's side, positioned directly under the grease drain.
- Turn the temperature control knob on probe to OFF position and attach securely in place.
- Coat the nonstick surface with with a high smoke point or butter before heating. If necessary, remove excess oil with paper towel.
- For additional tips, see Hints For Care and Use of Nonstick Surface and Care & Cleaning Instructions sections of this Instruction Manual.
THIS APPLIANCE IS FOR HOUSEHOLD USE ONLY.
FEATURES AND BENEFITS
Temperature Control Probe
- The temperature control probe is the most important part of your GreenLife ceramic nonstick electric Griddle. Damage to it can change its calibration and make the temperature settings inaccurate. Treat it with care.
- To select your desired temperature, rotate the dial to the correct setting.
- The indicator light on the temperature control probe will illuminate once the dial is rotated. The light will go out once your selected temperature is reached.
- Allow the Griddle to cool before removing the temperature control probe.
- To clean the temperature control probe, wipe down with a soft, damp cloth. Make sure you dry it thoroughly before using again.
NOTE: The temperature control probe is not submersible.
![]()
Use the temperature control probe supplied with this Griddle only. The use of other temperature control probes may cause fire, electric shock, or injury.
OPERATION
GETTING READY TO USE
- Make sure the temperature control probe is in the OFF position.
- Plug the temperature control probe securely into Griddle's control probe socket.
- Plug cord into any standard 120 V AC wall outlet.
![]()
ALWAYS PLUG CORD INTO GRIDDLE FIRST, THEN INTO WALL OUTLET. - Preheat Griddle for approximately 10 minutes before cooking. To preheat, turn the temperature control to desired temperature. The indicator light on the temperature control probe will illuminate as soon as the dial is rotated. The light will go out once the selected temperature has been reached.
- Add food and cook according to the recipe. Adjust temperature control dial from LOW to HI as needed.
NOTE: During cooking, the light will go on and off indicating that the Griddle is maintaining proper temperature.
![]()
The surfaces of the Griddle are hot during use.
![]()
AVOID LOW SMOKE POINT OILS OR SPRAY OILS. THEY CAN CAUSE A BUILD-UP ON THE CERAMIC NONSTICK COOKING PLATES AND CAN DAMAGE THE NONSTICK COATING. - When cooking bacon or foods containing large quantities of grease, it may be necessary to check the drip tray to ensure it doesn't overflow. Remove drip tray; empty contents and wash if needed. See the Time/Temperature Chart for basic suggested cooking information.
- When cooking has been completed, turn the temperature control to the OFF position. The indicator light on the temperature control probe will turn off.
- Unplug cord from wall outlet. Let the Griddle cool completely.
- Remove temperature control probe from Griddle. Follow the Care & Cleaning Instructions described in this Instruction Manual.
TIPS & HINTS
- To avoid scratching the nonstick surface of the Griddle, do not stack objects on the grill or griddle cooking plates.
- Use medium to low heat for best cooking results. Very high temperatures can cause discoloration and shorten the life span of any nonstick surface. If higher temperatures are necessary, preheat on medium heat for a few minutes.
- For best results and to preserve the nonstick coating longer, use nylon, plastic, wooden or rubber utensils.
- Never cut food on the Griddle.
- Remove stubborn stains with a melamine sponge and mild dish washing liquid; DO NOT USE STEEL WOOL or any other abrasive cleaner, as it will damage the nonstick surface of the cooking plates.
SUGGESTED TIME & TEMPERATURE CHART
| Food | Temperature | Time | Directions |
| Bacon | Low | 8-14 mins | Set to appropriate temperature – turn as required |
| Sausage | Low | 20-30 mins | Set to appropriate temperature – turn as required |
| French Toast | Med | 6-10 mins | Rotate halfway into cooking time |
| Hamburger | Med | 3-14 mins | Rotate halfway into cooking time |
| Ham Slices | Med | 14-18 mins | Rotate halfway into cooking time |
| Sandwiches | Med | 6-10 mins | Butter outside and brown both sides |
| Pancakes | Med | 2-6 mins | Pour batter onto griddle - when bubbles appear on top side, turn |
| Pork Chops | Med | 20-30 mins | Brown both sides then reduce temperature to LOW Rotate halfway into cooking time |
| Steaks | HI – Rare HI – Medium HI – Well | 4-6 mins 7-12 mins 13-18 mins | Rotate halfway into cooking time |
TROUBLESHOOTING
| Issue | Cause | Solution |
Unit does not turn on | Not plugged into a functional electrical outlet. | Make sure the griddle is plugged into a functional electrical outlet. |
What oils can I use? | Oils with high smoke points, like canola oil and grapeseed oils, are best. If you use Extra Virgin Olive Oil, cook on moderate heat settings to prevent it from burning onto your cooking surface. | |
Can I use spray oils? | Avoid all oils in spray form as they burn quickly and may damage the nonstick coating of your cooking surface. | |
I do not know when preheat is complete | Not watching when indicator light turns off. | The indicator light on the temperature control probe will illuminate once the dial is rotated. The light will go out once your selected temperature is reached. |
Light goes on and off during cooking | This is standard. | During cooking, the light will go on and off indicating the Griddle is maintaining proper temperature. |
Not getting good cooking results | Cooking at a high temperature. | For best cooking results, use medium to low heat. Very high temperature can cause discoloration and shorten the life span of any nonstick surface. If higher temperatures are necessary, preheat on medium heat for a few minutes. |
Oil/grease is spilling in the unit | Not cleaning drip tray. | Be sure to empty and clean the drip tray as needed and after each use. |
Trying to cut food directly on the Griddle | Never cut food directly on the Griddle. | |
Unsure of how to turn Griddle off | When cooking is complete, turn the temperature control to the OFF position. The indicator light on the temperature control probe will turn off. Unplug cord from wall outlet and let the Griddle cool completely. | |
Uncertain about which pieces are dishwasher safe | This Griddle is not dishwasher safe. Hand wash griddle cooking surface and drip tray with soapy water. DO NOT immerse the Griddle in water. | |
Unsure of how to clean temperature control probe | To clean the temperature control probe, wipe down with a soft, damp cloth. Make sure to dry it thoroughly before using again. | |
Scratches on plate after constant daily use | Everyday use. | To avoid scratching the nonstick surface of the Griddle, do not stack objects on the cooking plate. For best results and to preserve the nonstick coating longer, use nylon, plastic, wooden, or rubber utensils. |
| Stubborn stains on cooking plate | Remove stubborn stains with a melamine sponge and mild dish washing liquid. DO NOT use steel wool or any other abrasive cleaner. |
CLEANING AND MAINTENANCE

Do not immerse the cord, plug or temperature control probe in water or any other liquid.
To avoid accidental burns, allow your Griddle to cool thoroughly before cleaning.
- When finished cooking, turn unit Off and unplug cord from wall outlet. Allow Griddle to cool.
- Remove temperature control probe from Griddle.
![]()
The probe may become hot after use. Allow to cool before handling. - If necessary, wipe temperature control case and probe with a damp, soft cloth. Dry temperature control probe completely. Set aside.
![]()
The temperature control probe is not submersible. - Remove drip tray and empty contents. Wash Griddle and drip tray in soapy water (DO NOT immerse the griddle in water or place in the dishwasher); rinse and dry thoroughly with a towel.
![]()
Probe and probe receptacle must be completely dry before use. - For stubborn food particles, loosen with a plastic cleaning pad. Avoid hard scouring of the nonstick finish as this may cause surface scratches. Do not use steel wool, scouring pads, or abrasive cleaners on any part of the Griddle.
User Maintenance Instructions
This appliance requires little maintenance. It contains no user serviceable parts. Do not try to repair it yourself. Any servicing requiring disassembly other than cleaning must be performed by a qualified appliance repair technician.
BEFORE RETURNING YOUR GREENLIFE PRODUCT
If you are experiencing problems with your GreenLife Healthy Griddle XL, we suggest that you call GreenLife customer service at 1-877-926-6526 before returning the product. A representative can confirm whether the product is under warranty and advise on next steps.

If the defective product is to be serviced by someone other than GreenLife's authorized service, please tell the servicer to call our consumer service at 1-877926-6526 to ensure that the problem is properly diagnosed, the product is serviced with the correct parts, and the product is still under warranty.
IMPORTANT SAFEGUARDS
When using an electrical appliance, basic safety precautions should always be followed, including the following:
- READ ALL INSTRUCTIONS.
- Do not touch hot surfaces. Use handles or knobs. Use oven mitts or potholders.
- To protect against electrical shock, do not immerse cord or plugs or temperature control probe in water or other liquid.
- This appliance is not intended for use by persons (including children) with reduced physical, sensory or mental capabilities, or lack of experience and knowledge, unless they have been given supervision or instruction concerning use of the appliance by a person responsible for their safety.
- Close supervision is necessary when any appliance is used by or near children.
- Turn unit Off and unplug from outlet when not in use and before cleaning. Allow to cool before putting on or taking off parts, and before cleaning the appliance.
- Do not operate any appliance with a damaged cord or plug or after the appliance malfunctions, or has been damaged in any manner. Return appliance to the nearest authorized service facility for examination, repair or adjustment.
- The use of accessory attachments not recommended by the appliance manufacturer may cause injuries.
- Do not use outdoors.
- Do not let cord hang over the edge of table or counter, or touch hot surfaces.
- Do not place on or near a hot gas or electric burner, or in a heated oven.
- Extreme caution must be used when moving an appliance containing hot oil or other hot liquids.
- Always attach temperature control probe to appliance first, then plug cord in the wall outlet. To disconnect, turn temperature control probe to OFF, then remove plug from wall outlet.
- Do not use appliance for other than intended use. Use with wall receptacle only.
SAVE THESE INSTRUCTIONS
FOR HOUSEHOLD USE ONLY
ADDITIONAL IMPORTANT SAFEGUARDS
HOT SURFACES: This appliance generates heat and escaping steam during use. Proper precautions must be taken to prevent the risk of burns, fires or other injury to persons or damage to property.
This appliance is hot during operation and retains heat for some time after turning OFF. Always use oven mitts when handling hot materials and allow metal parts to cool before cleaning. Do not place anything on top of the appliance while it is operating or while it is hot.
- All users of this appliance must read and understand this Instruction Manual before operating or cleaning this appliance.
- The cord to this appliance should be plugged into a 120 V AC electrical outlet only.
- If this appliance begins to malfunction during use, turn unit Off and immediately unplug the cord. Then remove the temperature control probe. Do not use or attempt to repair the malfunctioning appliance.
- Do not leave this appliance unattended during use.
NOTES ON THE PLUG
This appliance has a polarized plug (one blade is wider than the other). To reduce the risk of electric shock, this plug will fit in a polarized outlet only one way. If the plug does not fit fully into the outlet, reverse the plug. If it still does not fit, contact a qualified electrician. Do not modify the plug in any way.
NOTES ON THE CORD
- A short power-supply cord (or detachable powersupply cord) is to be provided to reduce the risk resulting from becoming entangled in or tripping over a longer cord.
- Longer detachable power-supply cords or extension cords are available and may be used if care is exercised in their use.
- If a long detachable power-supply cord or extension cord is used:
- The marked electrical rating of the cord or extension cord should be at least as great as the electrical rating of the appliance;
- If the appliance is of the grounded type, the extension cord should be a grounding-type3-wire cord; and
- The longer cord should be arranged so that it does not drape over the countertop or table top where it can be pulled on by children or tripped over unintentionally.

PLASTICIZER WARNING
To prevent Plasticizers from migrating to the finish of the counter top or table top or other furniture, place NON-PLASTIC coasters or place mats between the appliance and the finish of the counter top or table top. Failure to do so may cause the finish to darken; permanent blemishes may occur or stains can appear.
ELECTRIC POWER
If the electrical circuit is overloaded with other appliances, your appliance may not operate properly. It should be operated on a separate electrical circuit from other appliances.
Documents / ResourcesDownload manual
Here you can download full pdf version of manual, it may contain additional safety instructions, warranty information, FCC rules, etc.
Advertisement
Need help?
Do you have a question about the Green Life HEALTHY GRIDDLE XL and is the answer not in the manual?
Questions and answers