Table of Contents
Advertisement
Quick Links
OFFICES - AUSTRALIA
OFFICES - OVERSEAS
NSW - SYDNEY
WATERCO (EUROPE) LIMITED
(HEAD OFFICE)
Sittingbourne, Kent, UK
Tel: +61 2 9898 8600
Tel: +44 (0) 1795 521 733
QLD - BRISBANE
WATERCO (USA) INC
Tel: +61 7 3299 9900
Augusta, Georgia, USA
Tel: +1 706 793 7291
VIC/TAS - MELBOURNE
Tel: +61 3 9764 1211
WATERCO CANADA
Boucherville, Quebec, Canada
WA - PERTH
Tel: +1 450 748 1421
Tel: +61 8 9273 1900
WATERCO (NZ) LIMITED
SA/NT - ADELAIDE
Auckland, New Zealand
Tel: +61 8 8244 6000
Tel: +64 9 525 7570
ACT DISTRIBUTION
Tel: +61 2 6280 6476
Waterco Limited ABN 62 002 070 733
(ZZM1822) 01/2022
WATERCO © LIMITED
Guangzhou, China
Tel: +86 20 3222 2180
WATERCO (FAR EAST) SDN BHD
Selangor, Malaysia
Tel: +60 3 6145 6000
PT WATERCO INDONESIA
Jakarta, Indonesia
Tel: +62 21 4585 1481
WATERCO SINGAPORE INTL PTE LTD
Nehsons Building, Singapore
Tel: +65 6344 2378
WATERCO VIETNAM COMPANY LIMITED
Ho Chi Minh City, Vietnam.
Tel: +84 28 3622 7780
ZX4000
Installation
and Operation
Manual
This equipment must be installed and serviced by a qualified technician. Improper
!
WARNING
installation can create electrical hazards which could result in property damage, serious
injury or death. Improper installation will void the warranty.
Notice to Installer
This manual contains important information about the installation, operation and safe use
of this product. Once the product has been installed this manual must be given to the
owner/operator of this equipment.
www.waterco.com
Advertisement
Table of Contents

Related Manuals for Waterco ZANE ZX4000

Summary of Contents for Waterco ZANE ZX4000
- Page 1 Once the product has been installed this manual must be given to the Tel: +61 2 6280 6476 Ho Chi Minh City, Vietnam. owner/operator of this equipment. Tel: +84 28 3622 7780 www.waterco.com Waterco Limited ABN 62 002 070 733 (ZZM1822) 01/2022...
-
Page 2: Table Of Contents
ZX4000 I pg 3 IMPORTANT SAFETY INSTRUCTIONS When using this electrical equipment, basic safety precautions should always be followed, including the following: READ AND FOLLOW ALL INSTRUCTIONS Introduction ------------------------------------------- What is included in the package? ------------------ • ! WARNING: Disconnect all AC power during installation. •... -
Page 3: Introduction
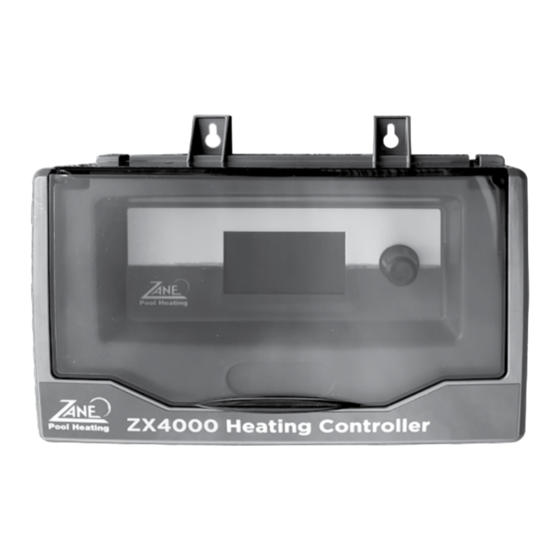
ZX4000 I pg 5 INTRODUCTION INSTALLING EQUIPMENT Thank you for choosing ZX4000 which provides you with a full range of pool heating ZX4000 Control Enclosure automation features. While you focus on fun, ZX4000 allows you to automate pool and spa heating and some other functions like: Install the ZX4000 control enclosure in a protected location out of direct sunlight. - Page 4 ZX4000 I pg 7 The ZX4000 has a number of sensors for pool, roof and air temperature monitoring. Roof Sensor (required if a solar heating system is installed): a) If the sensor lead is to be concealed, e.g. underground, make sure it is run through a conduit to ensure easy removal if service is required.
-
Page 5: Valve Actuators (Optional)
The ZX4000 can control up to two automatic valve actuators. immediately. The ZX4000 is optimized to operate Waterco FPI valve actuators and should be installed in 3. As a warning device to highlight the water flow below recommended levels for solar pool consultation with the product installation and operating instructions. -
Page 6: Hydraulics
ZX4000 I pg 11 HYDRAULICS INSTALLATION The ‘Flocheck’ valve should be placed at the end of a straight length of pipe at least 0.5cm long and before the solar take-off point. Mounting the valve in this position assumes that the water Hydraulics Layout flow is not turbulent at the point of sensing. -
Page 7: Electricals
Step 5 - Locate the motor control socket on the underside of the control housing and Waterco ECO pumps may be purchased with the communication cable fitted. Consult your insert the control cable plug and then reattach control housing to the motor control local Waterco sales office for order details. - Page 8 ZX4000 I pg 15 Installation of ECO Pump communication cable Flow Switch The Flow switch must be inserted into the socket marked FLOW on the underside of the ZX4000 Control Box plug. If a flow switch is installed, locate the socket marked FLOW and remove the small black jumper. Temperature Sensors The solar roof sensor (ROOF), pool water sensor (POOL 1 &...
- Page 9 3. Open control box cover. 1. Switch off power to heater at main circuit breaker panel. 4. To connect a 2-Wire Control (such as Waterco ZX4000™) or a timer: 2. Unbolt and remove the access door panels. • Locate the water pressure switch or water flow switch on the bottom plate of the electrical 3.
-
Page 10: Configuration
ZX4000 I pg 19 PROGRAMING THE ZX4000 CONFIGURATION Initial Start-up and programming The Wheel (rotary Index Switch (rIS)) located on the right side of the display is used to control the instrument. The wheel can be rotated in both directions to scroll over the menus and/or Accessing Timer menu: rotate or push the wheel to access menu. - Page 11 ZX4000 I pg 21 Setting the Date Select day / month / year, rotate the wheel to the desired value. Then press to confirm. To confirm the date and exit rotate the wheel to the check mark (II) and press to save. •...
- Page 12 ZX4000 I pg 23 FAST SETUP - PRESET SELECTION TABLE Step 1 – Navigate to settings Step 2 – use the preset table and select your heating configuration corresponding to your pool equipment and heating methods Step 3 – Once your preset has been selected work through the settings screens to customise and finalise the configuration Solar...
- Page 13 ZX4000 I pg 25 Quick Setup Configurations Integrated Solar Step 3 - Select the pump type Roof Temp. Probe Solar absorber Solar absorber Step 4 – Check the types of heating installed on the pool, solar only and the heating circuit as integrated and temperature as integrated Solar (pool 1)
- Page 14 ZX4000 I pg 27 Independent Solar and Integrated Heater Step 4 – Check the types of heating installed on the Roof Temp. pool, integrated with filtration for the heater and the Sensor Solar absorber Solar absorber temperature readings to and temperature sensors to independent due to the separate solar system Pool Temp.
- Page 15 ZX4000 I pg 29 Rotaflo Step 3 - Select the pump type Solar absorber Solar absorber Step 4 – if a variable speed pump is selected set the pump speed for when solar pool heating is running Solar and temperature check period Pump Flow ZX 4000...
- Page 16 ZX4000 I pg 31 Differential Heating Step 4 – Check the types of heating installed on the Roof Temp. Probe pool, integrated with filtration and the temperature Solar absorber Solar absorber readings to differential Heater Heater Chlorinator Step 5 – If the solar is run by a solar pump select the Solar Pump output as pump, the required pump speed to ensure...
- Page 17 ZX4000 I pg 33 Heater Integrated Step 4 – Check the heater installed on the pool, integrated with filtration and the temperature (pool 1) readings to independent Heater Motorised ZX 4000 Flow Blower Sensor Valve Filter Motorised Pump Valve Temp. Pool Temp.
- Page 18 ZX4000 I pg 35 Heater Independent Step 4 – Check the heater is installed on the independent hydraulic circuit and set Heat Circuit to independent, the temperature readings will default to Heater Chlorinator independent (pool 1) ZX 4000 Flow Motorised Blower Valve Sensor...
- Page 19 ZX4000 I pg 37 Manual Configuration Settings Preference The solar heating function may be given priority over other forms of heating by selecting the “Solar Preference” icon. The “Solar Preference” feature should be selected if solar heating is to have operational priority over a conventional heater. Step 1 –...
-
Page 20: Operation
I pg 39 Operation If Multicolour is selected the following light brands may be controlled > Waterco RGB > Aquaquip RGB Once all the settings have been entered, AUTO mode should be selected for the ZX4000 to operate the programmed functions and timers. - Page 21 ZX4000 I pg 41 Select the SUPERHEAT to switch on all fitted pool Select the LIGHT icon to toggle the pool lighting on heating systems to override all other heating settings or off Select the VALVE icon to open and close the motorised valve Select the SOLAR icon to toggle the solar pool heating system on or off...
- Page 22 ZX4000 I pg 43 Select the days the product or function is to operate Select None Select manual mode to disengage the auto operation All Days mode Weekend Weekday Custom (select by ticking the desired day) Select OFF to switch the unit to standby Select hours or minutes, rotate the wheel to the desired value for both start time and end time.
- Page 23 Time Menu, Set Clock, Set Timer 1-4 gas heating. e) When a new item is activated which is interlocked to a Waterco 3 speed filter pump the pump speed may need to increase to provide adequate water flow. Settings Menu f) When the filter pump is deactivated, it will also deactivate all interlocked outputs.
-
Page 24: Warranty
• The purchaser must contact the place of purchase or Waterco for further instructions and; All products sold by Waterco are covered by a one year warranty. The exceptions to this are the • The purchaser is responsible for any freight or infield labour costs. - Page 25 This warranty does not cover, and Waterco will not be responsible for, any defect or damage To the extent permitted by law Waterco excludes all liability it may have to the purchaser for indirect, special or consequential loss arising from or related to any defect in any Waterco...
-
Page 26: Glossary
Set Demand Mode Timer For service enquiries please contact your installer or: The “Set Demand Mode Timer” button allows timer control parameters to be set if the “Heating Waterco Limited. Demand Opt” is selected. 36 South Street Rydalmere, NSW 2116...
Need help?
Do you have a question about the ZANE ZX4000 and is the answer not in the manual?
Questions and answers