Table of Contents
Advertisement
Advertisement
Table of Contents

Subscribe to Our Youtube Channel
Summary of Contents for Summit FLIP
- Page 1 User Manual...
-
Page 2: Table Of Contents
Table of Contents IMPORTANT HEALTH AND SAFETY INFORMATION ........................5 GET STARTED ..................................8 ................................ 8 HONE AYOUT AND UNCTIONS SIM/SD C ARD ............................................Install the SIM/SD Card ................................. 10 ...................................... 12 ATTERY Charge the Battery ................................12 ..................................12 OWER N AND Power Your Phone On ................................ - Page 3 RTT Call ....................................36 ....................................37 ONTACTS Phone Number ..................................37 Add a Contact ..................................38 View Contact ..................................40 Edit a Contact ..................................40 Delete a Contact ................................... 41 Share a Contact ..................................42 Import Contacts ..................................42 Export Contacts ..................................43 Text and Multimedia Messages ............................
- Page 4 ......................................65 OUND Access Sound Settings ................................65 Sound Settings Overview ..............................65 ....................................... 66 ISPLAY Access Display Settings ................................. 66 Display Settings Overview ..............................66 ....................................67 CCESSIBILITY Access Accessibility Settings ..............................67 Accessibility Settings Overview ............................. 67 Access Security Settings ................................ 68 Security Settings Overview..............................
-
Page 5: Important Health And Safety Information
Important Health and Safety Information When using this product, the safety precautions below must be taken to avoid possible legal liabilities and damages. Retain and follow all product safety and operating instructions. Observe all warnings in the product operating instructions. To reduce the risk of bodily injury, electric shock, fire, and damage to the equipment, closely observe all of the following precautions. - Page 6 prolonged periods of time. Safety Precautions for Direct Sunlight Store this product away from excessive moisture and extreme temperatures. Do not leave the product or its battery inside a vehicle or in places where the temperature may exceed 55°C (131°F), such as on a car dashboard, window sill, or behind glass that is exposed to direct sunlight or strong ultraviolet light for extended periods of time.
- Page 7 well as causing non-compliance with local and national regulatory requirements. In order to limit RF energy exposure and to ensure optimal phone performance, operate the device only in its normal-use position. Contact with the antenna area may impair call quality and cause your device to operate at a higher power level than needed which can reduce antenna performance and battery life.
-
Page 8: Get Started
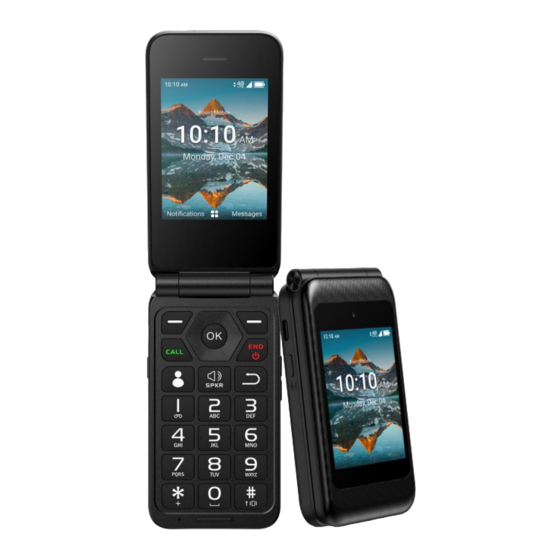
Get Started The following topics give you all the information you need to set up your phone the first time. Phone Layout and Functions Note: Your phone's screen and app layouts are subject to change. This user guide uses sample images only. - Page 9 Components Description Left Soft Button Access Notifications on the home screen Choose specific functions in other apps Right Soft Button Access Messages on the home screen Choose specific functions in other apps Place/Answer Call Button To answer or place a call ...
-
Page 10: Sim/Sd Card
Camera Button Press to take a photo or start recording a video Long press to enter Camera when phone is unfolded or folded CAUTION: Inserting an accessory into the incorrect jack may damage the phone. SIM/SD Card The SIM card is an IC card containing a phone number and other customer information. Your phone supports the use of an optional Micro SD card (sold separately) to expand its storage capacity up to 128GB. - Page 11 Locate the SIM card slot and the SD card slot. Slide the SIM card to the SIM card slot with the gold contacts facing down. If you have an SD card (sold separately), slide it to the SD card slot. Install the back cover.
-
Page 12: Battery
Enter the SD Card Summit Flip supports up to 128GB SD card, when you insert an optional SD card, you can view the folders by pressing the Left Navigation Key and select the SD card to view the folders. Battery Battery Cautions Storage: Avoid storing or leaving battery with no charge remaining. -
Page 13: Initial Setup
Select Power off. Initial Setup The setup screens help you set up certain features and preferences on your phone. When your phone has been turned on for the first time, you will need to follow these instructions to complete the setup process. 1. -
Page 14: Basic Operations
Note: For information on how to adjust the time before the screen turns off, see Display. Turn the Screen On and Unlock It 1. To turn the screen on, simply flip the phone open if the cover is closed, if the cover is already open, press any key to unlock the phone. -
Page 15: Capture Screenshots
The lock screen appears if set. 2. Enter the 4-digit password. The screen is unlocked. Note: See more on Screen Lock. Capture Screenshots You can use your phone’s Power Key and Lower Volume Key to capture screenshots. ■ Press and hold the Power Key and Lower Volume Key at the same time to capture a screenshot of the current screen. -
Page 16: Select Options And Navigate Screens
Item Description The status bar displays icons to notify you of your phone’s status and Status bar notifications It shows the time, date. Time and Date Press Left Soft Key to access Notification Notifications Press Right Soft Key to access Messages Messages Press OK Key to access to the Apps List Apps List... -
Page 17: Status Bar
Status Bar, Shortcuts, Notifications Panel Status Bar The status bar at the top of the home screen provides phone and service status information. Main Status Icons Icon Status Bluetooth active ® Wi-Fi active ® Vibrating Network (full signal) LTE data service UMTS data service Airplane mode Alarm set... - Page 18 Shortcuts You can access the shortcuts by press the Right Navigation Key. Shortcuts Menu Icon Name Function Turn Wi-Fi on or off. Please go to Settings to set up the Wi-Fi. Turn off Wi-Fi when not in use to save battery power. Turn Bluetooth on or off.
-
Page 19: Change The Wallpaper
Notifications panel Notifications remind you of the arrival of new messages, calendar events, etc. Press the Left Soft Key to open the notifications panel and view details. ■ To check a notification, select Select. ■ To remove a notification, select Clear. ■... -
Page 20: Transfer Files Between Your Phone And A Computer
Transfer Files between Your Phone and a Computer You can use the supplied USB cable to connect your phone directly to your computer and transfer music, photos, and other content files. ● If you want to save data to an SD card on your phone, make sure the SD card is installed and active. -
Page 21: Update Your Phone
Update Your Phone From time to time, updates may become available for your phone. Software Update Cautions During update: The phone cannot be used until the software update is complete. It may take time to update your phone’s software. Signal during update: Update your phone where signal reception is good, and do not change location during the update process. -
Page 22: Apps And Features
Apps and Features The following topics outline essential apps and features of your phone. Connectivity The following topics address your phone’s connectivity options including Wi-Fi, Bluetooth, and more. Wi-Fi Wi-Fi provides wireless internet access over distances. To use your phone’s Wi-Fi, you need access to a wireless access point or “hotspot.”... -
Page 23: Forget Or Disconnect Wi-Fi
Tips: • The password, for a household wireless LAN router, is sometimes found on a sticker on the router (WEP, WPA, KEY, etc.). Contact the router manufacturer for information. For password for a public wireless LAN, check with user's service provider. •... -
Page 24: Connect To Hotspot
3. Configure hotspot and tethering with the following options: Wi-Fi hotspot: Share your phone's mobile data services with other devices. The feature works best when used in conjunction with 4G data services (although 3G service can also be used). Select Wi-Fi hotspot > Options > Set up Mobile hotspot to set up hotspot name, password, and more. -
Page 25: Bluetooth Cautions
Bluetooth Cautions ● Information may not appear correctly on connected devices depending on the transferred data. ● Wireless connection to all Bluetooth functions is not guaranteed for the phone. ® ● The phone may not connect properly depending on the other device. ●... -
Page 26: Pair Bluetooth Devices
Bluetooth is enabled. To disable Bluetooth, Press the Left Soft Key again. Tips: You can also turn Bluetooth on or off in the Shortcut panel. Press the Right Navigation Key to enter the Shortcut panel and then select Bluetooth to turn Bluetooth on or off. Turn off Bluetooth when not in use to conserve battery power, or in places where using a wireless ... -
Page 27: Unpair From A Paired Device
Unpair from a Paired Device 1. From the “Paired devices” menu, select the paired device. 2. Press OK to disconnect. The device is unpaired from your phone. To make another connection with the device, you will need to pair again. Connect to a Paired Bluetooth Device You can pair with a previously paired Bluetooth device without re-entering the password. - Page 28 Sending Contacts Data via Bluetooth 1. From the home screen, press OK Key to enter the Apps List. 2. Select Contact > Find the contact you want to share > Options > Share > Bluetooth. 3. Select a paired device to receive the data. ...
-
Page 29: Receive Information Via Bluetooth
Receive Information via Bluetooth Your phone is capable of receiving a wide variety of file types with Bluetooth, including photos, music tracks, and documents such as PDFs. 1. When another device attempts to send a file to your phone via Bluetooth, you will see a request to accept the file. - Page 30 2. and then press the Place Call Key to place the call.. The phone dials the number. The call begins when the other party answers. Adjust In-Call Volume: Press the Volume Key up or down during the call. 3.
- Page 31 Call from Contacts You can place phone calls directly from entries in your Contacts list. 1. From the home screen, press OK to enter the Apps List. 2. Select Contacts to display the Contacts list. The contacts list appears. 3.
- Page 32 2. Press the Place Call Key to place the call. The phone dials the number. The call begins when the other party answers. 3. To end the call, press the Power Key. The call ends. Answer Phone Calls The following information show you how to answer incoming calls, mute the ringer on incoming calls, reject incoming calls, and more.
-
Page 33: In-Call Screen Layout And Operations
● Press the Volume Down Key. ● Press the Right Navigation Key to ignore the call. Reject an Incoming Call ■ When a call arrives, press the Power Key to reject it. Reject a Call and Send a Text Message You can reject an incoming call and automatically send a text message to the caller. -
Page 34: Voicemail
Voicemail The following topics describe how to set up and use your phone's voicemail and visual voicemail features. Voicemail Setup Follow the instructions below to set up voicemail on your phone. You should set up your voicemail and personal greeting as soon as your phone is activated. Always use a passcode to protect against unauthorized access. -
Page 35: Call Settings
3. You’re connected to the second party. 4. For conference calling, select Merge Call. Call Settings Your phone’s Call Settings menu lets you configure your voicemail options and more. Use the Call Settings Menu 1. From the home screen, press OK to enter Apps List 2. -
Page 36: Call Settings Options
Use the Call Settings menu to adjust the following settings: Setting Description Aanswer options Select how to answer an incoming call including “Flip open” or “Any key” or both Ignore with message Edit the message when rejecting a call and sending message... -
Page 37: Contacts
1. From the home screen, press OK to enter the Apps List. 2. Select Settings > Accessbility > RTT > RTT operation mode. 3. Select Visible during calls to make the RTT call key visible only during calls. – or – Select Always visible to make the RTT call key always visible on the keypad. -
Page 38: Add A Contact
You will see the number listed under My phone number. Add a Contact You can add contacts from the phone application. Enter details such as name, phone numbers, email addresses, mailing addresses, and more. 1. From the home screen, press OK to enter the Apps List, then select Contacts. ... - Page 39 3. Use the keyboard to enter the contact information. More fields: Select More fields to include additional information such as IM address, Notes, Nickname, Website, etc. 4. When you have finished adding information, select Save. The contact is added. Save a Phone Number You can save a phone number to Contacts directly from the phone keypad.
-
Page 40: View A Contact
For an existing contact, select the contact name and select a number type for the new number. For a new contact, enter the name and any additional information. 4. Select SAVE. The contact is added. View a Contact View a contact’s details by displaying a contact entry. -
Page 41: Delete A Contact
3. Select Edit. 4. Select any field you want to change or add. 5. Add or edit the information, and then select Save. Your changes are saved to the contact entry. Note: To select a type (label) for a phone number, email address, or postal address (such as Mobile, Home, Work, etc.), select Set when the field is selected. -
Page 42: Share A Contact
4. Select Delete. The contact is deleted. Share a Contact You can quickly share contacts using Bluetooth or Messages. 1. From the home screen, press OK to enter the Apps List, then select Contacts. You will see the Contacts list. 2. -
Page 43: Export Contacts
2. Select Options > Settings. You will see the Import Contacts menu. 3. Follow the onscreen instructions to complete the import. The contacts are imported and stored in the selected account. Export Contacts If you are saving contacts to an account that does not automatically back them up via the Cloud, you can manually back them up to .vcf file for re-import if needed. -
Page 44: Text And Multimedia Messages
You will see the Export contacts menu. 3. Follow the onscreen instructions to complete the export. The contacts are exported and saved. Messages With wireless service and your phone’s messages capabilities, you have the opportunity to share information through many different channels and accounts. Text and Multimedia Messages With text messages (SMS), you can send and receive instant text messages between your wireless phone and another messages-ready phone. -
Page 45: Send A Multimedia Message (Mms)
4. Select the “Type text message” box, then start composing your message. 5. When done, select Send to send the text message. Send a Multimedia Message (MMS) You can send a multimedia message (MMS) with photos, video files, or contact cards 1. -
Page 46: New Messages Notification
New Messages Notification Depending on your notification settings, the phone will play a ringtone, vibrate when you receive a new text or multimedia message. To change the notification for new text and multimedia messages, see Text and MMS Options for details. A new message icon also appears in the notifications area of the status bar to notify you of a new text or multimedia message. -
Page 47: Text And Mms Options
3. When prompted to confirm, select Delete. Text and MMS Options The messages settings menu lets you control options for your text and MMS messages including default SMS app, group Messages, and notifications. 1. From the home screen, press the Right Soft Key to enter Messages. 2. -
Page 48: Switch Camera Modes
● Gallery: enter Gallery and view photos. ● Video: to switch to the video mode. ● Zoom slider: use the Volume Keys or the * Star and # Hash Keys as zoom slider. ● Flash: press Up Navigation Key to switch the flash on or off. ●... -
Page 49: Record Videos
3. Press the OK Key or the Camera Key located at the side of the phone to take the photo. The photo is captured and saved to your phone or SD card. Record Videos Record videos using your phone’s video camera. 1. -
Page 50: Gallery
3. Press the OK Key agin to stop recording. The camera stops recording and the video is captured and saved to your phone or SD card. Use Camera on External Screen You Can use the camera while the phone is flipped close. 1. -
Page 51: Photos And Videos: Options While Viewing
Photos and Videos: Options while Viewing Select a photo or video to view it in full screen. ● Viewing: Edit Photos The Gallery application lets you to edit photos by rotate, crop, delete and more. Crop or Rotate a Photo 1. -
Page 52: Share Photos And Videos
5. Select OK > Save to apply the changes to the photo. The cropped photo is saved in the album as a copy. The original photo remains unedited. 6. To rotate the photo, select Rotate. 7. Use the Soft Keys to rotate the photo. Share Photos and Videos The Gallery application lets you send photos and videos using multimedia messages and Bluetooth. -
Page 53: Calendar
Multimedia Message: Multimedia Messages (MMS) lets you send photos and videos using your • phone’s messages app. Although you can send several photos or videos in a multimedia message, it may be better to just send one at a time, especially if the files are large in size. For more information about sending multimedia messages, see Send a Multimedia Message (MMS). - Page 54 Enter an event title, start date/time, end date/time, etc., and then select OK. The event is added to your calendar.
-
Page 55: View Calendar Events
View Calendar Events You can display the Calendar in daily, weekly or monthly view. 1. From the Calendar screen, select a date and then select an event. The event details appear. In event details, select to edit the event. ... -
Page 56: Clock
The calculator app launches. 2. Use the keypad and the navigation keys for calculations. Calculation results appear. Clock Your phone has a clock app that lets you set alarms, view time in time zones around the world, set a timer, and use a stopwatch. -
Page 57: Set Alarms
Set Alarms Set multiple alarms using your phone’s clock app. 1. From the home screen, press OK to enter the Apps List, then select Tools > Clock. The clock appears. 2. Select New to open the set alarm screen. 3. -
Page 58: Phone At Alarm Time
At Alarm Time ● At the set alarm time, the phone sounds the alarm and/or vibrates. ● Stopping an alarm remind later: When the alarm sounds, an alarm notification appears. Select STOP to dismiss it or select Snooze to stop and reset the alarm for a short time later to allow for more rest. -
Page 59: World Clock
World Clock The world clock lets you keep track of the current time in multiple cities around the globe. 1. From the clock app, use the Navigation Keys to select World clock. 2. Select Add and select a city. 3. Repeat to add multiple cities. Timer The timer provides a countdown timer for up to 99 hours, 59 minutes, and 59 seconds. -
Page 60: Settings
Settings The following topics introduce your phone’s basic settings menus. Settings Menu You can customize your phone’s settings and options through the Settings menu. 1. From the home screen, Press OK to enter the Apps List and then select Settings. 2. -
Page 61: Wi-Fi
Wireless & networks The following topics outline your phone’s Wi-Fi, mobile network, airplane mode, hotspot options and other network settings. Airplane mode Turning on airplane mode disables all network features including calling, Messages, mobile data, Wi-Fi and Bluetooth. 1. From the home screen, Press OK to enter the Apps List and then select Settings. 2. -
Page 62: Hotspot & Tethering
1. From the home screen, Press OK to enter the Apps List and then select Settings. 2. Select Wireless & networks > Mobile network > app data usage > Data usage. The data usage window opens. Hotspot & Tethering Use the settings menu to configure your tethering &... -
Page 63: Data Saver
Data Saver To help reduce data usage, Data Saver prevents some apps from sending or receiving data in the background. An app you are currently using can access data but may do so less frequently. This may mean, for example, that images don’t display until you select them. 1. -
Page 64: Storage
Connect to a VPN 1. From the VPN screen. 2. Select Connect to connect to an VPN. 3. Press Disconnect to disconnect from the VPN. Forget a VPN 1. From the VPN screen. 2. Select Options > Forget to forget an VPN. Edit VPN Settings 1. -
Page 65: Sound
Sound & notifications The sound settings menu lets you control your phone’s audio, from ringtones and alerts to select tones and notifications. Access Sound Settings 1. From the home screen, press OK to enter the Apps List then select Settings. 2. -
Page 66: Display
Display Use the phone's display settings menu to adjust items such as wallpaper, brightness level, screen timeout, and more. Access Display Settings 1. From the home screen, press OK to enter the Apps List then select Settings. 2. Select Display. 3. -
Page 67: Accessibility
Accessibility The accessibility settings menu lets you enable and manage accessibility-related applications. Access Accessibility Settings 1. From the home screen, press OK to enter the Apps List then select Settings. 2. Select Accessibility. 3. Set available accessibility options. Your accessibility settings are applied and saved. Accessibility Settings Overview The accessibility settings menu allows you to configure the following options. -
Page 68: Access Security Settings
Phone Settings The phone settings menu lets you set languages, date & time, security, etc. Access Phone Settings 1. From the home screen, press OK to enter the Apps List. 2. Select Settings > Phone settings. The phone settings menu opens. 3. -
Page 69: Date And Time
Select what the USB is used for when connect to another device. Location Set the location On or Off. Security & Privacy Set screen lock. Reset Reset all networks and set the factory data reset. Date & time Set date and time. Date and Time Use the date and time settings menu either to automatically use the network-provided date and time or manually set these values, as well as select time and date format options. -
Page 70: Date And Time Overview
Date and Time Overview The following date and time options may be configured: Option Description Set time automatically Set the date and time automatically via the connected wireless network. Set the date manually (only available when Set time automatically Set date option is disabled). -
Page 71: Reset Options Overview
3. Set options. The reset settings are applied and saved. Reset Options Overview The following options are available in the reset options menu: Option Description Network settings reset Reset all network settings, including Wi-Fi, mobile data and Bluetooth. Factory data reset (erase Reset all settings and delete all data on phone, or SD card, or both. -
Page 72: System Update
Access About Phone Settings 1. From the home screen, press OK to enter the Apps List. 2. Select Settings > About phone. 3. Select or view available options. Your phone information is displayed. About Phone Overview The following About Phone items may be reviewed or set: About Phone Item Description My phone Number... -
Page 73: Appendix
Appendix The following topics offer additional information for your phone, including troubleshooting, account information, FCC information, warranty information, and customer service contact information. Troubleshooting Check the questions and answers below for troubleshooting solutions for common phone issues. Question: Phone freezes/operation is unstable. Answer: Restart the phone. - Page 74 Answer 2: When calling using Speaker, check the call volume. Raising the call volume if the sound is not clear. Question: Sound pops momentarily during a call. Answer: Are you changing location while calling? Sound pops when the signal is weak and the phone switches to a different area.
-
Page 75: Fcc Notice And Cautions
FCC Notice and Cautions This device and its accessories comply with Part 15 of FCC Rules. Operation is subject to the following conditions: (1) This device and its accessories may not cause harmful interference. (2) This device and its accessories must accept any interference received, including interference that may cause undesired operation. -
Page 76: Consumer Information On Sar
Consumer Information on SAR This Model Phone Meets the Government’s Requirements for Exposure to Radio Waves. Your wireless phone is a radio transmitter and receiver. It is designed and manufactured not to exceed the emission limits for exposure to radio frequency (RF) energy set by the Federal Communications Commission (FCC) of the U.S. -
Page 77: Fcc Hearing-Aid Compatibility (Hac) Regulations For Wireless Devices
The FCC has granted an Equipment Authorization for this model phone with all reported SAR levels evaluated as in compliance with the FCC RF emission guidelines. The SAR values for this model phone (FCC ID: 2A28USL006D) when tested for use at the ear is 0.61 W/kg and when worn on the body is 0.97 W/kg as described in this user’s guide. -
Page 78: Standard Limited Warranty
The FCC has adopted HAC rules for digital wireless phones. These rules require certain devices to be tested and rated under the American National Standard Institute (ANSI) C63.19- 2011 hearing aid compatibility standards. The ANSI standard for hearing aid compatibility contains two types of ratings: ●... - Page 79 maintenance of the product can be found in your product’s User Guide. The opening, unauthorized disassembly, modification being carried out, or repair of the product by the end-user or by persons or by service providers not approved by the Manufacturer and/or with spare parts not approved by the Manufacturer. Use of the product with accessories, peripherals, and other products whose type, condition, and/or standards do not meet the Manufacturer’s standards.
-
Page 80: Warranty Contact Information
Customer Help: cooseaus_care@cooseaus.com Copyright Information Summit™ and Summit Flip and other words, slogans, designs and devices are trademarks or registered trademarks of DISH Wireless L.L.C. Copyright © 2023 DISH Wireless L.L.C. Screen and product images are simulated; they may differ from the actual product and are subject to change.
Need help?
Do you have a question about the FLIP and is the answer not in the manual?
Questions and answers
how to install SIM card
To install a SIM card in the Summit FLIP:
1. Power off the phone.
2. Remove the back cover by locating the notch on the bottom left edge of the phone and prying it open.
3. Locate the SIM card tray or slot.
4. Insert the SIM card into the tray, making sure the IC chip is clean and facing the correct direction.
5. Reattach the back cover.
6. Power on the phone to activate it.
This answer is automatically generated
how can i turn up the ring volume?
To increase the ring volume on the Summit FLIP, go to Settings > Notifications, then adjust the volume slider for the ringer.
This answer is automatically generated
The SIM card won’t lock in place directions say to slide when you try SIM card comes apart
To fix the SIM card locking issue on the Summit FLIP, follow these steps:
1. Power off the phone.
2. Remove the SIM card and check for any damage or dirt on the IC chip. Clean it with a dry, soft cloth if needed.
3. Reinsert the SIM card properly.
4. Power on the phone.
If the phone still shows "SIM inserted into Locked phone," it may be carrier-locked. In that case, you will need to contact the carrier to unlock the phone.
This answer is automatically generated
where is the power button on summit flip phone
The location of the power button on the Summit FLIP phone is not clearly stated in the provided information.
This answer is automatically generated
why does phone have" no sim card" displayed
Do you need an email to set it up?
How do I delete unused apps
Not sure how to get the music app working if you know how to please do reply have a great day
contacts app does not allow allow option to to press option after hitting ok
can you turn off 1 touch dialing