Table of Contents
Advertisement
Quick Links
GB
HingeJig™
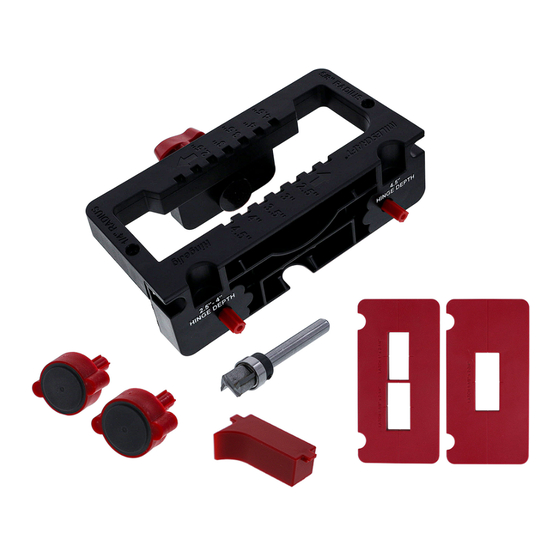
1 — Main Body
2 — Latch Template - Single
3 — Latch Template - Double
4 — Adjustable Spacer
5 — Router Bit w/ Bearing
6 — Backset Plugs
7 — Mounting Screws (Optional)
F
HingeJig
MC
1 — Boîtier principal
2 — Modèle de loquet - simple
3 — Modèle de loquet - double
4 — Espaceur réglable
5 — Mèche de défonceuse avec palier
6 — Bouchon d'écartement
7 — Vis de montage (en option)
E
HingeJig
MR
1 — Cuerpo principal
2 — Plantilla de cerrojo - simple
3 — Plantilla de cerrojo - doble
4 — Separador ajustable
5 — Broca para fresadora con rodamiento
6 — Enchufes traseros
7 — Tornillos de montaje (Opcional)
© 2023 Milescraft, Inc. • Patent Pending • www.milescraft.com
Model
Modèle
Modelo
scan
,
learn
,
build
.
1
1226
M1226M • 05/23
Advertisement
Table of Contents


Need help?
Do you have a question about the HingeJig and is the answer not in the manual?
Questions and answers