Table of Contents
Advertisement
Available languages
Available languages
Quick Links
Advertisement
Table of Contents

Related Manuals for Aqua Coastal AC-SFP14

Summary of Contents for Aqua Coastal AC-SFP14
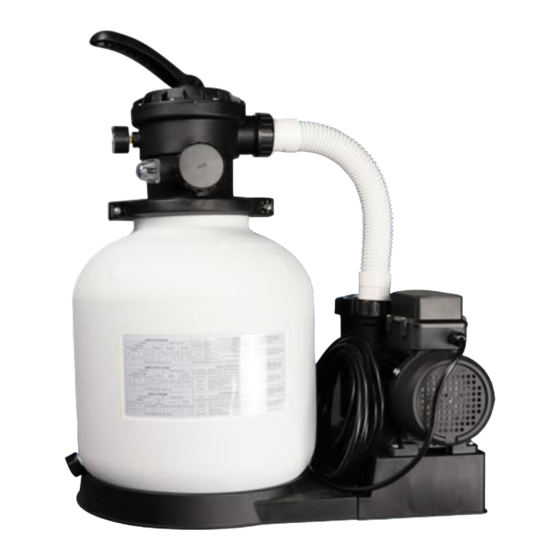
- Page 1 SAND FILTER PUMP INSTALLATION & OPERATING INSTRUCTI...
-
Page 2: Important Safety Instructions
14. Maintain water temperature between 4 °C (39.2 °F) and 35 °C (95 °F). 15. This product can only be used for the purposes described in the manual. SYSTEM OVERVIEW Model AC-SFP14 AC-SFP16 Tank Size 14 in 16 in Horsepower 0.6 HP... -
Page 3: Product Part List
PRODUCT PART LIST Before setting up the product, confirm all parts are included. - Page 4 REF. DESCRIPTION QTY. Six-Way Valve 14”/16” Sand Filter Tank 14”/16” Sand Filter Tank Base 14”/16” Filter Element Tube Assembly 14”/16” Filter Element Tube Six-Way Valve Lock Ring 0.6/0.75 HP Pump Base of Pump O-Ring of Six-Way Valve Sand Shield Screw with Gasket of Six-Way Valve Lock Ring Screw of Pump Base Connection Screw of Tank Base Connection O-Ring of Pressure Gauge...
- Page 5 ASSEMBLY INSTRUCTIONS Install the system on a flat, sturdy surface. The motor requires air circulation for proper cooling. Do not install the pump near a vent. Two or more people are recommended for installation. Before beginning assembly, (i) turn off the pump and turn off all automatic controls; (ii) open the manual bleed valve;...
- Page 6 STEP THREE Place the sand filter tank (2) on the base. STEP FOUR Fold all the filter element tubes (5) up which are on the filter element tube assembly and put the filter element tube assembly (4) into the bottom of the tank.
- Page 7 STEP FIVE Screw the pressure gauge (15) with O-ring (14) onto the six-way valve. STEP SIX Place the sand shield (10) over the PVC pipe to prevent sand from entering the pipe and pour the pool sand into the tank. Evenly distribute the sand until half full and add some water before pouring in the remaining sand until it is filled between the “MIN”...
- Page 8 STEP SEVEN Remove the sand shield (10) and level out the sand. Wash away all sand around the top edge of the tank. Install the O-ring (9) on the six-way valve, and then install the six-way valve (1) on the tank. The installation direction of the six-way valve (1) should be consistent with the picture below (the water inlet of the six-way valve and the water outlet of the pump should be on the same side).
- Page 9 STEP TEN Install the locking ring (6) to secure the six-way valve. Align the locking ring with the base of the six-way valve (see picture below) and secure with screws (11). STEP 11 (Optional if using US PVC Flex Pipe) If using US PVC flex pipe.
-
Page 10: Function Instruction
Note: If it has been a long time since using the system, unscrew the drain screw (see picture below) and drain the water out of the pump, before use. FUNCTION INSTRUCTION... - Page 11 Six-way Valve Operation BACKWASH RECIRCULATE RINSE FILTER WASTE CLOSED...
- Page 12 Valve Function Water Flow Direction Position Pool→Pump→Filter Backwash Reversing water flow to clean media→Waste valve / drain the filter media outlet Pool→Pump→Valve→Pool; Recirculate Circulating water back to the pool without passing through bypassing the filter media the filter media Pool→Pump→Filter Rinse Cleaning the sand on initial media→Waste valve / drain...
-
Page 13: Troubleshooting
TROUBLESHOOTING SITUATION POSSIBLE CAUSE SUGGESTION Plug into a three hole socket The motor is not plugged in Change the socket Check the wire connection System fails to start The motor is overheated, causing the overload Cool down the motor, then protection to disconnect the restart the system circuit... -
Page 14: Limited Warranty
LIMITED WARRANTY The sand filter pump system carries the following limited warranty when it is out of order due to faulty manufacture or materials during normal use and service. We warrant to the original purchaser that product shall be free of manufacturer’s defects at the time of sale, and upon examination shall provide replacements parts in accordance with the following schedule: Sand Filter Pump Warranty –... -
Page 15: Instructions Importantes En Matière De Sécurité
INSTRUCTIONS IMPORTANTES EN MATIÈRE DE SÉCURITÉ Lors de l'installation et de l'utilisation de cet appareil, il convient de toujours respecter les mesures de sécurité de base, notamment les suivantes: AVERTISSEMENT: Pour réduire les risques de blessures, ne pas permettre aux enfants d'utiliser ce produit. -
Page 16: Aperçu Du Système
APERÇU DU SYSTÈME Modèle AC-SFP14 AC-SFP16 Taille du réservoir 14 pouces 16 pouces Puissance 0.6 HP 0.75 HP Tension 115 Volt AC Ampérage 3.3 A 4.8 A Fréquence 60 Hz 230 V / 50 Hz Pression de service maximale 2 bar (30 psi) Surface filtrante effective 0.1 m... - Page 17 LISTE DES PIÈCES DU PRODUIT Avant d'installer le produit, vérifiez que toutes les pièces sont incluses.
- Page 18 RÉF. DESCRIPTION QTÉ. Vanne à six voies Réservoir de filtre à sable 14"/16 Base du réservoir du filtre à sable 14"/16 Assemblage du tube de l'élément filtrant 14"/16 Tube de l'élément filtrant 14"/16 Bague de verrouillage de la vanne à six voies Pompe de 0,6/0,75 HP Base de la pompe Joint torique de la vanne à...
-
Page 19: Instructions D'assemblage
INSTRUCTIONS D'ASSEMBLAGE Installez le système sur une surface plane et solide. Le moteur a besoin d'une circulation d'air pour être correctement refroidi. N'installez pas la pompe près d'une bouche d'aération. Il est recommandé d'être au moins deux personnes pour l'installation. Avant de commencer l'assemblage, (i) arrêtez la pompe et désactivez toutes les commandes automatiques;... - Page 20 TROISIÈME ÉTAPE Placez le réservoir du filtre à sable (2) sur la base QUATRIÈME ÉTAPE Repliez tous les tubes de l'élément filtrant (5) qui se trouvent sur l'ensemble de tubes de l'élément filtrant et placez l'ensemble de l'élément filtrant (4) au fond du réservoir. CINQUIÈME ÉTAPE Visser le manomètre (15) avec le joint torique (14) sur la vanne à...
- Page 21 SIXIÈME ÉTAPE Placez la protection contre le sable (10) sur le tuyau en PVC pour empêcher le sable de pénétrer dans le tuyau et versez le sable de quartz dans le réservoir. Répartissez uniformément le sable jusqu'à ce qu'il soit à moitié plein et ajoutez un peu d'eau avant de verser le reste du sable jusqu'à...
- Page 22 NEUVIÈME ÉTAPE Reliez l'entrée d'eau de la vanne à six voies et la sortie d'eau de la pompe avec le tuyau (17), et vissez les connecteurs dans le sens des aiguilles d'une montre à l'aide des écrous qui se trouvent sur le tuyau. DIXIÈME ÉTAPE Installez la bague de verrouillage (6) pour fixer la vanne à...
- Page 23 L'ASSEMBLAGE EST TERMINÉ Remarque: Si le système n'a pas été utilisé depuis longtemps, dévissez la vis de vidange (illustration ci-dessous) et videz l'eau de la pompe avant de l'utiliser.
- Page 24 INSTRUCTION DE FONCTION Fonctionnement de la vanne à six voies LAVAGE À CONTRE-COURANT RECIRCULER RINÇAGE FILTRAGE DÉCHETS FERMÉ...
- Page 25 Position de Fonction Direction de l'écoulement de la vanne l'eau Piscine→Pompe→ Média Lavage à Inverser le flux d'eau pour filtrant→Vanne de vidange / sortie contre- nettoyer le média filtrant courant de vidange Piscine→Pompe→Vanne→Piscine; Recirculation Faire circuler l'eau dans la piscine sans passer par le contournement du média filtrant média filtrant Piscine→Pompe→...
-
Page 26: Dépannage
DÉPANNAGE SITUATION CAUSE POSSIBLE SUGGESTION Le système ne Le moteur n'est pas Branchez dans une prise à trois trous démarre pas branché Changez la prise Vérifiez la connexion des fils. Le moteur est en Refroidissez le moteur, puis surchauffe, ce qui entraîne redémarrez le système. -
Page 27: Garantie Limitée
GARANTIE LIMITÉE Le système de pompe du filtre à sable bénéficie de la garantie limitée suivante lorsqu'il est hors service en raison d'un défaut de fabrication ou de matériaux dans le cadre d'une utilisation et d'un entretien normaux. Nous garantissons à l'acheteur initial que le produit est exempt de défauts de fabrication au moment de la vente et, après examen, nous fournirons des pièces de remplacement selon le calendrier suivant: Garantie de la pompe du filtre à...
Need help?
Do you have a question about the AC-SFP14 and is the answer not in the manual?
Questions and answers