Table of Contents
Advertisement
Available languages
Available languages
Quick Links
Advertisement
Chapters
Table of Contents

Related Manuals for RSupport RemoteView BOX

Summary of Contents for RSupport RemoteView BOX
- Page 1 Quick Guide Ver.1.0 box.rview.com/manual...
- Page 2 ©COPYRIGHT RSUPPORT Co., Ltd. • 本ガイドの内容は、 製品の性能上向または機能の改善などによ り、 予告なく変更される場合があります。 • RemoteViewBOXに関する保証は、 保証書ページをご覧くだ さい。 • 本ガイドには保証書の内容以外、 他のいかなる保証も含まれ ません。 日 本 • 詳細は、 box.rview.comをご覧ください。 語...
-
Page 3: Table Of Contents
目次 各部分の名称 各部分の名称 同梱物 同梱物 製品スペック 製品スペック デバイス接続 デバイス接続 デバイス登録 デバイス登録 日 1. デバイス設定サイ トに接続 1. デバイス設定サイ トに接続 本 語 2. プライバシーアクセス許可 2. プライバシーアクセス許可 3. デバイスの管理アカウン ト設定 3. デバイスの管理アカウン ト設定 4. RemoteViewのアカウン ト設定 4. RemoteViewのアカウン ト設定 5. デバイスの登録 5. デバイスの登録 6. -
Page 4: 各部分の名称
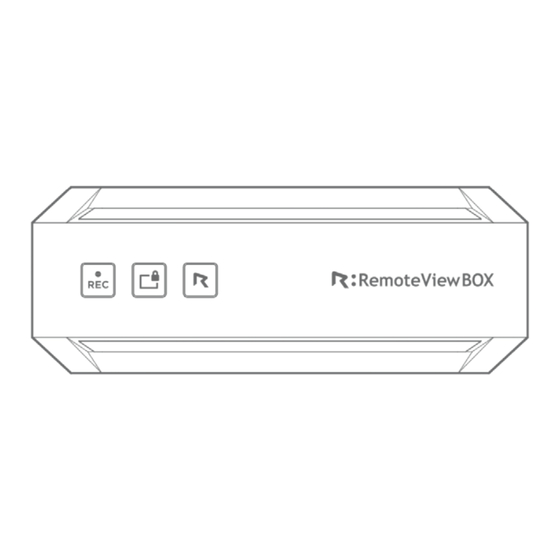
各部分の名称 日 本 語 録画ボタン 1 遠隔接続ブロックボタン 2 PC to HDMIポート AUX IN ポート 1 6 Monitor to HDMIポート microUSBポート 2 7 LANポート USB ポート 3 8 リセッ トボタン 電源接続ポート 4 9 microHDMIポート 送風口 5 10... -
Page 5: 同梱物
同梱物 日 本 語 RemoteViewBOX LANケーブル HDMIケーブル microUSB ACアダプタ スタンド QuickGuide ケーブル... - Page 6 製品スペック Spec 詳細 ポリカーボネート、 アルミニウム、 材質 シリコン、 本体 重量 225g 日 サイズ 175 x 65 x 45(mm) 本 語 映像入力 1 x HDMI 2.0 USBポート 2 x USB 3.0 Type A コネクタ 映像出力 1 x HDMI 2.0 オーディオ出力 Audio 3.5mm stereo 解像度...
- Page 7 デバイス接続 日 本 語 HDMIケーブルでRemoteView BOX (HDMI PCポート) と遠 1 隔地PCを接続します。 有線インターネッ トでRemoteView BOXと遠隔地PCを接 2 続します。 Micro USBケーブルでRemoteView BOXと遠隔地PCを接 3 続します。 電源アダプタをAC電源に接続し、 電源アダプターケーブル 4 をRemoteView BOXの電源ケーブルに接続します。 HDMIケーブルでRemoteView BOX (HDMIモニターポート) 5 とモニターを接続します。 (必須ではありません。 遠隔地PCの画面をモニターに出力する 場合のみ接続します。 )...
-
Page 8: デバイス登録
デバイス登録 1. デバイス設定サイトに接続 日 本 語 遠隔地PCでブラウザを開いてbox.rview.comに接続しま 1 す。 RemoteViewBOX本体の底面にあるETH MACアドレスを入 2 力しRemoteViewBOXのIPアドレスを検索します。 IPアドレスが表示されたら 「接続」 をクリ ックします。 3 ※IPアドレスが検索できない、 または固定IPを利用する場合、 マ ニュアルをご参考のうえ設定を行って ください。 【マニュアル】 box.rview.com/manual... -
Page 9: プライバシーアクセス許可
デバイス登録 2. プライバシーアクセス許可 日 本 語 詳細設定をクリ ックします。 1 IPアドレスにアクセスするをクリ ックします。 2... -
Page 10: デバイスの管理アカウント設定
デバイス登録 3. デバイスの管理アカウント設定 日 本 語 RemoteViewBOXデバイスの管理アカウン トを設定します。... -
Page 11: Remoteviewのアカウント設定
デバイス登録 4. RemoteViewのアカウント設定 日 本 語 RemoteViewサービスサイ ト(www.rview.com)のアカウン ト情 報を入力します。... -
Page 12: デバイスの登録
デバイス登録 5. デバイスの登録 日 本 語 • デバイス名 : RemoteViewに表示するデバイス名を入力しま す。 • アクセス情報 : RemoteViewBOXに遠隔接続を行う際、 認証 を行うために任意で設定する項目です。 忘れないように必ず お控え ください。... -
Page 13: 登録完了
デバイス登録 6. 登録完了 日 本 語 RemoteViewBOXの設定が完了しました。... -
Page 14: 遠隔接続
遠隔接続 1. RemoteViewログイン 日 本 語 RemoteViewサイ ト(www.rview.com)にアクセスしログインし ます。... -
Page 15: 遠隔接続
遠隔接続 2. 遠隔接続 日 本 語 登録したRemoteViewBOXアイコンをダブルクリ ックしま 1 す。 接続アカウン トを入力します。 2 RemoteViewビューアが実行され遠隔地PCの画面が表示 3 されます。... -
Page 16: 壁掛けマウント
壁掛けマウント RemoteViewBOX 日 スタンド 本 語 面ファスナー デバイスを設置する位置に面ファスナーを貼り付けた後、 デバイ ス下部とスタンドをねじで固定し面ファスナーに貼り付けます。... -
Page 17: 初期化
初期化 日 デバイス初期化方法 本 語 ピンなどの先の細いものでリセッ トボタンを5~10秒間押し続け ると、 ランプが点灯し本体が初期化されます。 初期化を行うと、 ネッ トワーク情報、 デバイス設定情報、 アカウン ト情報、 RemoteViewのAgent接続情報が全て消去されます。... -
Page 18: 注意事項
注意事項 <本製品を安全にご利用いただくために、 必ずお守り ください> 本製品のご利用に際して、 以下の警告および注意をよ くお読みのうえ、 正し くお使い ください。 ここに示した注意事項は、 ご利用者様や、 他の方への危害、 財産への損害 を未然に防ぐための内容を記載していますので、 必ずお守り頂く ようお願いいたしま す。 次の表示は、 表示内容を遵守せず、 誤った使用をされた場合に生じる損害の程度 を説明しています。 • 電源はAC100V(50/60Hz)を使用して ください。 日 本 • 記載と異なる電圧・電流でのご使用は、 発煙、 感電、 火災、 製品の誤作動や故障 語 などの原因になります。 • 記載されている推奨環境内で本製品をご使用ください。 • 本製品を分解、 改造しないでください。 感電、 火災、 製品の誤作動、 故障などの 原因となります。... - Page 19 • 本製品に触れる際は事前に指輪、 腕時計などの装身具を外して ください。 • ACアダプタにほこりが付着していないことを確認し、 コンセン トに根元までしっ かり差し込んでください。 差し込みが不完全のままやプラグにほこり等がたまる と、 火災の原因になります。 • 本製品とACアダプタは、 雷サージなどの雷対策をしていません。 雷防護対策済 み電源タップなどのご利用をお勧めします。 • 雷が発生しているときは本製品や接続されているケーブル等に触れないでくだ さい。 落雷による感電の原因になります。 • 製品から煙が出たり、 臭いがしたり、 液体や異物などが内部に入った場合、 直ち 日 本 にコンセン トからACアダプタを抜いて ください。 語 • 金融機器、 医療機器や人命に関わるシステムなど、 高い安全性が要求される用 途には使用しないでください。 • 本製品を次のような場所で使用や保管しないでください。 • 直射日光の当たる場所 ・ 温度変化の激しい場所 ・ 湿気やほこりの多い場所 •...
- Page 20 RoHS指令対応基本方針 生産から廃棄処分にいたる製品のライフサイクルにおいて、 人の健康や環境への負 荷を最小限に抑えることを目的とし、 RSUPPORT株式会社では、 EU(欧州連合)の RoHS指令準拠を始めとし、 環境汚染物質の削減を積極的に進めております。 日 本 語...
-
Page 21: 保証書
保 証 書 この製品は厳密な検査に合格したものです。 お客様の正常な使用状態で、 保証期間中に本製品が万一故障した場合 は、 製品に同梱されている保証書に記載された期間、 条件の下において 交換対応をいたします。 この保証書は再発行いたしませんので大切に保管して ください。 製品名 RemoteViewBOX 日 本 モデル名 RVBV0101 語 保証期間 ご購入日または、 納品日より1年間 条件 保証対象は本体、 電源アダプター、 LANケーブルとなり 同等製品に交換いたします。 同モデルの販売が終了した場合、 後続機器に交換い たします。 ご購入日 ______年 ___月___日 又は納品日 日付の確認できる書類 (納品書または、 請求書) を添付 して ください。 1.お問い合わせ先... - Page 22 日 本 語...
- Page 23 ©COPYRIGHT RSUPPORT Co., Ltd. • 본 매뉴얼에 포함된 내용은 추후 제품의 성능 향상 또는 기능 개선 등에 따라 사전 예고없이 변경될 수 있습니다. • RemoteViewBOX 관련 보증은 제품 보증서에서 확인하세요. • 알서포트㈜는 본 매뉴얼과 보증서에서 설명한 특수 용도 이외에 시장성 및 적합성 등에 대하여 어떠한 보증도 하지 않습니다.
- Page 24 목차 각 부분의 명칭 각 부분의 명칭 제품 내용물 제품 내용물 제품 상세 사양 제품 상세 사양 장비연결 장비연결 장비 등록 장비 등록 1. 장비 IP 확인 1. 장비 IP 확인 2. 연결 비공개 설정 페이지 이동 2. 연결 비공개 설정 페이지 이동 3.
-
Page 25: 각 부분의 명칭
각 부분의 명칭 녹화 1 원격 접속 차단 2 한 국 어 PC to HDMI AUX IN Port 1 6 Monitor to HDMI Micro USB 2 7 USB Ports 3 8 Reset 전원 케이블 4 9 Micro HDMI 통풍구 5 10... -
Page 26: 제품 내용물
제품 내용물 RemoteViewBOX LAN 케이블 HDMI 케이블 한 국 어 Quick Guide Micro USB AC 어댑터 거치대 케이블... -
Page 27: 제품 상세 사양
제품 상세 사양 Spec 설명 폴리카보네이트+알루미늄+실리콘 재질 무게 225g 물리적 특성 크기 175 x 65 x 45(mm) 비디오 입력 1 x HDMI 2.0 USB 포트 2 x USB 3.0 Type A 커넥터 비디오 출력 1 x HDMI 2.0 한 국 오디오... -
Page 28: 장비연결
장비연결 한 국 어 HDMI 케이블을 RemoteViewBOX의 HDMI PC 입력 포트 1 에 연결합니다. LAN 케이블을 공유기와 RemoteViewBOX 의 LAN 포트에 연 2 결합니다. 마이크로 USB 케이블을 원격제어 할 기기와 RemoteView- 3 BOX의 USB 포트에 연결합니다. 전원 케이블을 RemoteViewBOX의 전원 포트에 연결한 후 4 전원... -
Page 29: 장비 등록
장비 등록 1. 1. 장비 IP 확인 장비 IP 확인 한 국 어 웹브라우저에서 box.rview.com을 입력하여 RemoteView- 1 BOX홈페이지로 이동합니다. [2.장비등록] 메뉴로 이동합니다. 2 MAC 주소란에 RemoteViewBOX 장비 하단이나 포장박스에 3 부착된 스티커에 인쇄되어 있는 ETH MAC 주소를 입력하고 ‘ 검색’... -
Page 30: 연결 비공개 설정 페이지 이동
장비 등록 2. 2. 연결 비공개 설정 페이지 이동 연결 비공개 설정 페이지 이동 한 국 어 확인된 장비 IP에 접속 시, 비공개 설정된 브라우저 창이 열립니다. 고급 버튼을 클릭하여 장비 관리 페이지로 이동합니다. -
Page 31: 장비 관리 계정 설정
장비 등록 3. 3. 장비 관리 계정 설정 장비 관리 계정 설정 한 국 어 RemoteViewBOX 장비 관리 사이트의 관리자 계정을 생성합니다. -
Page 32: 사용자 사이트 계정 설정
장비 등록 4. 4. 사용자 사이트 계정 설정 사용자 사이트 계정 설정 한 국 어 RemoteViewBOX 장비에 접속할 수 있는 사용자 페이지 (www. rview.com)의 계정을 입력합니다. -
Page 33: 장비 접근 계정 설정
장비 등록 5. 5. 장비 접근 계정 설정 장비 접근 계정 설정 한 국 어 원격지PC 관리 페이지에 표시될 장비 표시 이름 및 장비 접속 시 사용할 접속 계정을 입력합니다. -
Page 34: 등록 완료
장비 등록 6. 6. 등록 완료 등록 완료 한 국 어 RemoteViewBOX 장비 설정이 완료되었습니다. 사용자 사이트 (www.rview.com)에 접속하여 장비 원격 접속 및 기능 이용을 할 수 있습니다. -
Page 35: 원격 접속
원격 접속 1. 1. 사용자 사이트 로그인 사용자 사이트 로그인 한 국 어 www.rview.com에 접속 후 장비 설정 사이트에서 설정한 사용자 사이트 계정을 입력하여 로그인 합니다. -
Page 36: 원격접속
원격접속 2. 2. 원격접속 원격접속 한 국 어 원격지 PC 관리에서 RemoteViewBOX 장비 아이콘을 더블 1 클릭합니다. 장비 접속 계정을 입력합니다. 2 원격지 기기를 제어하는 기기에서 리모트뷰 뷰어 프로그램이 3 실행되고 뷰어에 원격지 기기의 화면이 나타납니다. -
Page 37: 벽걸이 거치대 조립
벽걸이 거치대 조립 RemoteViewBOX 마운트킷 한 벨크로 국 어 RemoteViewBOX를 거치할 위치에 벨크로 부착후 기기하단에 마운트킷을 나사로 결합하여 벨크로에 부착하세요. -
Page 38: 초기화
초기화 Reset버튼을 5~10초간 핀셋으로 누르고 있는 경우 라이트 등이 초 한 국 기화 상태로 점등되며, 초기화가 진행됩니다. 어 초기화 진행시, 네트워크 정보 / 장비 설정 정보/ 장비 관리 계정 / 사용자 사이트 계정 / RemoteView 에이전트 접근 정보가 초기화 됩니다. -
Page 39: 주의사항
주의사항 <본 제품의 안전한 이용을 위해, 반드시 준수해 주세요> 본 제품 이용시, 아래의 경고 및 주의사항을 반드시 준수해 주세요. 아래 사항들을 지키지 않는 경우 ‘감전’, ‘화재’, ‘고장’등이 발생할 수 있습니다. 이에 의해 부상 및 사망으로 연결될 위험이 있습니다. 또한 ‘발화’,’연기발생’,’용해’등이 발생한... - Page 40 • 청소시에는 아래의 내용에 주의해 주세요. * 전원 플러그를 콘센트에서 뽑아주세요. * 신나 혹은 벤젠 등의 유기용제로 본 제품을 닦지 마세요. • 정전기에 의한 파손을 방지하기 위해 본제품을 만지기 전에 근처에 있는 금속(문 손잡이나 알루미늄 샷시 등)에 손은 댄 후 몸의 정전기를 제거해주세요. 몸에서 나 오는...
- Page 41 경고 • 전원은 AC 220V(50/60Hz)이외의 환경에서는 절대 사용하지 마세요. • 본 제품과 본 제품의 정규 전력 라벨에 기재되어있는 전압, 전류 환경에서 사용 해 주세요. • 다른 전압,전류 환경에서 사용하면 연기 발생, 감전, 화재 또는 제품의 오동작 및 고 장의 원인이 됩니다. •...
- Page 42 • 연기가나거나 이상한 냄새가 나는 경우 액체나 이물질이 내부에 들어간 경우에는 바로 콘센트에서 AC어댑터를 뽑아주세요. • 동작환경범위 이외에서 본 제품을 사용하지 마세요. • 범위외의 온도 및 습도 환경에서 이용하는 경우 감전, 화재 또는 오동작, 고장의 원 인이 됩니다. • 본 제품을 분해 및 개조하지 마세요. 감정, 화재 또는 제품의 오작동 및 고장의 원인 이...
-
Page 43: 보증서
보증서 본 제품은 엄격한 검사를 거친 제품입니다. 정상적인 사용상태에서 고장이 나는 경우 이 보증서에 기재된 기간/조건에 따라 동등한 제품으로 무상 교환해 드립니다. 이 보증서는 재발행이 불가능하므로 잘 보관해 주세요. 제품명 RemoteViewBOX 모델명 RVBV0101 구매일 또는 납품일로부터 1년간 보증기간 조건 보증대상은 본체, 전원 어댑터, 랜케이블이며 동등한 제품 으로... - Page 44 한 국 어...
- Page 45 • The contents of this manual may be changed without prior notice, depending on the performance or functional improvement of the product. • Check the product warranty for RemoteView BOX related warranty. • RSUPPORT Co., Ltd. does not provide any guarantee for marketability, suitability, etc.
- Page 46 Table of Contents Hardware Overview Hardware Overview Package Contents Package Contents Specification Specification Device Connection Device Connection Installation Installation 1. Device IP Check 1. Device IP Check 2. Allow Private Connection 2. Allow Private Connection 3. Device management account setting 3. Device management account setting 4. Service Site Account Settings 4.
-
Page 47: Hardware Overview
Hardware Overview Recording 1 Block remote access 2 芝 PC to HDMI AUX IN Port 1 6 Monitor to HDMI Micro USB 2 7 USB Ports 3 8 Reset Power cable 4 9 Micro HDMI Ventilation hole 5 10... -
Page 48: Package Contents
Package Contents RemoteViewBOX LAN Cable HDMI Cable Micro USB AC adapter Mounting kit Quick Guide Cable... -
Page 49: Specification
Specification Spec Description Polycarbonate + Aluminum + Material Silicone Physical Weight 225g details Size 175 x 65 x 45(mm) 1 x HDMI 2.0 Video input USB port 2 x USB 3.0 Type A Connector Video output 1 x HDMI 2.0 Audio output Audio 3.5mm stereo Video resolution... -
Page 50: Device Connection
Device Connection Connect the HDMI cable to the PC’s HDMI input port 1 on the RemoteViewBOX. Connect the LAN cable to the router and the LAN port 2 on the RemoteViewBOX. Connect the micro USB cable to the device to be 3 remotely controlled and to the USB port of the Re- moteViewBOX. -
Page 51: Installation
Installation 1. 1. Device IP Check Device IP Check Open the RemoteViewBOX website by entering box. 1 rview.com in the web browser. Click the [2.Registering the device] 2 In the MAC address bar, enter the ETH MAC address 3 printed on the sticker at the bottom of the Remote- ViewBOX equipment and click the ‘Search’... -
Page 52: Allow Private Connection
Installation 2. 2. Allow Private Connection Allow Private Connection When accessing the verified equipment IP, a private brows- er window opens. Click the Advanced button to go to the Device Manage- ment page... -
Page 53: Device Management Account Setting
Installation 3. 3. Device management account setting Device management account setting Create an administrator account on the RemoteViewBOX device management site. -
Page 54: Service Site Account Settings
Installation 4. 4. Service Site Account Settings Service Site Account Settings Enter the account on the user page (www.rview.com) where you can access the RemoteViewBOX equipment. -
Page 55: User Access Site Settings
Installation 5. 5. User Access Site Settings User Access Site Settings Enter the name of the device to be displayed on the Re- mote PC Management page and the connection account to be used when accessing the equipment. Enter the access ID/PW to be used to access the device. -
Page 56: Setup Completed
Installation 6. 6. Setup completed Setup completed RemoteViewBOX equipment setup is complete. You can access the user site (www.rview.com) to access the equipment remotely and use the functions. -
Page 57: Remote Control
Remote Control 1. 1. Log in to service site Log in to service site Log in by entering the user site account you set up on the equipment settings site after accessing www.rview.com. -
Page 58: Remote Access
Remote Control 2. 2. Remote Access Remote Access In Remote PC Management, double-click the Remote- 1 ViewBOX appliance icon. Enter the equipment access account. 2 The RemoteView Viewer runs on your device, and the 3 screen of the remote device appears in the viewer. -
Page 59: Wall Mount Assembly
Wall mount assembly RemoteViewBOX Mounting kit Velcro Attach Velcro to the location where you want to mount the device and attach the mounting kit to the Velcro by screwing it to the bottom of the device. -
Page 60: Initialize
Initialize Press and hold the Reset button with tweezers for 5 to 10 seconds and the light will light up in the initial state and the initialization will start. During initialization, network information / device setting information / device management account / user web account / RemoteView agent access information will be initialized. -
Page 61: Cautions
Cautions <For the safe use of this product, follow the recommendations below.> When using this product, be sure to follow the warnings and precautions below. Failure to comply with the following may result in ‘electric shock’, ‘fire’, and ‘failure’. This risks leading to injury and death. In addition, in the event of ‘ignition’, ‘smoke’, or ‘dissolution’, please stop using this product immediately and contact the distributor you purchased. - Page 62 • In particular, keep out of reach from children. • Unplug the AC adapter (or power cable) when moving. Make sure to unplug the power plug from the outlet and disconnect the external connection cord. • Pay attention to the following when cleaning. * Unplug the power from the outlet.
- Page 63 the contract details with the carrier. • Consult with the seller for delivery costs, settings, adjustments, and installation. • This product is available based on domestic law (Electrical House- hold Goods Safety Act), so the warranty is valid only in the country of purchase.
- Page 64 • Do not use the AC adapter on high-temperature, high-moisturizing objects (carpet, sponge, paper BOX, styrofoam, etc.) to avoid risk of high temperature and fire. • Do not plug or unplug the AC adapter with wet hands to avoid risk of electric shock.
-
Page 65: Warranty
Warranty This product has been rigorously inspected. In the event of a failure in normal use, we will replace the product for free in accordance with the terms and conditions of this warranty. Keep this warranty safely as it cannot be replaced. RemoteViewBOX Product name... - Page 66 Copyright ⓒ 2001~2022 RSUPPORT Co., Ltd. ALL RIGHTS RESERVED. www.rsupport.com...
Need help?
Do you have a question about the RemoteView BOX and is the answer not in the manual?
Questions and answers