Advertisement
Getting Acquainted
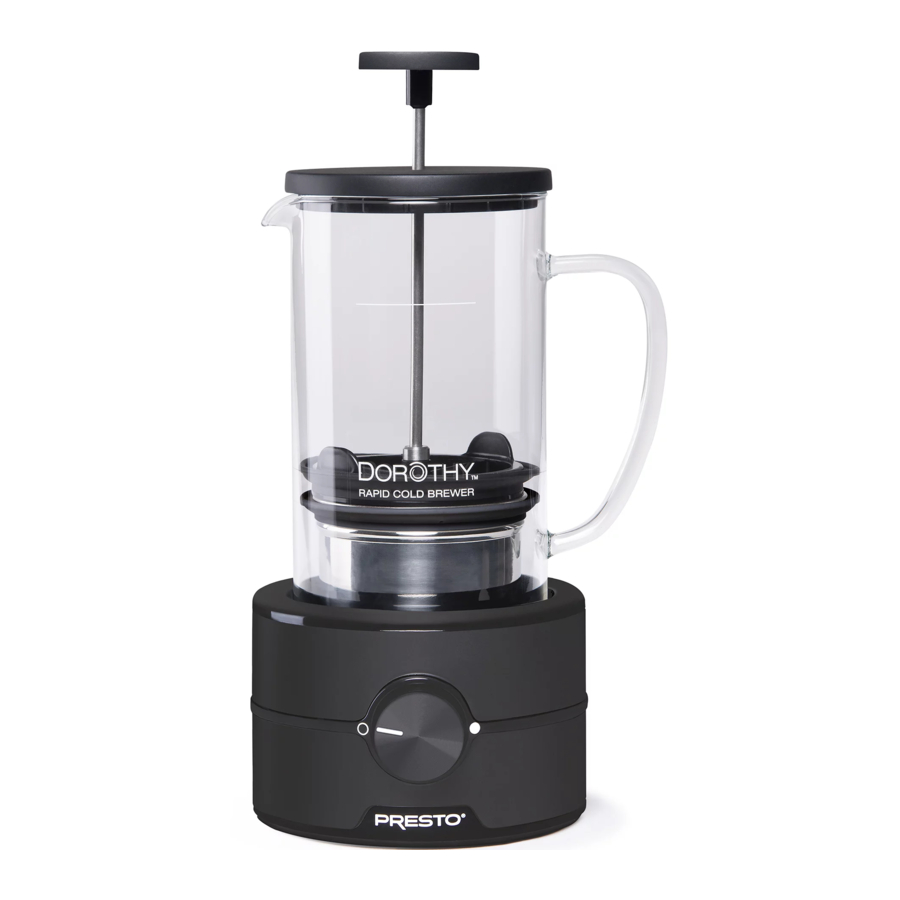
Become familiar with the rapid cold brewer parts (Fig. A) and read the instructions carefully. The cold brewer comes fully assembled. Before first use, disassemble and wash the parts using the following instructions:

- Grasp the glass carafe with one hand and the plunger knob with the other (Fig. C). Pull up slowly and firmly until the plunger and stirring cup are completely out of the carafe.
![]()
- To remove the stirring cup from the plunger, grasp the plunger lid with one hand and raise it up to the plunger knob. Place the thumb of your other hand on either one of the two tabs and wrap your fingers around the bottom of the cup (Fig. D). Push the tab with your thumb. The cup will slide off the filter.
![]()
- Wash the carafe, plunger, and stirring cup in warm, soapy water. Rinse and dry thoroughly. The carafe, plunger, and stirring cup are dishwasher safe (top rack). Do not remove the gaskets if washing in the dishwasher.


To prevent electrical shock and damage to the coffee maker, do not immerse the base in water or other liquid or allow the plug receptacle to get wet.
How to Use
- Place the cold brewer on a dry, level surface. Make sure the control dial is in the OFF (
![]() ) position (Fig. B). If not, turn the dial counterclockwise until it stops. Insert the stirring cup into the carafe and push down until it rests on the bottom of the carafe.
) position (Fig. B). If not, turn the dial counterclockwise until it stops. Insert the stirring cup into the carafe and push down until it rests on the bottom of the carafe.
![]()
![]()
![]()
The brewer's stirring mechanism will not work if the cup is not in this position. - Set the carafe on the base. Pour cold tap water or room temperature bottled water into the carafe to the fill line (approximately 26 ounces). NOTE: If using refrigerated water, you will need to double the brewing time.
![]()
If water is above the fill line, it may flow over the carafe during the stirring process. - Connect the power cord to the base (Fig. B) and then to a standard 120VAC wall outlet.
- Turn the control dial until the line is just past the halfway mark between the OFF (
![]() ) and HIGH SPEED (
) and HIGH SPEED (![]() ) positions (Fig. F). Wait for the "tornado" to form. Then gradually turn the dial until the tip of the "tornado" extends down to the post head of the stirring cup (Fig. G). NOTE: Turning the dial too rapidly may cause spinning to stop. If this occurs, turn the control dial off. Then slowly turn the dial back on until the line is just past the halfway point (Fig. F).
) positions (Fig. F). Wait for the "tornado" to form. Then gradually turn the dial until the tip of the "tornado" extends down to the post head of the stirring cup (Fig. G). NOTE: Turning the dial too rapidly may cause spinning to stop. If this occurs, turn the control dial off. Then slowly turn the dial back on until the line is just past the halfway point (Fig. F).
![]()
![]()
- Gradually (over about 30 seconds) add ⅔ cup medium grind coffee to the water. Medium grind coffee is the standard grind for commercially available ground coffee.
- After all coffee has been added, allow rapid brewer to stir for the amount of time needed to produce the desired strength:
- 10 minutes for a flavorful lighter brew (equivalent to 12 hours of conventional cold brewing).
- 20 minutes for a flavorful full-strength brew (equivalent to 16 hours of conventional cold brewing).
- 30 minutes for a flavorful ultra-strong brew (equivalent to 24 hours of conventional cold brewing).
 ) position (Fig. B). If not, turn the dial counterclockwise until it stops. Insert the stirring cup into the carafe and push down until it rests on the bottom of the carafe.


 ) positions (Fig. F). Wait for the "tornado" to form. Then gradually turn the dial until the tip of the "tornado" extends down to the post head of the stirring cup (Fig. G). NOTE: Turning the dial too rapidly may cause spinning to stop. If this occurs, turn the control dial off. Then slowly turn the dial back on until the line is just past the halfway point (Fig. F).

During the first 3 to 4 minutes, while the tornado is incorporating the coffee into the water, dry coffee will remain on the surface of the water. This is normal.
NOTE: The rapid cold brewer can run indefinitely without damage to the unit.
- If desired, the spinning speed can be increased after a few minutes by turning the control dial clockwise. Increased speed may aid in the removal of grounds from the side of the carafe.
- After stirring time is complete, turn the control dial off. Unplug the cord from the electrical outlet and then from the base. Allow the coffee to rest at least 5 minutes.
![]()
Resting allows the grounds to settle, making the plunging/filtering process in step 9 easier and more effective.
NOTE: After 5 minutes have elapsed, there will still be grounds visible on the top surface of the coffee. This is normal. - While the carafe is still on the base, grasp the plunger knob and lid. Insert the plunger into the carafe, making sure the filter is level (Fig. H). With straight downward pressure, press the plunger knob slowly and evenly until the filter contacts the stirring cup (Fig. I). This should take about 15 seconds.

![]()
If you plunge too fast, one or both of the following will occur:- You will feel an increase in resistance.
- Numerous small air bubbles will begin to escape past the plunger gasket.

DO NOT CONTINUE TO PRESS. Instead, pull the plunger up slightly — about 1/16th inch (2mm) is enough. Pause for a second. Then resume pressing again, evenly and slowly.
NOTE: You may notice some coffee collecting under the stirring cup. This is normal.
- Pour coffee from the carafe, making sure to hold the plunger knob and lid in position on top of the carafe.
Glass Carafe Care
- Do not use the carafe if it is cracked or chipped.
- Avoid sharp blows, scratches, and rough handling, as these can damage the glass.
- Do not use steel wool cleaning pads or abrasive powders to clean the carafe, as they may scratch the glass.
- Avoid exposing the carafe to extreme changes in temperature; for example, adding hot water to a carafe that is cold could cause the glass to break.
Cleaning
- Unplug the power cord from the electrical outlet and then from the cold brewer base.
- Pour any remaining coffee out of the carafe.
- Place the carafe in a sink or on a flat surface next to a sink. Place a paper towel in the sink. Grasp the carafe handle with one hand. With the other hand, apply slight downward pressure on the plunger until the clip on the end of the plunger engages with the post head on the stirring cup. You will hear a "click" when the clip engages the post head.
NOTE: If you do not hear the "click," you will need to press more firmly to engage the post head. - Slowly raise the stirring cup (Fig. C) by pulling up on the plunger knob until the cup touches the lid. Remove the plunger and cup from the carafe.
- Slide the cup off the plunger (Fig. D). Empty the contents of the stirring cup onto the paper towel, wrap it up, and discard.
- Remove the gasket from the coffee filter. Wash the gasket, carafe, plunger, and stirring cup in warm, soapy water. Rinse and dry thoroughly. The carafe, plunger, and stirring cup are dishwasher safe (top rack). Do not remove gaskets if washing in the dishwasher.
- Wipe the outside surface of the base with a damp cloth and dry.
![]()
To prevent electrical shock and damage to the coffee maker, do not immerse the base in water or other liquid or allow the plug receptacle to get wet. If you notice any moisture, dry thoroughly before use. - Periodically remove the gasket from the stirring cup to remove any remaining coffee and grounds. Wash in warm, soapy water.
Reinstall the gasket without the holes on the plunger (Fig. A) by stretching it over the filter so that it fits in the groove. Stretch the gasket with the holes (Fig. J) onto the stirring cup and place it in the groove on the top of the cup.
![]()

Questions and Answers
What temperature should the water be?
Cold tap water or room temperature water is recommended. If using refrigerated water, double the brewing time.
When I turned the control dial, nothing happened. What is wrong?
The stirring cup is not positioned correctly. When inserting it into the carafe, be sure to push it down until the bottom of the cup is resting flat on the bottom of the carafe (Fig. E).
What type of ground coffee should I use in the rapid cold brewer?
Medium grind coffee is the standard grind for commercially available ground coffee and the type recommended for use in the rapid cold brewer.
The stirring stopped when I turned the dial to high. What am I doing wrong?
The ideal stirring speed for cold brew occurs when the tip of the "tornado" extends down to the post head of the stirring cup. Avoid turning the control dial beyond this point. If the dial is turned to the HIGH SPEED setting (![]() ), the rotation may stop. If this occurs, turn the control dial off. Then slowly turn the dial back on until the line is just past the halfway point (Fig. F).
), the rotation may stop. If this occurs, turn the control dial off. Then slowly turn the dial back on until the line is just past the halfway point (Fig. F).
I noticed some sediment at the bottom of the glass. Is that normal?
Coffee prepared in the rapid cold brewer will have some sediment. It is common and contributes to the full-bodied flavor of the resulting brew. If desired, the cold brew coffee may be poured through a coffee filter to remove the sediment.
I feel resistance when I press the plunger. Why?
If you notice increased resistance, it is an indication that the filter is obstructed. If this should happen, DO NOT CONTINUE TO PRESS. Instead, pull the plunger up slightly — about 1/16th of an inch (2mm). Pause. Then resume pressing, slowly and evenly (Fig. H).
Can I keep leftover brew for later use?
Yes. Store remaining cold brew coffee in the refrigerator.
Occasionally, I hear a vibrating sound. Is that a concern?
No. It is due to the position of the carafe in the base and is not an issue. Slowly move the carafe from one side of the base to the other until you no longer hear the sound.
Recipes
Chocolate Hazelnut Coffee
1 cup cold brew coffee
¼ cup milk
2 tablespoons chocolate hazelnut spread
Add coffee, milk, and chocolate hazelnut spread to a blender. Process until frothy. Pour mixture over ice in a glass.
Variation: Use chocolate syrup in place of chocolate hazelnut spread. Mix milk and chocolate syrup in a glass. Pour in coffee; add ice.
Thai Iced Coffee
1 cup cold brew coffee
2 tablespoons sweetened condensed milk
½ teaspoon vanilla extract
Mix coffee, milk, and vanilla in a glass. Add ice.
IMPORTANT SAFEGUARDS
To reduce the risk of personal injury or property damage when using electrical appliances, basic safety precautions should always be followed, including the following:
- Read all instructions.
- To protect against electrical shock, do not immerse power cord or rapid cold brewer base in water or other liquid.
- This appliance is not intended for use by persons (including children) with reduced physical, sensory, or mental capabilities, or lack of experience and knowledge, unless they are closely supervised and instructed concerning use of the appliance by a person responsible for their safety. Close supervision is necessary when any appliance is used by or near children. Children should be supervised to ensure that they do not play with the appliance.
- Do not let children handle or put power cord in their mouths.
- Do not let power cord hang over edge of table or counter, or touch hot surfaces.
- Do not operate any appliance with a damaged cord or plug, or after the appliance malfunctions, or has been damaged in any manner. Return the appliance to the Presto Factory Service Department for examination, repair, or adjustment.
- The use of accessory attachments not recommended by the appliance manufacturer may cause injuries. Use only genuine Presto accessories and replacement parts.
- Avoid contact with moving parts.
- Do not place on or near a hot gas or electric burner or in a heated oven.
- Turn the appliance OFF, then unplug the power cord from the outlet when not in use, before assembling or disassembling parts, and before cleaning. To unplug, grasp the power supply and pull from the outlet. Never pull from the power cord.
- Unplug the power cord from the outlet when not in use and before cleaning. Allow to cool before putting on or taking off parts, and before cleaning the appliance.
- Do not use outdoors.
- Do not use appliance for other than intended use.
THIS APPLIANCE IS FOR HOUSEHOLD USE ONLY.
Consumer Service Information
If you have any questions regarding the operation of your Presto® appliance or need parts for your appliance, contact us by any of these methods:
- Call 1-800-877-0441 weekdays 8:00 AM to 4:00 PM (Central Time)
- Email us through our website at www.GoPresto.com/contact
- Write:
National Presto Industries, Inc., Consumer Service Department
3925 North Hastings Way, Eau Claire, WI 54703-3703
Inquiries will be answered promptly by telephone, email, or letter. When emailing or writing, please include a phone number and a time when you can be reached during weekdays if possible. When contacting the Consumer Service Department, please indicate the model and series numbers for the cold brewer. These numbers can be found on the bottom of the cold brewer base.
The Presto Factory Service Department is equipped to service Presto® appliances and supply genuine Presto® replacement parts. Genuine Presto® replacement parts are manufactured to the same exacting quality standards as Presto® appliances and are engineered specifically to function properly with its appliances. Presto can only guarantee the quality and performance of genuine Presto® replacement parts. "Lookalikes" might not be of the same quality or function in the same manner. To ensure that you are buying genuine Presto® replacement parts, look for the Presto® trademark.
Canton Sales and Storage Company, Presto Factory Service Department
555 Matthews Drive, Canton, MS 39046-3251
Product Registration

Please go online and register this product within ten days of purchase. Proper registration will serve as proof of purchase in the event your original receipt becomes misplaced or lost. Registration will not affect warranty coverage but may expedite the processing of warranty claims. The additional information requested will help us develop new products that best meet your needs and desires. To register the product, visit www.GoPresto.com/registration or simply scan this QR code. If you do not have computer access, contact the Consumer Service Department at 1-800-877-0441.

Visit www.GoPresto.com
Documents / Resources
References
Download manual
Here you can download full pdf version of manual, it may contain additional safety instructions, warranty information, FCC rules, etc.
Advertisement


Need help?
Do you have a question about the Dorothy 02937 and is the answer not in the manual?
Questions and answers