Table of Contents
Advertisement
Quick Links
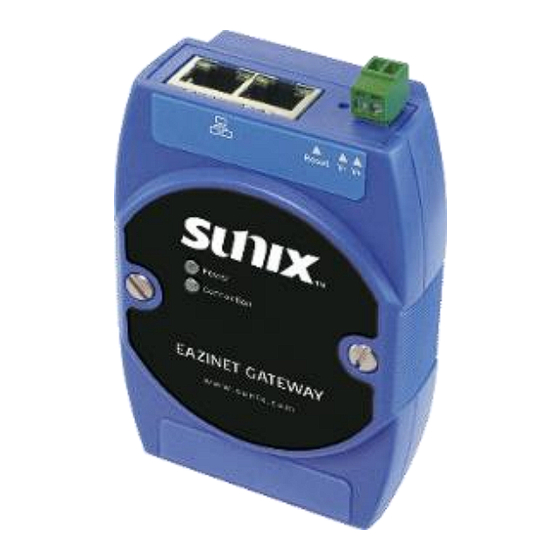
EZG1300
MQTT Gateway
-User Manual
Table of Contents
Table of Contents .............................................................................................................................. 1
1. EZG1300 Gateway quick installation ............................................................................................ 2
1.1 EZG1300 hardware quick installation ...................................................................................... 3
1.2 EZG1300 LED display ............................................................................................................. 4
1.3 EZG1300 environment configurations (Web interface) ........................................................... 5
2. Web operations .......................................................................................................................... 8
2.1 Home ................................................................................................................................... 9
2.2 Network ............................................................................................................................. 10
2.3 Device Management ......................................................................................................... 11
2.3.1(SUNIX Device list) .......................................................................................................... 11
2.3.2(Modbus_TCP Device list) ............................................................................................... 12
2.4 Communication .................................................................................................................... 13
2.4.1 Service ............................................................................................................................ 13
2.4.2 Interfaces ........................................................................................................................ 14
2.4.3 MQTT Topic setting ........................................................................................................ 24
2.5 Diagnostics ........................................................................................................................ 26
2.6 Tools ................................................................................................................................. 28
3. Contact Information ..................................................................................................................... 30
Copyright© 2021 SUNIX Co., Ltd. All Rights Reserved. No part of this publication may be reproduced, transcribed, stored in a retrieval system, translated into any language, or transmitted in any from or by any
means, photocopying, manual, or otherwise, without prior written permission from SUNIX. Disclaimer UNIX shall not be liable for any incidental or consequential damages resulting from the performance or
use of this equipment. SUNIX makes no representations or warranties regarding the contents of this manual. Information in this manual has been carefully checked for reliability; however, no guarantee is
given as to the correctness of this content. In the interest of continued product improvement, this company reserves the right to revise the manual or include change in the specifications of the product described
within it at any time without notice and without obligation to notify any person of such revision or changes. The information contained in this manual is provided for general use by the customers.
Trademarks UNIX is a registered trademark of SUNIX Group. All other trademarks or registered marks in this manual belong to their respective owners. Safety Information Keep this User's Manual for future reference.
Always read the safety information carefully. Keep this equipment away from direct sunlight, or in humid or damp places. Do not place this equipment in an unstable position, or on vibrating surface before setting it up. Do
not use or place this equipment near magnetic fields, televisions, or radios to avoid electronic interface that affects device performance.
v1.0
Advertisement
Table of Contents

Related Manuals for Sunix EZG1300


Summary of Contents for Sunix EZG1300
-
Page 1: Table Of Contents
3. Contact Information ........................30 Copyright© 2021 SUNIX Co., Ltd. All Rights Reserved. No part of this publication may be reproduced, transcribed, stored in a retrieval system, translated into any language, or transmitted in any from or by any means, photocopying, manual, or otherwise, without prior written permission from SUNIX. Disclaimer UNIX shall not be liable for any incidental or consequential damages resulting from the performance or use of this equipment. -
Page 2: Ezg1300 Gateway Quick Installation
1. EZG1300 Gateway quick installation Setting instruction for starting EZG1300 Gateway This chapter covers the following topics: 1.1 EZG1300 hardware quick installation 1.2 EZG1300 LED display 1.3 EZG1300 environment configuration (Web interface) -
Page 3: Ezg1300 Hardware Quick Installation
1.1 EZG1300 hardware quick installation 1. Connect power supply 2. Use Ethernet cable connect host computer and EZG1300 2 Pin terminal block 12~24VDC power input EZG1300... -
Page 4: Ezg1300 Led Display
1.2 EZG1300 LED display Behavior Color Action of light Status Normal Power Green status Fault Behavior Color Action of light Status Starting up Power on Green Start-complete MQTT Disconnect Green connection Connected... -
Page 5: Ezg1300 Environment Configurations (Web Interface)
1.3 EZG1300 environment configurations (Web interface) 1. To change computer IP settings, find Internet access in the lower right, right- click it, and click Open Network & Internet settings 2. Click Change adapter options... - Page 6 3. Right-click Ethernet of EZG1300 network then click Properties 4. Double-click Internet Protovol Version 4 (TCP/IPv4)
- Page 7 5. Select Use the following IP address, set IP address 192.168.111.1 then click OK 【Note】EZG1300's default IP address is 192.168.111.254, this setting is to set the host computer's IP address and EZG1300 to the same network segment 255 255 255 6.
-
Page 8: Web Operations
2. Web operations EZG1300 Web interface operation and settings This chapter covers the following topics: 2.1 Home 2.2 Network 2.3 Device Management 2.4 Communication 2.5 Tools... -
Page 9: Home
Click Home from the menu, display EZG1300 basic information (Device Name, Description, MAC, Firmware Version, etc.) Customize Device Name and Description If checked Locate ON, the Connection light on EZG1300 will blinking, checked OFF then Connection light always on Click Apply when finished ... -
Page 10: Network
2. Choose Static, set the correct IP address according to the actual network environment Choose DHCP, the system will display information based on the assigned IP 3. EZG1300 will provide the default NTP Server, If you need to change, please enter the correct NTP Server... -
Page 11: Device Management
2.3 Device Management 2.3.1(SUNIX Device list) Click Device Management from the menu, display SUNIX Devices list basic information (Device Num、Model、Description、Status) Check Connect or Disconnect to change connection status Click Refresh to refresh the page Click Apply when finished ... -
Page 12: Modbus_Tcp Device List
2.3.2(Modbus_TCP Device list) Click Device Management from the menu, display Modbus_TCP Devices list basic information (Device Num, Device Name, Server IP, Server Port, Status) Click Add Device to add Modbus_TCP Device Customize Device Name, insert Server IP and Server Port ... -
Page 13: Communication
2.4 Communication 2.4.1 Service Click Communication from the menu, display Service& Interfaces & Topics Management Click Service to set MQTT Server connection information Insert the corresponding information in the fields below Click Apply when finished Click “Communication” display Service & Interfaces & Topics Management Click “Service”... -
Page 14: Interfaces
2.4.2 Interfaces 1.Set Serial Interface Click Interfaces from the menu, display SUNIX Serial Interface (Device Num、Model、 Channel Num、Stream Name、Description,etc.) Click Config to configure Serial interface 1. Click “Interfaces” display EZG1300 SUNIX Serial interface 2. Click “Config” to configure Serial interface A pop-up window will display SUNIX Serial interfaces settings ... - Page 15 Set Stream amount, if there is no specific need, please choose 1 (maximum value32) Click Profile to set Stream profile Click Apply and Save when finished 4. Set Stream amount, click “Profile” to go to next step...
- Page 16 5. Input Stream Name, choose Command Enable 6. Insert parameter values 7. Set the Data Update Time 8. Set DataType 9. Set ByteOrder 10. Set Decimal places 11. Insert Offset value if needed 12. Click “Apply and Save “when finished...
- Page 17 2.Set Digital Interface Click Config to configure I/O channel A pop-up window will display SUNIX DIO channel settings Click Apply and Save when finished 1. Click Config, configure I/O channel This pop-up window will display SUNIX DI channel setting, customize your stream name, click “Apply and Save”...
- Page 18 The pop-up window will display SUNIX DO channel setting, customize your stream name, click “Apply and Save” when finished...
- Page 19 3.Set Analog Interface Click Config to configure I/O channel A pop-up window will display SUNIX AI channel settings Click Apply and Save when finished 1. Click Config, configure I/O channel 2. Fill in Stream Name and Description 3.
- Page 20 5. Set Measurement Scaling Calculator 訊號數值 6.Set Measure range 8.Set Decimal Places 7.Set Reading Data range 9. Input Offset value if needed...
- Page 21 4.Set Modbus_TCP device Interface Click Config to configure Modbus TCP/IP - I/O channel A pop-up window will display Modbus TCP/IP settings Click Apply and Save when finished 1. Click Config, configure Modbus_TCP Device 2. Set Stream amount 3.
- Page 22 Modbus TCP/IP - DI settings Input Description and Stream Name Set Command Enable as Modbus Input parameter values Set the Data Update Time Click “Apply and Save “when finished...
- Page 23 Modbus TCP/IP - DO settings Input Description and Stream Name Set Command Enable as Modbus Input parameter values Set the Data Update Time Click “Apply and Save “when finished...
-
Page 24: Mqtt Topic Setting
Num, Error Code Topic, Publish Topic, Subscribe Topic) Click Config to configure Publish Topic Click “Topics” Click “Config” to configure Publish Topic 3. Set Publish QoS 0:at most once 1:at least once 2:exactly once 4. Click “Topic copy” to copy the Public Topic SUNIX/92:29:99_EZG1300/88:01:0e_DPAD02HTP/GET/UART_INTERFACE/CH_01... - Page 25 Num, Error Code Topic, Publish Topic, Subscribe Topic) Click Config to configure Subscribe Topic 1. Click “Topics” 2. Click “Config” to configure Subscribe Topic 3. Set Subscribe QoS 0:at most once 1:at least once 2:exactly once 4. Click “Topic Copy “to copy the Subscribe Topic SUNIX/92:29:99_EZG1300/88:01:0e_DPAD02HTP/SET/UART_INTERFACE/CH_01...
-
Page 26: Diagnostics
Value of data analytics Update Decode Data Actual value 1. Click “Diagnostics” to display EZG1300 Diagnostics page 2. Click “DeviceNum” to check the connection status Each DeviceNum represents SUNIX Device Port or Modbus_TCP Server device, a EZG1300 can connect up to 10 devices. - Page 27 Diagnostics – Example for UART device Diagnostics –Example for Digital Input device Diagnostics - Example for Analog Input device...
-
Page 28: Tools
2.6 Tools Upgrade Management 1. Click “Choose File “to choose the rom file 2. Click “Apply “to start upgrade, Gateway will reboot, display the Web console page after firmware update successfully... - Page 29 Reboot to main screen after firmware update, press Ctrl + F5 refresh the page Check if the firmware version is the latest version 3. Check if the firmware version is the latest version...
-
Page 30: Contact Information
3. Contact Information Customer satisfaction is our number one concern, and to ensure that customers receive the full benefit of our products, SUNIX provides technical support, driver updates, product information, and user manual updates. Thank you for your support. Tech Support Email: ........
Need help?
Do you have a question about the EZG1300 and is the answer not in the manual?
Questions and answers