Table of Contents
Advertisement
Quick Links
Advertisement
Table of Contents

Summary of Contents for Monkey Vision Simple GoCam
- Page 1 GoCam | HD Security Camera User Guide...
- Page 2 Designed & supported in Australia. monkeyvision.com.au Level 1/527 Chapel St, South Yarra VIC 3141...
-
Page 3: Table Of Contents
Contents Packing list Product tour Quick Start Trouble Shooting Installing the camera Sharing the camera Charging the camera Indicator light status Product specifications Firmware upgrade How to reconnect your camera... -
Page 4: Packing List
Packing List Camera Bracket Mounting Kit USB Charging Cable User Guide Battery pre installed... -
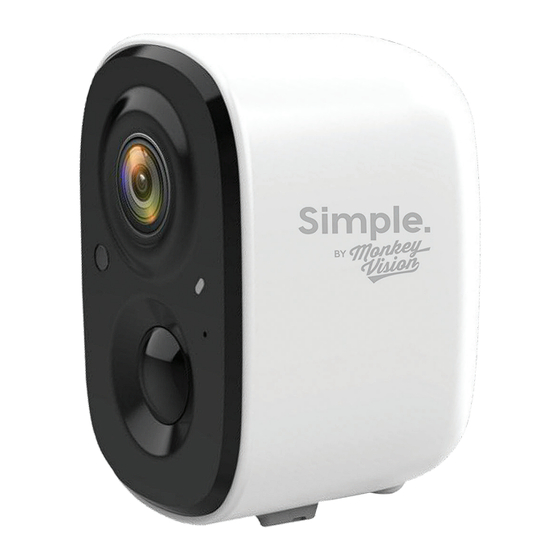
Page 5: Product Tour
Power button Product Tour Night Vision LED Lens Thread for wall bracket Indicator Light White LED Light mounting option Microphone Speaker Activity Detection Sensor Thread for wall bracket mounting option Power Button Micro-USB Port Restart Button Micro-SD Card Slot... -
Page 6: Quick Start
Quick Start The Simple GoCam has an inbuilt Download the battery but can be powered by USB. 1. Download and install the App The Simple GoCam can be viewed Simple App from our APP, compatible with both Android and iOS devices. Download the Simple by Monkey Vision APP from your preferred App Store. - Page 7 2. Adding your camera via the APP Sign into the Simple APP and follow the prompts to connect your camera to your WiFi.
- Page 8 Power button about 7 inches (20cm)
-
Page 9: Trouble Shooting
Troubleshooting tips for connecting your camera This camera only supports 2.4GHz WiFi. When you hear "Wi-Fi Password Error", please check whether the Wi-Fi password you entered in the App is correct. When you hear "Authentication Error", please ensure that your Wi-Fi network is not an enterprise-level network. Please note that the camera supports WPA-2 security and below. -
Page 10: Installing The Camera
Installing the camera You can put your Simple GoCam practically anywhere, but we recommend attaching it to a wall with our easy mounting kit. Step 1 Select a good spot for your camera. Install the camera in a position where... - Page 11 Installing the camera Drill Holes Step 2 Installing the bracket Drill the holes for the lugs to go into, using the bracket to mark the wall accordingly. Insert lugs, place bracket over top and then screw the bracket onto the wall. Screw Fixing Attach the camera to the bracket by Attach Camera...
- Page 12 Installing the camera Adjust Angle Adjust the camera to an appropriate angle, and then tighten the base by rotating it in a clockwise direction to fix the angle. Once you've secured the bracket to the wall, simply attach and position the camera by the magnetic chuck.
-
Page 13: Sharing The Camera
Sharing the camera Step 1 Find the camera you want to share on the homepage. Click the share button and enter the sharing screen. Step 2 Click "Invite", and a QR code will be generated for sharing. - Page 14 Sharing the camera Step 3 To see a camera shared with you, click on "Add a friend's Camera" on the "User" screen in the APP Step 4 Scan the QR code generated on their mobile phone, and you will receive a confirmation notification when complete.
-
Page 15: Charging The Camera
Charging the camera The App will remind you to charge your camera when the battery is low. Please use the Micro USB cable to plug into a 5V/1.5A charging adapter to charge the camera (not supplied). During charging, the camera's indicator light is solid yellow, and when the camera is fully charged, the indicator light will turn into solid green. -
Page 16: Indicator Light Status
Indicator light status Mode Status Working mode Blue Sleep mode Firmware Upgrade Charging mode Yellow Fully charged mode Green When you connect your camera through the App, it will prompt you if the latest firmware is available. You Product specification can also manually check the firmware Item Specification... -
Page 17: Faq
Why doesn't the Wi-Fi name appear What are the requirements for How far should the camera be when I connect to Wi-Fi? Wi-Fi? placed from the router? On Apple devices with iOS13 and Please use a 2.4GHz wireless network. Even though our Simple Go Cam can above, you need to turn on the The device does not support the work at a distance of 150m in an open... -
Page 18: How To Reconnect Your Camera
How to reconnect your camera Step 1 Press and hold the power button for 3 seconds to turn the camera on. Step 2 Double click the power button to enter the network configuration mode. Step 3 Open the Simple APP and follow the instructions to add a new camera. - Page 20 The full Simple range is available at www.bunnings.com.au Simple Doorbell Simple Easy Cam Simple PTZ Patrol Cam+ Solar Panel Simple Floodlight Gate Cam Simple Handy Cam Designed & supported in Australia. monkeyvision.com.au Level 1/527 Chapel St, South Yarra VIC 3141...
Need help?
Do you have a question about the Simple GoCam and is the answer not in the manual?
Questions and answers