Advertisement
Available languages
Available languages
Quick Links
Assembly video please
scan the QR code.
IMPORTANT, RETAIN FOR FUTURE REFERENCE: READ CAREFULLY
ASSEMBLY INSTRUCTION
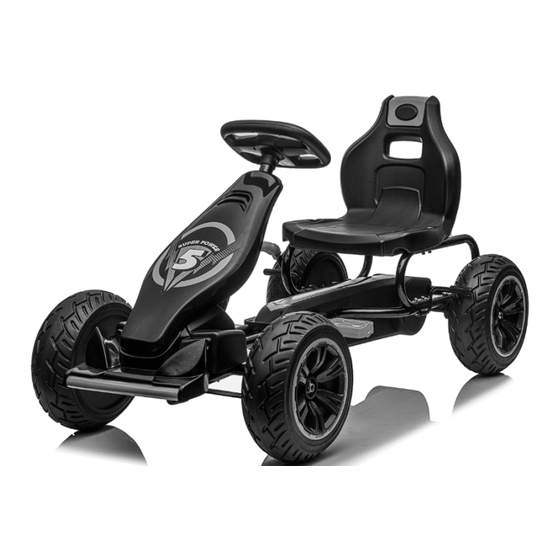
CHILDREN'S Pedal GO KART
IN221000249V02_US_CA
370-256V00
The chain maintain
video please scan the
QR code.
EN
Advertisement

Subscribe to Our Youtube Channel
Summary of Contents for Aosom 370-256V00
- Page 1 IN221000249V02_US_CA 370-256V00 CHILDREN'S Pedal GO KART The chain maintain video please scan the Assembly video please QR code. scan the QR code. IMPORTANT, RETAIN FOR FUTURE REFERENCE: READ CAREFULLY ASSEMBLY INSTRUCTION...
- Page 2 Note: All screws, nuts and small plastic parts are pre-installed in the corresponding position, please follow the steps to remove before you install the product. ● Assembly tools required: Screwdriver wrench (not included)
-
Page 3: Maintenance And Care
WARNING: 1.CHOKING HAZARD—Small parts. Not for children under 3 years. 2.Only allowed for adults to install, keep children away. 3.To be used under the direct supervision of an adult. 4.Just only allow one child to use. 5.Please use on a flat and clean surface. Never use near steps, sloped driveways, hills roadways, alleys, swimming pool areas, road, on grass or wet surfaces or other bodies of water. - Page 4 2. Attach the Rear Wheels 1. Slide the drive bracket into the rear axle. 2-3.attach the drive bracket to the rear axle using M5*25 screws and M5 nuts. 4. Slide the rear wheel into the rear axle so that it is connected to the drive bracket. 5.
- Page 5 3. Attach the Front Wheels & Steering Axle 1. Slide a 12 washer onto the front axle. 2. Slide the wheel into the front axle. 3. Slide a 10 washer onto the front axle. 4. Tighten the lock M10 nut to the end of the front axle using a wrench. Repeat for the other front wheel.
- Page 6 4. Attach the Steering Wheel & Front Cover Remove M5*32 screw & M5 nut from the Steering Wheel. 1. Insert the Steering Wheel to the end of the Steering Axle, align the holes of the Steering Wheel and Steering Axle, 2-3.Secure with M5*32 screw &...
- Page 7 5. Attach the Seat Remove M5*55mm & M5 nut from the Body. 1.Align and assemble the Seat to the Body 2-3.Secure with M5*55mm & M5 nut the Seat. Use your New bicycle 1. Brake:Pull the brake to slow or stop. 2.
- Page 8 Chain Adjustment regulating screw The chain must be at the correct tightness. If too tight, the bicycle will be difficult to pedal. If too loose, the chain can come off the sprockets. Adjust the tightness of the chain as follows: A.
- Page 9 IN221000249V02_US_CA 370-256V00 KART A PÉDALES POUR ENFANTS Vidéo d'assemblage, La vidéo du maintien de veuillez scanner le code la chaîne, veuillez scanner le code QR. IMPORTANT: A LIRE ATTENTIVEMENT ET À CONSERVER POUR CONSULTATION ULTÉRIEURE. Assemblage & manuel d’instructions...
- Page 10 Note : Toutes les vis, écrous et petites pièces en plastique sont préinstallés dans la position correspondante, veuillez suivre les étapes à retirer avant d'installer le produit. ● Outils d'assemblage Clé pour tournevis (Non inclus)
-
Page 11: Entretien Et Maintenance
AVERTISSEMENT : 1. DANGER D'ÉTOUFFEMENT - Petites pièces. Pas conseillé aux enfants de moins de 3 ans. 2.Installation par des adultes uniquement, tenir les enfants à l'écart. 3. À utiliser sous la surveillance directe d'un adulte. 4. Ne doit être utilisé que par un seul enfant à la fois. 5. - Page 12 2. Fixation des roues arrière Vue arrière droite 1. Faites glisser le support d'entraînement dans l'essieu arrière. 2-3. fixez le support d'entraînement à l'essieu arrière à l'aide de vis M5 * 25 et d'écrous 4. Faites glisser la roue arrière dans l'essieu arrière afin qu'elle soit reliée au support d'entraînement.
- Page 13 3. Fixation des roues avant et de L'essieu directeur 1. Faites glisser une rondelle 12 sur l'essieu avant. 2. Faites glisser la roue dans l'essieu avant. 3. Faites glisser une rondelle 10 sur l'essieu avant. 4. Serrez l'écrou de verrouillage M10 à l'extrémité de l'essieu avant à l'aide d'une clé. Répétez l'opération pour l'autre roue avant.
- Page 14 4. Fixation du volant et du capot avant Retirez la vis M5 * 32 et l'écrou M5 du volant. 1. Insérez le volant à l'extrémité de l'essieu directeur, alignez les trous du volant et de l'essieu directeur, 2-3. Fixez le volant avec la vis M5 * 32 et écrou M5. Retirez la vis M4 * 14 de la carrosserie.
- Page 15 5. Fixation du siège Retirez l'écrou M5 * 55mm et M5 de la carrosserie. 1. Alignez et assemblez le siège à la carrosserie 2-3. Fixez le siège avec l'écrou M5*55mm et M5. Utilisation de votre nouveau kart 1.Frein : Tirez sur le frein pour ralentir ou vous arrêter.
- Page 16 Ajustement de la chaîne Vue latérale Vue du bas Vue de l'intérieur Relâcher Vis de réglage Serrer Vue de l'intérieur La chaîne doit être à la bonne étanchéité. Si elle est trop serrée, il sera difficile de pédaler. Si elle est trop desserrée, la chaîne peut se détacher des pignons. Régler le serrage de la chaîne comme suit : A.


Need help?
Do you have a question about the 370-256V00 and is the answer not in the manual?
Questions and answers