Table of Contents
Advertisement
Quick Links
Advertisement
Table of Contents

Related Manuals for aram huvis APM PRO 200

Summary of Contents for aram huvis APM PRO 200
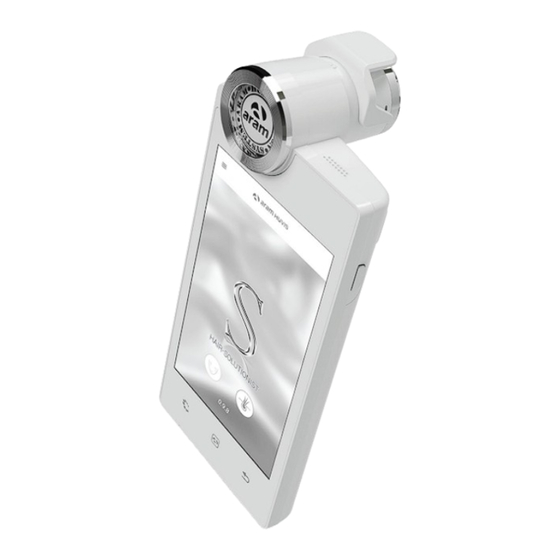
- Page 1 User Manual...
-
Page 2: Table Of Contents
Content Components H/W Parts Device Functions Power On/Off Battery / Status LED Indication System Settings Date & Time Wi-Fi Application Application Settings Customer Switching lens Hair Analysis (APM PRO 202 Lens) Hair Loss Status Scalp Status Hair Density Keratin of Scalp Exposure of Scalp’s Vessel Switching lens Hair Analysis (APM PRO 203 Lens) Hair Thickness... -
Page 3: Components
Components Components Total 3 lens Hair lens Hair lens Hair lens (APM PRO 202) (APM PRO 203) (APM PRO 204) Main unit with hair lens (APM PRO 200) Cradle Cleaning cloth Charger Manual USB cable Air blower... -
Page 4: H/W Parts
H/W Parts Device Functions APM PRO lens LED Indicator Flash button Volume up & down button Flash X1 lens Lens module change button On/off button USB slot (DC 5V 3A) -
Page 5: Power On/Off
H/W Parts Power On/Off To turn on & off the power Press the power button and hold. Then “LED Indicator” will be twinkle and turn to white. Charger can be used for American type & European type. The default is European type. Push the plug up. -
Page 6: Battery / Status Led Indication
H/W Parts Battery / Status LED Indication Deco LED Status LED CAMERA POSITION STATUS STATUS LED DECO LED In use While turning it on Light on Blue light In use When running the app Light on Displayed only on the indicator In use Low battery at the top of the LCD screen... -
Page 7: System Settings
System Settings Date & Time Press button. Touch button. Touch “Date & time”. Touch “Set date”. Change the date and Please check the setting touch “OK” button. is correctly applied. -
Page 8: Wi-Fi
System Settings Wi-Fi Touch button. Touch “Wi-Fi”. Turn on toggle switch. Wi-Fi list will appear. Among the lists, select Wait until the device is the Wi-Fi connection you connected to Wi-Fi. could use. -
Page 9: Application
Application Application Settings Press button. Go to "Settings". Go to "General Settings". Language, version, CRM data Import, Export, Background Setting. -
Page 10: Customer
Application Customer Touch "Customer". Touch to register Input the information. new customer. After putting all When user`s profile Touch button to information, touch was created on the list. start analyzing. Touch user`s profile to start analyzing. -
Page 11: Switching Lens Hair Analysis (Apm Pro 202 Lens)
Application Taking off the lens APM PRO-202 Press the lens module change The lens will be able to pull out. button which located below of the lens part. Hair lens (APM PRO 202) Inserting lens Until the correct lens is inserted, After fitting the marks on both lens indicating label will blink. -
Page 12: Hair Loss Status
Application Hair Loss Status X1 Lens Taken Image Taken Image X1 Lens X1 Lens Touch button to Put the camera onto the Touch “Analysis” to activate camera mode. hair and touch button to check analysis result. capture the image. Front Image Temporal Image X1 Lens Then select the type... -
Page 13: Scalp Status
Application Scalp Status APM PRO-202 APM PRO-202 APM PRO-202 Touch button to Put the camera onto the Touch “Analysis” to activate camera mode. hair and touch button to check analysis result. capture the image. APM PRO-202 Among the samples, Check the result. choose the one which is And swipe to next step. -
Page 14: Hair Density
Application Hair Density APM PRO-202 APM PRO-202 APM PRO-202 Touch button to Put the camera onto the Touch “Analysis” to activate camera mode. hair and touch button to check analysis result. capture the image. APM PRO-202 Count the hair number Check the result. -
Page 15: Keratin Of Scalp
Application Keratin of Scalp APM PRO-202 APM PRO-202 APM PRO-202 Touch button to Put the camera onto the Touch “Analysis” to activate camera mode. hair and touch button to check analysis result. capture the image. APM PRO-202 Among the samples, Check the result. -
Page 16: Exposure Of Scalp's Vessel
Application Exposure of Scalp’s Vessel APM PRO-202 APM PRO-202 APM PRO-202 Touch button to Put the camera onto the Touch “Analysis” to activate camera mode. hair and touch button to check analysis result. capture the image. APM PRO-202 Among the samples, Check the result. -
Page 17: Switching Lens Hair Analysis (Apm Pro 203 Lens)
Application Taking off the lens APM PRO-203 Press the lens module change The lens will be able to pull out. button which located below of the lens part. Hair lens (APM PRO 203) Inserting lens Until the correct lens is inserted, After fitting the marks on both lens indicating label will blink. -
Page 18: Hair Thickness
Application Hair Thickness APM PRO-203 Taken Image APM PRO-203 APM PRO-203 Touch button to Put the camera onto the Touch “Analysis” to activate camera mode. hair and touch button to check analysis result. capture the image. Complete APM PRO-203 Choose one hair and touch Check the result. -
Page 19: Hair Pore Status
Application Hair Pore Status APM PRO-203 APM PRO-203 APM PRO-203 Touch button to Put the camera onto the Touch “Analysis” to activate camera mode. hair and touch button to check analysis result. capture the image. APM PRO-203 Among the samples, Check the result. -
Page 20: Switching Lens Hair Analysis (Apm Pro 204 Lens)
Application Taking off the lens APM PRO-204 Press the lens module change The lens will be able to pull out. button which located below of the lens part. Hair lens (APM PRO 204) Inserting lens Until the correct lens is inserted, After fitting the marks on both lens indicating label will blink. -
Page 21: Cuticle Status
Application Cuticle Status APM PRO-204 Taken Image APM PRO-204 APM PRO-204 Touch button to Put the camera onto the Touch “Analysis” to activate camera mode. hair and touch button to check analysis result. capture the image. Complete Sample Client APM PRO-204 Among the samples, Check the result. -
Page 22: Summary
Application Summary Check the result. Touch Once you select "Show button or each parameter's Recommended Product", name on pentagon graph. product image will pop up as Available to check product image. -
Page 23: Send Result -Email
Application Send Result - Email Touch button. Go to "Send Email". Before sending Email, the device shall be connect- ed to Wi-Fi. Select “Gmail” and “ Select the mail account After selected sender`s always”. to register on the list. mail address, put receiver`s mail address. -
Page 24: Mirroring
Application Mirroring Go to "Settings". Go to "General Settings". Set the mirroring option Capture QR code using QR "On". code reader app. Automatically moved to App store. - Page 25 Application Mirroring Install “Aram VIEWER”. Then, go to “Wi-Fi Setting”. In your mobile device go Mirroring will be started. to Wi-Fi setting. Then find SSID and connect it.
-
Page 26: View Mode
Application View Mode Touch “View”. In view mode, it is able to take pictures with capture button. The user can select The user can mark the analysis parameter to take defect or concern according to pictures in proper mode. the image with note function. -
Page 27: Troubleshooting & Faq
Troubleshooting & FAQ I cannot turn on the device. Connect and charge the device (or the battery) using the adaptor provided the supplier. (The battery charging indicator will be shown on the system main page.) The using time of the battery is different from the manual. The battery using time will be shorten if you put the charged battery in a low or high temperature. - Page 28 Troubleshooting & FAQ I cannot connect to Blue-tooth. Make sure to use the Bluetooth hosting devices that have Bluetooth certified with the logo. You may need an external Bluetooth dongle for those devices that do not have Bluetooth feature. bring the device to closer with the Bluetooth hosting device. Try to re-pair the device with host device.
-
Page 29: Warranty
Warranty The product undergoes strict quality management and inspection process before production and introduction to market. In case of functional or operational defect occurs under normal condition of use within 10 days after purchase, we will repair it for free or replace in new product. When this product goes out under the normal use, we will repair it free of charge under warranty. - Page 30 Warranty Service request form Date of Company purchase Contact person Address : Tel : Product name, serial No : Problems : SHIPPING ADDRESS : #801 Byucksan Technopia, 560, Dunchon-daero, Jungwon-gu, Seongnam-si, Gyeonggi-do, 13230 Republic of Korea Tel: 070-4687-1712 / Fax: 031-732-6330 / Email: support@aramhuvis.com http://www.aramhuvis.com...
- Page 31 Memo...
- Page 32 HEAD OFFICE #401~402 Bundang Seoul National University Hospital Health Care Innovation Park, 172, Dolma-ro, Bundang-gu, Seongnam-si, Gyeonggi-do, 13605 Republic of Korea PRODUCTION DIVISION & FACTORY #909 Byucksan Technopia, 560, Dunchon-daero, Jungwon-gu, Seongnam-si, Gyeonggi-do, 13230 Republic of Korea Tel: 070-4687-1712 / Fax: 031-732-6330 / Email: info@aramhuvis.com http://www.aramhuvis.com...
Need help?
Do you have a question about the APM PRO 200 and is the answer not in the manual?
Questions and answers