
Related Manuals for CORRIVEAU ESSENTIELS IL3008C


Summary of Contents for CORRIVEAU ESSENTIELS IL3008C
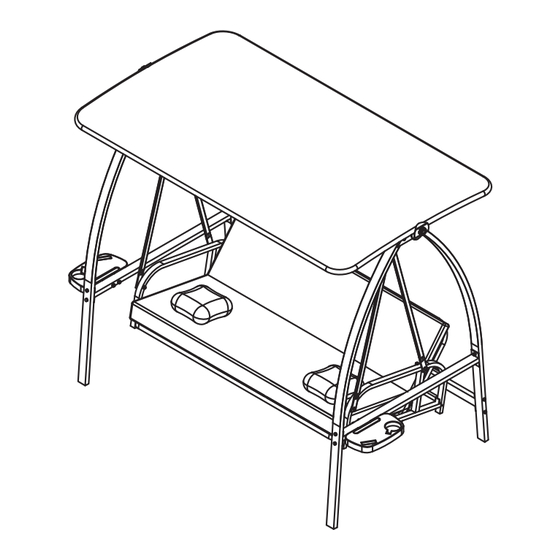
- Page 1 Three-seater swing with bed function Balançoire 3 places avec fonction de lit IL3008C- (2024) Assembly instruction - Plan d’assemblage...
-
Page 2: Important Notice
IMPORTANT NOTICE Pour le français voir pages 4 et 5 Please read and follow all safety statements, warnings, assembly instructions, use & care directions before attempting to assemble. Each of the recommendations must be followed to ensure the utmost solidity. Security Rules Warning : Keep flame and heat sources away from the swing. - Page 3 Care Avoid using a pressure washer. The use of a mild soap with warm water is the best solu- tion for the frame only. A clear water rinse is necessary then. Never use soap on fabric, this will reduce their durability, consequently their lifespan and general look. Warranty Covered : We warrant to the original purchaser for 1 year.
- Page 4 AVIS Veuillez lire et suivre toutes les notifications relatives à la sécurité, précautions générales, ins- tructions d’assemblage, directives d’utilisation et d’entretien avant de procéder à l’assemblage. Règles de sécurité Avertissement : Tenir toutes flammes ou sources de chaleur éloignées de la balançoire. L’armature et le tissu peuvent brûler s’il est exposé...
- Page 5 Entretien Ne jamais laver à l’aide d’une machine à pression élevée. On recommande d’utiliser un savon doux combiné à une eau chaude pour le lavage de la structure. Un rinçage à l’eau claire est requis ensuite. Ne jamais utiliser de savon sur les tissus, cette pratique réduirait leurs propriétés et par conséquent leur longévité...
- Page 6 Parts list: Liste de pièce: Drawing Description Illustration QTÉ Crossbar Traverse Support bar Barre de soutien Front leg Patte avant Back leg Patte arrière Connecting bar Barre de jonction Rear connecting bar Barre de jonction arrière Arm support Support de bras Bras Side table mount Fixation de table...
- Page 7 Parts list: Liste de pièce: Drawing Description Illustration QTÉ Side table Table d'appoint Canopy mount Fixation de l'auvent Seating frame Armature de l'assise Cushion Coussin Side pillow Oreiller Canopy bar Barre de l'auvent Canopy bar Barre de l'auvent Canopy fabric Tissu de l'auvent...
- Page 8 Hardware: Quincaillerie: Drawing Description Illustration QTÉ Canopy bolt Vis de l'auvent Plastic tube Tube en plastique Spring Resort Bolt M6x40mm Vis M6x40mm Bolt M6x50mm Vis M6x50mm Bolt M8x65mm Vis M8x65mm Bolt M6x70mm Vis M6x70mm Bolt M6x85mm Vis M6x85mm Washer M6 Rondelle M6...
- Page 9 Hardware: Quincaillerie: Drawing Description Illustration QTÉ Nut M6 Écrou M6 Nut cover M6 Couvre-écrou M6 Bolt cover M6 Couvre-vis M6 Wrench Clé Allen key M6 Clé Allen M6 Spacer M6 Entretoise M6 Bolt M6x65mm Vis M6x65mm Seating lock Serrure de l'assise Washer M8 Rondelle M8...
- Page 10 Hardware: Quincaillerie: Drawing Description Illustration QTÉ Nut M8 Écrou M8 Nut cover M8 Couvre-écrou M8 Bolt cover M8 Couvre-vis M8 Allen key M8 Clé Allen M8 Spacer M8 Entretoise M8...
- Page 11 Step 1: Do not tight bolts completely yet. Fix the front legs (3) & back legs (4) on the crossbar (1) by using the bolts (24) with washers (26) and nuts (27) as shown in fig. Make sure the back legs (4) are on the same side of the crossbar.
- Page 12 Step 3: Bolt can be tightened completely. Fix the side table mount (9) to the connecting bars (5) by using the bolts (25) with spacers (32), washers (26) and nuts (27) as shown in fig. Étape 3: La vis peut être serrée complètement. Fixer les fixations des tables d'appoint (9) aux barres de jonction (5) en utilisant les vis (25) avec les entretoises (32), des rondelles (26) et des écrous (27) tels qu'illustrés dans l'illustration.
- Page 13 Step 5: Do not tight bolts completely yet. Fix the support bars (2) to the arms (8) by using the bolts (21) with washers (26). Make sure the arms (8) are positioned as shown in fig. Étape 5: Ne serrez pas complètement les vis pour l'instant. Fixer les barres de soutien (2) sur les bras (8) en utilisant les vis (21) et des rondelles (26).
- Page 14 Step 7: Attach the cushion (16) onto the seating frame (15) as shown in fig. Étape 7: Attacher le coussin (16) sur l'armature de l'assise (15) tel qu'illustré dans l'illustration. Step 8: Bolts can be tightened completely. Fix the arms supports (7) with the arms (8) by using the bolts (22) with washers (26), spacers (32) and nuts (27) as shown in fig.
- Page 15 Step 9: Hang the assembly from step 8 onto the assembly frame from step 4 as shown in the fig. Étape 9: Accrocher l'assemblage de l'étape 8 au l'armature d'assemblage de l'étape 4 tel qu'illustré dans l'illustration. Step 10: To use the swing as a bed, take the seating locks (34) and insert them in the designed area as shown in fig.
- Page 16 Step 11: Insert one canopy bar (19) inside the canopy fabric (20) on the side without Velcro as shown in fig. Then, insert the canopy bars (18) inside the canopy fabric (20) & the canopy bar (19) as shown in fig. Étape 11: Insérez une barre de l'auvent (19) à...
- Page 17 10 by using the canopy bolts (11) with the canopy mounts (13) & plastic tubes (12) as shown in fig. We wish you a lot of good moments with your new Corriveau Essentiels swing! Leave us your comments on the Corriveau Outdoor furniture website. We look forward to hearing from you! Étape 13:...
Need help?
Do you have a question about the IL3008C and is the answer not in the manual?
Questions and answers