
Related Manuals for Bison Table 104

Summary of Contents for Bison Table 104
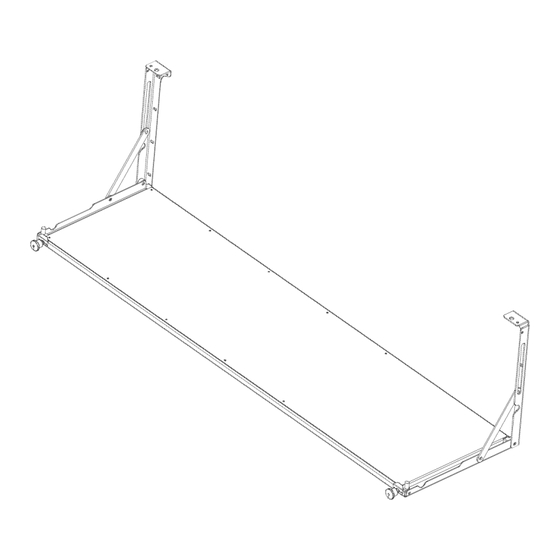
- Page 1 Table 104 Installation Guide - FJ Cruiser Required tools Optional tools ● phillips head screwdriver ● pick ● small drill bit (2 - 3 mm) ● 3 mm hex key ● pencil ● 5 mm wrench ● power drill...
-
Page 2: Installation
M5 medium washers M5 large washers M5 nuts Installation To install the table removing back door trim is required. Removing rear door trim * this procedure is also available as a video on Bison Gear YouTube channel Open back window... - Page 3 v1.0 Remove plastic caps (on top right and left trim corners). Unscrew the screws under the plastic plugs, use a phillips screwdriver. Pry up the left corner of the upholstery (you can use a flathead screwdriver).
- Page 4 v1.0 Pull firmly toward you to pop off upholstery. When all pins are free, push trim up and remove Put removed door trim on a flat surface. Place the table on the trim and align it. Leave access to mounting holes. Using holes in the front panel mark holes using small drill bit or sharp pick.
- Page 5 v1.0 Drill hole in marked position using 5 mm drill bit.
- Page 6 v1.0 Using a 5 x 20 bolt and large washer screw in bracket to the trim. Close the table and check locks alignment. Pin inside the lock must be on the same axis as the socket hole, and the lock should hold on both sides of the table. Mark and drill hole on the opposite side of the table.
- Page 7 v1.0 Repeat steps as for the first bracket. Drill small hole, drill 5 mm hole. Use a 5 x 20mm screw and large washer to screw bracket to the trim. Check if locking pins are in line with the holes and table locks without any issue. If the table closes without any issue use at least two more bolts to attach it in the bottom part.
Need help?
Do you have a question about the Table 104 and is the answer not in the manual?
Questions and answers