Advertisement
Quick Links
Advertisement

Summary of Contents for PowerHome 40415F
- Page 1 MPPT Solar Charge Controller User Manual...
- Page 2 Important safety instructions (This manual contains importantinformation about the safe installation and operation of the solarcharge controller. Please keep this manual for future reference.) This manual contains all the safety, installation and operation instructions oftheseries solar charge controller (hereinafter referred to as “controller”). ◇...
- Page 4 1.MPPT Controller General Information 1 .1 Overview Controller based on multiphase synchronous rectification technology(MSRT)andadvanced MPPT control algorithm, has the features ofhigh response speed ,high reliability.and high industrial standard, MSRT can guarantee very high conversion efficiency in anycharge power, which sharply improves the energy efficiency ofsolar system. Advanced MPPTcontrol algorithm minimize the maximum power point loss rate and loss time, to ensure thetracking efficiency, corresponding speed as well as high conversion efficiency under high orlow power, so that in any situation, products can rapidly track the maximum power point(MPPof PV array to obtain the...
-
Page 6: Maximum Power Point Tracking Technology
1 .3 Maximum Power Point Tracking Technology Due to the nonlinear output of a solar panel or solar array, there is a maximum energy point(Max Power Point, or MPP) on the output curve at which the solar panel achieves its highestefficiency. Traditional solar charge controllers with switch charging PWM technology cannottrack this highest efficiency point of a solar panel, so most ofthe time they work with reducedefficiency and do not extract the full energy available from the solar panel. - Page 7 1 .4 Battery Charging Stage The controller have 3 stages charge mode, Constant Current Charging (Bulk Charging), Constant Voltage Charging (CV) and Floating Charging(CF) for rapid, efficient, and safebattery charging. a) Battery Changing Stage Curve In this stage, the battery voltage has not yet reached the constant voltage point (Equalize or BoostVoltage) and the controller operates in a constant current mode, delivering its maximum current tothe batteries (MPPT charging).
-
Page 8: Installation Instructions
1 .5 Accessories (optional) 2.Installation Instructions 2 .1 Selecting the Mounting Location The position should be taken into consideration ofthe weight and size ofthe controller. The ambient temperature ofthe position should be within the range of -20°℃ ~50°C. A good ventilation environment should be maintained in the position.Install position should avoid direct sunlight 2 .2 Safe Distance Refer to the following safety clearance to ensure that other equipment or objects are notwithin... - Page 9 2 .3 Precautions for controller installation 3. MPPTController Connection 3.1 Connection of the PV Power System 3 .2 Serial connection (string) of PV modules (1) Thenumber ofphotovoltaic modules connected in series As the core component of PV system, controller could be suitable for various types of PV modules and maximize converting solar energy into electrical energy.
- Page 10 NOTE: The above parameter values are given under Standard Test Conditions (STC): irradiance 1000W/m , Module Temperature 25°C, Air Mass 1.5.) NOTE: The above parameter values are given under Standard Test Conditions (STC): irradiance 1000W/m2, Module Temperature 25°C, Air Mass 1.5.) 3 .3 PV Array Input Total Power This MPPT controller has a limiting function of charging current, the charging currentwill be limited within rated range.
- Page 11 3.4 Model of wires and breaker The installation ofinverter must strictly follow the local electrical requirements. The output current of solar panles will be effected by the model ofsolar panel cell, connection setting and the light intensity, so the minimum wire size is design according to the short circuit current of solar panels.
- Page 12 3 .5 Controller opening and closing steps Before you connect the wire, please open the product case. After done it, please closeand locked them, it is helpful to protect the connection port. Make sure that the controller is installed and connected correctly! Opening process: Step 1: open the circuit breaker ①...
-
Page 13: Controller Operation
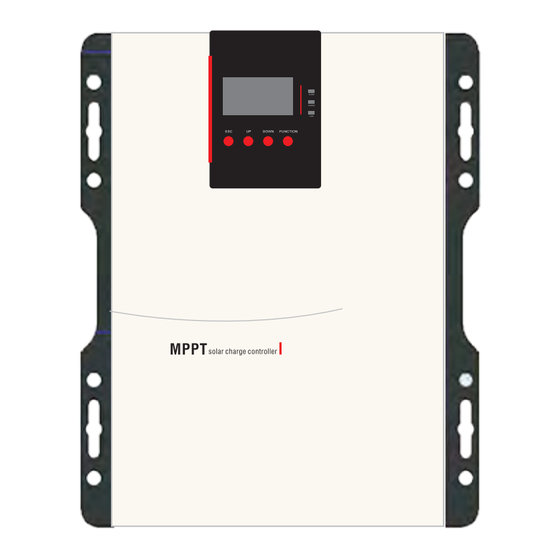
4.Controller Operation 4.1 Indicator Lights Note: Please refer to the charpter 4.3 "Alarming instructions" 4.2 Buttons... - Page 14 4 .3 LCD display (1)Browsing interfaces...
- Page 15 (2) Fault alarm display...
- Page 18 5. Protection,Troubleshooting,System maintenance 5 .1 Protections...
- Page 19 5 .2 Troubleshooting 5.3 System maintenance In order to maintain the best long-term working performance, we recommend to check thefollowing items twice a year Make sure that the airflow around the controller is not blocked, and remove the dirt ordebris from the air outlet ofthe cooling fan.
Need help?
Do you have a question about the 40415F and is the answer not in the manual?
Questions and answers