
Related Manuals for Audiophonics AP310-P250NC


Summary of Contents for Audiophonics AP310-P250NC
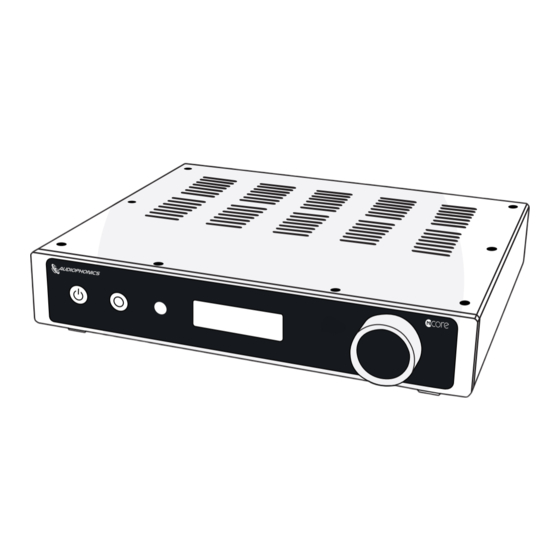
- Page 1 AP310-P250NC AMPLIFICATEUR INTÉGRÉ / INTEGRATED AMPLIFIER Manuel d’utilisation User manual...
-
Page 2: Table Of Contents
Table des matières Table des matières‑ �������������������������������������������������������������������������������������������������������������������������������������������������������������������� 1 Introduction‑ ������������������������������������������������������������������������������������������������������������������������������������������������������������������������������� 2 Conseils d’utilisation et de sécurité‑ ���������������������������������������������������������������������������������������������������������������������������������������� 2 Contenu du package‑ ����������������������������������������������������������������������������������������������������������������������������������������������������������������� 3 Garantie‑ �������������������������������������������������������������������������������������������������������������������������������������������������������������������������������������� 3 Présentation du produit‑ ����������������������������������������������������������������������������������������������������������������������������������������������������������� 4 Utilisation‑ ����������������������������������������������������������������������������������������������������������������������������������������������������������������������������������� 5 Réglages‑ ������������������������������������������������������������������������������������������������������������������������������������������������������������������������������������10 Spécifications‑ ���������������������������������������������������������������������������������������������������������������������������������������������������������������������������11 Mesures‑ ������������������������������������������������������������������������������������������������������������������������������������������������������������������������������������12... -
Page 3: Introduction
Introduction Nous vous remercions pour votre acquisition de cet amplificateur intégré Audiophonics AP310‑P250NC et vous souhaitons une agréable utilisation de celui‑ci. Nous vous recommandons vivement de lire ce mode d’emploi entièrement avant toute utilisation. Ainsi, vous prendrez connaissance de l’ensemble des possibilités de fonctionnement de l’appareil, tout en évitant une potentielle mauvaise manipulation de celui‑ci. -
Page 4: Contenu Du Package
Votre amplificateur Audiophonics AP310‑P250NC est garanti deux ans à partir du jour de livraison. Si votre appareil nécessite une intervention, vous devrez nous contacter via le formulaire de contact accessible via votre compte client sur Audiophonics.fr. La garantie couvre les vices de fabrication à l’exclusion de tout autre dommage, pannes ou défaillances :... -
Page 5: Présentation Du Produit
Présentation du produit Panneau avant POWER INPUT Description Bouton ON/OFF Bouton de sélection de source Récepteur IR Écran Bouton de volume Panneau arrière PRE-OUT ANALOG INPUTS AMP-IN Connection to preamp required XLR R XLR L TRIGGER Description Description Sortie pre‑out TRIGGER IN Entrée XLR TRIGGER OUT... -
Page 6: Utilisation
Télécommande INPUT SELECT Description Bouton ON/OFF Bouton sélection d’entrée Bouton réglages Navigation haut Navigation gauche Navigation droite VOL- VOL+ Navigation bas MUTE Volume ‑ Volume + Bouton mode muet Utilisation Intallation • Assurez‑vous que le réseau électrique de votre domicile fournit une tension comprise entre 110 et 240V. •... - Page 7 Affichage : mode préamplificateur Après la mise sous tension et la mise en route de l’appareil, l’écran de l’AP310‑P250NC affiche le mode du préamplificateur. Gain (+) ou Valeur Entrée actuelle de gain Statut de l'entrée Trigger 1 - Entrée actuelle Affiche l’entrée actuellement active.
- Page 8 Sélection de source Quand l'AP310‑P250NC est allumé et en mode préamplificateur, pour sélectionner une source d'entrée, appuyez brièvement sur le bouton "input" (2) du panneau avant ou le bouton "input" (20) de la télécommande. Avec la télécommande, vous pouvez également utiliser la flèche de navigation haute (22) et basse (26) pour changer la source d'entrée.
- Page 9 Utilisation du trigger L'AP310‑P250NC intègre une entrée (12) et une sortie trigger (13) fonctionnant sur plage de 5‑12VDC. Celles‑ci peuvent être branchées à des entrées et sorties trigger d’autres appareils pour mettre en place une chaîne permettant l’allumage automatique de votre système audio lorsque un signal est reçu et son extinction automatique lorsque plus aucune signal n’est détecté.
- Page 10 ANALOG INPUTS AMP-IN Connection to preamp required XLR R XLR L TRIGGER AP310-P250NC LINE4 BYPASS TRIGGER PRE-OUT AV RECEIVER PREAMP Éteindre l'appareil Appuyez longuement sur le bouton ON/OFF (1) situé sur la face avant de l'appareil ou appuyez sur le bouton ON/OFF de la télécommande afin de mettre l'AP310‑S250NC en mode veille (LED du bouton ON/OFF rouge).
-
Page 11: Réglages
Réglages Acceder aux paramètres Pour accéder à l’écran de configuration de l’appareil, appuyez longuement sur le bouton "input" (2) situé sur la face avant ou sur le bouton "Select" (21) de la télécommande� Trois paramètres s’affichent sur l’écran (4). Appuyez brièvement sur le bouton "input" (2) situé sur la face avant de l'appareil ou les boutons de navigation haut (22) et bas (26) de la télécommande pour sélectionner un paramètre�... -
Page 12: Spécifications
0.0015%% @ 1W, 1kHz THD+N 121dB +6dB Réglage de gain +12dB OLED Écran Non réglable Luminosité de l'écran 50 secondes Économiseur d'écran 110‑240V AC Alimentation 300*295*60mm Dimensions 2�5kg Poids net 1* Amplificateur intégré Audiophonics AP310‑P250NC 1* Télécommande IR Conditionnement 1* Câble d'alimentation secteur... -
Page 13: Mesures
Mesures des performances du module HYPEX NC252MP Performances HYPEX NC252MP Document traduit de l’Anglais par Audiophonics T T T T 0.05 0.05 0.02 0.02 0.01 0.01 0.005 0.005 0.002 0.002 0.001 0.001 0.0005 0.0005 0.0002 0.0002 0.0001 0.0001 100m 200m... -
Page 15: Table Of Contents
Table of contents Table of contents‑ ���������������������������������������������������������������������������������������������������������������������������������������������������������������������14 Introduction‑ �����������������������������������������������������������������������������������������������������������������������������������������������������������������������������15 Usage and safety advice‑ ���������������������������������������������������������������������������������������������������������������������������������������������������������15 Package content‑ ����������������������������������������������������������������������������������������������������������������������������������������������������������������������16 Warranty‑ �����������������������������������������������������������������������������������������������������������������������������������������������������������������������������������16 Product overview‑���������������������������������������������������������������������������������������������������������������������������������������������������������������������17 Operation of the device‑ ����������������������������������������������������������������������������������������������������������������������������������������������������������18 Settings‑ �������������������������������������������������������������������������������������������������������������������������������������������������������������������������������������23 Specifications‑ ���������������������������������������������������������������������������������������������������������������������������������������������������������������������������24 Measurements‑ �������������������������������������������������������������������������������������������������������������������������������������������������������������������������25... -
Page 16: Introduction
Introduction Thank you for purchasing this Audiophonics AP310‑P250NC integrated amplifier. We strongly recommend that you read this manual thoroughly before use. This way, you will be aware of all the possibilities of the device’s operation, while avoiding any potential misuse of it. You will protect yourself and the device from possible damage caused by improper use. -
Page 17: Package Content
Warranty Your Audiophonics AP310‑P250NC amplifier is guaranteed for two years from the date of delivery. If your device requires service, please contact us via the contact form available in your customer account on Audiophonics.com. The warranty covers manufacturing defects to the exclusion of any other damage, failure or malfunction: •... -
Page 18: Product Overview
Product overview Front panel POWER INPUT Description ON/OFF button Input selection button IR receiver Screen Volume button Rear panel PRE-OUT ANALOG INPUTS AMP-IN Connection to preamp required XLR R XLR L TRIGGER Description Description Pre‑out TRIGGER IN XLR input TRIGGER OUT RCA 1 input Right channel speaker terminal RCA 2 input... -
Page 19: Operation Of The Device
Remote control INPUT SELECT Description ON/OFF button Input selection button Settings button Up navigation Left navigation Right navigation VOL- VOL+ Bottom navigation MUTE Volume ‑ Volume + Mute button Operation of the device Intallation • Make sure your home electric network is providing a voltage between 110 and 240V. •... - Page 20 Display : preamplifier mode After powering up, AP310‑P250NC display will show its preamplifier mode. Gain (+) or Gain or Current input value Trigger input status 1 - Current input Displays which input is currently active. Possible values are : • XLR •...
- Page 21 Input selection When the AP310‑P250NC is switched on and in preamplifier mode, to select an input source, short press the "input" button (2) on the front panel or the "input" button (20) on the remote control. With the remote control, you can also use the up (22) and down (26) navigation arrows to change the input source. LINE1 LINE2 LINE4...
- Page 22 Trigger usage The AP310‑P250NC incorporates a trigger input (12) and trigger output (13) operating over a 5‑12VDC range. These can be connected to the trigger inputs and outputs of other devices to set up a chain that automatically switches your audio system on when a signal is received and off when no signal is detected. The trigger on the other device and the cable used to make the connection must be mono.
- Page 23 ANALOG INPUTS AMP-IN Connection to preamp required XLR R XLR L TRIGGER AP310-P250NC LINE4 BYPASS TRIGGER PRE-OUT AV RECEIVER PREAMP Éteindre l'appareil Long press the ON/OFF button (1) on the front panel of the device or press the ON/OFF button on the remote control to put the AP310‑S250NC into stand‑by mode (Power Led is red).
-
Page 24: Settings
Settings Setting mode To access the device configuration screen, press and hold the "input" button (2) on the front panel or the "select" button (21) on the remote control. Three parameters appear on the display (4). Short press the "input" button (2) on the front panel or the up (22) and down (26) navigation buttons on the remote control to select a parameter�... -
Page 25: Specifications
2x150W @ 8 Ohm, THD=1% 0.0015% THD+N 121dB +6dB Gain settings +12dB OLED Screen Non‑adjustable Screen brightness 50 secondes Screen saver 110‑240V AC Power supply 300*295*60mm Dimensions 2�5kg Net weight 1* Audiophonics AP310‑P250NC integrated amplifier 1* IR Remote control Package 1* Power supply cable... -
Page 26: Measurements
HYPEX NC252MP performance measurements...
Need help?
Do you have a question about the AP310-P250NC and is the answer not in the manual?
Questions and answers