Advertisement
Advertisement
Table of Contents

Summary of Contents for Vividia T-200
- Page 1 Operation Instructions for the Infrared Thermal Imager Vividia T-200...
-
Page 2: Table Of Contents
Table of Contents Safety Instruction Preliminary Acquaintance with Infrared Thermal lmager Overview Performance Indices Product Structure Operation Instruction... -
Page 3: Safety Instruction
Preface Respected users: How are you! Thank you for purchasing our instrument. In order to use it in a better manner, we remind you to read the instruction for use carefully before use and keep it properly so as to look up in the future use. Safety Instruction Please ensure that you have read and understood the safety precautions described in the following text before using the product so that you can... - Page 4 If the product case is damaged, don’t use it continuously. Please contact the local distributors or agents of the company under such condition. During the process of use, if the product is found with smoke,spark and the burnt smell, please stop using at once. In case of such condition, the product power supply should be powered off first.After the smoke and peculiar smell disappears completely, please contact the local distributors or agents of the company.
- Page 5 When the plug of the adapter or wire is damaged, stop using immediately. Don’t change the battery unless the plug of the charger is inserted into the socket completely. Do not touch the electric wire with wet hands. It is possible to cause electric shock when touching the electric wire with wet hands.
-
Page 6: Preliminary Acquaintance With Infrared Thermal Lmager
Problem caused by water condensation Don’t bring the instrument into low temperature environment from high tempera-ture environment in a short time or from low temperature environment to high temperature environment. This may result in that the inside of the instrument and appearance produce water condensation. In such condition, the instrument should be placed into portable box or plastic bag. -
Page 7: Overview
production to find the potential problems and prevent occurrence of malfunc- tion. The “non contact” modern detection technology is safe, reliable and quick. It is a type of technical revolution compared with traditional contact detection method.The infrared thermal imaging technology is widely used in the following fields: Power equipment, transmission, transformer line inspection;... - Page 8 Lens Maintenance Prevent damage of the infrared lens: Clean the infrared lens carefully. The lens is provided with refined anti- reflection coating. Don’t clean with force to prevent damage of the anti-reflection coating. Use a cleaning solution for lens maintenance, such as alcohol-based commercial lens cleaners, alcohol, and a lint-free cloth or paper towel.
-
Page 9: Performance Indices
Performance Indices Technical parameters Product model T-200 Detector’s resolution ratio 256x192 Pixel size 12um Response wave band 8-14um NETD <50mk Frame rate 25Hz Lens focal length 3.2mm Minimum imaging distance 0.15m Viewing angle 56°x 42° IFOV 3.75mrad Focus mode Fixed focus... - Page 10 Temperature measurement Celsius and Fahrenheit unit Emissivity setting 0.01-1.0 adjustable Language Chinese, English, German, Italian Operating temperature -10℃--50℃ Protection level IP54 Fall Hardware functions Lighting LED flash Detector 256x192 0.3Mp (652x480) Visible light camera 3.2”LCD 240x320 Display screen CTP3.2” 240x320 Capacitive touch screen 7 functional buttons Buttons...
-
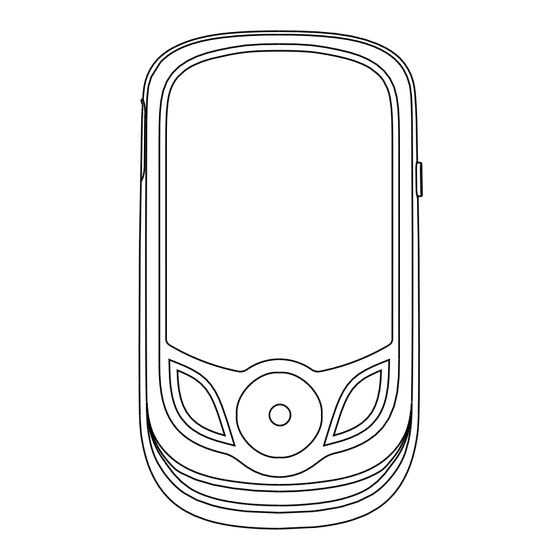
Page 11: Product Structure
Product Structure 1. Instruction to Structure Infrared imaging sensor LED lighting lamp Visible light camera Back Type-C USB Image capture key Selection key/Entry key On/off key/Menu key Navigation key: Up, down, left and right Front... - Page 12 2. Product Structure Temperature range Current emissivity Central point Battery power temperature Color code The highest temperature cursor Temperature cursor at central point The lowest temperature Maximum value/ cursor minimum value of Time field temperature Color code: used to mark the color corresponding to the relative temperature from low to high in the field of version.
-
Page 13: Operation Instruction
3. Key Description On/off key/Menu key Selection key/Entry key Navigation key: Up, down, left and right Operation Instruction Product boot/shutdown Press and hold the “ /MENU” button for more than 3 seconds to turn the Thermal Imaging on or off. LCD screen display After turning on the power, the screen shows the thermal imaging status. - Page 14 “ SELECT/ENTER ” key to determine not to save the image. Video recording In the normal startup and running interface, long press the capture button, the screen will display the prompt “record video?” , if you want to select “Yes” at this time, please press the “...
- Page 15 Cautions: When connecting to the computer, select ‘Safe Eject Device’ and then unplug the data cable to avoid problems such as file system damage. If there are issues such as inability to store, you can find the hard drive on your computer and repair it.
- Page 16 1.“Image overlap” sub menu 1.1. Description of image overlap The image overlap makes it easier for users to understand infrared images by using aligned visual and infrared images. By overlapping images, a visual image of each infrared image can be captured to accurately display the temperature distribution of the target area and share it more effectively with others.
- Page 17 Touch to select the images to be previewed, or click on the up or down Navigation button to select the pictures to be previewed, and press the “SELECT/ENTER” button to view images, as shown in the figure below: Return to previous level Previous picture Next picture Delete pictures...
- Page 18 Videos 20230921-133505 20230921-143535 20230921-143910 20230921-151336 20230921-152123 20230921-152256 By touch, select the videos to be played, or click on the up or down Navigation button to select the videos to be played, and press the “SELECT/ENTER” button to play videos. In the process of video playing, click on the “SELECT/ENTER”...
- Page 19 4. Introduction to “Color Palette” Sub-menu 4.1.Color Palette Description The palette can be used to change the pseudo-color display of the infrared image on the display. Some tune Swatches are better suited for specific applications and can be set up as needed. The palette is divided into: rainbow, iron, cold color, white hot, black hot, five palettes.
- Page 20 Color palette Spectra Iron Cool White Black By touch, select Palette or press the “▲” or “▼” Navigation button to select the palette, and then by touch, click on the left upper corner or press the “ /MENU” button to be able to set the palette successfully. 5.
- Page 21 the product. Understanding the surface emissivity will enable you to obtain correct temperature measure ment result. 5.2. Emissivity Setting The product is provided with four types of object measurement modes: Coarse object (0.95) Semi-matte object (0.85) Semi-shiny object (0.60) Shiny object (0.30) According to the characteristics of the measured objects, users may set the emissivity value through the “self-define”...
- Page 22 and click on the left upper corner to return or press the “ /MENU” button to return to be able to set the emissivity successfully. If you touch to select “User defined” emissivity to go to the editing state, or press the “▲” or “▼”...
- Page 23 5.3. The Emissivity Value of Common Materials Substance Substance Thermal radiation Thermal radiation Bitumen 0.90~0.98 Black cloth 0.98 Concrete 0.94 Human skin 0.98 0.96 Cement Foam 0.75~0.80 Sand 0.90 Charcoal dust 0.96 Earth Paint 0.92~0.96 0.80~0.95 Water Matte paint 0.92~0.96 0.97 0.96~0.98 Black rubber...
- Page 24 6.“ Set ” sub menu Press the “ /MENU” button, from the main menu, select “Set”, and then press the “SELECT/ENTER” button to go to the “Set” sub menu. Settings Auto on/off▶ 5min 20min Brightness▶ Medium High English Chinese Language▶ Italian German Celsius...
- Page 25 6.1. Auto power off setting Press the “ /MENU” button to go to the main menu, from the main menu, by touch, click on the “ Set ” to go to the sub menu or by the Navigation button, select the “Set” sub menu, and press the “SELECT/ENTER” button to go to the sub menu.
- Page 26 Then, by touch, click on the “Brightness” to go to the Set interface, or by the Navigation button, select the “ Brightness ” sub menu, and press the “SELECT/ENTER” button to go to the Set interface, as shown in the figure below: Intensit+t Medium...
- Page 27 Luaguage English Chinese Italian German As shown in the figure above, by touch, select 4 options, or press the “▲” or “▼” Navigation button to select 4 options, and then press the “SELECT/ENTER” button for confirmation. After setting is okay, by touch, click on the left upper corner to return or press the “...
- Page 28 As shown in the figure above, By touch, select “Celsius” or “Fahrenheit” option, or press the “▲” or “▼” Navigation button to select these 2 options, and then press the “SELECT/ENTER” button for confirmation. After setting is okay, by touch, click on the left upper corner to return or press the “...
- Page 29 6.6. Time format setting Press the “ / MENU ” button to go to the main menu, from the main menu, by touch, click on the “Set” to go to the sub menu or by the Navigation button, select the “Set” sub menu, and press the “SELECT/ENTER” button to go to the sub menu.
- Page 30 Then, by touch, click on “Set Time” to go to the Set interface, or by the Navigation button, select the “ Set Time ” sub menu, and press the “SELECT/ENTER” button to go to the Set interface, as shown in the figure below: Set the clock Set date...
- Page 31 As shown in the figure above, there are three columns like “year”, “month” and “date”, and by touch, click on the “▲”or “▼” button of the corresponding columns on the screen to set the corresponding values, or by the “▶” or “◀” Navigation button, select the corresponding columns, and then by the “▲”...
- Page 32 6.8 Cold and hot spots setting Press the “ / MENU ” button to go to the main menu, from the main menu, by touch, click on the “Set” to go to the sub menu or by the Navigation button, select the “Set” sub menu, and press the “SELECT/ENTER” button to go to the sub menu.
- Page 33 Then, by touch, click on the “WIFI” to go to the Set interface, or by the Navigation button, select the “ WIFI ” sub menu, and press the “SELECT/ENTER” button to go to the Set interface, as shown in the figure below: WIFI As shown in the figure above, By touch, select the “Off”...
- Page 34 Thermal Imaging Image Analysis Software Operation Guide Software Installation And Operation 1. Connect the product with a USB cable, and then connect to the computer. Open the removable disk in the computer, find the "INSTALLATION PACKAGE" folder and open it, and click to install the software.
- Page 35 Fusion rate: Moving the slider can realize the fusion of visible light image and infrared thermal image. The left end is a visible light image, and the right end is an infrared thermal image. Palette: In the palette, click the “ ▼ ” icon to choose from five color palettes: rainbow, iron red, cold, white hot, black hot.
- Page 36 5. " "icon, arbitrarily circle the thermal imaging map to take the maximum temperature and the minimum temperature. 6. " "Return icon, when an operation error occurs, you can click this icon to return to the previous operation. 7. " "Delete icon, when you select multiple temperature values and need to cancel all of them, click Delete.
- Page 37 Vividia Technologies www.vividia-tech.com User Manual Version 1.0. March 1st. 2024.
Need help?
Do you have a question about the T-200 and is the answer not in the manual?
Questions and answers