Table of Contents
Advertisement
Quick Links
Advertisement
Table of Contents

Subscribe to Our Youtube Channel
Related Manuals for West Marine 20905022


Summary of Contents for West Marine 20905022
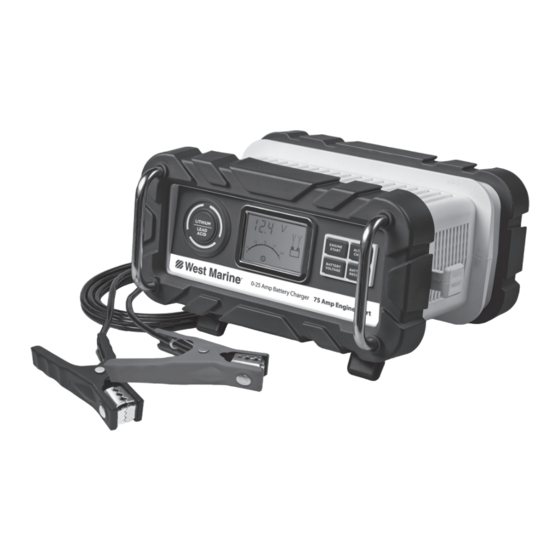
- Page 1 25 Amp Battery Charger PORTABLE DOCKSIDE SKU 20905022...
-
Page 3: Safety Guidelines - Definitions
SAFETY GUIDELINES / DEFINITIONS HAZARD: Indicates an imminently hazardous situation which, if not avoided, will result in death or serious injury. WARNING: Indicates a potentially hazardous situation which, if not avoided, could result in death or serious injury. CAUTION: Indicates a potentially hazardous situation which, if not avoided, may result in minor or moderate injury. -
Page 4: Specific Safety Instructions For Power Cords
eye: Flush the affected eye with clean water and then seek medical attention. If liquid crystal is swallowed: Flush your mouth thoroughly with water. Drink large quantities of water and induce vomiting. Then seek medical attention. SPECIFIC SAFETY INSTRUCTIONS FOR POWER CORDS •... - Page 5 SPECIFIC SAFETY INSTRUCTIONS FOR LEAD-ACID BATTERIES • Use of accessories and attachments: The use of any accessory or attachment not recommended by manufacturer for use with this battery charger could be hazardous. • Stay alert. Use common sense. Do not operate this unit when you are tired or impaired. •...
- Page 6 • Never smoke or allow a spark or flame in vicinity of vehicle battery, engine or battery charger. • Be extra cautious to avoid dropping a metal tool onto the battery. It might spark or short-circuit the battery or another electrical part, and that may cause an explosion. •...
-
Page 7: Charger Location
PREPARING TO CHARGE A LEAD-ACID BATTERY 1. Be sure area around battery is well ventilated while battery is being charged. 2. Remove battery completely from boat/airplane or any confined area before charging. 3. If it is necessary to remove battery from vehicle to charge, or to clean terminals, always remove grounded terminal from battery first. - Page 8 6. For negative-grounded vehicle, connect the Positive (RED) Clamp from battery charger to the positive (POS, P, +) ungrounded post of the battery. Connect the Negative (BLACK) Clamp to the vehicle chassis or engine block away from battery. Do not connect the clamp to the carburetor, fuel lines, or sheet-metal body parts.
- Page 9 Review cautionary markings on this product and on engine. INTRODUCTION ® Congratulations on purchasing your West Marine Battery Charger. Read this Instruction Manual and follow the instructions carefully before using your new battery charger. Battery Chargers...
- Page 10 FEATURES ENGINE START ALTERNATOR CHECK BUTTON LCD SCREEN BUTTON BATTERY CHARGE BUTTON BATTERY VOLTAGE BATTERY RECONDITION CHECK BUTTON BUTTON NEGATIVE (BLACK) POSITIVE (RED) CLAMP CLAMP 120 VOLT AC STORAGE 120 VOLT AC PLUG (NOT SHOWN) COMPARTMENT Battery Chargers 1-877-571-2391...
- Page 11 LCD DISPLAY DETAIL DIGITAL DISPLAY AMPERES/ VOLTAGE/ SECONDS (VARIES BY FUNCTION) BATTERY RECONDITION INDICATOR INDICATOR BATTERY CHARGE CLAMP GAGE ICONS FAULT ICON BATTERY RECONDITIONING ICONS ARROW ICONS BATTERY ICON ALTERNATOR ICON LOW SURROUNDING OVERHEAT ALARM ENGINE START HIGH SURROUNDING TEMPERATURE ICON ICON ICON TEMPERATURE ICON...
- Page 12 CAUTION: Please make sure you select the proper charge mode to charge a 12V lithium LiFePO4 battery or a 12V lead acid. If the clamps are INCORRECTLY connected with regard to polarity, the LCD screen will display the following (the “+” and “–” inside the battery icon and the fault icon will flash and the clamp icons, the battery icon and the gauge without the pointer will light) and a warning will sound until the clamps are disconnected: Unplug the charger;...
- Page 13 screen will display the following (the digital readout shows “F04”, the clamp icons, arrow icons, battery icon and the gage without the pointer will light solid): Disconnect the charger. Have the battery checked by a qualified technician. 4. When the battery is completely charged, the unit automatically goes into float charge mode and the LCD screen displays the following: 5.
- Page 14 Notes: If the clamps are correctly connected with regard to polarity and the unit is properly connected to the AC outlet, the unit will be in lithium charge mode and the LCD screen will display the following (the clamp icons, arrow icons, the battery icon and the gauge without the pointer light solid); the LI and battery voltage will display alternatively.
-
Page 15: Checking The Battery Voltage
When disconnecting the charger, disconnect the AC cord, remove clamp from the vehicle chassis, and then remove the clamp from the battery terminal. Checking the Battery Voltage TO CHECK THE BATTERY VOLTAGE IN CHARGING MODE: Press the battery voltage check button and the LCD screen will display the following: The digital display shows the current voltage of the connected battery and LI alternatively for 10 seconds in lithium charging mode. - Page 16 3. If the unit detects that the alternator is out of typical voltage range, the LCD screen will display the following: The fault icon will flash, and the alternator icon, “ALT” and the gauge without the pointer will light solid. 4.
-
Page 17: Reconditioning The Battery
When disconnecting the charger, disconnect the AC cord, remove the clamp from the vehicle chassis, and then remove the clamp from the battery terminal. Reconditioning the Battery IMPORTANT: Reconditioning is only to be used with lead acid batteries. Periodic reconditioning is recommended to maintain a battery’s optimum performance. Battery recondition sends a series of electrical pulses to break up the crystalline form of lead sulfate and turn these chemicals into useful battery electrolytes. -
Page 18: Care And Maintenance
3. When “00” is reached, a beep will sound, engine start icon ( ) will begin flashing. The vehicle is ready to start. 4. Crank the engine using manufacturer’s guidelines, typically in 3 to 5 second bursts. The digital display shows “5 sec.” indicating a 5-second countdown. 5. -
Page 19: Troubleshooting
This manufacturer’s warranty does not apply to accessories, bulbs, fuses and batteries; defects resulting from normal wear and tear, accidents; damages sustained during shipping; alterations; unauthorized use; neglect, misuse, abuse; and failure to follow instructions for care and maintenance for the product. This manufacturer’s warranty gives you, the original retail purchaser, specific legal rights and you may have other rights which vary from state to state or province to province. -
Page 20: Fcc Compliance
FCC COMPLIANCE This device complies with Part 15 of the FCC Rules. Operation is subject to the following two conditions: (1) this device may not cause harmful interference, and (2) this device must accept any interference received, including interference that may cause undesired operation. - Page 21 How Long Does This Limited Warranty Last? This limited warranty is valid for one (1) year from the date of the original retail purchase from West Marine within the United States (the “Limited Warranty Term”).
- Page 22 We use new and refurbished parts made by various manufacturers in performing warranty repairs and in building replacement parts and systems. Refurbished parts and systems are parts or systems that have been returned to West Marine, some of which were never used by a customer.
Need help?
Do you have a question about the 20905022 and is the answer not in the manual?
Questions and answers