Table of Contents
Advertisement
Available languages
Available languages
Quick Links
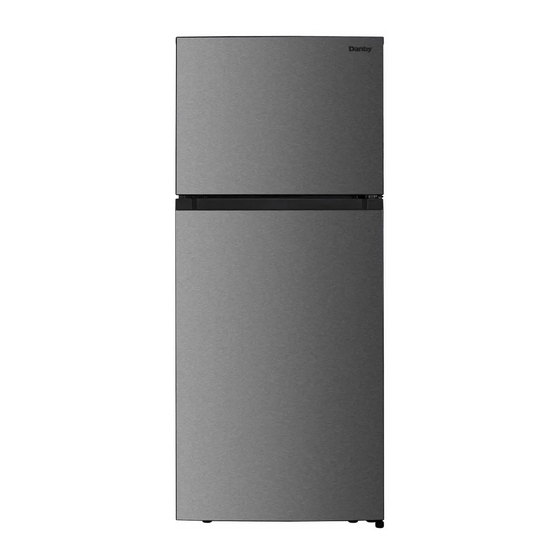
MODEL * MODÈLE * MODELO
DFF176B1SLDB
DFF176B1WDB
FROST FREE REFRIGERATOR
Owner's Manual...............................................1 - 9
RÉFRIGÉRATEUR SANS GIVRE
Manuel du propriétaire...................................10 - 18
REFRIGERADOR LIBRE DE ESCARCHA
Manual del propietario.................................19 - 27
Danby Products Limited, Guelph, Ontario, Canada N1H 6Z9
Danby Products Inc. Findlay, Ohio, U.S.A. 45840
www.danby.com
Printed in China | Imprimé en Chine | Impreso en China
2024.03.04
Advertisement
Table of Contents

Related Manuals for Danby DFF176B1SLDB


Summary of Contents for Danby DFF176B1SLDB
- Page 1 Manuel du propriétaire........10 - 18 REFRIGERADOR LIBRE DE ESCARCHA Manual del propietario.........19 - 27 Danby Products Limited, Guelph, Ontario, Canada N1H 6Z9 Danby Products Inc. Findlay, Ohio, U.S.A. 45840 www.danby.com Printed in China | Imprimé en Chine | Impreso en China...
- Page 2 2. Visit www.Danby.com to access self-service tools, FAQs and much more by searching your model number in the search bar. 3. For the Quickest Customer Service, please fill out the web form at www.danby.com/ support. Your submission will go directly to an expert on your particular appliance.
-
Page 3: Read And Follow All Safety Instructions
Important Safety Information READ AND FOLLOW ALL SAFETY INSTRUCTIONS SAFETY REQUIREMENTS SAFETY REQUIREMENTS DANGER: Risk of fire or explosion. Flammable This appliance is not intended for use by persons refrigerant used. Do not puncture refrigerant tubing. (including children) whose physical, sensory or mental capabilities may be different or reduced, or who lack •... -
Page 4: Leveling Instructions
OPERATING INSTRUCTIONS FEATURES LOCATION 1. Freezer Temperature Control • Two people should be used when moving the 2. Refrigerator Temperature Control appliance. 3. Refrigerator Shelves (2) 4. Crisper Drawers (2) • Remove interior and exterior packaging prior to Glass Crisper Cover (not shown) installation. -
Page 5: Temperature Control Refrigerator
OPERATING INSTRUCTIONS TEMPERATURE CONTROL TEMPERATURE CONTROL REFRIGERATOR FREEZER The refrigerator temperature control is located on the upper back section of the refrigerator compartment. On First Set Up The temperature control will regulate the actual cooling • Set the freezer temperature to “Coldest” by turning cycle while the control knob in the freezer compartment the knob. -
Page 6: Door Reversal Instructions
OPERATING INSTRUCTIONS DOOR REVERSAL INSTRUCTIONS Required Parts: Required Tools: Flathead Left hinge Left hinge cover screwdriver Phillips Left middle screwdriver Left middle stopper metal stoppers (x2) block (x2) The cover of the middle hinge’s hole Wrench on the right of the refrigerator door If the appliance is placed on its back or side during this process it must be allowed to stand upright for 6 hours before plugging in to avoid damage to internal components. - Page 7 OPERATING INSTRUCTIONS 8. Remove your refrigerator’s front feet by hand then remove the lower hinge by Phillips screwdriver. 9. Reassemble the bottom hinge: A. Remove the bottom hinge pin from the lower hinge with a wrench. B. Turn the bottom hinge over. C.
-
Page 8: Power Failure
CARE & MAINTENANCE CLEANING DEFROST Ensure the appliance is unplugged before cleaning. This appliance is equipped with an automatic defrost function and does not require manual defrosting. Defrost • To clean the inside of the appliance, use a soft cloth water from the appliance is channeled into a drip tray and a solution of a tablespoon of baking soda to one located near the compressor. -
Page 9: Frequently Asked Questions
Reference the energy card attached to the front of the appliance or go to www.danby.com and visit the corresponding product page to find a copy of the energy card. -
Page 10: Troubleshooting
TROUBLESHOOTING No power • A fuse may be blown or the circuit breaker tripped • Plug not fully inserted into the wall outlet Internal temperature not cold enough • Temperature setting is too warm • The door is not shut properly or opened excessively •... - Page 11 Nothing within this warranty shall imply that Danby will be responsible or liable for any spoilage or damage to food or other c...
- Page 12 1. Lisez votre manuel du propriétaire pour obtenir de l’aide à l’installation, au dépannage et à la maintenance. 2. Visitez www.Danby.com pour accéder aux outils en libre-service, aux FAQ et bien plus encore en recherchant votre numéro de modèle dans la barre de recherche.
-
Page 13: Instructions De Mise À La Terre
Consignes de sécurité importantes LIRE ET SUIVRE TOUTES LES INSTRUCTIONS DE SÉCURITÉ EXIGENCES DE SÉCURITÉ EXIGENCES DE SÉCURITÉ Cet appareil n’est pas destiné à être utilisé par des DANGER : Risque d’incendie ou d’explosion. Liquide personnes (y compris des enfants) dont les capacités frigorigène inflammable utilisé. -
Page 14: Instructions D'installation
INSTRUCTIONS D’INSTALLATION EMPLACEMENT CARACTÉRISTIQUES • Deux personnes doivent être utilisées pour déplacer 1. Contrôle de la température du congélateur l’appareil. 2. Contrôle de la température du réfrigérateur 3. Tablettes de réfrigérateur (2) • Retirer l’emballage intérieur et extérieur avant 4. Bacs à légumes (2) l’installation. -
Page 15: Consignes D'utilisation
CONSIGNES D’UTILISATION CONTRÔLE DE LA TEMPÉRATURE CONTRÔLE DE LA TEMPÉRATURE RÉFRIGÉRATEUR CONGÉLATEUR La commande de température du réfrigérateur est située sur la partie arrière supérieure du compartiment réfrigérateur. La commande de température règle le cycle de refroidissement proprement dit, tandis que le bouton Lors de la première installation de commande situé... -
Page 16: Instructions Pour L'inversion De La Porte
CONSIGNES D’UTILISATION INSTRUCTIONS POUR L’INVERSION DE LA PORTE Pièces nécessaires: Outils nécessaires: Charnière Cache de Tournevis à gauche charnière gauche tête plate Tournevis Bloc métallique cruciforme Butoirs centraux de butoir central gauches (x2) gauche (x2) Le cache du trou de la charnière centrale sur le Clé... - Page 17 CONSIGNES D’UTILISATION Goupille de 8. Retirez les pieds avant de votre réfrigérateur à la main, puis retirez la charnière charnière inférieure à l’aide d’un tournevis cruciforme. Clé 9. Réassemblez la charnière inférieure : A. Retirez la goupille de charnière inférieure de la charnière inférieure à...
-
Page 18: Soins Et Entretien
SOINS ET ENTRETIEN DÉGIVRER NETTOYAGE Assurez-vous que l’appareil est débranché avant de Cet appareil est équipé d’une fonction de dégivrage nettoyer une partie de l’appareil. automatique et ne nécessite pas de dégivrage manuel. L’eau de dégivrage de l’appareil est acheminée dans un •... -
Page 19: Questions Fréquemment Posées
Reportez-vous à la carte d’énergie attachée à l’avant de l’appareil ou visitez le site www.danby. com et visitez la page produit correspondante pour Comment régler la température? trouver une copie de la carte d’énergie. -
Page 20: Dépannage
DÉPANNAGE L’appareil n’est pas alimenté • Un fusible est peut-être grillé ou le disjoncteur s’est déclenché • La fiche n’est pas complètement insérée dans la prise murale Température interne pas assez froide • Le réglage de la température est trop chaud •... - Page 21 Aucune partie de la garantie ne prévoit implicitement que le fabricant sera tenu responsable des dommages subis par les aliments ou Nothing within this warranty shall imply that Danby will be responsible or liable for any spoilage or damage to food or other c ontents of this appliance, whether due d’autres types de contenu, qu’ils soient causés par la défectuosité...
- Page 22 3. Para obtener el servicio al cliente más rápido, complete el formulario web en www. danby.com/support. Su envío irá directamente a un experto en su dispositivo en particular. Nuestros tiempos de respuesta promedio son entre 20 minutos y 2 horas, durante el horario comercial EST.
-
Page 23: Instrucciones De Conexion A Tierra
Importantes Instrucciones de Seguridad LEA Y SIGA TODAS LAS INSTRUCCIONES DE SEGURIDAD REQUERIMIENTOS DE SEGURIDAD REQUERIMIENTOS DE SEGURIDAD Este aparato no está diseñado para ser usado por PELIGRO: Riesgo de incendio o explosión. Refrigerante personas (incluyendo niños) cuyas capacidades inflamable usado. No perforar la tubería del físicas, sensoriales o mentales pueden ser diferentes refrigerante. - Page 24 INSTRUCCIONES DE INSTALACIÓN UBICACIÓN CARACTERISTICAS 1. Control de temperatura del congelador • Deben utilizarse dos personas para trasladar el 2. Control de temperatura del frigoríficol aparato. 3. Estante del frigorífico (2) 4. Cajones para verduras (2) • Retire el embalaje interior y exterior antes de la Tapa de cristal para cajones (no se muestra) instalación.
-
Page 25: Instrucciones De Operación
INSTRUCCIONES DE OPERACIÓN CONTROL DE TEMPERATURA CONTROL DE TEMPERATURA REFRIGERADOR CONGELADOR El control de temperatura del frigorífico se encuentra en la parte superior trasera del compartimento frigorífico. En la primera instalación El control de temperatura regulará el ciclo de • Ajuste la temperatura del congelador a “El Más refrigeración propiamente dicho, mientras que el mando Frío”... - Page 26 INSTRUCCIONES DE OPERACIÓN INSTRUCTIONS POUR L’INVERSION DE LA PORTE Piezas necesarias: Herramientas necesarias: Cubierta Bisagra Destornillador de de bisagra izquierda cabeza plana izquierda Destornillador Bloque metálico Phillips Topes centrales del tope central izquierdos (x2) izquierdo (x2) La cubierta del agujero de la bisagra central en Llave inglesa el lado derecho de la puerta del refrigerador Si el electrodoméstico se coloca boca abajo o de lado durante este...
- Page 27 INSTRUCCIONES DE OPERACIÓN Pasador de 8. Quite los pies delanteros de su refrigerador a mano y luego quite la la bisagra bisagra inferior con un destornillador Phillips. Llave inglesa 9. Reensamble la bisagra inferior: A. Retirez la goupille de charnière inférieure de la charnière inférieure à...
-
Page 28: Cuidado Y Mantenimiento
CUIDADO Y MANTENIMIENTO DESCONGELAR LIMPIEZA Este aparato está equipado con una función Asegúrese de que la unidad esté desenchufada antes de de descongelación automática y no requiere limpiar cualquier parte del aparato. descongelación manual. El agua de desescarche del aparato se canaliza hacia una bandeja de goteo •... -
Page 29: Preguntas Frecuentes
Consulte la tarjeta de energía que se encuentra en la parte frontal del aparato o vaya a www.danby. com y visite la página del producto correspondiente ¿Cómo configuro la temperatura? para encontrar una copia de la tarjeta de energía. - Page 30 SOLUCIÓN SUGERIDA No funciona • Es posible que se haya fundido un fusible o que se haya disparado el disyuntor • El enchufe no está completamente insertado en el tomacorriente de pared La temperatura interna no es lo suficientemente fría •...
- Page 31 Los cargos por transporte desde y hacia el lugar en que se efectúe el servicio técnico no están cubiertos por esta garantía y son de responsabilidad del comprador. Nothing within this warranty shall imply that Danby will be responsible or liable for any spoilage or damage to food or other c ontents of this appliance, whether due Nada dentro de esta garantía implica que Danby será...
- Page 32 Manuel du propriétaire........10 - 18 REFRIGERADOR LIBRE DE ESCARCHA Manual del propietario.........19 - 27 Danby Products Limited, Guelph, Ontario, Canada N1H 6Z9 Danby Products Inc. Findlay, Ohio, U.S.A. 45840 www.danby.com Printed in China | Imprimé en Chine | Impreso en China...
Need help?
Do you have a question about the DFF176B1SLDB and is the answer not in the manual?
Questions and answers