Advertisement
Quick Links
Advertisement

Related Manuals for Stortech SNB-20XX0T Series


Summary of Contents for Stortech SNB-20XX0T Series
- Page 1 NETWORK CAMERA Installation and Programming Manual SNB-20XX0T Series Version 1 05/2023...
- Page 2 (LAN) • Connecting directly to a DHCP server Stortech Electronics does its best to ensure the integrity and accuracy of the contents in this Router via the PPPoE/Cable Modem • document and cannot guarantee this. The outcome of using this document shall be entirely the user’s own responsibility.
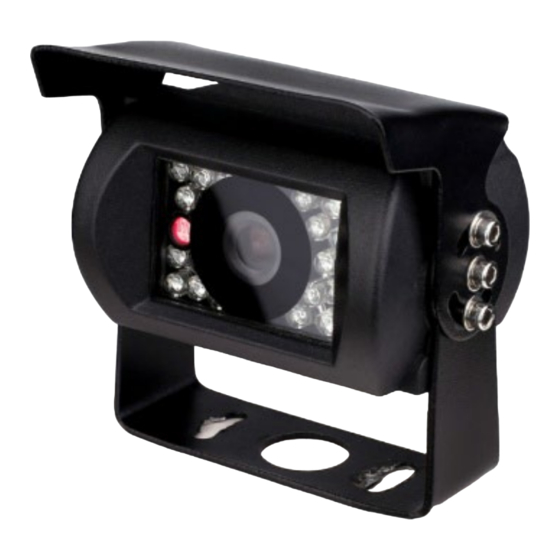
- Page 3 Overview Recommended PC Specifications Product Features CPU: Intel(R) Core (TM) i7 3.4 GHz or higher • • Max. 2megapixel (1920 x 1080) resolution • RAM: 8G or higher • 2.1mm & 3.6mm lens options • Supported OS: Windows 7, 8.1, 10, •...
- Page 4 Installation This camera is waterproof IP67, however the RJ45 socket on the Cat6 is not unless it is paired with the correct weatherproof plug. Precaution Before installing the camera ensure you read out the following instructions: • The wall or ceiling that the camera is installed upon to withstand 5 x times the weight of the camera.
- Page 5 This camera can be connected to using Stortech VMS software, a Network Video Recorder (NVR) or a Web-Browser. This manual will show how to connect and set up via a Web-Browser. The set up via Stortech’s VMS software, or an NVR, please refer to the separate manuals.
- Page 6 Remote Setting Camera Config OSD Configuration 1. Name Choose the camera’s name 2. Additional Overlay Such as resolution information 3. Channel Display Enable/Disable 4. Time Display Enable/Disable Image Control 1. Default Returns this page to factory default 2. Smart Night Prioritise, White light, Infra-Red light, or Intelligent Light (Camera decides best option).
- Page 7 Remote Setting Privacy Zones The ability to set up to 4 separate zones to hide sensitive areas from view. Network Configuration 1. IP Type Static, DHCP, Auto Dynamic Host Configuration Protocol, 2. Auto IP IPv4, IPv6 3. IP Address Entering the Static IP Address 4.
- Page 8 Remote Setting Third Party Trigger Not applicable in European and UK Markets RTSP Streaming port 1. RTSP RTSP: Used to transfer videos in the RTSP mode; the default is 554. P2P Configuration Not applicable in European and UK Markets...
- Page 9 Remote Setting Code Parameters There are 10 video streams coming from the camera, the MainStream and 9 SubStream. The process of configuration is the same. 1. Stream Type Video or Video & Audio 2. Video Codec H.264 / H.265 Compression 3.
- Page 10 Remote Setting Alarm Config 1. Alarm Out 1 Out Put 2. AlamOut Name Selectable Name 3. AlamOut Delay Custom/Keep 1 – 600 System Config 1. Date Format DD-MM-YY, YY-MM-DD etc. 2. Time Format 12-Hour / 24-Hour Clock 3. Device date time Synchronic with local PC date/time 4.
- Page 11 Local Setting User Management There are 6 Admin (x 1) and 5 user accesses to the camera, only Admin has the ability tole to change any parameters. Device Info This is for information only, showing Firmware, software, Device Serial Number and other important pieces of information. PTZ Setting 1.
- Page 12 Specifications Auto Reboot 1. Maintenance Mode Select the Reboot frequency 2. Week Plan Select the day for the Reboot 3. Maintenance Time Select the Reboot time 4. Next Maintenance Time The time the next Reboot is planned Firmware (F/W) Upgrade When new F/W is released, it can be loaded into the camera from here.
- Page 13 Local Setting 1. Local Disk Choose the recording disk 2. Record Path Video recording position 3. Snapshot Path Image recording position 4. File Type Recording format Interval: video recording time (1/5/15/30/60min) 5. Save Saving the changes...
- Page 14 Remote Setting Intelligent Detection Human shape detection 1. Enable Enable/ Disable 2. Sensitivity High, Medium, Low 3. Type Sound output, Light alarm, Trigger Alarm out Motion 1. Enable Enable/ Disable Defence Area The area of interest split into up to 4 zones. There are 6 shape options to maximise your coverage.
- Page 15 Whilst every effort has been made to ensure the accuracy of the information provided, no liability can be undertaken for any errors or omissions. All dimensions stated in this document are approximate. Stortech Electronics Ltd reserves the right to alter the specifications and introduce changes...
- Page 16 Light Alarm 1. Lighting mode Always Open / Twinkle (Flashing) 2. Delay record (1-60 secs) N.B. This function is only triggered by human movement and will only work during the daylight hours (Not available in this camera, need to connect with different IR LED board) Overlay settings.
- Page 17 Whilst every effort has been made to ensure the accuracy of the information provided, no liability can be undertaken for any errors or omissions. All dimensions stated in this document are approximate. Stortech Electronics Ltd reserves the right to alter the specifications and introduce changes...
- Page 18 The camera connected to the network is not Some cameras are powered via POE, ensure the POE camera is connected to a POE switch detected in the Stortech VMS software program. If the transmission method is set to multicast, check whether the router the camera is ...
- Page 19 Whilst every effort has been made to ensure the accuracy of the information provided, no liability can be undertaken for any errors or omissions. All dimensions stated in this document are approximate. Stortech Electronics Ltd reserves the right to alter the specifications and introduce changes...
Need help?
Do you have a question about the SNB-20XX0T Series and is the answer not in the manual?
Questions and answers