Table of Contents
Advertisement
Quick Links
Advertisement
Table of Contents
Troubleshooting

Related Manuals for Wexxar BEL 290T


Summary of Contents for Wexxar BEL 290T
- Page 1 6135...
- Page 2 BEL 290T Fully Automatic Case Sealer...
- Page 3 ERIAL UMBER 6135 UILT RUBBERMAID 3415 E. 12 PLANT 1087 – WINFIELD MFG WINFIELD KS 67156 UNITED STATES 11/20/20...
- Page 4 BEL 290T Fully Automatic Case Sealer...
-
Page 5: Table Of Contents
BEL 290 Automatic Case Sealer Contents ABOUT THIS MANUAL This manual covers the following models: . . . . . . . . . . . . . . . . . . . . . . . . . . . . . . . . . . . . . . . . . . . . . . . . . . . . . . 3 C U . . . . . . . . . . . . . . . . . . . . . . . . . . . . . . . . . . . . . . . . . . . . . . . . . . . . . . . . . . . . . . . . . . . . . . . . . . . 3 ONTACT S . . . . . . . . . . . . . . . . . . . . . . . . . . . . . . . . . . . . . . . . . . . . . . . . . . . . . . . . . . . . . . . . . . . . . . . . . . . . . 3 ARTS ERVICE , C , W . . . . . . . . . . . . . . . . . . . . . . . . . . . . . . . . . . . . . . . . . . . . . . . . . . . . . . . . . . . . . . . . . 4 OTES AUTIONS ARNINGS . . . . . . . . . . . . . . . . . . . . . . . . . . . . . . . . . . . . . . . . . . . . . . . . . . . . . . . . . . . . . . . . . . . . . . . . . . . . . . . . . . . 4 ISCLAIMER SAFETY C . . . . . . . . . . . . . . . . . . . . . . . . . . . . . . . . . . . . . . . . . . . . . . . . . . . . . . . . . . . . . . . . . . . . . . . . . 5 AFETY ONSIDERATIONS S . . . . . . . . . . . . . . . . . . . . . . . . . . . . . . . . . . . . . . . . . . . . . . . . . . . . . . . . . . . . . . . . . . . . . . . . . . . . . 5 AFETY TANDARDS ... - Page 6 BEL 290 Automatic Case Sealer To Adjust the Remote Demand Settings: . . . . . . . . . . . . . . . . . . . . . . . . . . . . . . . . . . . . . . . . . . . . . . . . . . . . . . . 34 C P S . . . . . . . . . . . . . . . . . . . . . . . . . . . . . . . . . . . . . . . . . . . . . . . . . . . . . . . . . . . . . 34 IEWING RODUCTION PEED C J . . . . . . . . . . . . . . . . . . . . . . . . . . . . . . . . . . . . . . . . . . . . . . . . . . . . . . . . . . . . . . . . . . . . . . . . . . 35 LEARING BEL 290 Standard . . . . . . . . . . . . . . . . . . . . . . . . . . . . . . . . . . . . . . . . . . . . . . . . . . . . . . . . . . . . . . . . . . . . . . . . . . 35 BEL 290 Auto Adjust . . . . . . . . . . . . . . . . . . . . . . . . . . . . . . . . . . . . . . . . . . . . . . . . . . . . . . . . . . . . . . . . . . . . . . . 35 MAINTENANCE M S . . . . . . . . . . . . . . . . . . . . . . . . . . . . . . . . . . . . . . . . . . . . . . . . . . . . . . . . . . . . . . . 37 REVENTIVE AINTENANCE CHEDULE ‐D C S M . . . . . . . . . . . . . . . . . . . . . . . . . . . . . . . . . . . . . . . . . . . . . . . . . . . . . . . . . 38 RIVE ONVEYOR YSTEM...
-
Page 7: About This Manual
BEL 290 Automatic Case Sealer About this Manual 1 ABOUT THIS MANUAL This Operation and Service Manual was written to assist you in installing, operating, troubleshooting, maintaining, and repairing your Wexxar BEL 290. Please read the manual carefully, as it contains the necessary information required to extend the service life of this machine to its fullest. This manual covers the following models: • BEL290T Automatic Case Sealer (top and bottom) ‐ Tape • BEL290H Automatic Case Sealer (top and bottom) ‐ Hot Melt •... -
Page 8: Notes , Cautions , And Warnings
Warnings alert you to the possibility that taking a specific action, or failing to take a specific action, could cause injury. This icon is used to reference content or instructions that can be found in supplemen‐ tary documentation. Disclaimer While every effort has been made to ensure the completeness and accuracy of this manual, Wexxar assumes no responsibility or liability for any losses or damages resulting from the use of the information contained in this document. However, Wexxar is committed to providing manuals that meet all of your needs in the operation and service of your machine. We would appreciate any suggestions you may have for the improvement of this manual. -
Page 9: Safety
WARNING Any electrical or mechanical modifications to this equipment without the prior written consent of WEXXAR may void your warranty. Unauthorized modifications can also result in personal injury, death, or destruction of the equipment. Safety Considerations At WEXXAR, our commitment to workplace safety has made us a world‐class leader in the packaging industry due to our adoption of the following best practices: • Fully automatic functionality, requiring minimal operator interaction. • Advanced safety guarding with keyed interlock switches. • Lock‐out provision on electrical and pneumatic main shut‐offs. • Intuitive cautionary labeling demonstrating electrical and mechanical risks. -
Page 10: Interlock Guard Doors
BEL 290 Automatic Case Sealer Safety • Do not operate the BEL 290 until it is completely set up and installed properly, and you are familiar with its operation. • Do not operate machine without guards and safety mechanisms in place and functioning. • Do not attempt to enter the machine for any reason while it is powered or the air pressure is still • Do not wear neckties, jewelry, loose clothing, or other items that can get caught in moving parts or mechanisms near the machine. • Do not operate, troubleshoot, or maintain the machine while under the influence of any type of drug or alcohol. • Always observe all safety warnings and notices on the machine and in this manual. • Do not use solvents when cleaning or maintaining the machine. • All installation wiring must comply with applicable local codes. Interlock Guard Doors • The interlock guard doors are meant to keep personnel out of contact of moving parts while the machine is operating. Do not operate the BEL 290 with these safety devices removed or disabled. • Opening any of the guard doors on the BEL 290 disables all machine functions. Lock‐out Compliance • The BEL 290 is lock‐out / tag‐out compliant on both the electrical and pneumatic main shut‐offs. • Ensure that you lock out the BEL 290 and adhere strictly to the safety precautions listed in this chapter before clearing any jams or performing any repairs and maintenance. Compressed Air • The air valve shuts off when an E‐Stop is pushed, the guard doors are opened, or when the main power is switched Off. • Before starting service or repair work on the BEL 290, lock out the air supply. • Exercise caution when switching the compressed air back On. Stay well clear of all moving parts, as they may move quickly when the pressure is reapplied. Make sure all personnel are clear of the ... -
Page 11: Electrical Power
BEL 290 Automatic Case Sealer Safety Electrical Power • Switch off the main power disconnect switch on the control panel, and lock it out before starting service or repair work. • Before performing service work inside of the electrical enclosure, disconnect all electrical power to the BEL 290. Conveyor Belts • Keep fingers well clear of conveyor belts. • Do not wear loose clothing or accessories when operating WEXXAR packaging machines. DEKKA Tape Head • Keep fingers clear of the knife on the tape head at all times. • Always exercise caution when handling the tape head. Hot Melt Glue System ° °), • The hot melt glue system operates at temperatures in the range of 350 and contact with the glue gun applicators or hot glue will cause serious burns. • Always wear safety glasses and gloves when refilling the glue tank, and be careful to avoid splash‐ ing. • Keep the tank lid closed at all times except when refilling the tank. - Page 12 BEL 290 Automatic Case Sealer Safety...
-
Page 13: Installation
BEL 290 Automatic Case Sealer Installation 3 INSTALLATION NOTE Read Safety on page 5 prior to installing the machine. Installing the BEL 290 Wooden Block Wooden Block Position forklift forks here To Install the BEL 290: Remove the bolts that secure the BEL 290 to the shipping base. Use a forklift to move the machine off its base, with wooden blocks between the forks and the frame. While the machine is elevated, install the footpad extensions or castor extensions to the bottom of each leg and adjust them for the desired operating height. Position the BEL 290 where it is to be used. Leveling the BEL 290 The BEL 290 should be installed in a level position to avoid frame stress and ensure optimum performance. An adjustable height footpad kit is included as standard equipment and can be used to level the machine on an uneven floor. We recommend that you anchor the machine to prevent unwanted vibrations or movement during normal operation. -
Page 14: (Bel290T Only ) Installing The Tape Heads
BEL 290 Case Former Installation (BEL290T Only) Installing the Tape Heads Machines are shipped with the tape heads secured in their brackets. To reinstall the tape heads, lower them into the brackets to align the pins on their sides with the slots in the brackets. Follow these steps: Bottom Tape Head Place the tape head’s rear pins into the slots of the bracket. Then, slide to lock. Pivot down the free end so that the pins rest in the aligned slots. Top Tape Head Place all of the tape head’s four pins in the slots of the bracket. Slide to secure, then lock them in place with the thumb screws. Please consult the tape head manual for instructions on the mounting of tape rolls and the proper threading of tape through the applicator head. -
Page 15: (Bel290H Only ) Installing The Hot Melt System
BEL 290 Automatic Case Sealer Installation (BEL290H Only) Installing the Hot Melt System The hot melt system should be mounted on a freestanding table. The electrical power, pneumatic air supply and insulated adhesive hose need to be reconnected. Refer to the separate Hot Melt System Manual for further details on installing and set‐ ting up the hot melt tank. Power Connections CAUTION The following electrical connections must be handled by a qualified electrician. Electric The BEL 290 is equipped with single phase, 120‐600V electronics and manufactured to NEMA 12 specifications. ... -
Page 16: (Bel Auto -Adjust Only ) Adding Anew Case Recipe
BEL 290 Case Former Installation (BEL Auto‐Adjust Only) Adding a new Case Recipe The auto‐adjust feature uses a set of pre‐entered case dimensions. These case “recipes” are entered into the HMI and stored. If you are sealing a new case for the first time, you will need to create a new case recipe. To Add a Case Recipe: Measure: On the Main Control screen, touch Setup. Touch Recipe Setup. Enter the engineering password. NOTE The default user for the HMI is: engineer. The default password for the HMI is: 9300. In the Recipe Setup selection screen, touch an empty recipe button. Complete the following: Enter a name for the case recipe. - Page 17 BEL 290 Automatic Case Sealer Installation Enter the case length (C dimension) Enter the case width (D dimension) Enter the closed height of the case (H dimension) Touch Save Recipe. Touch Main Control to return to the Main Control screen. NOTE To activate the pass‐thru feature on the case recipe that you are creating, touch the Rotary Bypass button. When this feature is active, cases aren’t sealed as they are moved through the BEL 290.
- Page 18 BEL 290 Case Former Installation...
- Page 19 BEL 290 Automatic Case Sealer Machine Specifications 4 MACHINE SPECIFICATIONS WARNING Ensure the machine is disconnected from air and power supplies before undertaking any maintenance or service procedures. The machine must be operated by qualified personnel only. Following are standard BEL 290 specifications. Case length depends on conveyor system integration and machine options. Length Width Height Case Size Range Minimum 8” / 203 mm 5.25” / 133 mm 5” / 127 mm Maximum 24" / 609 mm 17.5" / 444 mm...
-
Page 20: Machine Specifications
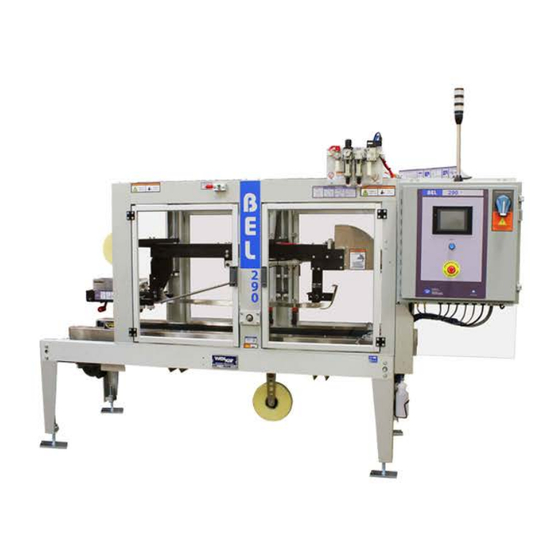
BEL 290 Automatic Case Sealer Machine Specifications Component Identification (BEL290T and BEL290H) Beacon Height Adjustment Control Panel Main Air Regulator (Chain) Lock Main Disconnect Minor Flap Kicker Tape Head (BEL290T ONLY) Reset Button E‐Stop Button Major Flap Folding Rods Stop Gate (Optional) Case Height Adjustment Case Width Adjustment Hot Melt Unit (BEL290H ONLY) Glue Gun (BEL290H ONLY) -
Page 21: Sensor Locations (Bel290T)
BEL 290 Automatic Case Sealer Machine Specifications Sensor Locations (BEL290T) Sensor # Name Part # PHS‐01 CASE DETECT 02‐1026 PHS‐02 ROTARY FOLDER 02‐1026 PHS‐06 CASE AT TAPE HEAD/JAM DETECT 02‐1026 PRS‐07 LOW TAPE 02‐1004 PRS‐08 NO TAPE/RUNNING TAPE 02‐1004... -
Page 22: Pneumatic Valve Locations (Bel290T)
BEL 290 Automatic Case Sealer Machine Specifications Pneumatic Valve Locations (BEL290T) Valve # Name Part # SV0A/SV0B MAIN AIR 111‐0489 ROTARY FOLDER DOWN 16‐1318 STOP GATE 16‐1321... -
Page 23: Operating Procedures
BEL 290 Automatic Case Sealer Operating Procedures 5 OPERATING PROCEDURES BEL 290 Controls Overview Control panel disconnect switch Disconnects power to the BEL 290. Used to start or stop the run cycle, monitor production, troubleshoot and modify machine settings. Reset Used to reset the BEL290 after an emergency stop or fault. E‐STOP NOTE The position of the HMI screen, control panel, and main air regulator may vary according to order specifications. Editing HMI Value Fields Most of the HMI screens include several value fields. Some of these fields can be edited, while some are for displaying data only. Generally, a field with blue text can be edited. A field with white text cannot. Blue text can be edited. White text cannot. -
Page 24: Hmi Navigation
BEL 290 Automatic Case Sealer Operating Procedures To Edit a Value Field: HMI Navigation... -
Page 25: Adjustment And Operation
BEL 290 Automatic Case Sealer Operating Procedures Adjustment and Operation NOTE Read Safety on page 5 prior to adjusting and operating the machine. Case Size Adjustments Following are the adjustments required to set up a particular case size: Case Height Adjustment (H): Adjusts the machine head with the top flap folders and glue heads tape head to match the height of the partially closed case. Case Width Adjustment (D1): Adjusts the side‐belt conveyors to fit the width of the case. Case Width Adjustment (D2): Adjusts the spacing of the major flap folder rods to match the spacing of the major flaps of the case. Case Width Adjustment (D3): Adjusts the width of the side‐compression rollers to match the width of the case. Top Ski Flap Width Adjustment (G): Adjusts the ski position to match the height of the partially closed case. - Page 26 BEL 290 Automatic Case Sealer Operating Procedures Touch Auto Adjust Start. As the case sealer adjusts the height and width, the position of the components are updated in real‐time on the HMI screen. When the adjustment is finished, touch Main Control. Continue with manual adjustments (D2, D3, and G) starting on page...
-
Page 27: Manual Adjustments ( No Auto -Adjust )
BEL 290 Automatic Case Sealer Operating Procedures Manual Adjustments (no Auto‐Adjust) WARNING Ensure the machine is disconnected from electrical and air supplies before making these adjustments Case Height Release the chain lock. Adjustment (H) (No Auto‐Adjust) Measure the case height Using the case height crank and scale on the side of the arch, adjust the case height to Dimension (H) Engage the chain lock. - Page 28 BEL 290 Automatic Case Sealer Operating Procedures Case Width Adjustment (D1) (Conveyor Adjustment) Measure the case width. Using the case width crank and the scale at the front of the conveyor, adjust the Dimension (D1). NOTE: The case width crank can be connected to the case width leadscrew on either side of the machine frame. TIP: An alternative method to using the width scale is first to move the con‐ veyor belts apart until they are wider than the case to be run. Then, adjust the conveyor belts back in until they lightly contact the case sides. Remove the case through the machine infeed and wind the belts in by a further one‐half turn. This usually moves the conveyor to the correct position for a good grip on the case. NOTE: Depending on case fill, weight, dimensional variations, and conveyor belt wear, it may be necessary to make minor adjustments to the settings to ensure best performance.
- Page 29 BEL 290 Automatic Case Sealer Operating Procedures WARNING Ensure the machine is disconnected from electrical and air supplies before making these adjustments Case Width Adjustment (D2) (Major Flap‐folding Rods) Loosen the bolts that lock the major flap folding rods. Adjust their position so that they capture the top case flaps and fold them down before being sealed. The rods will need to be moved inward toward each other for narrow cases and outward for wide ones. Retighten the bolts.
- Page 30 BEL 290 Automatic Case Sealer Operating Procedures Case Width Adjust the side‐compression rollers to control the tendency of the Adjustment (D3) upper sides of the case to expand. The side‐compression rollers (Case Side Compres‐ minimize the gap between the minor flaps and the inside of the case sion) wall. This in turn closes the gap between the major flaps when they seal. To test, place a case between the rollers to ensure that there is no gap between the major flaps. Adjust the compression rollers Compression rollers minimize the gap between the minor flap and case wall.
- Page 31 BEL 290 Automatic Case Sealer Operating Procedures Top Ski Flap Width Adjustment (G) The top ski, used to fold down the front minor flap, is mounted on a slotted bracket that permits the ski to be adjusted towards or away from the machine infeed. Unless there is a wide variation in the width of cases or the size of case minor flaps, it should not require frequent re‐adjustment. The ski position must allow the rear minor flap to fold down without hitting the ski. Once The flap width folded, it must hold the flap down and not let is usually 1/2 it re‐open. the case width. The size of the case minor flap, which, with RSC cases, usually is a function of case width, determines the adjustment. When running cases that are close to the machines minimum and maximum width limits, or cases with different flap lengths (i.e. Flap‐cut cases) it may be necessary to adjust the position of the ski to keep control of the minor flaps. • To run most case widths close to the machine's average width capabili‐ ties, the ski should be set at the midpoint on its mounting slot. • With cases that are close to the maximum machine width capability, or with larger than normal minor flaps, the ski should be adjusted back, away from the machine infeed so that the rear minor flap does not hit the ski before it is fully folded down. • With cases that are near the machine minimum width capability, or with narrower than normal minor flaps, the ski should be adjusted for‐ ward, towards the machine infeed, so that the rear minor flap is guided underneath the ski and does not spring open before it reaches the ski.
-
Page 32: Starting The Bel 290
BEL 290 Automatic Case Sealer Operating Procedures Starting the BEL 290 Refer to BEL 290 Controls Overview on page 19 for the location of the following controls. Turn On the Main Air Regulator. Manual On/Off Lock Out Valve Main Air Valve From the Control Panel, turn On the Main Disconnect. Wait for the Programmable Logic Controller (PLC) and the Human Machine Interface (HMI) control screen to complete their startup cycles. NOTE: The main supply voltage is typically 120V 60Hz single phase, but alternate voltages are available to meet specific customer requests. -
Page 33: (Bel 290H Only ) Starting U Pthe Hot Melt System
BEL 290 Automatic Case Sealer Operating Procedures (BEL 290H Only) Starting Up the Hot Melt System NOTE It takes approximately 20 minutes for the glue to heat and reach its operating ° ° temperature of 350 F / 175 To Start up the Hot Melt System: Turn on the power to the hot melt system. Ensure that there is sufficient glue in the tank for the case run. There should be no less than half a tank. NOTE Avoid allowing the glue to remain heated for extended periods of time as the glue can char and clog the glue lines and nozzles. Refer to the separate Hot Melt System Manual for further details on installing and set‐ ting up the hot melt unit. Glue Pattern Adjustments The Hot Melt System glue guns apply a glue pattern to the case flaps. The pattern is comprised of the glue bead length, the glue bead position, and the glue bead width. • For Bottom Sealers, the pattern consists of two glue beads applied to each major case flap at the point where the minor flap edge folds onto the major flaps • For Top Sealers, the pattern consists of two glue beads applied to each minor case flap at the point where the major flap edge folds onto the minor flaps. The glue pattern is determined by optical proximity sensor GS‐1, mounted on a bracket on the top of the infeed end of the conveyor housing, as well as by the adjustable parameters on the Glue Settings screen. -
Page 34: Glue Bead Position
BEL 290 Automatic Case Sealer Operating Procedures Glue Bead Position The position of the glue bead is a determined by the case length as specified in the HMI. NOTE To complete this procedure, you will need the Engineer password. The default user name is: Engineer. The default password is: 9300. To Change the Glue Timing Values: NOTE If your BEL 290 is equipped with top and bottom glue guns, you’ll have to adjust each set separately. On the HMI, navigate to the Glue Settings screen (Main Control> Setup> Parameters> Top Glue Settings/Bottom Glue Settings). Using the Glue Values table, enter the new timing values for A, B, C, and D. Touch Parameters. If a prompt appears asking if you want to save your changes, touch Yes. Navigate back to the Main Control screen. Glue Bead Width Width adjustment of the glue pattern is obtained by angular rotation of the glue gun discharge nozzles. Use a wrench to adjust the angle of the nozzles closer or further away. WARNING Ensure the machine is disconnected from electrical and air supplies before making these adjustments. -
Page 35: (Top Seal Only) Glue Gun Adjustment For Cases With "Flap Gap
BEL 290 Automatic Case Sealer Operating Procedures (Top Seal Only) Glue Gun Adjustment for Cases with “Flap Gap” If your cases are designed to have a significant gap between the major flaps when closed, or if you find that glue is applied too close to the edge of the major flaps, you may need to adjust the horizontal position of the glue guns. WARNING The Hot Melt glue system operates at temperatures in the range of 350°F (175°C), and contact with the glue gun applicators or hot glue will cause serious burns. We recommend using Personal Protective Equipment (PPE) before starting this procedure. -
Page 36: Feeding Cases Into The Bel 290
BEL 290 Automatic Case Sealer Operating Procedures Feeding Cases into the BEL 290 Cases should be fed into the BEL 290 via a powered infeed conveyor belt with a recommended speed of 60 Feet Per Minute (FPM). Speeds between 20 and 70 FPM are acceptable. However, the infeed conveyor speed must be less than the machine conveyors (90 FPM) for the machine to function properly. Proper operation of the stop gate requires a gap between each case. When the infeed conveyor runs slower then the machine conveyor, a gap will be created as the case is pulled into the machine. Without a proper gap, the stop gate will hit the following case, lifting it and causing the cases to jam. Do not manually feed cases. Doing so will bring you in close proximity to moving components that may cause serious injury. Gravity feeding could be problematic, as the machine requires adequate spacing between each case for proper case sealing and to prevent case jams. -
Page 37: Beacon Status
BEL 290 Automatic Case Sealer Operating Procedures Beacon Status The beacon light mounted on top of the BEL 290 provides a visual indicator of the BEL 290’s operating status. Color State Solid: Machine fault Solid: Low Magazine Amber (Machine Management Option Only) Flashing: Low glue/tape Solid: Machine cycling Green Flashing: Power‐saving mode Resolving Tray Backups in the Discharge Area (Remote Demand Option) Your BEL 290 may be equipped with a Remote Demand sensor that, when active, pauses operation when it detects a backup in the discharge area. Once the discharge area is clear, the BEL 290 automatically resumes operation. The operator is not required to restart or reset the case sealer. To Turn On the Remote Demand: On the HMI’s Main Control screen, touch Setup. Touch the Remote Demand toggle switch. The toggle ... -
Page 38: To Adjust The Remote Demand Settings
BEL 290 Automatic Case Sealer Operating Procedures To Adjust the Remote Demand Settings: From the Setup screen, touch Parameters. Touch Remote Demand Settings. Adjust the timing settings as required: ○ Remote Demand Delay On: Controls how long the machine will continue to run after the Remote Demand sensor is blocked. ○ Remote Demand Delay Off: Controls the delay time between the clearing of the Remote Demand sensor and the machine restarting. ○ Conveyor Run‐on Time: Controls how long the conveyor continues to run after the Remote Demand sensor is blocked. Viewing Case Production and Speed On the Case Record Summary screen, you can view the number of cases that the machine has formed (lifetime), the total number of cases formed in the current “shift”, as well as the current speed in cases per minute. To View Case Production and Speed: From the Main Control screen, touch Setup. Touch Case Record Summary. -
Page 39: Clearing A Case Jam
BEL 290 Automatic Case Sealer Operating Procedures Clearing a Case Jam BEL 290 Standard: • Manually: Lock‐out / tag‐out your BEL 290 before manually clearing any case jams, or when making adjustments. See Safety on page 5 for more information. • Via the HMI: Alternatively, you can clear case jams without opening a guard door or shutting down the machine by using the Jog Control screen. See Jog Belts on page 49 for more information. BEL 290 Auto Adjust: Push the RESET button and wait for at least 3 seconds to allow energy buildup to release from the machine. On the Main Control screen of the HMI, touch Case Clear. On the Jog screen, touch and hold (H) Dimension Rotary Jog Up to move the rotary folder up and clear of the jam. - Page 40 BEL 290 Automatic Case Sealer Operating Procedures Touch and hold the Jog Conveyor Belts button to jog the conveyor belts, moving the case out of the machine. Touch Auto Adjust Reset Position to return the rotary folders to the correct position. Touch Main Control to exit the Jog screen. NOTE If jogging the conveyor belts does not successfully remove the case from the machine, you can open up the belts by holding the (D) Dimension Open Conveyor Belts button and removing the case by hand. Touch the Auto Adjust Reset Position button afterwards to return the belts to the correct position.
-
Page 41: Maintenance
BEL 290 Automatic Case Sealer Maintenance 6 MAINTENANCE NOTE Read Safety on page 5 before continuing. WARNING The tape knife blades are sharp and can cause serious injury. CAUTION Do not use liquids other than those listed when performing maintenance on the machine. Use the appropriate lubricants when lubricating the machine. Preventive Maintenance Schedule A regular program of preventative maintenance for your BEL 290 will help to avoid unnecessary downtime due to premature component failures. -
Page 42: Uni -Drive Conveyor System Maintenance
BEL 290 Automatic Case Sealer Maintenance Daily Maintenance Schedule Hot Melt • Check for leaks System • Inspect for damage to hot melt tank, glue hose and glue heads. Weekly Maintenance Schedule • Inspect drive‐belts for ease of movement. Conveyor • Check the integrity of all springs. System • Inspect the UHMW‐lined conveyor‐bearing backing plates for bearing mate‐ rial residue. Cleaning • Dust and clean hard‐anodized frame areas. Lubrication • Grease all leads crews, chains, sprockets, and sliding components using Fuchs FMG 387 Food Grade grease or its equivalent. Monthly Maintenance Schedule (or 500 hour intervals) Guide Tubes • Remove, clean and grease the guide tubes. If the environment is extremely dirty, or if some sticking is experienced, a shorter interval is recommended. Remove only one guide tube at a time per acme nut to avoid rotation of the nut. This will prevent mis‐alignment of the drive belts. Uni‐Drive Conveyor System Maintenance The side‐belt conveyor is designed to keep the case square during sealing, which results in a technically stronger seal and a better‐finished appearance. This is achieved by linking the drives of both conveyor belts to a single motor and gear‐reducer that inherently synchronizes belt speeds. Maintenance includes ensuring the chain drive is set at the correct tension, replacing side‐belts when necessary, and monitoring the gear reducer. -
Page 43: Setting The Chain Drive Tension
BEL 290 Automatic Case Sealer Maintenance Setting the Chain Drive Tension Uniform chain tension is maintained automatically during case width adjustments through a self‐ compensating serpentine system. Chain tension is preset at the factory but if the drive becomes noisy or needs adjustment then adjust as shown below. Proper tension is achieved when the horizontal sag in the chain measures between 1/8 inch and 1/4 inch with drive belts in a fully opened position. To Tension the Chain Drive: At the conveyor drive motor corner of the machine, loosen the idle sprocket mounting bolt enough to allow it move in its slot. Unfasten the flexible plastic bellows on top of the stainless steel safety cover and remove the cover. - Page 44 BEL 290 Automatic Case Sealer Maintenance Loosen the locknut and adjust the tension chain tensioning bolt Retighten the idle sprocket mounting bolt Replace the safety cover. CAUTION The Safety Covers MUST be replaced prior to restarting the machine. NOTE The optional Spare Parts Maintenance Kit contains all the parts necessary for maintaining the Uni‐Drive Conveyor System. Contact Wexxar for the kit’s price and availability.
-
Page 45: Replacing The Side-Belts
BEL 290 Automatic Case Sealer Maintenance Replacing the Side‐belts The belts are replaced by removing the top cover assemblies from each side unit. We recommend replacing both belts at the same time. To Replace the Side‐belts: Remove the case infeed guide plate. Loosen the belt tension by adjusting the top and bottom tension adjustment screws (DO NOT REMOVE). Remove the top tension adjustment screw... - Page 46 BEL 290 Automatic Case Sealer Maintenance Remove the idle pulley top plate. Remove the stainless steel cover guard. Remove the belt and replace it with a new one. Reverse steps 2 to 6 to reassemble the drive assembly.
-
Page 47: Maintaining The Gear Reducer
BEL 290 Automatic Case Sealer Maintenance Reset the belt tension and tracking by adjusting the top and bottom tensioning screws so that the belt can move without riding up or down. Set the belt tension just enough to prevent the belts from slipping during use. Excessive tension will cause premature belt and bearing wear. Adjust belt tension & tracking with top and bottom adjusting screws. Replace the case infeed guide plates. Maintaining the Gear Reducer Gear reducers should be inspected regularly for evidence of oil leakage, excessive noise or vibration in order to ensure maximum performance and life. CAUTION The gear reducer lubricant should be changed after the initial 1,500 hours of operation and after every 5,000 subsequent hours of operation. Gear Reducer Maintenance Oil Leakage • Inspect the housing bolts and tighten them if necessary. Replace the oil seals if required. Oil • Gear reducers usually run warm through an initial run‐in period. Check the Temperature reducer temperature for undue rise above levels normally encountered and not explained by a rise in ambient temperature. Low or high oil levels and abnormal loading are possible causes of high oil temperature. -
Page 48: (Bel 290H Only ) Hot Melt System Maintenance
BEL 290 Automatic Case Sealer Maintenance Gear Reducer Maintenance Sound Level • A change in sound level or excessive vibration can indicate low oil level, and Vibration abnormal loading or worn elements. Dirt • Excessive accumulation of dirt or grease will affect the proper cooling of the Accumulation unit. (BEL 290H Only) Hot Melt System Maintenance Ensure that the hot melt tank lid is closed at all times except when removing old glue or placing new material in the tank. An open container will allow entry of paper, lint, dust, etc, into the melted glue. The resulting contamination of the glue will rapidly clog the glue system to the point of requiring complete cleaning of the system and possible replacement of damaged parts. Refer to the separate Hot Melt System Manual for further details on maintaining the hot melt tank. (BEL 290T Only) Tape System Maintenance WARNING The tape knife blades are sharp and can cause serious injury. -
Page 49: Cleaning
BEL 290 Automatic Case Sealer Maintenance Cleaning CAUTION Do not use solvents, or flammable or toxic fluids such as gasoline, benzene, or ether to clean the equipment. BEL 290 maintenance includes a daily clean‐up, including removal of any deposits which may have accumulated (e.g. adhesive fragments, corrugate fragments). We recommend using low‐pressure compressed air to clean the drive‐belts of dust and corrugate. Tools and Materials Use the following materials for cleaning: • Soapy water. • Rag or paper towel. • 1” Flexible putty scraper. •... - Page 50 BEL 290 Automatic Case Sealer Maintenance...
-
Page 51: Troubleshooting
BEL 290 Automatic Case Sealer Troubleshooting 7 TROUBLESHOOTING WARNING Prior to referencing the troubleshooting guide, ensure that you have properly read and understand Safety on page 3 All troubleshooting steps that require working inside the electrical panel or removing guarding should only be performed by certified maintenance personnel. About Warnings and Alarms Machine warnings and alarms are displayed on most HMI screen at the top of the screen. Alarm Messages Warning Messages • Warning Messages: Displayed in yellow text on the HMI. Warning messages are meant to alert the operator to certain machine conditions (for example, the magazine is running low). The triggering of a warning message does not stop or prevent machine operation. • Alarm Messages: Displayed in red text on the HMI. An alarm is typically triggered to alert the oper‐ ator of a machine error (for example, a case jam). When an alarm is triggered, the machine stops operation. The machine can not start operation again until the alarm condition is resolved and the machine is reset. (See Restarting the Case Former After an Emergency Stop or Alarm on page 23.) WARNING Air and power is not removed from the machine when an alarm is triggered. NOTE Touch the red alarm message to view the machine area that generated the alarm. ... -
Page 52: Viewing The Alarm History
BEL 290 Automatic Case Sealer Troubleshooting Viewing the Alarm History The Alarm History screen displays the date, time, and identity of each alarm condition that the machine has experienced. This screen is useful in determining common problems, which can assist the operator in troubleshooting or making machine adjustments. To View the Alarm History: From the Main Control Screen, touch Setup. Touch Alarm History. The Alarm History screen opens. NOTE To clear the alarm history, touch the Clear button, and then enter the Engineer password. ... -
Page 53: Identifying Problems With Plc Inputs
BEL 290 Automatic Case Sealer Troubleshooting Error Code Condition Error Code Condition Bottom Tape Management ‐ F017 Stop Gate Sensor Fault F067 Tape Finished (BEL290T Only) Bottom Tape Head ‐ F018 Rotary Folder Sensor Fault F080 Case Jam Detection (BEL290T Only) Bottom Tape Head Sensor F019 F081 Case Jam Detection Fault (BEL290T Only) Identifying Problems with PLC Inputs The PLC Input screen can help troubleshoot problems with the machine’s PLC inputs (sensors). To Access the PLC Inputs screen: From the Main Control screen, touch Setup. Touch Troubleshooting. Touch PLC Inputs. The PLC Inputs screen opens. -
Page 54: Identifying Problems With Plc Outputs
Indicator Dark: The sensor is not on or does not have an active target. Indicator Lit: The sensor is on or has an active target. Indicator Blinking: There is a problem with the sensor. NOTE If there is a problem with a sensor, touch the PLC Input button to view the sensor’s location in the machine. Shutdown and lock out the machine. Inspect the area for any visible problems and begin troubleshooting procedures (refer to pages 53—63). For help, contact the Wexxar Service Department toll free +1 (888) 565‐3219. Identifying Problems with PLC Outputs The PLC Outputs screen contains control buttons for each of the machine’s PLC outputs. Use this screen to test the operation of the PLC outputs and identify problems. To Access the PLC Outputs screen: From the Main Control screen, touch Setup. Touch Troubleshooting. -
Page 55: To Test Plc Outputs
BEL 290 Automatic Case Sealer Troubleshooting WARNING Before touching a PLC Output button, stop the machine, close all guard doors, and keep personnel clear of the machine. To Test PLC Outputs: • Touch a PLC Output button. If the output is working correctly, it activates and runs through its cycle. NOTE If the output fails to activate, shutdown and lock out the machine. Inspect the area for any visible problems and begin troubleshooting procedures (refer to pages 53—63). For help, contact the Wexxar Service Department toll free +1 (888) 565‐3219. General Troubleshooting The most common error in troubleshooting packaging machinery problems is an incorrect diagnosis of the problem. Errors cause much lost time and needless expense and are avoided by a careful analytical approach before attempting corrective action. Always start by ensuring that all case size adjustments have been made correctly. See Case Size Adjustment on page The following is a list of some common mechanical problems that can occur, and suggestions for dealing with them. More advanced troubleshooting may require special training. CAUTION Some of the advanced troubleshooting steps contained in this section may need to be carried out by trained technicians. ... -
Page 56: Jogging " The Bel 290 (Jog Cycle )
BEL 290 Automatic Case Sealer Troubleshooting “Jogging” the BEL 290 (Jog Cycle) BEL 290 Standard BEL 290 Auto Adjust Use the Jog cycle for clearing case jams or for troubleshooting. To Jog the BEL 290 (Standard): From the Main Control screen, touch the Jog Control button on the bottom left of the screen. The machine enters JOG cycle. Touch and hold the Converyor Belts Jog button to continuously jog the conveyor belts forward. Touch the Main Control button to exit Jog cycle and return to continuous cycle operation. To Jog the BEL 290 (Auto‐Adjust): From the Main Control screen, touch the Case Clear button on the bottom left of the screen. The machine enters JOG cycle. Touch and hold the Jog Conveyor Belts button to continuously jog the conveyor belts forward. To jog the rotary folders up, touch and hold (H) Dimension Rotary Folder Jog Up. To jog open the conveyor belts, touch and hold (D) Dimension Open Conveyor Belts. Touch Auto Adjust Reset Position to reset the rotary folders and conveyor belts to the correct position. Touch the Main Control button to exit Jog cycle and return to continuous cycle operation. NOTE The Sensor status indicators show which sensors are activated a the conveyor belts are jogged forward. A blinking Sensor status indicator means that there is no response from a particular sensor. Touching the Sensor status indicator brings up the Error Identification screen with a photo of the sensor and its location on the machine. This photo enables easy identification and repair of non‐functioning machine parts. Touching the photo will return the touchscreen to the Jog Control screen. ... -
Page 57: 1 - Corrugated Case Quality & Specifications
BEL 290 Automatic Case Sealer Troubleshooting Section 1 ‐ Corrugated Case Quality & Specifications Corrugated case quality is a major factor in smooth running and quality sealing. The following points will help determine if you have a case size or quality problem: Corrugate Case Quality & Specification Troubleshooting Problem Possible Cause Solution Case Dimen‐ Over‐filling or top bulging of the case due • The problem may be due to the sions to the fit of the product. There will usu‐ distribution of product inside ally be a wider gap between the top the case. Leveling the product major flaps after sealing. Over filling of by hand or with a case shaker the cases will often jam cases inside the conveyor may solve the prob‐ machine. lem. • If the product is not compress‐ ible, depending on the sealer In addition to model, a floating top tape head avoiding case option may be available. It will sealing prob‐ both press down on the top lems, re‐sizing flaps and ride over the top of cases can bulge resulting from over‐fill‐ often result in ing. cost savings by using the cor‐... - Page 58 BEL 290 Automatic Case Sealer Troubleshooting Corrugate Case Quality & Specification Troubleshooting Problem Possible Cause Solution Case Dimen‐ Over‐filling or top bulging of the case due • The problem may be due to the sions to the fit of the product. There will usu‐ distribution of product inside ally be a wider gap between the top the case. Leveling the product major flaps after sealing. Over filling of by hand or with a case shaker the cases will often jam cases inside the conveyor may solve the prob‐ machine. lem. In addition to avoiding case sealing prob‐ lems, re‐sizing of cases can often result in cost savings by using the cor‐ Under‐fill can cause flaps not to fold cor‐ A correctly filled case will help the rect case size rectly with automatic flap folding. Top sealing process by supporting the case and material flaps may be pushed into the case. body during flap folding and top flap weight. Consult sealing. your corrugated case supplier for ...
- Page 59 BEL 290 Automatic Case Sealer Troubleshooting Corrugate Case Quality & Specification Troubleshooting Problem Possible Cause Solution Side‐bulging of the cases can be due to • Reduce the impact of product heavy product pushing out on the case being filled into the case by side panels. It can prevent the top flaps more gradual filling or perhaps from being folded automatically and put by using a shaking process additional stress on side‐belt conveyor rather than a compression pro‐ components. cess to avoid overfill. • The case material weight may not be heavy enough for the product and the score lines may need to be made deeper to help with flap folding. Corrugated Can be caused by: • Store unformed cases on a flat Case Weakness surface and in a dry environ‐ • Crushed Corrugate ment. • Bands of Crushed Corrugate Flutes • Ensure that unformed cases are • Case Storage not stacked excessively. The ...
- Page 60 BEL 290 Automatic Case Sealer Troubleshooting Corrugate Case Quality & Specification Troubleshooting Problem Possible Cause Solution Flap Corner If the flap corner slots are too narrow, the If the corner slots are wider, cases can Slots ends of the major flaps can block the be automatically folded with a mini‐ minor flaps from folding properly. It is mum of interference between major often a problem with heavier double‐wall and minor flaps. material cases. Case The glue joint where the manufacturer Contact your corrugated case supplier Squareness glues the flat case together can present a to have them correct their manufac‐ quality problem if they are misaligned. turing process. This causes the case to be wider or twisted at one end. This can lead to case jams and poor sealing quality. Overlapped or Can be caused by incorrect flap lengths. Contact your corrugated case supplier Gapped Case To determine if the flap meet neatly in to have them correct their manufac‐ Flaps the center, fold the case by hand and turing process. apply pressure to the sides of the case to simulate the case being squeezed by the belts.
-
Page 61: 2 - Uni-Drive Conveyor System
BEL 290 Automatic Case Sealer Troubleshooting Section 2 ‐ UNI‐DRIVE Conveyor System UNI_DRIVE Conveyor System Troubleshooting Problem Possible Cause Solution Case is not seal‐ Despite the synchronized side belts of the Ensure that: ing so that it is UNI‐DRIVE conveyor, the cases exit the The case is square before it square machine not square after sealing. enters the side‐belt conveyor. The side belts are correctly adjusted to the case’s width Adjusting the belts until they lightly contact case sides, but so that the case can still slide through the belts if pushed firmly. Removing the case and adjusting the belts inwards one‐half turn. Neither of the conveyor belts is ... - Page 62 BEL 290 Automatic Case Sealer Troubleshooting UNI_DRIVE Conveyor System Troubleshooting Problem Possible Cause Solution There is rubber A dark gray or almost black dust appears • Ensure that the case is clearing 'dust' being beneath the conveyor belts, particularly the belts as it exits the machine shed from the at the end where the case exits the sealer. and that outfeed conditions do belts not cause cases to back up into the conveyor. • Ensure that belt tensioning and tracking adjustments are cor‐ rect. See Setting the Chain Drive Tension on page 39 and Replac‐ ing the Side‐belts on page 41. Incorrect settings can cause pre‐ mature belt wear and possible belt breakage. There is a 'rat‐ Although pre‐stretched chain is used in Tighten the chain idler sprocket. See tling' noise the machine drive, the chain over time Setting the Chain Drive Tension on coming from may loosen and rattle on the drive cover. page the conveyor drive Frequent Belt ...
-
Page 63: Infeed
BEL 290 Automatic Case Sealer Troubleshooting UNI_DRIVE Conveyor System Troubleshooting Problem Possible Cause Solution Machine Jams Various Turn Off the machine as soon as the Frequently jam occurs and before clearing it. Exer‐ cise the safety procedures in Safety on page 5. Open the belts and raise the glue head top tape head. Remove the jammed case and debris. Check for the following causes of case jams: • The top tape headglue head is adjusted too low. • The product is overfilled or inconsistent, causing intermit‐ tent jams. See also General Troubleshooting on page 51 • The belts are set too tight, caus‐ ing machine overloading • Check the position of the top ski • The top flap folding is not set correctly. The flaps subse‐ quently hit the ski or glue head‐ tape head mechanism Section 3 ‐ Case Infeed Cases must be properly fed into the BEL 290 in order for the machine to function efficiently and the cases to be sealed properly (see Feeding Cases into the BEL 290 on page 32). The ... -
Page 64: Case Infeed Separation / Stop Gate (Optional)
BEL 290 Automatic Case Sealer Troubleshooting Problem Possible Cause Solutions Case is loosely Bottom minor flaps or case contents are Make sure cases are properly packed sealed on bot‐ hitting the bottom ski over the glue gun. so that contents are not falling out or tom (in causing the bottom flaps to bend machines con‐ downwards. figured for bot‐ tom‐sealing) Case Infeed Separation / Stop Gate (Optional) BEL 290’s equipped with the Stop Gate option ensure that cases enter the BEL 290 in a timed manner, preventing case jams caused by more than one case being in process. This option is recommended when an accumulation or backlog of cases is expected on the infeed conveyor. The stop gate is normally in the Up position and provides some squaring assistance, as the moving case strikes the gate. A timer will then drop the gate if the machine is clear and ready to cycle Problem Solution Two cases are in Stop Gate feature is not powered up Power up the Stop Gate and make sure the machine at it is working. the same time Stop Gate Timing is not set to a sufficient From the Parameters screen, adjust and cause a jam interval. the Stop Gate Down time. See Parameters ... -
Page 65: Rotary Folder Tuning
BEL 290 Automatic Case Sealer Troubleshooting To Adjust the Folder Down Hold Time: From the Setup screen, touch Parameters. The Parameters screen appears. On the Parameters screen, touch Rotary Folder Settings. The Rotary Folder Settings screen appears. Touch the Rotary Folder Down Hold Time input field. A Keypad appears. Enter the new value. Touch Enter. Touch Main Control to return to the Main Control screen. - Page 66 BEL 290 Automatic Case Sealer Troubleshooting The following provides detailed descriptions for performing these five steps. Adjust the Air Regulator Settings Assure that the main air regulator is set correctly. If done so correctly, the rotary folder should rise slowly. Set the Upper Shock Absorber at Zero The upper shock absorber should be set at the lowest setting, as the upward force should be minimal. Adjust the Cylinder Cushions & Loosen the nut and adjust as follows: To correctly adjust the Rod‐End cushion: a. Observe the machine in dry‐cycle mode. Notice whether the Rotary Flap Folder bounces when it comes down. If it bounces, skip the next step. b. If the rotary folder does not bounce, close the rod‐end cushion several turns. Dry‐cycle again. Continue this process until it does bounce. c. Loosen the rod‐end cushion in very small increments (1/8 to 1/4 turns) and trou‐ bleshoot by dry‐cycling at least 2 cycles after each adjustment. Continue until any jolting/bouncing motions and any banging noises are eliminated. d. Lock down when the correct setting is achieved, lock down the cushion, and dry‐ cycle again to confirm the rotary folder still performs smoothly. The Clevis‐End cushion should be set to the widest open setting. The peg should be fully extended, but not removed. Adjust the Flow Control Valve Adjust the knob on the Flow Control Valve to change how quickly the Rotary Flap Folder comes down.
-
Page 67: Troubleshooting
BEL 290 Automatic Case Sealer Troubleshooting Section 5 ‐ Sealing Troubleshooting BEL 290T Tape System Troubleshooting Problem Possible Cause Solution Tape does not The tape is not bonding to the flaps or • Under‐filled Case. Ensure that stick to case ends of the case to provide a secure seal. product provides support under surface the top flaps so that they are not simply pushed down or away from the tape head rather than having the tape rolled onto the surface. • Overlapping flaps. If the out‐ side (major) flaps are allowed to overlap, the 'step' created results in an uneven taping sur‐ face, causing poor tape adhe‐ sion that can release during shipping and handling. See Gen‐ eral Troubleshooting on page 51 • Tape‐head roller contact. Tape head rollers should make good contact with the case. Adjust roller spring tension, if neces‐ sary. • Dust or dirt. Large amounts of ... - Page 68 BEL 290 Automatic Case Sealer Troubleshooting Tape System Troubleshooting Problem Possible Cause Solution Tape is not cut The tape is not cut properly every time. In every time the worst situations, several cases may be taped together. Check the following conditions: • Tape head position. If the top tape head is set too high, the Tape does not The tape is not being cut properly. This cut‐off knife will not be fully cut off evenly can cause problems in regards to the activated resulting in poor cut quality of your tape seals and also the off. Ensure also that cases ride aesthetic look of the tape on your cases. fully down between the con‐ veyor belts to provide proper contact with the bottom head cut off knife. • Knife extension. Ensure that the knife extends enough to fully contact the tape during the cut‐ ting stroke. • Tape tension. Unroll tension should be smooth and not too tight, as a 'snap back' caused by stretched tape can cause a jag‐ ged cut‐off and cause tape pieces to be stuck to the blade. •...
- Page 69 BEL 290 Automatic Case Sealer Troubleshooting Tape System Troubleshooting Problem Possible Cause Solution Tape tail does The end of the tape on the back side of • Tape tension. Tension should be not stick down the case (as it leaves the machine) has smooth and not too tight. Tape properly not adhered well to the case. tension 'Snap Back' will cause tape tail to recoil and not stick well on the back of the case. • Tape head roller contact. Tape‐ head rollers should make good contact with the case. Adjust roller spring tension if neces‐ sary. Tape is off‐cen‐ The line of tape is not centered over the • Tape roll position. Ensure that gap between flaps on the top or bottom the tape roll is fully pushed onto of the case. the spool. • Tape head straight. Ensure that the tape head sits straight in its bracket and is not tilted to one side. • Obstructions. Look for obstruc‐ tions that could be pushing the tape off center.
- Page 70 BEL 290 Automatic Case Sealer Troubleshooting Tape System Troubleshooting Problem Possible Cause Solution Tape Falls For‐ The beginning end of the tape must stand • Contamination. The tape may ward on Bot‐ vertically in front of the tape head front be wound around the roller, or tom Tape Head roller in order to contact the leading end there may be dirt on the roller. of the next case. • No static charge. Dust roller NOTE: The guide on the tape head is surfaces with talcum powder to designed to curve the tape along its increase static charge on the width. This helps to keep the tape stiff roller. and upright. A static electric charge on • Incorrect tape head guide set‐ the tape head rollers also attracts the tings. Ensure that the plastic tape and helps to keep it in place. tape guide is set correctly. The tape should be curved across its width. See the DEKKA tape head manual for further detail. • Inappropriate environment. A strong breeze in the vicinity of the tape sealer can cause the tape to blow down. High tem‐ perature or humidity may affect ...
-
Page 71: Bel290H
BEL 290 Automatic Case Sealer Troubleshooting BEL290H Hot Melt System Troubleshooting Problem Possible Cause Solutions Clogged glue Various Glue application is controlled by sensor GS‐1, as well as system or noz‐ on the Main Control and Glue Settings screens. Check: zle, machine not • that the GS‐1 sensor is powered and operating gluing, etc. properly. • That the hot melt system is turned on. • that the solenoid valve SV3 is operating properly. • That the glue pattern is set correctly. • that the glue applicator is not clogged. NOTE: Use caution when manually operating the valve as hot glue will be discharged from the applicator. If the above remedies do not resolve the issue, refer to the Nordson manual, or contact your glue supplier. Glue Does Not The glue is not bonding Look for the following conditions: Stick To Case to the flaps or ends of • Dust or dirt. Large amounts of dust or dirt gath‐ Surface the case to provide a ering on the cases or in the air will impair adhe‐ secure seal. sive effectiveness. -
Page 72: Getting Help
BEL 290 Automatic Case Sealer Hot Melt System Troubleshooting Problem Possible Cause Solutions Glue Pattern Hot Melt tank pump reg‐ • Locate the pump regulator at the bottom of the Amount is Inad‐ ulator needs adjustment Hot Melt tank. Using a 3/16” Allen key, adjust the equate regulator until an appropriate amount of glue is applied to each blank. • The glue may be thick or contain debris. It may Dust or debris clogging be necessary to flush out the glue and refill the the tank or thickening tank. NOTE: Keep the lid of the Hot Melt tank on the glue. at all times, when not refilling, to keep the glue free of dust and debris. Comprehensive information on the set‐up, operation, and maintenance of the adhesive system on the BEL 290 is contained in the separate Hot Melt System Man‐ ual supplied with this machine. Getting Help For additional assistance, contact us at: Wexxar Packaging Inc. Phone (604) 930‐9300, 1 (888) 565 3219, Fax 604‐930‐9368 E‐mail: parts@wexxar.com, sales@wexxar.com... -
Page 73: Options Stop Gate
BEL 290 Automatic Case Sealer Options 8 OPTIONS Stop Gate Stop gate shown in the up or closed position The BEL 290 can be equipped with an optional timed stop gate which separates the cases as they enter the machine. This helps prevent case jams that are due to an accumulation of cases at the infeed conveyor. This feature is actuated by PHS01 (photo sensor 01). See Case Infeed Separation / Stop Gate (Optional) on page 60 for more information. Remote Demand This option includes a sensor that monitors for case backups on the outfeed conveyor. When a backup occurs, the Remote Demand pauses the BEL290 production until the backup clears the sensor and cases are needed again. This feature is fully automatic and the operator is not required to restart or reset the case sealer. Floating Tape Head WARNING Never ... - Page 74 BEL 290 Automatic Case Sealer Options Purpose: The floating tape head automatically adjusts its position to allow over‐filled cases to pass through the machine, preventing case jams and line stoppages. Note: Overfilled cases may not properly seal, depending on the amount of overfill. How‐ ever, overfilled cases should pass through the machine without causing them to jam, or the production line to stop. Description: Floating Tape Heads are more flexible than other tape heads generally used on the BEL 290 machines. A Spring and Linkage Arms connect the float‐ ing tape head to the main frame of the machine, allowing the entire head to raise and lower in order to allow overfilled cases to pass through. The Let‐down Ski is designed to prevent abrupt dropping of the assembly upon release of the case. Troubleshooting: Problem: Jamming at front plow Solution: Assure that: the Height is properly adjusted. the Height Adjustment is locked. the overfill is less than 3/4”. the Spring is adjusted so that it lifts slightly when you remove the tape head.
-
Page 75: Tape Management System
BEL 290 Automatic Case Sealer Options Tape Management System This optional system on the BEL 290 monitors the pressure‐sensitive adhesive tape application, and detects faulty conditions. A set of optical and inductive sensors monitors the condition of the tape applicator. Sensor name Part # Function LS12 01‐198 Detects if the tape is not being applied and if the blade is not cutting the tape. - Page 76 BEL 290 Automatic Case Sealer Options...
-
Page 77: Service And Warranty
BEL 290 Automatic Case Sealer Service and Warranty 9 SERVICE AND WARRANTY Service The WEXXAR organization is committed to providing an exceptionally high level of support to all of its customers and their installed equipment. WEXXAR maintains a comprehensive inventory of replacement parts, as well as factory trained technical representatives for consultation, installation and start‐up, customer employee training, in‐plant service, or complete rebuilding of equipment. To order parts or arrange for service, please call us. Parts & Service: 1‐888‐565‐3219 Warranty Machinery and parts manufactured by WEXXAR are warranted for a period of one year from date of shipment against failure or defective workmanship. Components purchased from other manufacturers by... - Page 78 BEL 290 Case Former Service and Warranty...
- Page 79 ___________________________________________________________________________ ____________ SECTION 1 - PRODUCT AND COMPANY IDENTIFICATION _____________ PRODUCT IDENTIFICATION: . . : FM GREASE 387 MANUFACTURER IDENTIFICATION Company Name..: FUCHS LUBRICANTS CO. Address ..: 17050 LATHROP AVE. HARVEY 60426 Telephone .
- Page 80 PRODUCT NAME: FM GREASE 387 --------------------------------------------------------------------------- when direct contact occurs, or when exposed to high mist levels in poorly ventilated areas. - SKIN EXPOSURE - Short term skin contact is not expected to cause skin irritation. Prolonged or repeated direct exposure to the skin may result in symptoms of irritation and redness.
- Page 81 PRODUCT NAME: FM GREASE 387 --------------------------------------------------------------------------- medical attention. NOTE TO PHYSICIAN: No further data known. ___________________________________________________________________________ ___________________ SECTION 5 - FIRE FIGHTING MEASURES __________________ FIRE AND EXPLOSIVE PROPERTIES: Flashpoint ... . . : 445.0 °F Flammability Limits .
- Page 82 PRODUCT NAME: FM GREASE 387 --------------------------------------------------------------------------- Section 8 of this MSDS to evaluate personal protective equipment needs. Open containers slowly to relieve any pressure. Follow all other standard industrial hygiene practices. Empty containers may contain product residue. All safety precautions taken when handling this product should also be taken when handling empty drums and containers.
- Page 83 PRODUCT NAME: FM GREASE 387 --------------------------------------------------------------------------- Respirator use should comply with the OSHA Respirator Protection Standard found in 29 CFR 1910.134. ENGINEERING CONTROLS: Normal general ventilation is expected to be adequate. It is recommended that ventilation be designed in all instances to maintain airborne concentrations at lowest practicable levels.
- Page 84 PRODUCT NAME: FM GREASE 387 --------------------------------------------------------------------------- ___________________________________________________________________________ _________________ SECTION 11 - TOXICOLOGICAL INFORMATION ________________ EYE EFFECTS: No further toxicological data known. SKIN EFFECTS: No further toxicological data known. ORAL EFFECTS: No further toxicological data known. INHALATION EFFECTS: No further toxicological data known. OTHER: No further data known.
- Page 85 PRODUCT NAME: FM GREASE 387 --------------------------------------------------------------------------- This product contains the following substances subject to the reporting requirements of Section 313 of Title III of the Superfund Amendments and Reauthorization Act of 1986 and 40 CFR Part 372: Zinc oxide CAS# 1314-13-2 PCT BY WT: <...
- Page 86 PRODUCT NAME: FM GREASE 387 --------------------------------------------------------------------------- 451065 ___________________________________________________________________________ NOTICE: This MSDS provides a good faith representation of information believed to be accurate as of the last revision date. This document does not create any express or implied product warranties. Since conditions of use are beyond the control of Fuchs Lubricants Co., all risks associated with product use are assumed by the user.
- Page 87 Model BEL 290T Automatic Case Sealer UPPLEMENTARY ANUAL Serial Number: 6135 Built for: RUBBERMAID 3415 E. 12TH AVE PLANT 1087 - WINFIELD MFG WINFIELD KS 67156 UNITED STATES 13471 Vulcan Way, Richmond, B.C V6V 1K4 Canada Telephone (6 04) 930 9300, Fax (604) 930-9368...
- Page 88 BEL290T ODEL EALER UPPLEMENTARY ANUAL Contents Options List Spare Parts List Programmable Controller-Program Documentation Drawing List Technical Drawings Pneumatic & Electrical Schematics...
- Page 89 Options Your Wexxar BEL-290T case sealer S/N 6135 has been fitted with the following options: • Wexxar BEL 290 Fully Automatic Case Sealer • BEL290T Top Only • Discharge Height, Standard, 23”-28” • DEKKA SE-22 V3 2” SS Tape Head •...
- Page 90 Recommended Spare Parts List WEXXAR recommends that you keep an inventory of these parts to help you swiftly get the machine back into operation in case of component failure. Contact or Parts and Service Department at: Phone: +1 (604) 930 9300...
- Page 91 SPARE PARTS LIST – BEL 290 (STD) 62-3163 01-295 PUSHBUTTON,RED,EMERGENCY STOP,40MM,ABB 01-299 CONTACT BLOCK,1 N/O,REAR MT,ABB 01-300 CONTACT BLOCK,1 N/C,REAR MT,ABB 01-302 CONTACT HOLDER FOR 3 BLOCK,FRONT MT,ABB 01-304 CONTACT BLOCK,1 N/O,FRONT MT,ABB 01-305 CONTACT BLOCK,1 N/C,FRONT MT,ABB 02-1026 SENSOR, OPTICAL 18MM FIXED 100MM RIGHT 16-1178 CYLINDER REPAIR KIT 16-1318...
- Page 92 Programmable Logic Controller Program Documentation Refer to the Program Disc...
- Page 93 Drawing List...
- Page 94 DRAWING LIST MODEL BEL-290T CASE SEALER 62-2062 KIT, VERTICAL ADJUSTMENT LOCK 62-2356 ASSY, TAPE HOLDER, TOP 62-2359 ASSY, SCREW PACKAGE, STD, BOT FRAME 62-2360 ASSY, SCREW PACKAGE, STD, TOP FRAME 62-2368 ASSY, PNEUMATIC CONTROL, BOT FR MT 62-2390 ASSY, E-CHAIN, BEL-290 62-2593 ASSY, BOTTOM ROLLERS SUPPORT 62-2600...
- Page 95 PROPRIETARY AND CONFIDENTIAL Packaging Inc. OTHERWISE SPECIFIED: THE INFORMATION CONTAINED IN THIS DRAWING IS THE SOLE THIRD ANGLE PROJECTION PROPERTY OF WEXXAR PACKAGING INC. ANY REPRODUCTION DECIMAL .030 (3D SOLID DRAWING) IN PART OR AS A WHOLE WITHOUT THE WRITTEN PERMISSION OF...
- Page 96 DESCRIPTION DATE OTHERWISE SPECIFIED: THE INFORMATION CONTAINED IN THIS DRAWING IS THE SOLE THIRD ANGLE PROJECTION PROPERTY OF WEXXAR PACKAGING INC. ANY REPRODUCTION DECIMAL .030 (3D SOLID DRAWING) ADD Z03-371, REPLACED 22-2648-M1(1X) WITH 22-2648 REVISED FOR IN PART OR AS A WHOLE WITHOUT THE WRITTEN PERMISSION OF...
- Page 97 PROPRIETARY AND CONFIDENTIAL Packaging Inc. OTHERWISE SPECIFIED: THE INFORMATION CONTAINED IN THIS DRAWING IS THE SOLE THIRD ANGLE PROJECTION PROPERTY OF WEXXAR PACKAGING INC. ANY REPRODUCTION DECIMAL .030 (3D SOLID DRAWING) IN PART OR AS A WHOLE WITHOUT THE WRITTEN PERMISSION OF...
- Page 98 PROPRIETARY AND CONFIDENTIAL Packaging Inc. OTHERWISE SPECIFIED: THE INFORMATION CONTAINED IN THIS DRAWING IS THE SOLE THIRD ANGLE PROJECTION PROPERTY OF WEXXAR PACKAGING INC. ANY REPRODUCTION DECIMAL .030 (3D SOLID DRAWING) IN PART OR AS A WHOLE WITHOUT THE WRITTEN PERMISSION OF...
- Page 99 PROPRIETARY AND CONFIDENTIAL Packaging Inc. OTHERWISE SPECIFIED: THE INFORMATION CONTAINED IN THIS DRAWING IS THE SOLE THIRD ANGLE PROJECTION PROPERTY OF WEXXAR PACKAGING INC. ANY REPRODUCTION DECIMAL .030 (3D SOLID DRAWING) IN PART OR AS A WHOLE WITHOUT THE WRITTEN PERMISSION OF...
- Page 100 PROPRIETARY AND CONFIDENTIAL Packaging Inc. OTHERWISE SPECIFIED: THE INFORMATION CONTAINED IN THIS DRAWING IS THE SOLE THIRD ANGLE PROJECTION PROPERTY OF WEXXAR PACKAGING INC. ANY REPRODUCTION DECIMAL .030 (3D SOLID DRAWING) IN PART OR AS A WHOLE WITHOUT THE WRITTEN PERMISSION OF...
- Page 101 PROPRIETARY AND CONFIDENTIAL Packaging Inc. OTHERWISE SPECIFIED: THE INFORMATION CONTAINED IN THIS DRAWING IS THE SOLE THIRD ANGLE PROJECTION PROPERTY OF WEXXAR PACKAGING INC. ANY REPRODUCTION DECIMAL .030 (3D SOLID DRAWING) IN PART OR AS A WHOLE WITHOUT THE WRITTEN PERMISSION OF...
- Page 102 Packaging Inc. ECO#4943 OTHERWISE SPECIFIED: THE INFORMATION CONTAINED IN THIS DRAWING IS THE SOLE THIRD ANGLE PROJECTION PROPERTY OF WEXXAR PACKAGING INC. ANY REPRODUCTION DECIMAL .030 REPLACE ALL FASTENERS. REMOVE 1 PCS OF Z22-2719, REMOVE Z22- (3D SOLID DRAWING) IN PART OR AS A WHOLE WITHOUT THE WRITTEN PERMISSION OF...
- Page 103 14JUN12 Packaging Inc. ECO#4943 OTHERWISE SPECIFIED: THE INFORMATION CONTAINED IN THIS DRAWING IS THE SOLE THIRD ANGLE PROJECTION PROPERTY OF WEXXAR PACKAGING INC. ANY REPRODUCTION DECIMAL .030 (3D SOLID DRAWING) REPLACE ALL FASTENERS, ECO#4931 06SEP12 IN PART OR AS A WHOLE WITHOUT THE WRITTEN PERMISSION OF...
- Page 104 Packaging Inc. UNLESS OTHERWISE SPECIFIED: THE INFORMATION CONTAINED IN THIS DRAWING IS THE SOLE .XXX .005 FRACTIONAL 1/32 PROPERTY OF WEXXAR PACKAGING INC. ANY REPRODUCTION IN PART OR AS A WHOLE WITHOUT THE WRITTEN PERMISSION OF .010 ANGULAR TITLE ASSY, SAFETY DOOR, GUARD WEXXAR PACKAGING INC IS PROHIBITED.
- Page 105 PROPRIETARY AND CONFIDENTIAL Packaging Inc. OTHERWISE SPECIFIED: THE INFORMATION CONTAINED IN THIS DRAWING IS THE SOLE THIRD ANGLE PROJECTION PROPERTY OF WEXXAR PACKAGING INC. ANY REPRODUCTION DECIMAL .030 (3D SOLID DRAWING) IN PART OR AS A WHOLE WITHOUT THE WRITTEN PERMISSION OF...
- Page 106 PROPRIETARY AND CONFIDENTIAL Packaging Inc. OTHERWISE SPECIFIED: THE INFORMATION CONTAINED IN THIS DRAWING IS THE SOLE THIRD ANGLE PROJECTION PROPERTY OF WEXXAR PACKAGING INC. ANY REPRODUCTION DECIMAL .030 (3D SOLID DRAWING) IN PART OR AS A WHOLE WITHOUT THE WRITTEN PERMISSION OF...
- Page 107 Packaging Inc. ADD P/No. 52-3558 29MAR12 OTHERWISE SPECIFIED: THE INFORMATION CONTAINED IN THIS DRAWING IS THE SOLE THIRD ANGLE PROJECTION PROPERTY OF WEXXAR PACKAGING INC. ANY REPRODUCTION DECIMAL .030 ADD P/No. 16-551, ADD NOTES, ECO# 4934 12JUN12 (3D SOLID DRAWING)
- Page 108 UNLESS OTHERWISE SPECIFIED: THE INFORMATION CONTAINED IN THIS DRAWING IS THE SOLE THIRD ANGLE PROJECTION .XXX .005 FRACTIONAL 1/32 PROPERTY OF WEXXAR PACKAGING INC. ANY REPRODUCTION (3D SOLID DRAWING) IN PART OR AS A WHOLE WITHOUT THE WRITTEN PERMISSION OF .010 ANGULAR TITLE WEXXAR PACKAGING INC IS PROHIBITED.
- Page 109 UNLESS OTHERWISE SPECIFIED: THE INFORMATION CONTAINED IN THIS DRAWING IS THE SOLE THIRD ANGLE PROJECTION .XXX .005 FRACTIONAL 1/32 PROPERTY OF WEXXAR PACKAGING INC. ANY REPRODUCTION (3D SOLID DRAWING) IN PART OR AS A WHOLE WITHOUT THE WRITTEN PERMISSION OF .010 ANGULAR WEXXAR PACKAGING INC IS PROHIBITED.
- Page 110 THE INFORMATION CONTAINED IN THIS DRAWING IS THE SOLE THIRD ANGLE PROJECTION .XXX .005 FRACTIONAL 1/32 22-2184 QTY WAS 4 PCS 19FEB14 PROPERTY OF WEXXAR PACKAGING INC. ANY REPRODUCTION (3D SOLID DRAWING) IN PART OR AS A WHOLE WITHOUT THE WRITTEN PERMISSION OF .010 ANGULAR TITLE WEXXAR PACKAGING INC IS PROHIBITED.
- Page 111 UNLESS OTHERWISE SPECIFIED: THE INFORMATION CONTAINED IN THIS DRAWING IS THE SOLE THIRD ANGLE PROJECTION .XXX .005 FRACTIONAL 1/32 PROPERTY OF WEXXAR PACKAGING INC. ANY REPRODUCTION (3D SOLID DRAWING) IN PART OR AS A WHOLE WITHOUT THE WRITTEN PERMISSION OF .010 ANGULAR TITLE WEXXAR PACKAGING INC IS PROHIBITED.
- Page 112 UNLESS OTHERWISE SPECIFIED: THE INFORMATION CONTAINED IN THIS DRAWING IS THE SOLE THIRD ANGLE PROJECTION .XXX .005 FRACTIONAL 1/32 PROPERTY OF WEXXAR PACKAGING INC. ANY REPRODUCTION (3D SOLID DRAWING) IN PART OR AS A WHOLE WITHOUT THE WRITTEN PERMISSION OF .010 ANGULAR TITLE WEXXAR PACKAGING INC IS PROHIBITED.
- Page 113 UNLESS OTHERWISE SPECIFIED: THE INFORMATION CONTAINED IN THIS DRAWING IS THE SOLE THIRD ANGLE PROJECTION .XXX .005 FRACTIONAL 1/32 PROPERTY OF WEXXAR PACKAGING INC. ANY REPRODUCTION (3D SOLID DRAWING) .010 ANGULAR IN PART OR AS A WHOLE WITHOUT THE WRITTEN PERMISSION OF TITLE WEXXAR PACKAGING INC IS PROHIBITED.
- Page 114 Packaging Inc. UNLESS OTHERWISE SPECIFIED: THE INFORMATION CONTAINED IN THIS DRAWING IS THE SOLE .XXX .005 FRACTIONAL 1/32 PROPERTY OF WEXXAR PACKAGING INC. ANY REPRODUCTION IN PART OR AS A WHOLE WITHOUT THE WRITTEN PERMISSION OF .010 ANGULAR TITLE WEXXAR PACKAGING INC IS PROHIBITED.
- Page 115 PROPRIETARY AND CONFIDENTIAL Packaging Inc. OTHERWISE SPECIFIED: THE INFORMATION CONTAINED IN THIS DRAWING IS THE SOLE THIRD ANGLE PROJECTION PROPERTY OF WEXXAR PACKAGING INC. ANY REPRODUCTION DECIMAL .030 (3D SOLID DRAWING) IN PART OR AS A WHOLE WITHOUT THE WRITTEN PERMISSION OF...
- Page 116 LEGEND NOTES: 1. AIR C ONSUMPTION 20 STAND ARD CU BIC FEET PER MINU TE R odless D ouble-Acting D ouble-Acting Cy linder OF C LEAN, D RY AIR AT 90 PSIG IS REQU IR ED . C y linder 5/2-W ay Solenoid Valv e 2.
- Page 117 Pro Mach Rev. Page ML1400 THIS DOCUMENT CONTAINS INFORMATION PROPRIETARY TO WEXXAR PACKAGING INC. AND MUST NOT BE REPRODUCED, DESCRIBED TO OTHERS, OR USED FOR ANY OTHER PURPOSE OTHER THAN THE PURPOSE FOR WHICH IT IS FURNISHED PVP7 7'' Drawing No.
- Page 118 Pro Mach Rev. Page ML1400 THIS DOCUMENT CONTAINS INFORMATION PROPRIETARY TO WEXXAR PACKAGING INC. AND MUST NOT BE REPRODUCED, DESCRIBED TO OTHERS, OR USED FOR ANY OTHER PURPOSE OTHER THAN THE PURPOSE FOR WHICH IT IS FURNISHED PVP7 7'' Drawing No.
- Page 119 Pro Mach Rev. Page ML1400 THIS DOCUMENT CONTAINS INFORMATION PROPRIETARY TO WEXXAR PACKAGING INC. AND MUST NOT BE REPRODUCED, DESCRIBED TO OTHERS, OR USED FOR ANY OTHER PURPOSE OTHER THAN THE PURPOSE FOR WHICH IT IS FURNISHED PVP7 7'' Drawing No.
- Page 120 Pro Mach Rev. Page ML1400 THIS DOCUMENT CONTAINS INFORMATION PROPRIETARY TO WEXXAR PACKAGING INC. AND MUST NOT BE REPRODUCED, DESCRIBED TO OTHERS, OR USED FOR ANY OTHER PURPOSE OTHER THAN THE PURPOSE FOR WHICH IT IS FURNISHED PVP7 7'' Drawing No.
Need help?
Do you have a question about the BEL 290T and is the answer not in the manual?
Questions and answers