Advertisement
Advertisement
Table of Contents

Subscribe to Our Youtube Channel
Related Manuals for Kogan KAMFSBS551A


Summary of Contents for Kogan KAMFSBS551A
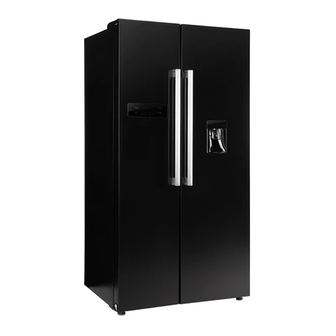
- Page 1 551L SIDE BY SIDE FRIDGE WITH WATER DISPENSER KAMFSBS551A...
-
Page 2: Table Of Contents
Safety & Warnings Overview Installation Operation Cleaning & Care Troubleshooting Notes... -
Page 3: Safety & Warnings
SAFETY & WARNINGS Before switching on the appliance for the first time read the following safety notes. • This appliance is intended to be used in household and similar applications such as staff kitchen areas in shops, offices and other working environments; farmhouses and by clients in hotels, motels and other residential type environments;... - Page 4 Children should be supervised to ensure that they do not play with the appliance. • If the power cord is damaged, it must be replaced by the Kogan.com, its service agent or similarly qualified persons in order to avoid a hazard.
- Page 5 • If the power cord or plug shows any sign of damage, cease immediately and contact help.Kogan.com for support. • Use a dedicated electrical outlet for this appliance. Avoid sharing the outlet with other appliances.
- Page 6 WARNING To avoid contamination of food, familiarise yourself with the following: • Opening the door for long periods can cause a significant increase of the temperature in the compartments of the appliance. • Regularly clean surfaces that contact food and accessible drainage systems. •...
-
Page 7: Overview
OVERVIEW Light Door tray Water tank Glass shelf Glass shelf Ice tray 2-star Crisper drawer door tray Drawer Note: The above image is for illustrative purpose only. Actual product may differ slight. • The 2-star door tray maintains a temperature of -12°C, making it ideal for keeping your ice cream and other frozen treats perfectly chilled. -
Page 8: Installation
INSTALLATION Before First Use • Unpacking: Remove all external and internal packaging. Clean the exterior with a soft, dry cloth and the interior with a damp, lukewarm cloth to remove any residue from manufacturing or shipping. • Placement: Avoid installing the fridge in a narrow recess or in direct proximity to heat sources, direct sunlight, or areas with high moisture. - Page 9 Space Requirements 1765 1600 1130 Product Overall Dimensions (W x D x H): 897 x 761 x 1765. Note: All dimensions in mm...
- Page 10 +16°C to +32°C +16°C to +38°C +16°C to +43°C If you have any doubts regarding installation, contact help.Kogan.com for support. ATTENTION The cooling performance and power consumption of the refrigerator may be affected by the ambient temperature, the door-opening frequency and the location of the refrigerator. The...
- Page 11 Leveling Feet • To avoid vibration, the appliance must be levelled. • If required, adjust the leveling feet to compensate for an uneven floor. • The front should be slightly higher than the rear to aid in door closing. • Leveling feet can be turned easily by tipping the cabinet slightly.
- Page 12 Connecting the Appliance After installing the appliance, connect the power plug to an electrical outlet. ATTENTION After connecting the power cord (or plug) to the outlet, wait 2-3 hours before placing food into the appliance. If you add food before the appliance has cooled completely, your food may spoil.
-
Page 13: Operation
OPERATION Control Panel Display Freezer compartment temperature Refrigerating compartment temperature Vacation indicator Quick freezing indicator Quick cooling indicator Lock/unlock indicator Button Freezer compartment temperature adjustment Refrigerating compartment temperature adjustment Mode setting Lock/unlock controls Note: The above image is for illustrative purpose only. Actual product may differ slight. - Page 14 Lock/Unlock Control Panel • In the unlocked state, press and hold the “LOCK/UNLOCK” button for 3 seconds. The control panel will lock. • In the locked state, press and hold the “LOCK/UNLOCK” button for 3 seconds. The control panel will unlock. •...
- Page 15 • Quick-Freezing Mode: This mode sets the freezing chamber temperature to -24°C for rapid freezing of items. Upon exiting quick-freezing mode, the temperature of the freezing chamber will automatically revert to the temperature setting that was in place prior to activation. This ensures your freezer returns to its standard operating temperature without manual adjustment.
- Page 16 Recommended Settings: These settings are recommended for optimal energy efficiency and to ensure the best preservation of food quality and safety. • Refrigerated Chamber: 4°C • Freezing Chamber: -18°C ATTENTION The quick-freezing function is specifically designed to preserve the nutritional value of your food by freezing it rapidly.
- Page 17 Using the Water Dispenser The water dispenser provides chilled water directly without the need to open the refrigerator door. This feature helps reduce the number of door openings, minimizing the loss of cold air and saving on electricity costs. It’s a convenient way to access cold water while keeping your refrigerator efficient and effective.
- Page 18 Making Ice Gently pull out the ice tray and fill the ice tray with water to the water level line. Then carefully replace the ice tray horizontally. When the ice cubes are ready, turn the knob clockwise (turn to the end and release), the ice cubes will drop from the ice tray into the ice box.
- Page 19 Storing Food Freezer compartment: • The freezer compartment is specifically designed for the low-temperature freezing of food, long-term storage of frozen items, and making ice cubes. • Be mindful of the star classifications (4-star, 2-star, and 1-star) within the freezer compartment, which indicate the maximum storage periods for different types of frozen food.
- Page 20 • Foods or food containers should not touch the back wall of the fridge to avoid freezing to the wall. Also, minimize the frequency of opening the refrigerator door to maintain the internal temperature. • Meat and clean fish, when wrapped in a package or plastic foil, can be stored in the fridge compartment if they will be used within 1–2 days.
-
Page 21: Cleaning & Care
CLEANING & CARE Before Maintenance: Disconnect the appliance from the electrical supply and wait at • least 5 minutes before restarting. This prevents damage to the compressor from frequent starting. Removing Frost and Ice: Do not use sharp objects to remove frost or ice. Avoid using •... - Page 22 Defrosting Defrosting the Freezer Compartment: Even though this appliance features automatic defrosting, a layer of frost may still form on the interior walls of the freezer compartment if the door is frequently opened or left open for extended periods. Should the frost build-up become excessive, it's advisable to defrost when your food stock is low.
- Page 23 Cleaning the Glass Shelves Removing the Shelves: The glass shelves are secured with a backstop at the point where they contact the refrigerator liner. To remove a shelf, first lift it slightly upward to clear the backstop, then pull it toward you to take it out of the refrigerator. Cleaning and Adjusting the Shelves: Once removed, adjust the height of the shelves or clean them as needed.
- Page 24 Cleaning the Water Dispenser Note: The specific features and components of the water dispenser may vary depending on the model of your refrigerator. Removing the Dispenser Components: Water Dispenser: Empty the water dispenser to ensure there is no water inside. Grasp both sides of the water dispenser elements with your hands.
- Page 25 Installing the Water Valve: • Align the valve with the guide groove. • Push the valve downward at a 45° angle until you hear a click, indicating that the valve is securely in place. Installing the Seal Ring on the Water Dispenser: •...
- Page 26 Changing the Light Replacement or maintenance of the LED lights should only be performed by Kogan.com, its service agent, or a similarly qualified person to ensure safety and proper handling. Note: This appliance contains two light sources rated in energy efficiency class G.
-
Page 27: Troubleshooting
TROUBLESHOOTING The following minor issues can be resolved by the user. If problem persists, contact help.Kogan.com for support. Problem Possible Causes Solution Power supply is off or the Ensure the power cord is firmly plug is not properly plugged in. - Page 28 This is normal but ensure Normal heat dissipation adequate ventilation around the from the appliance. appliance. Outer wall feels hot Elevated ambient If possible, increase ventilation or temperatures, especially in relocate the appliance to a cooler summer. area. Metal tubes inside the Cross or vertical This is normal.
- Page 29 Understanding and Managing Common Refrigerator Noises During normal operation, your refrigerator may produce sounds that are typical and do not indicate any issues with its functionality. Here’s how to address and minimize some common noises: Uneven Placement Noise: If you hear noise due to the appliance not being level, adjust •...
-
Page 30: Notes
NOTES... - Page 32 Need more information? We hope that this user guide has given you the assistance needed for a simple set-up. For the most up-to-date guide for your product, as well as any additional assistance you may require, head online to help.kogan.com...
Need help?
Do you have a question about the KAMFSBS551A and is the answer not in the manual?
Questions and answers