Advertisement
Installation instructions, accessories
Volvo Car Corporation Gothenburg, Sweden
Instruction No
Instruction No
Version
Version
32400777
32400777
1.0
1.0
Materials
Materials
Designation
Designation
Isopropanol
Isopropanol
Masking tape
Masking tape
Activator
Activator
Velcro strip
Velcro strip
IMG-491737
IMG-491737
© Volvo Car Corporation
Part. No.
Part. No.
32373249, 32400137, 32400136
32373249, 32400137, 32400136
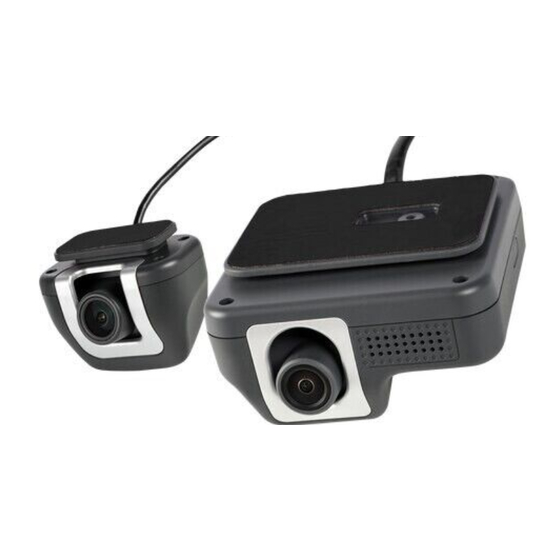
Dashcam, front and rear
Dashcam, front and rear
Part number
Part number
1161823
1161823
Dashcam, front and rear- 32400777 - V1.0
Page 1 / 47
Advertisement
Table of Contents

Related Manuals for Volvo 32373249

Summary of Contents for Volvo 32373249
- Page 1 Installation instructions, accessories Volvo Car Corporation Gothenburg, Sweden Instruction No Instruction No Version Version Part. No. Part. No. 32400777 32400777 32373249, 32400137, 32400136 32373249, 32400137, 32400136 Dashcam, front and rear Dashcam, front and rear Materials Materials Designation Designation Part number...
-
Page 2: Further Information
Certain steps in the instructions are only presented in the form of images. Explanatory text is also given for more complicated steps. In the event of any problems with the instructions or the accessory, contact your local Volvo dealer. Color symbols Note! This colour chart displays (in colour print and electronic version) the importance of the different colours used in the images of the method steps. - Page 3 Installation instructions, accessories Volvo Car Corporation Gothenburg, Sweden There may be parts in the accessories kit that are not needed for this installation. IMG-497538 Preparation IMG-426135 © Volvo Car Corporation Dashcam, front and rear- 32400777 - V1.0 Page 3 / 47...
-
Page 4: Disconnecting The Battery
Installation instructions, accessories Volvo Car Corporation Gothenburg, Sweden IMG-411342 Disconnecting the battery IMG-453837 © Volvo Car Corporation Dashcam, front and rear- 32400777 - V1.0 Page 4 / 47... - Page 5 Installation instructions, accessories Volvo Car Corporation Gothenburg, Sweden Remove the marked part. IMG-497676 Loosen the nut. Remove the battery's negative cable. IMG-497677 Removal © Volvo Car Corporation Dashcam, front and rear- 32400777 - V1.0 Page 5 / 47...
- Page 6 Installation instructions, accessories Volvo Car Corporation Gothenburg, Sweden Release the catches. Repeat on the other side. Remove the marked part. IMG-497738 Note! The graphic shows the back of the component before removal. IMG-497740 © Volvo Car Corporation Dashcam, front and rear- 32400777 - V1.0...
-
Page 7: Accessory Installation
Installation instructions, accessories Volvo Car Corporation Gothenburg, Sweden Release the catches. Loosen the component indicated. Do not remove it. IMG-498123 Release the catches. Repeat on the other side. Remove the marked part. IMG-498133 Accessory installation © Volvo Car Corporation Dashcam, front and rear- 32400777 - V1.0... - Page 8 Installation instructions, accessories Volvo Car Corporation Gothenburg, Sweden Caution! Make sure that the surface is clean and free of foreign material. Clean the marked area. Use: , Isopropanol IMG-497864 Note! The graphic shows the back of the component before removal.
- Page 9 Installation instructions, accessories Volvo Car Corporation Gothenburg, Sweden 1. Lift approximately 2 mm. 2. Remove the marked part. IMG-499118 Note! Do not remove the protective film. Place the component where indicated in the graphic. Measure IMG-499107 © Volvo Car Corporation Dashcam, front and rear- 32400777 - V1.0...
- Page 10 Installation instructions, accessories Volvo Car Corporation Gothenburg, Sweden Mark using a pen IMG-499108 Apply tape. Use: , Masking tape IMG-499109 © Volvo Car Corporation Dashcam, front and rear- 32400777 - V1.0 Page 10 / 47...
- Page 11 Installation instructions, accessories Volvo Car Corporation Gothenburg, Sweden Apply a thin and even layer. Use: 1161823, Activator IMG-499110 Remove the tape. IMG-499112 © Volvo Car Corporation Dashcam, front and rear- 32400777 - V1.0 Page 11 / 47...
- Page 12 Installation instructions, accessories Volvo Car Corporation Gothenburg, Sweden Remove the protective film. IMG-499105 Note! Press the component to remove any air bubbles between the window and the component. Allow to dry for at least 20 minutes. IMG-499137 Removal © Volvo Car Corporation Dashcam, front and rear- 32400777 - V1.0...
- Page 13 Installation instructions, accessories Volvo Car Corporation Gothenburg, Sweden Remove the panel. IMG-436053 Disconnect the connector. IMG-453298 © Volvo Car Corporation Dashcam, front and rear- 32400777 - V1.0 Page 13 / 47...
- Page 14 Installation instructions, accessories Volvo Car Corporation Gothenburg, Sweden Remove the panel. IMG-414575 Remove the panel. Disconnect the connector, if applicable. IMG-414580 © Volvo Car Corporation Dashcam, front and rear- 32400777 - V1.0 Page 14 / 47...
- Page 15 Installation instructions, accessories Volvo Car Corporation Gothenburg, Sweden Remove the screws. Remove the panel. IMG-414585 Remove the marked part. Remove the screw. Tightening torque: Panel A-pillar , 4.5 Nm IMG-491860 © Volvo Car Corporation Dashcam, front and rear- 32400777 - V1.0...
- Page 16 Installation instructions, accessories Volvo Car Corporation Gothenburg, Sweden Remove the panel. Use: Interior trim remover IMG-491865 Release the lock. Repeat on the other side. Remove the marked part. IMG-414411 © Volvo Car Corporation Dashcam, front and rear- 32400777 - V1.0...
- Page 17 Installation instructions, accessories Volvo Car Corporation Gothenburg, Sweden Caution! Make sure that the seat backrest upholstery (fold down position) is not damaged by contact with the floor! IMG-422120 Remove the panel. IMG-414415 © Volvo Car Corporation Dashcam, front and rear- 32400777 - V1.0...
- Page 18 Installation instructions, accessories Volvo Car Corporation Gothenburg, Sweden Remove the screw. IMG-414995 Remove the marked part. IMG-414433 © Volvo Car Corporation Dashcam, front and rear- 32400777 - V1.0 Page 18 / 47...
- Page 19 Installation instructions, accessories Volvo Car Corporation Gothenburg, Sweden Release the catch. Remove the marked part. IMG-415049 Remove the marked part. IMG-497829 © Volvo Car Corporation Dashcam, front and rear- 32400777 - V1.0 Page 19 / 47...
- Page 20 Installation instructions, accessories Volvo Car Corporation Gothenburg, Sweden Remove the marked part. Remove the screws. Tightening torque: Panel, to D-Pillar , 4.5 Nm IMG-497681 Note! The graphic shows the back of the component before removal. IMG-497729 Vehicles with sun curtain ©...
-
Page 21: All Vehicles
Installation instructions, accessories Volvo Car Corporation Gothenburg, Sweden Note! The graphic shows the back of the component before removal. IMG-498022 All vehicles Remove the marked part. IMG-497730 © Volvo Car Corporation Dashcam, front and rear- 32400777 - V1.0 Page 21 / 47... - Page 22 Installation instructions, accessories Volvo Car Corporation Gothenburg, Sweden Remove the insulation material. IMG-497757 Remove the screws. Remove the marked part. Tightening torque: M5 , 5 Nm IMG-497759 © Volvo Car Corporation Dashcam, front and rear- 32400777 - V1.0 Page 22 / 47...
- Page 23 Installation instructions, accessories Volvo Car Corporation Gothenburg, Sweden Remove the panel. IMG-418522 Remove the clip. IMG-497765 © Volvo Car Corporation Dashcam, front and rear- 32400777 - V1.0 Page 23 / 47...
- Page 24 Installation instructions, accessories Volvo Car Corporation Gothenburg, Sweden 1. Loosen the marked detail. 2. Lift the marked component up 3. Loosen the marked details from the clip/clips. IMG-497773 Tilt the component somewhat. Remove the marked part. IMG-497784 © Volvo Car Corporation Dashcam, front and rear- 32400777 - V1.0...
- Page 25 Installation instructions, accessories Volvo Car Corporation Gothenburg, Sweden Fold marked parts aside. Remove the screws. Tightening torque: Entry handle, to bracket , 6 Nm IMG-497828 Remove the panel. Disconnect the connector, if applicable. IMG-414483 © Volvo Car Corporation Dashcam, front and rear- 32400777 - V1.0...
- Page 26 Installation instructions, accessories Volvo Car Corporation Gothenburg, Sweden Remove the marked part. IMG-397280 Detach the panel. IMG-397244 © Volvo Car Corporation Dashcam, front and rear- 32400777 - V1.0 Page 26 / 47...
-
Page 27: Accessory Installation
Installation instructions, accessories Volvo Car Corporation Gothenburg, Sweden Remove the panel. IMG-397247 Accessory installation Caution! Make sure that the surface is clean and free of foreign material. Clean the marked area. Use: , Isopropanol IMG-497830 © Volvo Car Corporation Dashcam, front and rear- 32400777 - V1.0... - Page 28 Installation instructions, accessories Volvo Car Corporation Gothenburg, Sweden Measure Hold the component in the position shown. Use: Steel scale IMG-497832 Note! Note the position. Use pencil to mark the target area. IMG-497837 © Volvo Car Corporation Dashcam, front and rear- 32400777 - V1.0...
- Page 29 Installation instructions, accessories Volvo Car Corporation Gothenburg, Sweden Note! Note the position. IMG-497838 Remove the protective film. IMG-492660 © Volvo Car Corporation Dashcam, front and rear- 32400777 - V1.0 Page 29 / 47...
- Page 30 Installation instructions, accessories Volvo Car Corporation Gothenburg, Sweden Install component that comes with the accessory kit. IMG-497845 Assemble components that come with the accessory kit. Wrap a Velcro strap around the wire to increase the diameter. Use: , Velcro strip IMG-497856 ©...
- Page 31 Installation instructions, accessories Volvo Car Corporation Gothenburg, Sweden Caution! Take extra care not to crease the headliner. Note! Velcro strip Lower the component somewhat. IMG-497869 Position wire as illustrated. IMG-497872 © Volvo Car Corporation Dashcam, front and rear- 32400777 - V1.0...
- Page 32 Installation instructions, accessories Volvo Car Corporation Gothenburg, Sweden Caution! The wire must be routed behind the inflatable curtain. Route the wire adjacent to existing wirings. Use: , Velcro strip IMG-497876 Route the wire adjacent to existing wirings. Use: , Velcro strip IMG-498031 ©...
- Page 33 Installation instructions, accessories Volvo Car Corporation Gothenburg, Sweden Install the marked component. IMG-498069 Press the marked component. IMG-498034 © Volvo Car Corporation Dashcam, front and rear- 32400777 - V1.0 Page 33 / 47...
- Page 34 Installation instructions, accessories Volvo Car Corporation Gothenburg, Sweden Straighten the cable. IMG-498071 Note! Orientation view IMG-499138 © Volvo Car Corporation Dashcam, front and rear- 32400777 - V1.0 Page 34 / 47...
- Page 35 Installation instructions, accessories Volvo Car Corporation Gothenburg, Sweden Remove the marking. Use: , Isopropanol IMG-499132 Install component that comes with the accessory kit. IMG-499162 © Volvo Car Corporation Dashcam, front and rear- 32400777 - V1.0 Page 35 / 47...
- Page 36 Installation instructions, accessories Volvo Car Corporation Gothenburg, Sweden Caution! Take extra care not to crease the headliner. Route the wire adjacent to existing wirings. Use: , Velcro strip IMG-499164 Install components that come with the accessory kit. Connect the connectors.
- Page 37 Installation instructions, accessories Volvo Car Corporation Gothenburg, Sweden Caution! Take extra care not to crease the headliner. Position/route the cables as illustrated. IMG-498011 Route the wire adjacent to existing wirings. Use: , Velcro strip IMG-497692 © Volvo Car Corporation Dashcam, front and rear- 32400777 - V1.0...
- Page 38 Installation instructions, accessories Volvo Car Corporation Gothenburg, Sweden Fold the insulation aside. Position/route the cables as illustrated. assemble the cables. Use: , Velcro strip IMG-497430 Fold the carpet aside. IMG-492231 © Volvo Car Corporation Dashcam, front and rear- 32400777 - V1.0...
- Page 39 Installation instructions, accessories Volvo Car Corporation Gothenburg, Sweden Remove the marked part. IMG-491936 Position/route the cables as illustrated. IMG-498507 © Volvo Car Corporation Dashcam, front and rear- 32400777 - V1.0 Page 39 / 47...
- Page 40 Installation instructions, accessories Volvo Car Corporation Gothenburg, Sweden Remove fuses. The parts are not to be reused. IMG-491838 Install components that come with the accessory kit. IMG-492400 © Volvo Car Corporation Dashcam, front and rear- 32400777 - V1.0 Page 40 / 47...
- Page 41 Installation instructions, accessories Volvo Car Corporation Gothenburg, Sweden Route the wires adjacent to existing wirings. Position the cable harness excess as illustrated. Use: , Velcro strip IMG-497438 Connect the ground cable. Install the nut. Tightening torque: M6 , 10 Nm IMG-497442 ©...
- Page 42 Installation instructions, accessories Volvo Car Corporation Gothenburg, Sweden Route the wires adjacent to existing wirings. Use: , Velcro strip IMG-497445 Position/route the cable as illustrated. Use: , Velcro strip IMG-497298 © Volvo Car Corporation Dashcam, front and rear- 32400777 - V1.0...
- Page 43 Installation instructions, accessories Volvo Car Corporation Gothenburg, Sweden Position/route the cable as illustrated. Use: , Velcro strip IMG-497468 Assemble components that come with the accessory kit. IMG-497232 © Volvo Car Corporation Dashcam, front and rear- 32400777 - V1.0 Page 43 / 47...
- Page 44 Installation instructions, accessories Volvo Car Corporation Gothenburg, Sweden Route the wire adjacent to existing wirings. Use: , Velcro strip IMG-497288 Connect the connectors. Position the cable harness excess as illustrated. IMG-498119 © Volvo Car Corporation Dashcam, front and rear- 32400777 - V1.0...
- Page 45 Installation instructions, accessories Volvo Car Corporation Gothenburg, Sweden Use: , Velcro strip IMG-498122 Connecting the battery Reinstall the battery's negative cable. Tighten the nut. Tightening torque: Battery cable for battery , 6 Nm IMG-497677 Accessory installation © Volvo Car Corporation Dashcam, front and rear- 32400777 - V1.0...
-
Page 46: Installation
Installation instructions, accessories Volvo Car Corporation Gothenburg, Sweden Download the app for the accessory according to the camera's manual Connect the app to the camera IMG-497537 1. Adjust the camera lens vertically so that the rear edge of the hood is visible at the bottom of the image in the app. - Page 47 Installation instructions, accessories Volvo Car Corporation Gothenburg, Sweden Note! Note the position. IMG-498040 Check for correct operation. IMG-498060 Reinstall the removed parts in reverse order. © Volvo Car Corporation Dashcam, front and rear- 32400777 - V1.0 Page 47 / 47...
Need help?
Do you have a question about the 32373249 and is the answer not in the manual?
Questions and answers