Nvidia BlueField-3 User Manual
Dpu controller
Hide thumbs
Also See for BlueField-3:
- User manual (104 pages) ,
- User manual (99 pages) ,
- User manual (140 pages)
Table of Contents
Advertisement
Quick Links
Advertisement
Table of Contents

Related Manuals for Nvidia BlueField-3


Summary of Contents for Nvidia BlueField-3
- Page 1 NVIDIA BlueField-3 DPU Controller User Manual...
-
Page 2: Table Of Contents
Accessories Kit ................8 1.2.3 PCIe Auxiliary Card Package.............8 Features and Benefits ............... 8 BlueField-3 Administrator Quick Start Guide ........13 Prerequisites for Initial BlueField-3 Deployment ........13 First-time Installation Procedure ............13 Supported Interfaces ..............14 FHHL DPU Controller Layout and Interface Information ......14 Interfaces Detailed Description............ - Page 3 Power-Down Sequence ..............38 5.10 PCIe x16 DPU Controller Installation Instructions........39 5.10.1 Installation Instructions..............39 5.10.2 Uninstalling the BlueField-3 Card ............ 40 5.11 [Optional] PCIe Extension Connection (2x PCIe x16) Installation Instructions ..41 5.11.1 Installing the DPU............... 42 5.11.2 Uninstalling the Cards..............
- Page 4 Troubleshooting ................ 52 General Troubleshooting ..............52 Specifications................53 900-9D3C6-00CV-GA0 / 900-9D3C6-00CV-DA0 Specifications......53 8.1.1 DPU Controller Mechanical Drawing and Dimensions......54 Monitoring................55 Thermal Sensors................55 Heatsink ..................55 Finding the GUID/MAC and Serial Number on the Card ......56 10.1 DPU Controller Board Label Example ............
- Page 5 This manual is intended for the installer and user of these cards. The manual assumes basic familiarity with InfiniBand/Ethernet network and architecture specifications. Technical Support Customers who purchased NVIDIA products directly from NVIDIA are invited to contact us through the following methods: •...
- Page 6 (DACs), copper splitter cables, Active Optical Cables (AOCs) and transceivers in a wide range of lengths from 0.5m to 10km. In addition to meeting IBTA standards, NVIDIA tests every product in an end-to-end environment ensuring a Bit Error Rate of less than 1E-15. ...
-
Page 7: Introduction
Providing powerful computing, and a broad range of programmable acceleration engines in the I/O path, BlueField-3 is perfectly positioned to address the infrastructure needs of the most demanding applications, while delivering full software backward compatibility through the NVIDIA DOCA™... -
Page 8: Package Contents
Be sure to inspect each piece of equipment shipped in the packing box. If anything is missing or damaged, contact your reseller. 1.2.1 Card Package 1x BlueField-3 DPU Controller Cards 1x tall bracket (shipped assembled on the card) Accessories 1.2.2 Accessories Kit ... - Page 9 Feature Description InfiniBand Architecture Specification v1.5 The DPU Controller delivers low latency, high bandwidth, and compliant computing efficiency for high-performance computing (HPC), artificial intelligence (AI), and hyperscale cloud data centers applications. The DPU Controller is InfiniBand Architecture Specification v1.5 compliant. InfiniBand Network Protocols and Rates: ...
- Page 10 Feature Description Up to 200 Gigabit Ethernet The DPU Controller complies with the following IEEE 802.3 standards: 200GbE / 100GbE / 50GbE / 40GbE / 25GbE / 10GbE Protocol MAC Rate IEEE802.3ck 200/100 Gigabit Ethernet (Include ETC enhancement) IEEE802.3cd 200/100 Gigabit Ethernet IEEE802.3bs (Include ETC enhancement) IEEE802.3cm...
- Page 11 NVIDIA BlueField-3 Arm cores. On the storage initiator side, the DPU Controller can prove an efficient solution for hyper-converged systems to enable the host CPU to focus on compute while all the storage interface is handled through the Arm cores.
- Page 12 DPU Controller hardware-based accelerations offload the crypto operations and free up the CPU, reducing latency and enabling scalable crypto solutions. BlueField-3 “host-unaware” solutions may transmit and receive data, while BlueField-3 acts as a bump-in-the-wire for crypto. Security Accelerators A consolidated compute and network solution based on the DPU Controller achieves significant advantages over a centralized security server solution.
-
Page 13: Bluefield-3 Administrator Quick Start Guide
2 BlueField-3 Administrator Quick Start Guide This page is tailored for system administrators wishing to install BlueField and perform sample administrative actions on it. For a quick start guide aimed at software developers wishing to develop applications on the BlueField card using the DOCA framework, please refer to the... -
Page 14: Supported Interfaces
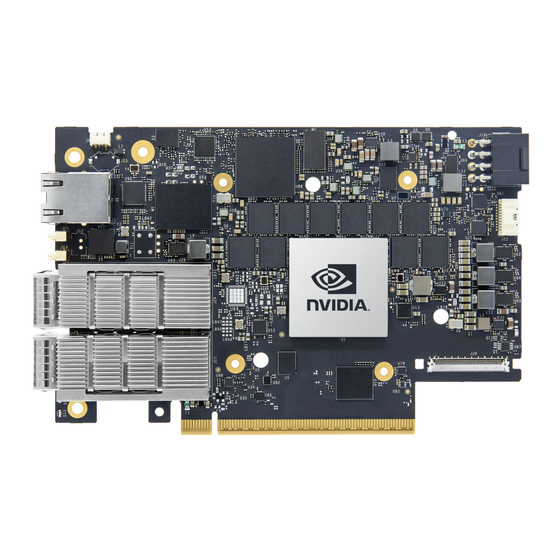
3 Supported Interfaces This section describes the DPU Controller supported interfaces. Each numbered interface referenced in the figures is described in the following table with a link to detailed information. The below figures are for illustration purposes only and might not reflect the current revision of the DPU Controller. -
Page 15: Interfaces Detailed Description
Leverages the rich Arm software ecosystem and introduces the ability to offload the x86 software stack. At the heart of BlueField-3, the ConnectX-7 network offload controller with RDMA and RDMA over Converged Ethernet (RoCE) technology delivers cutting-edge performance for networking and storage applications such as NVMe over Fabrics. Advanced features include an embedded virtual... -
Page 16: Networking Interface
3.2.2 Networking Interface The DPU Controller includes special circuits to protect the card/server from ESD shocks when plugging copper cables. The network ports are compliant with the InfiniBand Architecture Specification, Release 1.5. InfiniBand traffic is transmitted through the cards' QSFP112 connectors. 3.2.3 Networking Ports LEDs Interface One bicolor (Yellow and Green) I/O LED per port indicates speed and link status. ... -
Page 17: Pci Express Interface
The USB to UART cable is not used for NC-SI management purposes. 3.2.7 UART Interface Connectivity The UART debug interface on BlueField-3 boards can be accessed through a 20-pin NC-SI connector, which is associated with the NIC BMC device. The connectivity is shown in the following table:... -
Page 18: Usb 4-Pin Ra Connector
3.2.8 USB 4-pin RA Connector The USB 4-pin RA USB connector is used to load operating system images. Use a 4-pin male connector to a male Type-A cable to connect to the board. It is prohibited to connect male-to-male to host, it is only used for a disk on key. The male connector to the male Type-A cable is not included in the shipped DPU Controller card box and should be ordered separately as part of the accessories kit (P/N: MBF35-DKIT). -
Page 19: Pps In/Out Interface
The DPU Controller PTP solution allows you to run any PTP stack on your host. With respect to testing and measurements, selected NVIDIA DPU Controllers allow you to use the PPS-out signal from the onboard MMCX RA connecter. The DPU Controller also allows measuring PTP in scale with the PPS-In signal. -
Page 20: Cabline Ca-Ii Plus Connectors
• Do not link the CPU power cable to the BlueField-3 DPU PCIe ATX power connector, as their pin configurations differ. Using the CPU power cable in this manner is strictly prohibited and can potentially damage the BlueField-3 DPU. Please refer to External PCIe Power Supply... -
Page 21: Integrated Bmc Interface
3.2.15 RTC Battery BlueField-3 incorporates a coin type Lithium battery CR621 for RTC (Real Time Clock). 3.2.16 eMMC Interface The eMMC is an x8 NAND flash used for Arm boot and operating system storage. Memory size is... -
Page 22: Pinouts Description
4 Pinouts Description 4.1 PCI Express Interface The below tables lists the PCI Express pins description. For further details, please refer to PCI Express Interface. DPU PCI Express x16 Pin Description Signal Description Signal Description Name Name PRSNT1# Mechanical Present JTAG - Not Connected SMCLK Host SMBus JTAG - Not Connected... - Page 23 Signal Description Signal Description Name Name PERN2 PETP3 PETN3 PERP3 PERN3 RSVD RSVD SER_CLK SER_CAPTUR PETP4 E PETN4 PERP4 PERN4 PETP5 PETN5 PERP5 PERN5 PETP6 PETN6 PERP6 PERN6 PETP7 PETN7 PERP7 PERN7 RSVD RSVD PETP8 PETN8 PERP8 PERN8 PETP9 PETN9 PERP9 PERN9...
-
Page 24: External Power Supply Connector
Signal Description Signal Description Name Name PERN10 PETP11 PETN11 PERP11 PERN11 PETP12 PETN12 PERP12 PERN12 PETP13 PETN13 PERP13 PERN13 PETP14 PETN14 PERP14 PERN14 PETP15 PETN15 PERP15 PERN15 PRSNT2# Mechanical Present 4.2 External Power Supply Connector The below table provides the External Power Supply pins of the external power supply interfaces on the DPU. -
Page 25: Nc-Si Management Interface
Pin Number Description Sense1 Sense0 4.3 NC-SI Management Interface The below tables list the NC-SI management interface pinout descriptions. For further details, please refer to NC-SI Management Interface. Signal Signal Description Name Ground PKG_ID1 Input (to NC-SI PKG_ID BlueField- Shoul be connected to the Primary controller NC-SI PKG_ID pins to set the appropriate package ID. - Page 26 Signal Signal Description Name RBT_CRS_D Output Carrier sense/receive data valid. This signal is used to indicate to the baseboard that the carrier sense/receive data is valid. For baseboards, this pin should be connected between the baseboard NC-SI over RBT PHY and the connector. This signal requires a 100 kΩ pull down resistor on the baseboard between the BMC and the RBT isolator to prevent the signal from floating when no DPU is installed.
-
Page 27: Cabline Ca-Ii Plus Connectors Pinouts
Signal Signal Description Name PRESENCE_ Presence of DPU. Baseboard should implement a 200 Ω series resistor and 4.7kohm pull-up resistor to 3.3V AUX. DPU should tie this to GND. Ground RBT_ARB_O Input NC-SI hardware arbitration output. If the baseboard supports multiple DPUs cards connected to the same RBT interface, it should implement logic that connects the RBT_ARB_OUT pin of the first populated DPU card to its RBT_ARB_IN pin if it is the only card present or to the RBT_ARB_IN pin of the next populated card and so on... - Page 28 Pin# Signal Name Wire Type AWG# Pin# on other PCIE_CPU_CX_12P Micro coax GND GND BAR PCIE_CPU_CX_11N Micro coax PCIE_CPU_CX_11P Micro coax GND GND BAR PCIE_CPU_CX_10N Micro coax PCIE_CPU_CX_10P Micro coax GND GND BAR PCIE_CPU_CX_9N Micro coax PCIE_CPU_CX_9P Micro coax GND GND BAR PCIE_CPU_CX_8N Micro coax...
-
Page 29: Print Side
Pin# Signal Name Wire Type AWG# Pin# on other PCIE_CPU_CX_0P Micro coax GND GND BAR No wire Micro coax No wire Micro coax AUX_PGOOD Micro coax No wire Micro coax I2C_AUX_SCL Micro coax I2C_AUX_SDA Micro coax S_PRSNT1_L Micro coax No wire 4.4.2 Print Side Pin# Signal Name... - Page 30 Pin# Signal Name Wire Type AWG# Pin# on other PCIE_CPU_CX_4P Micro coax PCIE_CPU_CX_4N Micro coax GND GND BAR PCIE_CPU_CX_5P Micro coax PCIE_CPU_CX_5N Micro coax GND GND BAR PCIE_CPU_CX_6P Micro coax PCIE_CPU_CX_6N Micro coax GND GND BAR PCIE_CPU_CX_7P Micro coax PCIE_CPU_CX_7N Micro coax GND ...
- Page 31 Pin# Signal Name Wire Type AWG# Pin# on other S_PERST1_CONN_L Micro coax No wire No Wire S_PRSNT2_L Micro coax...
-
Page 32: Hardware Installation And Pcie Bifurcation
5 Hardware Installation and PCIe Bifurcation Installation and initialization of the DPU Controller require attention to the mechanical attributes, power specification, and precautions for electronic equipment. 5.1 Safety Warnings Safety warnings are provided here in the English language. Please observe all safety warnings to avoid injury and prevent damage to system components. Note that not all warnings are relevant to all models. -
Page 33: Installation Procedure Overview
5.2 Installation Procedure Overview The installation procedure of DPU involves the following steps: Step Procedure Direct Link Check the system’s requirements. Refer to System Requirements Pay attention to the airflow consideration within Refer to Airflow Requirements the host system Follow the safety precautions Refer to Safety Unpack the package... -
Page 34: Software Requirements
Requirements section under the Introduction section. • Software Stacks -BlueField-3 DPU Controller is shipped with Ubuntu – a Linux commercial operating system – which includes the NVIDIA OFED stack (MLNX_OFED), and is capable of running all customer-based Linux applications seamlessly. For more information, please refer to the DOCA SDK documentation or NVIDIA BlueField DPU BSP. ... -
Page 35: Cables And Modules
Installation Instructions [Optional] PCIe Extension Connection (2x PCIe x16) Installation Instructions 5.8 Cables and Modules 5.8.1 Networking Cable Installation All cables can be inserted or removed with the unit powered on. To insert a cable, press the connector into the port receptacle until the connector is firmly seated. -
Page 36: Cable Installation Instructions
• Do not link the CPU power cable to the BlueField-3 DPU Controller PCIe ATX power connector, as their pin configurations differ. Using the CPU power cable in this manner is strictly prohibited and can potentially damage the BlueField-3 DPU Controller. Please refer to External PCIe Power Supply Connector Pins for the external PCIe power supply pins. -
Page 37: Dpu Controller Power-Up And Power-Down Sequences
5.9 DPU Controller Power-Up and Power-Down Sequences 5.9.1 Power-Up Sequence The 12V_ATX voltage can exceed the 12V_PCIE voltage by a maximum allowable voltage difference (dV) when the 12V_ATX reaches 11V. See below graph and table describing the dV between the 12V_ATX and 12V_PCIE voltages. -
Page 38: Power-Down Sequence
The 12V_ATX can be powered up after the 12V_PCIE, with a maximum delay of 2 seconds. The below graph illustrates the delay between the 12V_ATX and 12V_PCIE voltages at power-up. 5.9.2 Power-Down Sequence The 12V_PCIE voltage can be powered down simultaneously with the 12V_ATX voltage, or within a maximum delay of 200usec. -
Page 39: Pcie X16 Dpu Controller Installation Instructions
Locate an available PCI Express slot. Hold the card by its edges and bracket, avoiding contact with the top surface. Apply even pressure to both edges of the card and gently insert the BlueField-3 card into the PCI Express slot. Exercise caution to avoid touching the components on the top surface of the card. Do not use excessive force when seating the card, as this may damage the system or the card's components. ... -
Page 40: Uninstalling The Bluefield-3 Card
When the BlueField-3 card is properly seated, the port connectors are aligned with the slot opening, and the card's faceplate is visible against the system chassis. Secure the card with the screw. Close the system case. Install the networking cables. For instructions, please refer to Networking Cable... -
Page 41: Optional] Pcie Extension Connection (2X Pcie X16) Installation Instructions
The card is installed in a system that operates with voltages that can be lethal. Before uninstalling the board, please observe the following precautions to avoid injury and prevent damage to system components. Remove any metallic objects from your hands and wrists. It is strongly recommended to use an ESD strap or other antistatic devices. -
Page 42: Installing The Dpu
5.11.1 Installing the DPU The installation instructions include steps that involve a retention clip to be used while connecting the Cabline harnesses to the DPUs. Please note that this is an optional accessory. Please make sure to install the DPU cards in a PCIe slot capable of supplying the required power and airflow as stated in Specifications. - Page 43 Step 4: Slide the retention clip latches through the cutouts on the PCB. The latches should face the annotation on the PCB. Step 4: Clamp the retention clip. Verify both latches are firmly locked.
- Page 44 Step 5: Slide the Cabline CA-II Plus harnesses through the retention clip. Make sure that the clip opening is facing the plugs. ...
- Page 45 Step 6: Plug the Cabline CA-II Plus harnesses on the PCIe Auxiliary Card. As indicated on both sides of the Auxiliary connection card; plug the black harness to the component side and the white harness to the print side. Step 7: Verify the plugs are locked. Step 8: Slide the retention clip through the cutouts on the PCB.
-
Page 46: Uninstalling The Cards
Connect the DPU Controller and PCIe Auxiliary Connection cards in available PCI Express x16 slots in the chassis. Step 1: Locate two available PCI Express x16 slots. Step 2: Applying even pressure at both corners of the cards, insert the DPU in the PCI Express slots until firmly seated. -
Page 47: Pcie Bifurcation Configuration Options
PCIe bifurcation is supported starting from DOCA 2.5 with BlueField BSP 4.5.0 (released December 2023). NVIDIA BlueField-3 Self-Hosted DPU Controller provides a range of configuration scenarios to meet the demands of environments and deployments. This section describes the various connectivity options for peripherals on the PCIe, such as NVMe SSDs as PCIe endpoints. -
Page 48: Bifurcated To Eight X4 Pcie
5.12.1 Bifurcated to Eight x4 PCIe In this scenario, the x16 PCIe Goldfingers of the BlueField-3 DPU are bifurcated into four PCIe links, where each link comprises x4 PCIe lanes, while the additional x16 PCIe lanes are accessible via the Cabline CA-II Plus connector, bifurcated into four PCIe links, where each link comprises x4 PCIe lanes. -
Page 49: Bifurcated To One X16 Pcie And Eight X2 Pcie
5.12.2 Bifurcated to One x16 PCIe and Eight x2 PCIe In this scenario, the x16 PCIe Goldfingers of the BlueField-3 DPU are bifurcated to one PCIe link with x16 PCIe lanes, while the additional x16 PCIe lanes are accessible via the Cabline CA-II Plus connector, bifurcated into eight PCIe links, where each link comprises x2 PCIe lanes. - Page 50 mlxconfig -d <device> s PCI_BUS12_HIERARCHY_TYPE=2 mlxconfig -d <device> s PCI_BUS12_WIDTH=2 mlxconfig -d <device> s PCI_BUS12_SPEED=4 mlxconfig -d <device> s PCI_BUS13_HIERARCHY_TYPE=2 mlxconfig -d <device> s PCI_BUS13_WIDTH=2 mlxconfig -d <device> s PCI_BUS13_SPEED=4 mlxconfig -d <device> s PCI_BUS14_HIERARCHY_TYPE=2 mlxconfig -d <device> s PCI_BUS14_WIDTH=2 mlxconfig -d <device>...
-
Page 51: Setting High-Speed-Port Link Type
6 Setting High-Speed-Port Link Type The following table lists the BlueField-3 supported speeds and the default networking port link type OPN. Data Transmission Rate Default Protocol and Rate 900-9D3C6-00CV-GA0 InfiniBand: NDR200 200Gb/s Ethernet 200GbE 900-9D3C6-00CV-DA0 Ethernet: 200GbE To configure the networking high-speed ports mode, you can either use the mlxconfig or the UEFI tools. -
Page 52: Troubleshooting
Check that the DPU and its link are set to the same established speed, and duplex settings Refer to the latest version of BlueField DPU SW Manual Forgot password needed to install/upgrade and follow the instructions under "Upgrading NVIDIA the DPU image BlueField DPU Software" section. -
Page 53: Specifications
Electrical and thermal specifications are provided in "NVIDIA BlueField-3 DPUs and SuperNICs Thermal Electrical and Thermal Specifications" document. You can access the document either by Specificati logging into NVOnline or by contacting your NVIDIA representative. Temperature Operational 0°C to 55°C Environmen Non-operational -40°C to 70°C... -
Page 54: Dpu Controller Mechanical Drawing And Dimensions
Non-operational 10% to 90% relative humidity Altitude 3050m (Operational) Safety CB / cTUVus / CE Regulatory CE / FCC / VCCI / ICES / RCM RoHS RoHS compliant a. The non-operational storage temperature specifications apply to the product without its package. 8.1.1 DPU Controller Mechanical Drawing and Dimensions All dimensions are in millimeters. -
Page 55: Monitoring
9 Monitoring Thermal Sensors The thermal threshold definitions are described in the "NVIDIA BlueField-3 Networking Platforms Electrical and Thermal Specifications" document. You can access the document either by logging into NVOnline or by contacting your NVIDIA representative. 9.2 Heatsink This section applies to 900-9D3C6-00CV-DA0 only, 900-9D3C6-00CV-GA0 is shipped without a heatsink. -
Page 56: Finding The Guid/Mac And Serial Number On The Card
Card Each BlueField-3 platform is uniquely identified to facilitate efficient management and configuration. This section aims to guide you through identifying your BlueField-3 platform by using the information provided on the board label. The board label includes unique identifiers essential for network communication—specifically, a primary GUID address for InfiniBand protocols or MAC addresses for Ethernet protocols. - Page 57 Item on Label Description Example/Additional Information HOST (Base MAC) Represents the base MAC address for DPUs with more than one high-speed high-speed data port 0 port will use incremental (+1) MAC addresses against the base HOST MAC on the label. For instance: From the label - HOST: 94 6D AE F5 A1 Port 0: 94 6D AE F5 A1 CC (same as...
-
Page 58: Pcie Auxiliary Card Kit
Cabline SA-II Plus Harness connecting the two. Utilizing the Down Stream Port (DSP) extension option, where the PCIe extension card is connected to the BlueField-3 DPU, used as a root complex for storage devices. This enables direct access from each CPU to the network through its dedicated PCIe interface as the card's 32-lane PCIe bus is split into two 16-lane buses, with one bus accessible through a PCIe x16 edge connector and the other bus through an x16 Auxiliary PCIe Connection card. -
Page 59: Channel Insertion Loss
Channel insertion loss is the loss of signal power resulting from the insertion of a device in a transmission line or optical fiber and is usually expressed in decibels (dB). The following table describes the BlueField-3 DPU channel insertion loss budget for PCIe Gen 5.0 architecture (32 GT/s). The total PCIe channel insertion loss approved by PCI-SIG Gen5.0 spec is 36dB @16GHz. - Page 60 Pin# Signal Name Wire Type Detailed AWG# Pin# on the Description other end PCIE_REFCLK1_P Micro coax Primary PCIe clock from the motherboard to the Network Adapter Main card, to be used for the x16 Cabline harness PCIe interface. This clock must meet all the PCIe SIG spec requirements.
- Page 61 Pin# Signal Name Wire Type Detailed AWG# Pin# on the Description other end PCIE_CPU_CX_14P Micro coax Connect from the Black Cabline CA-II Plus cable through 220nF capacitors to the x16 PCIe Tx lanes of the CPU/ GPU/End-Point GND BAR PCIE_CPU_CX_13N Micro coax ...
- Page 62 Pin# Signal Name Wire Type Detailed AWG# Pin# on the Description other end GND BAR PCIE_CPU_CX_10N Micro coax Connect from the Black Cabline CA-II Plus cable through 220nF capacitors to the x16 PCIe Tx lanes of the CPU/ GPU/End-Point PCIE_CPU_CX_10P Micro coax ...
- Page 63 Pin# Signal Name Wire Type Detailed AWG# Pin# on the Description other end PCIE_CPU_CX_7N Micro coax Connect from the Black Cabline CA-II Plus cable through 220nF capacitors to the x16 PCIe Tx lanes of the CPU/ GPU/End-Point PCIE_CPU_CX_7P Micro coax Connect from the Black Cabline CA-II Plus cable through...
- Page 64 Pin# Signal Name Wire Type Detailed AWG# Pin# on the Description other end PCIE_CPU_CX_4P Micro coax Connect from the Black Cabline CA-II Plus cable through 220nF capacitors to the x16 PCIe Tx lanes of the CPU/ GPU/End-Point GND BAR PCIE_CPU_CX_3N Micro coax ...
- Page 65 Cabline CA-II Plus interface parameters to the main-card network adapter silicon, like Cabline CA-II Plus cables length (contact NVIDIA for the format of this EEPROM). If additional optional I2C slave devices need to be managed by the main-card network adapter...
-
Page 66: Cabline Ca-Ii Plus Harness - Print Side
Cabline CA-II Plus interface parameters to the main-card network adapter silicon, like Cabline CA-II Plus cables length (contact NVIDIA for the format of this EEPROM). If additional optional I2C slave devices need to be managed by the main-card network adapter... - Page 67 Pin# Signal Name Wire Type AWG# Detailed Pin# on the Description other end No wire Micro coax Reserved_06 Micro coax Reserved_07 Micro coax Reserved for future expansion Reserved_08 Micro coax Reserved for future expansion GND BAR PCIE_CX_CPU_0P Micro coax Connect from the White Cabline CA-II Plus harness to the PCIe x16 Rx lanes of...
- Page 68 Pin# Signal Name Wire Type AWG# Detailed Pin# on the Description other end PCIE_CX_CPU_2P Micro coax Connect from the White Cabline CA-II Plus harness to the PCIe x16 Rx lanes of the CPU/GPU/End- Point. 220nF caps are required on this signal on the ConnectX-7 card. ...
- Page 69 Pin# Signal Name Wire Type AWG# Detailed Pin# on the Description other end PCIE_CX_CPU_4N Micro coax Connect from the White Cabline CA-II Plus harness to the PCIe x16 Rx lanes of the CPU/GPU/End- Point. 220nF caps are required on this signal on the ConnectX-7 card. ...
- Page 70 Pin# Signal Name Wire Type AWG# Detailed Pin# on the Description other end PCIE_X_CPU_7P Micro coax Connect from the White Cabline CA-II Plus harness to the PCIe x16 Rx lanes of the CPU/GPU/End- Point. 220nF caps are required on this signal on the ConnectX-7 card. ...
- Page 71 Pin# Signal Name Wire Type AWG# Detailed Pin# on the Description other end PCIE_CX_CPU_9N Micro coax Connect from the White Cabline CA-II Plus harness to the PCIe x16 Rx lanes of the CPU/GPU/End- Point. 220nF caps are required on this signal on the ConnectX-7 card. ...
- Page 72 Pin# Signal Name Wire Type AWG# Detailed Pin# on the Description other end PCIE_CX_CPU_12P Micro coax Connect from the White Cabline CA-II Plus harness to the PCIe x16 Rx lanes of the CPU/GPU/End- Point. 220nF caps are required on this signal on the ConnectX-7 card. ...
- Page 73 Pin# Signal Name Wire Type AWG# Detailed Pin# on the Description other end PCIE_CX_CPU_14N Micro coax Connect from the White Cabline CA-II Plus harness to the PCIe x16 Rx lanes of the CPU/GPU/End- Point. 220nF caps are required on this signal on the ConnectX-7 card. ...
- Page 74 Pin# Signal Name Wire Type AWG# Detailed Pin# on the Description other end S_PERST1_CONN_L Micro coax PCIe compliant PERST_L (active low PCI Reset) signal for the PCIe Cabline CA- II Plus Connectors. The direction of this PERST_L signal depends on the implementation: When connecting a CPU root complex to...
-
Page 75: Technical Specifications
Pin# Signal Name Wire Type AWG# Detailed Pin# on the Description other end S_PRSNT2_L Micro coax Connect to a 4.7K pull-up resistor to 3.3V on the motherboard side, to detect if both the Cabline harnesses are connected or not. This signal is connected to S_PRSNT1_L on the network adapter... -
Page 76: Pcie Auxiliary Card Mechanical Drawings And Dimensions
PCIe Auxiliary Card Size: 5.09 in. x 2.32 in. (129.30mm x 59.00mm) Physical Two Cabline CA-II Plus harnesses (white and black) Length: 15, 25 or 35cm Voltage: 12V, 3.3V_AUX Power Consumption Maximum current: 100mA for the 3.3V_AUX voltage rail RoHS: RoHS Compliant 11.4.1 PCIe Auxiliary Card Mechanical Drawings and Dimensions All dimensions are in millimeters. -
Page 77: Cabline Ca-Ii Plus Harnesses Mechanical Drawing
11.4.3 Cabline CA-II Plus Harnesses Mechanical Drawing... -
Page 78: Cables And Cabling Configurations
12 Cables and Cabling Configurations 12.1 RJ45 Cable for the 1GbE OOB Management Interface 12.2 USB Interface Cabling Debugging and loading new versions of the operating systems and firmware requires the use of Type A to Type B USB 2.0 Cable. The following figure shows an example of Type A to Type V USB Cable. -
Page 79: General Cooling Recommendations For Heatsink-Less Dpu Controllers
13 General Cooling Recommendations for Heatsink-less DPU Controllers This section offers general cooling recommendations to NVIDIA customers who have acquired a heatsink-less DPU Controller (OPN: 900-9D3C6-00CV-GA0). IMPORTANT NOTES: The customer holds exclusive responsibility for the thermal design and for ensuring all board components never exceed their designated thermal operating limits. -
Page 80: Components That Require Cooling
13.2 Components that Require Cooling It is the responsibility of the customer to ensure proper cooling and thermal regulation for all components on the board. The provided guidelines are minimal and are based on NVIDIA's air-cooling thermal solution. Note the following: •... -
Page 81: Mechanical Interfaces
Item # Board Components See marked square 13.2.1 Mechanical Interfaces The following figure lists the mechanical interfaces of the DPU controller. Mechanical Interface 13.2.2 Encapsulation and Battery on SFG Ensure that the battery remains unobstructed to allow access for replacement. Furthermore, avoid any interference with the TTP. -
Page 83: Document Revision History
14 Document Revision History Date Comments/Changes Apr. 2024 • Removed the "Securing Workloads" feature from Features and Benefits • Updated the important notes and warnings in External PCIe Power Supply Connector • Added 8-pin ATX Power Supply Cable installation instructions • Updated Cabline CA-II Plus Harness Pinouts •... - Page 84 NVIDIA accepts no liability related to any default, damage, costs, or problem which may be based on or attributable to: (i) the use of the NVIDIA product in any manner that is contrary to this document or (ii) customer product designs.
- Page 85 Mellanox Technologies Ltd. in the U.S. and in other countries. Other company and product names may be trademarks of the respective companies with which they are associated. Copyright © 2024 NVIDIA Corporation & affiliates. All Rights Reserved.
Need help?
Do you have a question about the BlueField-3 and is the answer not in the manual?
Questions and answers