Table of Contents
Advertisement
Advertisement
Table of Contents

Summary of Contents for WFCO POWER PRO BASIC
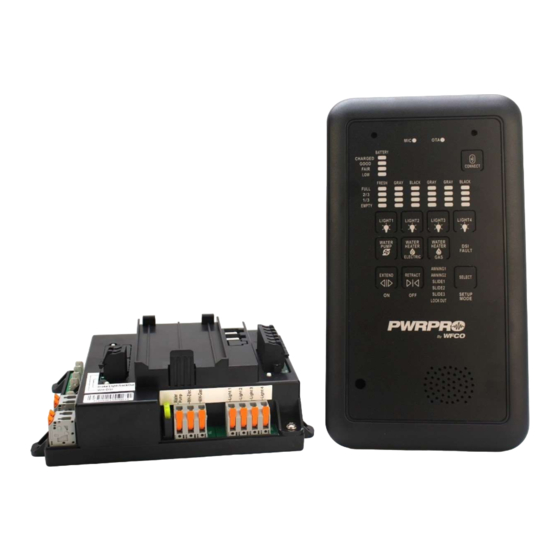
- Page 1 WFCO SMART POWER CONTROL SYSTEM WF- 3510 POWER PRO BASIC...
-
Page 2: Table Of Contents
TABLE OF CONTENTS Contents INTRODUCTION ..........................4 CONTROL PANEL OPERATION ....................... 5 Device Status Display ........................6 Device Controls ..........................7 Light Controls Water Pump Control Awning/Slide Controls Setup Mode (For OEM Installation) .................... 8 Enter/Exit Setup Mode Enabling/Disabling Devices in Setup Mode III. - Page 3 RV Voice Control TTS Notification Settings RV Voice Command Reply Microphone LED Speaker Volume Setting Nickname Setting System Diagnostics RV Panel Version (OTA) RV Help Center APP Voice Control APP Safety Lock APP Device Log Sharing INSTALLATION ..........................37 Mounting the Smart Power Unit ....................37 Mounting to Wall/Floor Mounting to WF-89xxAD Power Center Mounting to WF-95xxAD Power Center...
-
Page 4: Introduction
APP through a smart device. I. INTRODUCTION The WFCO smart power control system gives the user control of devices throughout the RV, including lights, water pump, awnings, and slideouts. In addition, monitoring functions such as battery and fresh/wastewater tanks are available with the WFCO smart power control system. -
Page 5: Control Panel Operation
II. CONTROL PANEL OPERATION 1. Local Microphones(an optional remote microphone module is available) 2. Voice Control Indication(voice control available when MIC green LED lit-up) 3. OTA (Over the Air) Status Indication 4. Battery Status Indication 5. Bluetooth (BT) Control Button / Indication 6. -
Page 6: Device Status Display
1. Device Status Display: The status of the following devices can be checked by user: Battery Level (voltage) Water tank level: Fresh, Gray or Black water The LED indicators of MIC light and OTA display the status of Voice Control and OTA functions, please refer to Voice Control and APP Control sections in this manual. -
Page 7: Device Controls
2. Device Control Users can control the RV devices by pressing the buttons on the Control Panel. a. Light Controls: The illustration shows light 3 is ON, other three lights are OFF. Press & Release: Toggles ON / OFF. When the output is turned off, the indicator LED is blue. To turn on the output, press the button, and the panel indicator LED will become white. -
Page 8: Awning/Slide Controls
c. Awning / Slide Controls: Switch illumination, as shown, will indicate retract button is pressed. SELECT button: cycles through the selections (highlighting constant blue one at a time). Extend Button: press & hold to extend the selected item (Awning 1, 2, Slide 1,2,3), and the selected item shall be turned on and extending. -
Page 9: Voice Control
III. VOICE CONTROL 1. Voice Control of RV Panel Users can use voice to control the equipment in the RV and query status information such as power and water tanks. a. How to use the voice command on the RV Panel ... -
Page 10: Single Device Voice Command Form
2. Single Device Voice Command Form a. Lights Control Voice Command Users can use the following commands to control the light's switch and brightness, and the light's name can be flexibly replaced. ‘Light Name’ refers here to Light 1/ Light 2/ Light 3/ Light 4/ Bedroom lights/ Living room lights/ Bathroom lights/ Exterior Lights. -
Page 11: Device Controls Voice Command
b. Device Control Voice Command Turn on/off Water pump Water pump on/ off Turn water pump on/ off Turn pump on/ off Start/ stop water pump Turn on/ off the water pump Switch pump on/ off Switch on/ off water pump Turn the water pump on/ off Turn on/ off pump Pump on/ off... -
Page 12: Rv Device Status Query Voice Command
3. RV Device Status Query Voice Command Users can inquire about the RV's battery level, freshwater tank status, gray water tank status, and black water tank status using any of the following voice commands. *Note: The RV device status query voice command is not applicable to the APP. Voice Command-List Battery Level Check How's the battery... -
Page 13: Scene Mode Voice Command
4. Scene Mode Voice Command Scene mode is a batch control feature that allows multiple device operations to be set and executed as a single command. *Note: Customize the light zone and brightness settings for reading, movie, and relaxation modes in 2.3 Device Control -> 2.3.2 Custom Control Scene Mode Instruction Scene mode voice Spec... - Page 14 Movie Mode I'm going to watch TV/ Adjust to movie mode Let's watch a movie Change lights to movie mode I'd like to watch a movie I'd like to watch TV Movie mode lighting I'm going to watch a movie It's time to watch a movie Relaxation Mode I'd like to relax...
- Page 15 Shutdown RV Turn off RV Turn the RV off Shutdown the RV Turn off the RV The trip is done Our trip is done The trip is over Our trip is over Shut off the RV Shut the RV off...
-
Page 16: App Control
IV. APP CONTROL 1. Bluetooth To remotely control the RV device using a mobile phone, users must first connect and pair the RV panel via Bluetooth. Once successfully paired, the mobile phone can be used for remote control of the device in the RV. a. -
Page 17: Auto Connect Rv Panel
b. Auto Connect RV Panel The phone automatically connects to the last connected panel. (If the panel is not powered off and the BT function on the panel is ON) Note: in certain situations, the phone may fail to connect automatically to the panel. In that case, please tap on the blue text "here"... -
Page 18: Homepage
2. Homepage The home page includes four main parts: RV device status, Scene mode control, Device control, and navigation bar (as shown in the image below). -
Page 19: Rv Device Status
a. RV Device Status Users can check the status of the RV battery, voltage, fresh water tank, black water tank, and gray water tank. Battery Status Charged、Good、Fair、Low Fresh tank level Full、2/3、1/3、Empty Gray tank level Empty 、1/3、2/3、Full Black tank level Empty 、1/3、2/3、Full... -
Page 20: Scene Mode Control
b. Scene Mode Control The Scene mode consists of 8 cards, which comprise of 4 system scenes (movie mode, reading mode, relaxation mode, and shower mode) and 4 custom cards (custom mode 1, 2, 3, and 4). Users can swipe left to view more. Users can quickly operate multiple devices in the RV through the scene mode. - Page 21 Custom Scene Mode Users can modify the order and display of scene mode cards on the homepage. Interaction Instructions a) Tap and drag to adjust the order, and the position of the card on the homepage will change accordingly. b) Tap to hide the card on ‘My RV’...
- Page 22 Set Custom Mode Interaction Introduction Name your customized mode Users can select devices to control in the scene mode. Set the status of the selected device *Note: Users cannot control custom modes by voice command.
-
Page 23: Device Control
c. Device Control Users can control the RV device by interacting with cards on ‘Controls’. Detail Description a) Master Control controls all connected light zones, users can use this card to control all connected light zones on/off status and brightness. - Page 24 b) Users tap to open the brightness pop-up and drag the slider to adjust the light brightness. c) Users tap the awning and slide card to open the control page. *Note: To ensure safety, users need to enter the APP PIN to go to the control page. Upon first use, users need to set the APP PIN.
- Page 25 Custom Control Detail Description to custom control page. Users can edit cards and lights name and drag to adjust the order to hide the card on ‘My RV’ page to rename the light *If one alias is used for a specific device, it cannot be set to another device of the same category.
-
Page 26: Voice Control
d. Voice Control Users can control the panel by voice command on their phone. Tap the center microphone icon to activate the voice control mode. After hearing the "ding" sound, users can speak the voice command. *Note If the voice command is not recognized within 4s, it will automatically exit the voice control and jump to the home page. -
Page 27: Settings
3. Settings Settings include two main parts: RV settings (including function & maintenance) and APP settings. Users can modify these according to their preferences. -
Page 28: Change Rv Panel Name
a. Change RV Panel Name Users can modify the name of the RV Panel, which is also the Bluetooth name of the panel. b. RV Voice Control Users can activate/ deactivate the voice command function of the control RV panel. If the user turns off the RV voice control, the Microphone LED & LED on the panel turns off. - Page 29 c. TTS Notification Settings Users can turn on/off the voice notification on control panel & the push notification on smartphone with two kinds of settings. Turn on/off voice notifications of user’s voice command. Turn on/off proactive voice notifications when the following conditions occur. The default is off.
- Page 30 d. RV Voice Command Reply Users can turn off the RV voice command reply, and RV panel will directly execute the voice command without the voice reply. Additionally, within the voice command reply menu you can select either a “ding” or a conversational greeting. e.
- Page 31 Speaker Volume Setting Users can set the speaker volume from mute to maximum volume. User can use the ‘Test volume’ button to confirm the volume effect. g. Nickname Setting Users can set the nickname and RV panel will reply accordingly. This setting is optional.
- Page 32 System Diagnostics If users think that the voice function on the panel does not work normally, users can run the system diagnostics to check the issue and provide information to the services of WFCO.
- Page 33 RV Panel Version (OTA) Users can update the RV Panel (including firmware and software) on ‘Settings - > RV Panel Version’. To ensure the smooth operation of OTA, please try to place the mobile phone close to the RV panel •...
- Page 34 *Note: User cannot decompress the OTA package when operating the large current device. RV Help Center Users can get the up-to-date user manual under this menu.
- Page 35 k. APP Voice Control Users can turn on/off the App voice control.
- Page 36 The functions include awnings and slideouts. Users can set in ‘Settings - > safety lock’. m. APP Device Log Sharing Users can choose whether to agree to upload device and app usage logs (without any personal information) to WFCO for a better user experience.
- Page 37 The smart power unit has primarily been designed for three different mounting configurations. 1. Wall/Floor Mounting. 2. Back of WFCO WF-89xxAD Power Centers. 3. Back of WFCO WF-95xxAD Power Centers. b. Mounting to a Wall or Floor The smart power unit can be mounted to a wall or floor with four self-tapping...
- Page 38 c. Mounting to a WF-89xxAD The smart power unit can be mounted to the back of a WF-89xx AD power center with four M4*10mm screws, thread M4, thread pitch 0.7mm. d. Mounting to a WF-95xxAD The smart power unit also can be mounted to the back of a WF-95xxAD power center with four M4*10mm screws, thread M4, thread pitch 0.7mm.
- Page 39 2. Mounting the Control Panel The control panel should be mounted in an easily accessible location. Recommended wall square hole dimension is 4.5*8.6 inch for control panel cutout. The user can choose the following length of can bus cable; the can bus cable shall be routed from the control panel to the smart power unit.
- Page 40 3. Mounting the MORS Kit (Optional) The MORS kit should be mounted in an easily accessible location. The supplied wire harness should be routed from the MORS interface of smart power unit to the MORS kit. wall mounting hole dimension 4.
- Page 41 5. Wiring Instructions a. Smart Power Unit Wiring Instructions Refer to the below table for wiring specification, use copper conductors only. All wiring shall meet local codes/standards and be performed by qualified personnel. Terminal Name Recommended Wire Temperature Remark Wire Gauge Rating Min.
- Page 42 Panel not In APP settings, Restart panel. To Contact WFCO tech responding to ensure 'RV Voice do this, support at 574-294- wake up Control' is enabled. disconnect shore 8997. words.
- Page 43 VII. WARRANTY CONSUMER WARRANTY CLAIM PROCEDURE After it has been determined that a WFCO product is defective, an RGA number will be required before it can be returned. The RGA number can be requested by completing the Warranty Information Fax Sheet & Troubleshooting Form found at www.wfcoelectronics.com.
Need help?
Do you have a question about the POWER PRO BASIC and is the answer not in the manual?
Questions and answers