Advertisement
Quick Links
HZQD-V2
Notice:
1.Follow the installation instructions. Please confirm all accessories are present before installation.
2.Do not fully tighten the screws during initial assembly.Fully tighten screws only after all pieces
are correctly assembled.
3.If you encounter any problems during installation, please contact our customer service.
ASSEMBLY INSTRUCTIONS
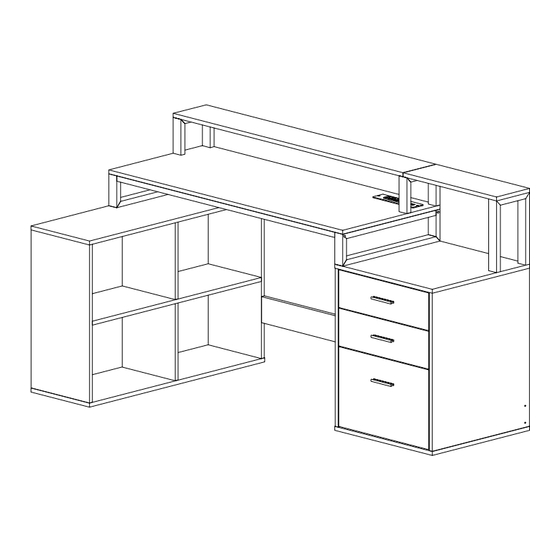
COMPUTER DESK
FTOFOD-6006
FTOFOD-6033
FTOFOD-6034
FTOFOD-6035
1
Advertisement

Related Manuals for YitaHome FTOFOD-6006


Summary of Contents for YitaHome FTOFOD-6006
- Page 1 ASSEMBLY INSTRUCTIONS HZQD-V2 FTOFOD-6006 FTOFOD-6033 FTOFOD-6034 FTOFOD-6035 COMPUTER DESK Notice: 1.Follow the installation instructions. Please confirm all accessories are present before installation. 2.Do not fully tighten the screws during initial assembly.Fully tighten screws only after all pieces are correctly assembled.
- Page 4 30+2 18+2 M6*35 5*40 M6*60 ∅ M6*28 24+2 20+2 12+2 H x 3 6*35 6*35 6*35 ∅ 12*9.5 400mm ∅ 15*11.5 ∅ 12+2 31+4 3.5*12 M4*18=6 3.0*14 M4*10=2 TOOL 3.0*12 6.4mm 3x57 4x57 Don't confuse left and right hardware. CR+DR CL+DL Attention Be sure to use the proper screws to avoid damaging the parts...
- Page 5 STEP 1 These two holes face up STEP 2 Pay attention to the orientation of the holes Enlarged view of the iron pipe protruding from the board after the assembly is complete...
- Page 6 STEP 3 Tear off the adhesive tape, put the sticky side upward, and apply it to the back of No. 6 board.
- Page 7 STEP 4 STEP 5 The iron pipe protrudes on the same side as the electrical outlet...
- Page 8 STEP 6 Note: This location is empty. These two holes face up STEP 7...
- Page 9 STEP 8 STEP 9...
- Page 10 STEP 10 Pay attention to the orientation of the holes STEP 11...
- Page 11 STEP 12 STEP 13...
- Page 12 STEP 14 STEP 15...
- Page 13 STEP 16 STEP 17...
- Page 14 STEP 18 STEP 19...
- Page 15 STEP 20 H-CR H-CL H-CR H-CL H-CL H-CR × √ √ ×...
- Page 16 STEP 21 Make sure the back panel slot is on top when installing STEP 22...
- Page 17 STEP 23 STEP 24...
- Page 18 STEP 25 STEP 26...
- Page 19 STEP 27 STEP 28...
- Page 20 STEP 29 The edge of pipe 4 should be flush with the edge of board 9...
- Page 21 STEP 30 The edge of pipe 4 should be flush with the edge of board 17...
- Page 22 STEP 31 STEP 32...
- Page 23 STEP 33 STEP 34 The self-tapping thread can be locked tightly...
- Page 24 Steps 32 through 37 are the two-drawer installation STEP 35 STEP 36...
- Page 25 STEP 37 STEP 38...
- Page 26 STEP 39 STEP 40 H-DL √ H-DR √...
- Page 27 STEP 41 STEP 42...
- Page 28 STEP 43 STEP 44 Put in the accessory "5" first...
- Page 29 STEP 45 STEP 46 H-DL √ H-DR √...
- Page 30 STEP 47 Installation Completed...
Need help?
Do you have a question about the FTOFOD-6006 and is the answer not in the manual?
Questions and answers