Advertisement
Available languages
Available languages
Advertisement
Table of Contents

Related Manuals for Zzipp TXZZ700

Summary of Contents for Zzipp TXZZ700
- Page 1 USER MANUAL MANUALE D’USO TXZZ700 RICEVITORE UHF UHF RECEIVER...
-
Page 2: Safety Instructions
Thanks for purchasing this ZZIPP product, please read this instruction carefully to understand how to operate the product correctly. Please store this instruction in a safe place after reading as a reference in the future. SAFETY INSTRUCTIONS To reduce the risk of electric shock, do not remove the cover or the side. -
Page 3: Specification
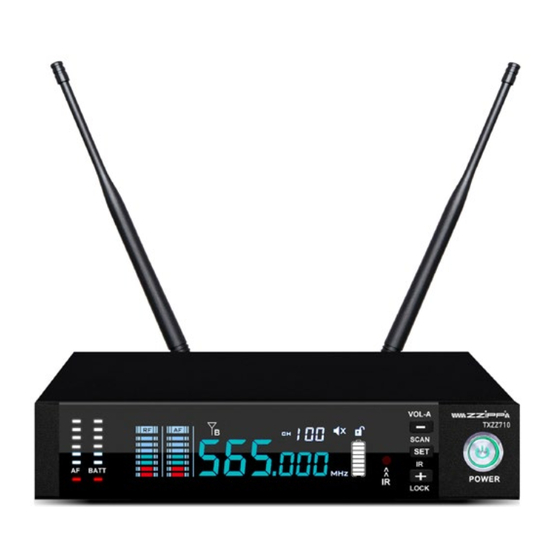
FEATURES The system use UHF frequency band with PLL combined technology make the frequency adjustable. Specially adopt tone locked pilot syste for avoiding the same frequency interference let receiver output interface signal. The system is adopted by CPU control, digital LCD display, with simple ope- ration and perfect display combine. - Page 4 FRONT / BACK PANEL (SINGLE UNIT) POWER SWITCH. Turn on the switch the lamp is ON. SETTIN KEY. Short press SCAN/UP key it is for scan function operation scan out the free frequency. Short press IR/SET fot the IR switch, put the mic IR window close the receiver IR window and press IR/SET key, if the transmitter frequency is same as receive, that means IR finished.
- Page 5 FRONT / BACK PANEL (DOUBLE UNIT) POWER SWITCH. Turn on the switch the lamp is ON. SETTIN KEY. Short press SCAN/UP key it is for scan function operation scan out the free frequency. Short press IR/SET fot the IR switch, put the mic IR window close the receiver IR window and press IR/SET key, if the transmitter frequency is same as receive, that means IR finished.
- Page 6 MODE SWITCH PARALLEL FRONT / BACK PANEL (QUADRUPLE UNIT) POWER SWITCH. Turn on the switch the lamp is ON. Menu Key for Channel A/B/C/D Press MENU key 1 time to the frequency flashing, then turn the menu controlto left or right for frequency select.
-
Page 7: Transmitter Function
TRANSMITTER FUNCTION MIC CAPSULE LCD Display: Show frequency and battery life. POWER SWITCH: Double press switch for RF power selection: High power or low power. Low power can be 200 meters distance, battery life 5/8 hours. High power can be 300 meters distance, battery life 3 hours. Ex-factoring setting for lower power is enough for regular use, if want longer distance need adjust to highpower byself. -
Page 8: Bodypack Transmitter
BODYPACK TRANSMITTER Single channel XLR mic input Power Switch Antenna IR Receiving window LCD Display Setting KEY: To select frequency & RF power High /Low Battery cover Crip cover... - Page 9 CONFERENCE TRANSMITTER Power switch: ON/OFF/MUTE Long press for ON/OFF, short pressfor mute Power light LCD display: frequency and battery lifedisplay 4 pins XLR audioinput for microphone IR receiving window: put <2 meters to the receiver IR sending window when IR automatic frequency Battery cover: alkaline AA 1.5V Battery 3 pcs, please take the batteries out if no use for long time.
-
Page 10: Troubleshooting
TROUBLESHOOTING Press power switch the lamp is not lighting Check if the cable is plugged correctly and the power is on. Signal lamp flashes but no voice output Check if the volume is turned on to the minimum or the plug is inserted correctly Receiving range getting closing and signal getting instability Check if the antenna has moved out, or the receiver is in a wrong position (on the ground or at the corner) or near the magnetic field (kep away it) - Page 11 Imported and distribuited by: ZZIPP Group S.p.A. Via Caldevigo 23/d, 35042 Este (PD) 0429 617 888 info@zzippgroup.com zzippgroup.com...
-
Page 12: Istruzioni Di Sicurezza
Grazie per aver acquistato questo prodotto ZZIPP, si prega di leggere attentamente queste istruzioni per capire come utilizzare correttamente il prodotto. Si prega di conservare queste istruzioni in un luogo sicuro dopo averle lette come riferimento in futuro. ISTRUZIONI DI SICUREZZA Per ridurre il rischio di scosse elettriche, non rimuovere il coperchio o il lato. - Page 13 CARATTERISTICHE Il sistema utilizza la banda di frequenza UHF con la tecnologia combinata PLL che rende la frequenza regolabile. Il sistema è dotato del controllo CPU, display LCD digitale, con funzionamento semplice e perfetta visualizzazione dei parametri essenziali. Suono di alta qualità e audio in uscita con un rap- porto S/N elevato per garantire il massimo della fedeltà.
- Page 14 PANNELLO ANTERIORE/POSTERIORE (UNITÀ SINGOLA) INTERRUTTORE DI ACCENSIONE. La spia luminosa indica che l’apparecchio è acceso. TASTO IMPOSTAZIONE. Premere brevemente il tasto SCAN/UP per l’operazione di scansione delle frequenze libere. Premere brevemente IR/SET per attivare il sensore IR, posizionare la finestra IR del microfono vicino alla finestra IR del ricevitore e premere il tasto IR/SET, se la frequenza del trasmettitore è...
- Page 15 PANNELLO FRONTALE/POSTERIORE (UNITÀ DOPPIA) INTERRUTTORE DI ACCENSIONE. La spia luminosa indica che l’apparecchio è acceso. TASTO IMPOSTAZIONE. Premere brevemente il tasto SCAN/UP per l’operazione di scansione delle frequenze libere. Premere brevemente IR/SET per attivare il sensore IR, posizionare la finestra IR del microfono vicino alla finestra IR del ricevitore e premere il tasto IR/SET, se la frequenza del trasmettitore è...
- Page 16 MODE SWITCH PARALLEL PANNELLO ANTERIORE/POSTERIORE (UNITÀ QUADRUPLA) INTERRUTTORE DI ACCENSIONE. La spia luminosa indica che l’apparecchio è acceso. Tasto menu per canale A/B/C/D: Premere il tasto MENU 1 volta finché la frequenza lampeg- gia, quindi ruotare il controllo menu a sinistra o a destra per selezionare la frequenza. Premere il tasto MENU 2 volte finché...
-
Page 17: Istruzioni Per L'uso
FUNZIONE TRASMETTITORE CAPSULA MICROFONICA Display LCD: mostra la frequenza e la carica della batteria. INTERRUTTORE DI ACCENSIONE: premere due volte l’interruttore per la selezione della po- tenza RF: alta potenza o bassa potenza. La bassa potenza può arrivare a 200 metri di distanza, la durata della batteria è... - Page 18 TRASMETTITORE BODYPACK Ingresso microfonico XLR a canale singolo Interruttore di alimentazione Antenna Finestra di ricezione IR Display LCD TASTO Impostazione: Per selezionare la frequenza e la potenza RF Alta/Bassa Coperchio della batteria Clip di fissaggio alla cintura...
- Page 19 TRASMETTITORE CONFERENCE Interruttore di alimentazione: ON/OFF/MUTE Premere a lungo per ON/OFF, premere breve- mente per disattivare l’audio Spia di alimentazione Display LCD: visualizzazione della frequenza e della durata della batteria Ingresso audio XLR a 4 pin per microfono Finestra di ricezione IR: posizionare <2 metri alla finestra di invio IR del ricevitore quando si utilizza la frequenza IR automatica Coperchio della batteria: batteria alcalina AA da 1,5 V, 3 pezzi, rimuovere le batterie se non vengono utilizzate per un lungo periodo.
-
Page 20: Risoluzione Dei Problemi
RISOLUZIONE DEI PROBLEMI Premendo l’interruttore di alimentazione, il dispositivo non si accende Controllare se il cavo è collegato correttamente e che l’alimentazione sia attiva. La spia di segnalazione lampeggia ma non viene emesso alcun segnale Controllare se il volume è al minimo o il connettore di uscita audio non sia inserito in modo scorretto. Il segnale diventa instabile anche con raggio di azione contenuto Controllare se l’antenna si è... - Page 21 Importato e distribuito da: ZZIPP Group S.p.A. Via Caldevigo 23/d, 35042 Este (PD) 0429 617 888 info@zzippgroup.com zzippgroup.com...
Need help?
Do you have a question about the TXZZ700 and is the answer not in the manual?
Questions and answers