Table of Contents
Advertisement
Available languages
Available languages
Quick Links
Advertisement
Chapters
Table of Contents

Related Manuals for Aerian AAC12Konnect


Summary of Contents for Aerian AAC12Konnect
- Page 1 AAC12Konnect ...
- Page 3 Catalogue Language of Introduction Page English EN1 - EN21 French FR1 - FR23 Dutch NL1 - NL22 ...
-
Page 4: Table Of Contents
Table of Contents WARNINGS ................................. 2 IMPORTANT SAFETY INSTRUCTIONS ........................ 4 PARTS .................................. 5 USING THE REMOTE CONTROL .......................... 8 INSTALLATION .............................. 9 OPERATION .............................. 1 1 Turning ON/OFF ............................ 1 1 Selecting a Mode ............................ 1 1 Setting the temperature ......................... 1 2 Changing the temperature display (remote control only) .............. 1 2 Setting the fan speed ... -
Page 5: Warnings
WARNINGS This appliance is intended for domestic household use only and should not be used for any other purpose or in any other application, such as for non‐domestic use or in a commercial environment. This appliance can be used by children aged from 8 years and above and persons with reduced physical, sensory or mental capabilities or lack of experience and knowledge if they have been given supervision or instruction concerning use of the appliance in a safe way and understand the hazards involved. Children shall not play with the appliance. Cleaning and user maintenance shall not be made by children without supervision. If the supply cord is damaged, it must be replaced by the manufacturer, its service agent or similarly qualified persons in order to avoid a hazard. For the details concerning the method and frequency of cleaning, 18&19 please see section “Cleaning and maintenance” on pages The refrigerant used in this appliance is fluorinated greenhouse gases, which can be harmful to environment and can be responsible for the global warming if it leaks into atmosphere. The appliance contains fluorinated greenhouse gases. Chemical name of the gas: R410A Fluorinated greenhouse gases are contained in hermetically sealed equipment. An electrical switchgear has a tested leakage rate of less than 0.1 % per year as set out in the technical specification of the manufacturer. The R‐410A refrigerant used in this product is a gas at fluorinated EN EN-2... - Page 6 greenhouse under the Kyoto Protocol, which can be harmful to the environment and may be responsible for global warming if it escapes into the atmosphere. Its global warming potential is 2088. For disposal of the appliance: To prevent possible harm to the environment or human health from uncontrolled waste disposal, recycle it responsibly to promote the sustainable reuse of material resources. And the disposal should only be done through public collection points. For installation, servicing: The appliance should be placed on a horizontal floor and keep the ventilation freely. Don’t try to replace or repair any components by yourself, ask the service agency for help if necessary. For handling: Always handle the appliance to avoid any damage. The battery must be removed from the appliance before it is scrapped. The battery is to be disposed of safely. Different types of batteries or new and used batteries are not to be mixed. Batteries of the same or equivalent type as recommended are to be used. Batteries are to be inserted with the correct polarity. Exhausted batteries are to be removed from the product. Attention should be drawn to the environmental aspects of battery disposal. Don’t throw used batteries in dustbin. Please contact your retailer in order to protect the environment. The batteries (batteries installed) shall not be exposed to excessive heat such as sunshine, fire or the like. EN-3...
-
Page 7: Important Safety Instructions
IMPORTANT SAFETY INSTRUCTIONS • Only use the appliance in the upright position on a flat level surface and at least 30 cm from the wall or any objects. • This air conditioner must be operated within the temperature range: 16°C ~ 35°C. • The appliance is for indoor use only. • Turn the power off and remove the plug when the appliance is not in use and before cleaning. • Transport and store the appliance in an upright position only. • Always place the appliance on a stable, level surface. • Do not cover or obstruct the appliance inlet and outlet grilles. • Do not use the appliance in a wet room, such as a bathroom or laundry room to avoid the risk of electrical shocks. • Do not place articles on the appliance. • Do not use the appliance with wet or damp hands. • Do not use the appliance in the presence of flammable substances or vapours such as alcohol, insecticides, petrol, etc. • Do not use the plug to start and stop the appliance. ALWAYS use the control panel to start and stop the appliance. • The filters must be used with the appliance at all times. •... -
Page 8: Parts
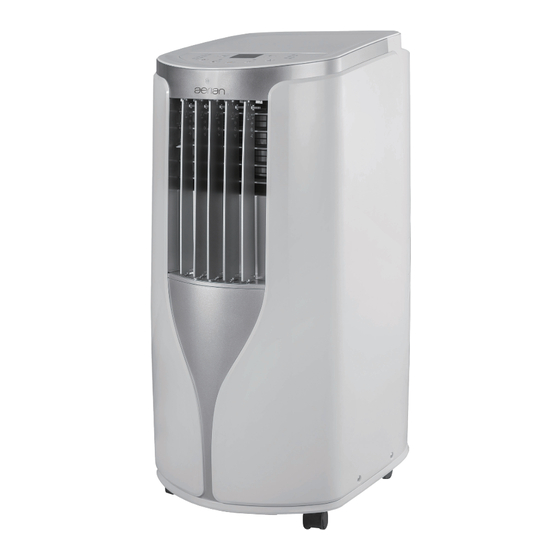
PARTS Front side Back side 1. Control panel 5. Upper air inlet grilles 2. Louvers 6. Exhaust connector • Horizontal louvers (inside) 7. Lower air inlet grilles • Vertical louvers 8. Hook for wrapping the power cord 3. Casters (4) 9. Adapters 4. Remote control compartment 10. Exhaust hose Accessories Adapters ... - Page 9 Control panel Buttons: Adjusting temperature or time Setting fan speed Wifi function Setting timer Setting mode ON/OFF Indicator lights: Cool mode Low fan speed Dehumidification Medium fan speed mode Fan only mode High fan speed Auto fan speed WiFi function Timer function EN-6...
- Page 10 Remote control Buttons: Setting mode ON/OFF Adjusting temperature or time Setting fan speed Timer on Timer off Setting the clock Sleep mode Checking the set temperature/indoor ambient temperature Activate / deactivate WiFi function Left part: X‐fan function, Right part: turn on/off control panel display ...
-
Page 11: Using The Remote Control
USING THE REMOTE CONTROL Installing batteries 1. Remove the battery cover. Install 2. Insert two supplied batteries in the compartment, making sure the + and – polarities are correctly aligned. Remove 3. Reinstall the battery cover. NOTE: If you will not use the appliance for a long time, remove the batteries from the remote control. How to use the remote control Point the remote control toward the signal receiver window of the appliance and then press the desired button on the remote control. The appliance will generate a beep when it receives the signal. • Make sure there is no curtain or other object between the remote control and the appliance. • The remote control can send signals from up to 7 meters away. CAUTION: • Do not allow the signal receiver window to receive strong direct sunlight, since it can adversely affect its operation. If the signal receiver window is exposed to direct sunlight, close a curtain to block the light. ... -
Page 12: Installation
INSTALLATION This appliance is a portable air conditioner, which can be moved from room to room. Exhaust hose installation The exhaust hose and adapters must be installed or removed depending on usage. For COOL mode Install the exhaust hose and adapters For FAN and DEHUMIDIFICATION modes Remove the exhaust hose and adapters 1. Assemble two pieces of adapters into a whole one. 2. Screw the adapter into one end of the exhaust hose. 3. Screw the exhaust connector into the other end of the exhaust hose. EN-9... - Page 13 4. Insert the exhaust connector into the air outlet located at the rear the appliance until a click is heard. 5. Lead the exhaust hose outdoors. Installing the exhaust hose into the wall 1. Place the adapter against the wall and mark it. 2. Cut a hole in the wall, using the appropriate tools and safety equipment. 3. Place the adapter against the wall and mark the location for the four holes. 4. Drill four holes in the wall and insert expansion plugs in the holes. 5. Fix the adapter on the wall by inserting and tightening four screws. EN-10...
-
Page 14: Operation
Note: The hose may extended but for maximum efficiency use the shortest length. IMPORTANT: DO NOT BEND THE HOSE. OPERATION Plug the appliance into the mains socket. A buzzer will beep and all indicator lights will illuminate briefly. Turning ON/OFF Press on the control panel or on the remote control to switch the appliance on or off. Selecting a Mode Repeatedly press on the control panel or on the remote control to select the desired working mode: auto (available only on the remote control), cooling, dehumidification or fan only. The indicator light of your selected mode will illuminate. Control panel Remote display The cooling system will switch off if the ambient temperature is lower than the set temperature. As the ... -
Page 15: Setting The Temperature
Setting the temperature Repeatedly press on the control panel on the remote control to set the temperature. Press and hold on the remote control for fast setting. In the auto, dehumidification and fan only modes, you cannot set the temperature. The display will show the temperature you set in the cool mode. Adjustable temperature range: 30°C max. 16°C min. Changing the temperature display (remote control only) When the appliance is turned off, press and at the same time to change the temperature display from Celsius to Fahrenheit and vice versa. Setting the fan speed Repeatedly press on the control panel or on the remote control to select the fan speed. The speed indicator light will illuminate to indicate which speed setting is in use. On the control panel On the remote display ... -
Page 16: Setting The Timer
Setting the timer Programming the timer for ON – when the appliance is OFF. 1. Press on the control panel or on the remote control. The indicator light on the control panel display and/or the indicator “ON” on the remote display will flash. 2. While the indicator light or indicator is flashing on the display, repeatedly press on the control panel or on the remote control to change the time. Press and hold on the remote control for fast setting. On the control panel display, the time will be changed in half an hour increments up to 10 hours, and then in 1 hour increments up to 24 hours. 3. Once set press ... -
Page 17: Temperature Display Function (Remote Control Only)
Temperature display function (remote control only) Repeatedly press to show the set or ambient temperature on the control panel display. • When the remote control display shows the symbol or shows no symbol for temperature display, the set temperature will be shown on the control panel display. • When the remote control display shows the symbol , the ambient temperature will be shown on the control panel display. Sleep operation (remote control only) The sleep function adjusts the set temperature of the appliance to the thermal needs of the body falling asleep. Press to operate the sleep mode. The sleep symbol will appear on the remote display. NOTE: This function is available in cool mode ONLY. To cancel the function, press . The sleep symbol will disappear from the remote display. X‐Fan function (remote control only) The function allows the fan to continue to blow for about 2 minutes after the appliance is stopped to remove moisture on the evaporator to avoid mold to build up. In Cool and Dehumidification modes, press the LEFT PART of the button ... -
Page 18: Wifi Function
To cancel the lock function, press and at the same time again to unlock. The symbol will disappear from the remote display. WiFi function With this function, you can control the air conditioner using a smartphone. 1. Download the Ewpe Smart APP to your smartphone or tablet at the Apple App store or Google Play. 2. Enable Wi‐Fi on your smartphone. 3. Press on the control panel to turn on or off the WiFi function. When this function is activated, the indicator light will illuminate. To reset the WiFi function, press and hold for about 10 seconds. Remote control: You can also press on the remote to turn on or off this function. When this function is activated, the remote display will show “WiFi”. To reset the WiFi function, keep and pressed at the same time for about 1 second. 4. -
Page 19: Drainage
DRAINAGE Under high humidity conditions it may be necessary to empty the internal water tank. When the internal water tank is full the display will show “H8”. The cooling/dehumidification process will stop. Before the appliance is turned on, you can insert the rubber plug to the bottom drainage point or attach the supplied drain hose to the continuous drainage point. To attach the supplied drain hose to the bottom drainage point: 1. Remove the rubber plug from the bottom drainage point. 2. Fix the bracket on the lower air inlet grille with the supplied screw. 3. Screw one end of the drain hose over the bottom drainage point and then clip it with the hose clamp. 4. Fix the drain hose in the bracket. Clip it with the hose clamp and attach the rubber plug to the other end of the drain hose. EN-16... - Page 20 To empty the water tank do the following: 1. Switch off the appliance and remove the plug from the mains socket. 2. Place a water tray on the floor underneath the bottom drainage point. 3. Remove the rubber plug from the drain and let the water run out. • If a drain hose is used, do the following: 1) Remove the drain hose from the bracket. 2) Remove the rubber plug from one end of the hose. 3) Put the drain hose onto the water tray. 4. Replace the rubber plug or drain hose, plug the appliance into the mains socket, and switch the appliance on. Continuous drainage When you need operating this appliance in high humidity, during the dehumidification or cooling mode, connect the drain hose to the continuous drainage point. 1. Remove the drain cap and then remove the rubber stopper from the continuous drainage point. 2. Screw the supplied drain connector on the continuous drainage point. 3. Connect one end of the drain hose onto the continuous drainage point and place the other end of the drain hose in a normal drain. ...
-
Page 21: Cleaning And Maintenance
CLEANING AND MAINTENANCE Switch off and unplug the appliance from the mains socket before cleaning. To maximise the efficiency of the appliance clean it regularly. Cleaning the housing Clean the housing with a slightly damp cloth. Never use chemical or abrasive cleaning agents. Cleaning the filters Remove the filters. • The filters should be cleaned regularly. Use a vacuum cleaner or tap the filters lightly to remove loose dust and dirt from the filters and then rinse thoroughly under running water. Dry thoroughly before replacing. NOTE: Never use the air conditioner without the filters. Storage • Drain any water in the appliance before completely operating the appliance on fan only mode for a few hours, to thoroughly dry the inside. • Clean the filters. • Fix the supplied power cord wraps to the rear of the appliance using the supplied screws. Coil the power cord to the wraps. EN-18... -
Page 22: Troubleshooting
• To store the remote control, remove the batteries from the remote control and then put it in the remote control compartment on the top of the appliance. • Place the appliance in a dry place. TROUBLESHOOTING Never try to repair or dismantle the air conditioner yourself. Problem Possible Cause Possible Solution Power failure Restore power. The mains plug is loose. Reinsert the plug. The air switch is tripped off or fuse is Ask your local qualified technician to The air conditioner does burnt. replace air switch or fuse. not operate. Ask your local qualified technician to There is malfunction for the circuit. replace circuit. After turning on the appliance, Wait for about 3 minutes and then immediately turn it off. turn on the appliance. ... -
Page 23: Technical Data
• Check if the appliance is under high‐temperature and H3 Overload protection for compressor high‐humidity environment. If the ambient temperature is too high, power off the appliance and then energize it for operation after the ambient temperature drops to below 35°C. • Check if the evaporator and condenser are blocked by E8 Overload malfunction some objects. If yes, please remove objects, power off the appliance and then energize it for operation. • If the malfunction still occurs, please contact the after‐sales service. • Replace the detecting plate with the same model. • Replace the mainboard with the same model. JF Malfunction of detecting plate (WiFi) • If there is still malfunction, please contact the after‐sales service. TECHNICAL DATA Rated capacity for cooling (P for cooling) 3.5kW rated Rated power input for cooling (P ) 1550W ... -
Page 24: Disposal
DISPOSAL As a responsible retailer we care about the environment. As such we urge you to follow the correct disposal procedure for the appliance and packaging materials. This will help conserve natural resources and ensure that it is recycled in a manner that protects health and the environment. You must dispose of this appliance and its packaging according to local laws and regulations. Because this appliance contains electronic components, the appliance and its accessories must be disposed of separately from household waste when the appliance reaches its end of life. Contact your local authority to learn about disposal and recycling. The appliance should be taken to your local collection point for recycling. Some collection points accept appliance free of charge. We apologise for any inconvenience caused by minor inconsistencies in these instructions, which may occur as a result of product improvement and development. Darty Holdings SAS © 14 route d’Aulnay 93140 Bondy, France 27 / 02 / 2017 EN -21... - Page 25 Table des matières AVERTISSEMENTS ............................... 2 CONSIGNES DE SÉCURITÉ IMPORTANTES ...................... 5 PIÈCES ................................. 6 UTILISATION DE LA TÉLÉCOMMANDE ........................ 9 INSTALLATION .............................. 10 UTILISATION .............................. 1 2 Allumer et éteindre l’appareil ........................ 1 2 Sélectionner un mode .......................... Régler la température ........................... 1 3 Changer l'affichage de la température (télécommande uniquement) ............ 1 3 Régler la vitesse de ventilation ...
-
Page 26: Avertissements
AVERTISSEMENTS Cet appareil est destiné à un usage domestique uniquement. Toute utilisation autre que celle prévue pour cet appareil, ou pour une autre application que celle prévue, par exemple une application commerciale, est interdite. Cet appareil peut être utilisé par des enfants âgés d'au moins 8 ans et par des personnes ayant des capacités physiques, sensorielles ou mentales réduites ou dénuées d’expérience ou de connaissance, s'ils (si elles) sont correctement surveillé(e)s ou si des instructions relatives à l'utilisation de l'appareil en toute sécurité leur ont été données et si les risques encourus ont été appréhendés. Les enfants ne doivent pas jouer avec l’appareil. Le nettoyage et l'entretien par l'usager ne doivent pas être effectués par des enfants sans surveillance. Si le câble d'alimentation est endommagé, il doit être remplacé par le fabricant, son service après‐vente ou des personnes de qualification similaire afin d'éviter un danger. En ce qui concerne la méthode et la fréquence du nettoyage, référez‐vous à la section “ NETTOYAGE ET ENTRETIEN” en page 20 &21 Le fluide frigorigène utilisé dans cet appareil est un gaz à effet de serre fluoré qui peut être nocif pour l’environnement et peut être responsable du réchauffement global s’il s’échappe dans l’atmosphère. Cet appareil contient des gaz à effet de serre fluorés. Nom chimique du gaz: R410A ... - Page 27 hermétiquement scellé. Un appareil de commutation électrique a un taux de fuite testé, indiqué dans les spécifications techniques du fabricant, inférieur à 0,1 % par an. Le R‐410A utilisé dans cet appareil est un gaz à effet de serre fluoré relevant du protocole de Kyoto, qui peut être nocif pour l’environnement et peut être responsable du réchauffement global s’il s’échappe dans l’atmosphère. Son potentiel de réchauffement global est 2088. Mise au rebut de l’appareil: Pour éviter toute nuisance envers l’environnement ou la santé humaine causée par la mise au rebut non contrôlée de déchets électriques, les réfrigérants et les agents moussants inflammables, recyclez l’appareil de façon responsable pour promouvoir la réutilisation des ressources matérielles. La mise au rebut doit être faite de façon sûre dans des points de collecte publique prévus à cet effet, contactez le centre de traitement des déchets le plus près de chez vous pour plus de détails sur les procédures correctes de mise au rebut. Installation et mise en service: L’appareil doit être installé sur le sol, sur une surface plane et horizontale en s’assurant que les ouvertures d’aération sont correctement dégagées. Ne jamais essayer de remplacer ou de réparer vous‐même une partie ou un composant de l’appareil, demandez de l’aide à un personnel professionnel et qualifié, si besoin. Manipulation: Toujours manipuler l’appareil avec soin afin d’éviter d’endommager celui‐ci. FR-3...
- Page 28 La batterie doit être retirée de l'appareil avant que celui‐ci ne soit mis au rebut. La batterie doit être éliminée de façon sûre. Les différents types de piles ou les piles neuves ne doivent pas être mélangées avec les piles usagées. Utiliser uniquement des piles du même type que celles recommandées par le fabricant. Les piles doivent être installées en respectant la polarité +/‐. Les piles usagées doivent être enlevées de l'appareil. Il convient d’attirer l’attention sur les problèmes d’environnement dus à la mise au rebut des piles usagées de façon sûre. Déposez‐les dans des bacs de collecte prévus pour cet effet (renseignez‐vous auprès de votre revendeur afin de protéger l'environnement). Les piles ne doivent pas être exposées à une chaleur excessive telle que celle du soleil, d'un feu ou d'origine similaire. FR-4...
-
Page 29: Consignes De Sécurité Importantes
CONSIGNES DE SÉCURITÉ IMPORTANTES • Utilisez l’appareil exclusivement en position verticale sur une surface horizontale plane, à au moins 30 cm de tous les murs et objets environnants. • Le climatiseur doit être utilisé dans la plage de température suivante : 16 °C ~ 35 °C. • L'appareil est conçu exclusivement pour un usage en intérieur. • Éteignez l'appareil et débranchez sa fiche quand vous ne l utilisez pas et avant de le nettoyer. ’ • Transportez et rangez l appareil exclusivement en position verticale. ’ • Placez toujours l'appareil sur une surface horizontale et stable. • Ne couvrez pas et ne bouchez pas les grilles d entrée et de sortie d air. ’ ’ • N utilisez ... -
Page 30: Pièces
PIÈCES Avant Arrière 1. Panneau de contrôle 6. Raccord d'extraction 2. Déflecteurs 7. Grilles d entrée d air inférieures ’ ’ • Déflecteurs horizontaux (internes) 8. Support d enroulement du cordon ’ • Déflecteurs verticaux d'alimentation 3. Roulettes (4) 9. Adaptateurs 4. Logement pour la télécommande 10. Tuyau d'extraction 5. Grilles d entrée d air supérieures ... - Page 31 Panneau de contrôle Touches : Réglage de la température ou de la durée. Réglage de la Réglage du vitesse de Fonction WiFi Réglage du mode Marche/Arrêt minuteur ventilation Voyants : Mode Ventilation basse Rafraîchissement Ventilation Mode moyenne Déshumidification Mode Ventilation Ventilation rapide Seule Ventilation Auto Fonction WiFi Minuteur FR-7...
- Page 32 Télécommande Touches : Réglage du mode Marche/Arrêt Réglage de la température ou de la durée Réglage de la vitesse de ventilation Activation du minuteur Désactivation du minuteur Réglage de l horloge ’ Mode nuit Vérification du réglage de la température / température ambiante à l intérieur ’ Activation / Désactivation de la fonction WiFi Partie gauche : Fonction Ventilation X, Partie droite : allumage/extinction de l écran de la ’ télécommande Écran de la télécommande Vitesse de ventilation réglée Envoi de signaux Modes de fonctionnement Mode Ventilation X Mode Auto ...
-
Page 33: Utilisation De La Télécommande
UTILISATION DE LA TÉLÉCOMMANDE Installer les piles 1. Retirez le couvercle du logement des piles. Install 2. Insérez les deux piles fournies dans le logement en veillant à respecter la polarité +/‐ indiquée. 3. Refermez le couvercle du logement des piles. Retrait REMARQUE : Avant toute période d'inutilisation prolongée de l'appareil, retirez les piles de la télécommande. Comment utiliser la télécommande Dirigez la télécommande vers la fenêtre du récepteur de signaux de l'appareil et appuyez sur la touche désirée de la télécommande. L'appareil bipe quand il reçoit un signal. • Veillez à ce qu'il n'y ait pas de rideau ou d'autre objet entre la télécommande et l'appareil. • La télécommande peut envoyer des signaux jusqu'à 7 m de distance. ATTENTION : • Veillez à ce que la fenêtre du récepteur de signaux ne soit pas exposée à la lumière directe du soleil, car cela impacter son fonctionnement. Si la fenêtre du récepteur de signaux est exposée à la lumière du soleil, fermez un rideau pour bloquer la lumière. • N'exposez pas la télécommande à la lumière directe du soleil et ne la placez pas près d'un radiateur. Protégez l'appareil et la télécommande de l'humidité et des chocs qui peuvent les détériorer et les décolorer. Pour éviter de perdre la télécommande, remettez‐la toujours dans le logement prévu à cet effet quand vous ne l'utilisez pas. ... -
Page 34: Installation
INSTALLATION Cet appareil est un climatiseur mobile qui peut être déplacé d une pièce à l autre. ’ ’ Installation du tuyau d'extraction Selon la manière dont vous utilisez l’appareil, les adaptateurs et le tuyau d extraction doivent être installés ’ ou désinstallés. Pour le mode RAFRAÎCHISSEMENT Installez les adaptateurs et le tuyau extraction. ’ Pour les modes VENTILATION et Retirez les adaptateurs et le tuyau DÉSHUMIDIFICATION extraction. ’ 1. Assemblez les deux pièces représentées ci‐dessous pour former l adaptateur. ’ Fermoirs 2. Vissez l adaptateur sur l une des extrémités du tuyau d extraction. ’ ’ ’ 3. Vissez le raccord d extraction sur l autre extrémité du tuyau d extraction. ... - Page 35 4. Insérez le raccord d extraction dans la sortie d air au dos de l appareil jusqu à entendre un déclic. ’ ’ ’ ’ Fermoir Rainure 5. Positionnez le tuyau d'extraction à l'extérieur. Installer le tuyau d extraction dans un mur ’ 1. Placez l adaptateur d extraction contre le mur et marquez son emplacement. ’ ’ 2. Percez un trou dans le mur avec les outils et équipements de sécurité requis. 3. Placez l adaptateur d extraction sur le mur et marquez l emplacement des quatre trous. ’ ’ ’ 4. Percez les quatre trous dans le mur et enfoncez des chevilles dans les trous. 5.
-
Page 36: Utilisation
Remarque : Le tuyau peut être allongé, mais il est préférable d utiliser la longueur la plus courte pour une ’ efficacité optimale. IMPORTANT : NE PLIEZ PAS LE TUYAU. UTILISATION Branchez l'appareil dans une prise secteur. Une sonnerie retentit et tous les voyants s allument brièvement. ’ Allumer et éteindre l’appareil Appuyez sur la touche du panneau de contrôle ou sur la touche de la télécommande pour allumer ou éteindre l'appareil. Sélectionner un mode Appuyez plusieurs fois sur la touche du panneau de contrôle ou sur la touche de la télécommande pour sélectionner le mode de fonctionnement : auto (disponible uniquement avec la télécommande), rafraîchissement, déshumidification ou ventilation seule. Le voyant/indicateur du mode sélectionné s allume/s affiche. ’ ’ Panneau de contrôle Écran de la télécommande Le système s éteint quand la température ambiante devient inférieure à la température réglée, puis il ... -
Page 37: Régler La Température
Régler la température Appuyez plusieurs fois sur la touche du panneau de contrôle ou sur la touche de la télécommande pour régler la température. Maintenez la touche de la télécommande appuyée pour que le réglage change rapidement. Dans les modes auto, déshumidification et ventilation seule, vous ne pouvez pas régler la température. écran affiche la température que vous avez réglée dans le mode rafraîchissement. ’ Plage de réglage de la température : 30°C max. 16°C min. Changer l'affichage de la température (télécommande uniquement) Quand l'appareil est éteint, appuyez simultanément sur et pour basculer entre l'affichage de la température en degrés Celsius ou Fahrenheit. Régler la vitesse de ventilation Appuyez plusieurs fois sur la touche du panneau de contrôle ou sur la touche de la télécommande pour régler la vitesse de ventilation. Le voyant correspondant à la vitesse de ventilation sélectionnée s allume. ’ Sur le panneau de contrôle Sur l'écran de la télécommande ... -
Page 38: Réglage De La Minuterie
2. Pendant que le symbole de l horloge clignote, appuyez plusieurs fois sur pour régler ’ heure actuelle. ’ • Maintenez la touche pour avancer rapidement le réglage. appuyée 3. Appuyez sur pour confirmer le réglage. Réglage de la minuterie Programmer le minuteur pour allumer l appareil quand il est éteint. ’ 1. Appuyez sur la touche du panneau de contrôle ou sur la touche de la télécommande. Le voyant du panneau de contrôle et/ou l indicateur « ON » de l'écran de la télécommande ’ clignote(nt). 2. Quand le voyant ou l indicateur clignote, appuyez plusieurs fois sur la touche du panneau ’ de contrôle ou sur la touche de la télécommande pour modifier la durée. Maintenez la touche ... - Page 39 Maintenez la touche de la télécommande enfoncée pour un changement rapide du réglage. Sur l écran du panneau de contrôle, l heure change par tranches de 30 minutes jusqu à 10 heures, ’ ’ ’ puis par tranches de 1 heure jusqu'à 24 heures. 3. Une fois le réglage effectué, appuyez sur la touche du panneau de contrôle ou sur la touche de la télécommande pour confirmer. Le voyant éclairage et/ou le voyant «OFF » s arrête(nt) de clignoter. Le décompte de la durée réglée ’ commence. 4. Une fois la durée réglée écoulée, l appareil s éteint automatiquement. ’ ’ Annuler le réglage du minuteur Appuyez sur la touche du panneau de contrôle ou de la télécommande. Le voyant du panneau de contrôle s'éteint et le voyant « ON »/« OFF » disparaît de l'écran de la télécommande. Affichage de la température (télécommande uniquement) Appuyez plusieurs fois sur la touche ...
-
Page 40: Fonction Ventilation X (Télécommande Uniquement)
Fonction ventilation X (télécommande uniquement) Cette fonction permet au ventilateur de continuer de souffler pendant environ 2 minutes une fois que vous l’avez éteint, afin d'éliminer l humidité de l évaporateur pour éviter la formation de moisissures. ’ ’ En mode Rafraîchissement et Déshumidification, appuyez sur la PARTIE GAUCHE de la touche pour activer la fonction Ventilation X. L écran de la télécommande affiche le symbole . ’ Pour désactiver cette fonction, appuyez à nouveau sur la PARTIE GAUCHE de la touche . Le symbole disparaîtra de l écran. ’ Allumer et éteindre l’écran du panneau de contrôle (télécommande uniquement) Si vous préférez éteindre l écran du panneau de contrôle, appuyez sur la PARTIE DROITE de la touche ’ . Le symbole disparaît de l écran de la télécommande. ’ Si vous préférez allumer l écran du panneau de contrôle, appuyez à nouveau sur la PARTIE DROITE de la ’ touche . Le symbole apparaît sur l écran de la télécommande. ’ Fonction verrouillage (télécommande uniquement) ... -
Page 41: Régler L'orientation Du Flux D'air
pour activer ou désactiver cette fonction. Lorsque cette fonction est activée, l’écran de la télécommande affiche « WiFi ». Pour réinitialiser la fonction WiFi, maintenez enfoncés simultanément durant environ 1 seconde. 4. Ouvrez l application Ewpe Smart et inscrivez‐vous. ’ 5. Identifiez‐vous et appuyez sur en haut à droite sur l écran principal. ’ 6. Sélectionnez l appareil de type « AC » et vous verrez apparaître un écran « Ajouter appareil ». ’ 7. Appuyez sur le bouton Suivant pour passer à la suite : sur cet écran, il vous sera demandé d entrer le ’ nom de votre WiFi personnel et votre mot de passe. 8. Appuyez sur le bouton Rechercher appareil et attendez jusqu à ce que l appareil soit connecté à votre ... - Page 42 2. Fixez le support sur la grille d entrée d air inférieure avec la vis fournie. ’ ’ 3. Vissez l une des extrémités du tuyau de vidange sur l orifice de vidange inférieur et fixez‐le avec l’un des ’ ’ colliers de fixation fournis. 4. Attachez le tuyau de vidange sur le support. Attachez‐le avec le deuxième collier de fixation fourni, et attachez le bouchon en caoutchouc sur l autre extrémité du tuyau de vidange. ’ Vider le réservoir d eau : ’ 1. Éteignez l appareil et débranchez sa fiche de la prise secteur. ’ 2. Placez un récipient sur le sol sous l orifice de vidange inférieur. ’ 3. Retirez le bouchon en caoutchouc de l orifice de vidange et laissez l eau s écouler complètement. ’ ’ ’ •...
- Page 43 4. Réinstallez le bouchon en caoutchouc ou le tuyau de vidange, branchez la fiche de l appareil dans une ’ prise secteur, puis allumez l appareil. ’ Vidange en continu Quand vous utilisez cet appareil dans un environnement très humide, pendant le mode déshumidification ou rafraîchissement, raccordez le tuyau de vidange sur l'orifice de vidange en continu. 1. Retirez le bouchon de vidange, puis retirez le bouchon en caoutchouc de l'orifice de vidange en continu. 2. Vissez le raccord de vidange fourni sur l'orifice de vidange en continu. 3. Raccordez une extrémité du tuyau de vidange sur l'orifice de vidange en continu et placez son autre extrémité dans un drain normal. • Vérifiez que le tuyau n'est ni plié ni tordu. • REMARQUE : Le tuyau de vidange doit être à la même hauteur ou plus bas que l orifice de sortie ’ de l eau. ’ FR-19...
-
Page 44: Nettoyage Et Entretien
NETTOYAGE ET ENTRETIEN Éteignez l appareil et débranchez‐le de la prise secteur avant de le nettoyer. ’ Pour maximiser l efficacité de l appareil, nettoyez‐le régulièrement. ’ ’ Nettoyer le boîtier Nettoyez le boîtier avec un chiffon légèrement humide. utilisez jamais de nettoyant chimique ou abrasif. ’ Nettoyer les filtres Retirez les filtres. Filtre 2 Fermoir Filtre 1 • Les filtres doivent être régulièrement nettoyés. Aspirez les filtres avec un aspirateur ou tapotez‐les légèrement pour en enlever les poussières et saletés, puis rincez‐les intégralement à l eau courante. Séchez‐les intégralement avant de les ’ réassembler. REMARQUE : N utilisez jamais le climatiseur sans les filtres. ’ Rangement • Videz toute l eau contenue dans l appareil (s il y en a), puis faites‐le fonctionner en mode ventilation ... -
Page 45: Dépannage
• Pour ranger la télécommande, retirez les piles de la télécommande, puis insérez‐la dans le logement prévu en haut de l'appareil. • Rangez l appareil dans un endroit sec. ’ DÉPANNAGE N'essayez pas de réparer ni de démonter le climatiseur vous‐même. Problème Cause possible Solution possible Panne de courant. Rétablissez le courant. La fiche électrique est mal branchée. Rebranchez la fiche électrique. Contactez un réparateur pour faire Le commutateur de débit d’air s'est remplacer le commutateur de débit déclenché ou le fusible a grillé. Le climatiseur ne d’air ou le fusible. fonctionne pas. Il y a un dysfonctionnement du Contactez un réparateur pour faire circuit. remplacer le circuit. Après avoir allumé l'appareil, vous Attendez 3 minutes environ, puis avez voulu l’éteindre rallumez l appareil. ’ immédiatement. Exposition à la lumière directe du Fermez les rideaux. soleil. ... -
Page 46: Spécifications Techniques
Codes d erreur ’ Débranchez l appareil, puis rallumez‐le après 10 minutes. ’ E5 Protection contre la surchauffe Si « E5 » reste affiché, contactez un réparateur. Videz l eau contenue dans le réservoir. Si « H8 » reste ’ H8 Le réservoir d eau est plein. ’ affiché, contactez un réparateur. Dysfonctionnement du capteur de F1 Contactez un réparateur. température ambiante. Dysfonctionnement du capteur de F2 Contactez un réparateur. température de l évaporateur. ’ Éteignez l appareil et débranchez‐le de la prise secteur. ’ • Il y a une fuite de réfrigérant. Attendez 30 minutes avant de le rebrancher et de le F0 • Le système est bloqué. redémarrer. Si le problème persiste, contactez le service après‐vente. • Vérifiez si l'appareil se trouve dans un environnement Protection du compresseur contre la ... -
Page 47: Mise Au Rebut
GWP : 2088 ; 1,65 tonne d'équivalent CO . Contient des gaz fluorés à effet de serre. Scellé hermétiquement. Gamme de fréquences:2400 ‐ 2483 MISE AU REBUT En tant que revendeur, nous nous préoccupons de l'environnement. Aidez‐nous en observant toutes les instructions de mise au rebut de vos produits, emballages et, le cas échéant, accessoires et piles. Nous devons tous œuvrer pour la protection des ressources naturelles et nous efforcer de recycler tous les matériaux d'une manière qui ne puisse nuire ni à notre santé ni à l'environnement. Nous devons tous nous conformer strictement aux lois et règlements de mise au rebut édicté par nos autorités locales. Évitez de jeter vos produits électriques défectueux ou obsolètes, et vos piles usagées, avec vos ordures ménagères. Contactez votre revendeur ou vos autorités locales pour connaître les instructions de mise au rebut et de recyclage. Déposez les piles au point de collecte pour recyclage le plus proche de chez vous. Le guide d'instruction du produit vous indique exactement comment procéder pour enlever les piles usagées. Nous nous excusons d'avance pour les désagréments causés par les quelques erreurs mineures que vous pourriez rencontrer, généralement dues aux constantes améliorations que nous apportons à nos produits. Hotline Darty France Quels que soient votre panne et le lieu d'achat de votre produit en France, avant de vous déplacer en magasin Darty, appelez le 0 978 970 970 (prix d'un appel local) 7j/7 et 24h/24. Hotline Vanden Borre Le service après‐vente est joignable au +32 2 334 00 00, du lundi au vendredi de 8h à 18h et le samedi de ... - Page 48 WAARSCHUWINGEN ............................ 2 BELANGRIJKE VEILIGHEIDSINSTRUCTIES ...................... 4 ONDERDELEN .............................. 5 DE AFSTANDSBEDIENING GEBRUIKEN ....................... 8 INSTALLATIE ................................ 9 GEBRUIK ................................ 1 1 IN‐/UITschakelen ............................ 1 1 Een modus kiezen ............................ 1 1 De temperatuur instellen .......................... 1 2 Weergave van de temperatuur wijzigen (alleen afstandsbediening) ............ 1 2 De ventilatorsnelheid instellen ........................ 1 2 De klok instellen (alleen afstandsbediening) ...
-
Page 49: Waarschuwingen
WAARSCHUWINGEN Dit apparaat is alleen bestemd voor huishoudelijk gebruik en mag niet voor andere doeleinden of toepassingen worden gebruikt, zoals niet‐huishoudelijk gebruik of in een commerciële omgeving. Dit apparaat kan worden gebruikt door kinderen vanaf 8 jaar en ouder of personen met beperkte fysische, visuele of mentale mogelijkheden, of die een gebrek hebben aan ervaring en kennis, als ze onder toezicht staan of instructies hebben gekregen over het veilig gebruik van het apparaat en de gevaren die het gebruik van het apparaat met zich meebrengen begrijpen. Laat kinderen nooit met het apparaat spelen. Kinderen mogen het apparaat niet zonder toezicht reinigen of onderhouden. Als het snoer beschadigd is, moet het worden vervangen door de fabrikant, een erkend servicecentrum of een gelijkwaardig vakbekwaam persoon om elk gevaar te vermijden. Voor details over de reinigingsmethode en ‐frequentie, zie de sectie & 19 . “Reiniging en onderhoud” op pagina 18 Het koelmiddel dat in dit apparaat wordt gebruikt is een gefluoreerd broeikasgas, dat zowel schadelijk voor het milieu als verantwoordelijk voor de opwarming van de aarde kan zijn als deze in de atmosfeer vrijkomt. Cet appareil contient des gaz à effet de serre fluorés. Nom chimique du gaz: R410A Les gaz à effet de serre fluorés sont contenus dans un équipement hermétiquement scellé. Un appareil de commutation électrique a un taux de fuite testé, indiqué dans les spécifications techniques du NL-2... - Page 50 fabricant, inférieur à 0,1 % par an. Het R‐410A koelmiddel dat in dit product wordt gebruikt is een gefluoreerd broeikasgas onder het Kyoto protocol, dat zowel schadelijk voor het milieu als verantwoordelijk voor de opwarming van de aarde kan zijn als deze in de atmosfeer vrijkomt. Zijn aardopwarmingspotentieel is 2088. Het apparaat afvoeren: Om mogelijke schade aan het milieu of aan de menselijke gezondheid te voorkomen door het ongecontroleerd verwijderen van afval, recycle het apparaat op een verantwoordelijke wijze, om het duurzame hergebruik van grondstoffen te bevorderen. Lever het apparaat in bij een inzamelpunt in uw gemeente. Voor installatie, onderhoud: Plaats het apparaat op een horizontaal oppervlak en zorg voor voldoende ventilatie. Vervang of repareer de onderdelen niet zelf. Raadpleeg indien nodig het servicecentrum. Hantering: Hanteer het apparaat altijd met de nodige voorzichtigheid om schade te voorkomen. Haal de batterij uit het apparaat voordat u het afdankt. Gooi de afgedankte batterij op een juiste manier weg. Gebruik geen verschillende soorten batterijen of oude met nieuwe batterijen door elkaar. Er mogen alleen batterijen worden gebruikt van het aanbevolen of NL-3...
-
Page 51: Belangrijke Veiligheidsinstructies
een gelijkwaardig type. Plaats de batterijen volgens de juiste polariteit. Haal verbruikte batterijen uit het product. Voer de batterij op een milieuvriendelijke manier af. Gooi geen gebruikte batterijen weg met het huisvuil. Neem contact op met uw handelaar om het milieu te beschermen. Stel de batterijen (geïnstalleerde batterijen) niet bloot aan overmatige hitte zoals zonlicht, vuur, etc. BELANGRIJKE VEILIGHEIDSINSTRUCTIES • Gebruik het apparaat alleen in een rechtopstaande p ositie op een vlak, effen oppervlak e n op een afstand van m instens 30 cm van muren of andere voorwerpen. ... -
Page 52: Onderdelen
• Giet of spetter geen water op het apparaat. Anders kan er kortsluiting of schade aan het apparaat ontstaan. • Als de afvoerslang wordt gebruikt, mag de omgevingstemperatuur niet lager dan 0°C zijn. om het lekken van water te vermijden. • Hang of plaats geen druipende voorwerpen boven het apparaat. • Repareer of demonteer het apparaat niet zelf. Neem contact op met een erkende reparateur. • Gebruik geen verlengsnoer. Installatie en gebruik van de batterij Batterijen voor afstandsbediening (meegeleverd): De batterijen mogen alleen door volwassenen worden vervangen. Zorg dat kinderen de afstandsbediening niet gebruiken, tenzij het batterijvakdeksel er goed op zit. De batterijen op de verkeerde polen aansluiten kan schade aan de afstandsbediening en risico op brand veroorzaken. Vervang de batterij alleen door een batterij van hetzelfde type. De afstandsbediening werkt op twee AAA 1,5 batterijen, die op een eenvoudige manier vervangen kunnen worden. ONDERDELEN Vooraanzicht Achteraanzicht 1. Bedieningspaneel 5. Bovenste luchtinlaatroosters 2. Ventilatiegleuven 6. Uitlaatkoppelstuk • Horizontale ventilatiegleuven 7. Onderste luchtinlaatroosters (binnenkant) 8. - Page 53 Toebehoren Adapters Uitlaatkoppelstuk (dient op een adapter gemonteerd te Uitlaatslang worden) Schroeven (3) Beugel Rubber plug Slangklemmen (2) Snoeropberghaak (2) Afvoerslang Afvoeraansluiting Afstandsbediening Bedieningspaneel Knoppen: Temperatuur of tijd instellen Ventilatorsnelheid Wifi‐functie Timer instellen Modus instellen AAN/UIT instellen NL-6...
- Page 54 Indicatielampjes: Lage Koelmodus ventilatorsnelheid Normale Ontvochtigings‐ ventilatorsnelheid modus Alleen Hoge ventilatormodus ventilatorsnelheid Automatische ventilatorsnelheid Wifi‐functie Timerfunctie Afstandsbediening Knoppen: Instelmodus AAN/UIT Temperatuur of tijd instellen Ventilatorsnelheid instellen Timer aan Timer uit ...
-
Page 55: De Afstandsbediening Gebruiken
Display van de afstandsbediening Ventilatorsnelheid instellen Signaal sturen Turbomodus Werkingsmodi Automatische modus X‐ventilatormodus Koelmodus Temperatuur instellen Droge modus Ventilator‐modus Tijd instellen TIMER AAN / TIMER Klok UIT Inslaapmodus Kinderslot Licht Temp. displaytype Temp. instellen Kamertemperatuur DE AFSTANDSBEDIENING GEBRUIKEN De batterijen installeren 1. Verwijder het batterijvakdeksel. Installeren 2. Installeer de twee meegeleverde batterijen in het batterijvak, volgens de juiste polariteit (+ en ‐). 3. Breng het batterijvakdeksel opnieuw aan. Verwijderen OPMERKING: Als u het apparaat gedurende een lange periode niet zult gebruiken, haal de batterijen uit de ... -
Page 56: Installatie
• Laat de afstandsbediening niet achter in direct zonlicht of in de buurt van een verwarming. Bescherm het apparaat en de afstandsbediening tevens tegen vocht en schokken om verkleuring of beschadigingen te vermijden. Om te voorkomen dat de afstandsbediening verloren raakt, plaats deze in het afstandsbedieningsvak van het apparaat wanneer u het niet gebruikt. INSTALLATIE Dit apparaat is een mobiele airconditioning die naar andere ruimten kan worden verplaatst. De uitlaatslang installeren De uitlaatslang en adapters moeten afhankelijk van het gebruik worden geplaatst of verwijderd. Voor KOELmodus Installeer de uitlaatslang en adapters Voor VENTILATOR‐ en Verwijder de uitlaatslang en adapters ONTVOCHTIGINGSmodi 1. Maak van twee adapterdelen één geheel. Sluithaken 2. Schroef de adapter in één uiteinde van de uitlaatslang. 3. Schroef het uitlaatkoppelstuk in het ander uiteinde van de uitlaatslang. NL-9... - Page 57 4. Duw het uitlaatkoppelstuk in de luchtuitlaat aan de achterkant van het apparaat, totdat deze op zijn plaats klikt. sluithaak Groef 5. Leid de uitlaatslang naar buiten. De uitlaatslang in de muur installeren 1. Plaats de adapter tegen de muur en markeer hem. 2. Maak met behulp van geschikt gereedschap en veiligheidsuitrusting een gat in de muur. 3. Plaats de adapter tegen de muur en markeer de locatie voor de vier gaten. 4. Boor vier gaten in de muur en steek pluggen in de gaten. 5. Maak de adapter aan de muur vast door de vier schroeven erin te steken en vast te draaien. NL-10...
-
Page 58: Gebruik
Opmerking: De slang kan worden verlengd maar voor de maximale efficiëntie dient u de kortste lengte te gebruiken. BELANGRIJK: BUIG DE SLANG NIET. GEBRUIK Steek de stekker in het stopcontact. Een zoemer gaat af en alle controlelampjes branden eventjes. IN‐/UITschakelen Druk op op het bedieningspaneel of op op de afstandsbediening om het apparaat in of uit te schakelen. Een modus kiezen Druk herhaaldelijk op op het bedieningspaneel of op op de afstandsbediening om de gewenste gebruiksmodus te selecteren: auto (alleen beschikbaar op de afstandsbediening), koelen, ontvochtigen of alleen ventilator. Het controlelampje van uw gekozen modus brandt. Bedieningspaneel Display van de afstandsbediening Het koelsysteem wordt uitgeschakeld als de kamertemperatuur lager dan de ingestelde temperatuur is. Als de kamertemperatuur boven de ingestelde temperatuur komt, wordt de koelfunctie opnieuw ingeschakeld. NL-11... -
Page 59: De Temperatuur Instellen
De temperatuur instellen Druk herhaaldelijk op op het bedieningspaneel of op op de afstandsbediening om de temperatuur in te stellen. Druk en houd op de afstandsbediening ingedrukt om snel in te stellen. In de auto‐, ontvochtingings‐ en ventilatormodi is het niet mogelijk om de temperatuur in te stellen. Het display geeft de temperatuur weer die in u de koelmodus heeft ingesteld. Instelbaar temperatuurbereik: 30°C max. 16°C min. Weergave van de temperatuur wijzigen (alleen afstandsbediening) Als het apparaat is uitgeschakeld, druk gelijktijdig op en om de weergave van de temperatuur van graden Celcius naar Fahrenheit en andersom te wisselen. De ventilatorsnelheid instellen Druk herhaaldelijk op op het bedieningspaneel of op op de afstandsbediening om de ventilatorsnelheid te selecteren. Het snelheidscontrolelampje brandt om aan te geven welke snelheidsinstelling in gebruik is. Op het bedieningspaneel Op het display van de afstandsbediening OPMERKING: Als het apparaat zich in de ontvochtigingsmodus bevindt, kunt u de snelheid van de ventilator niet instellen. De klok instellen (alleen afstandsbediening) 1. Druk op . ... -
Page 60: De Timer Instellen
De timer instellen De timer voor INschakeling programmeren als het apparaat UIT is. – 1. Druk op op het bedieningspaneel of op op de afstandsbediening. Het controlelampje op het bedieningspaneel en/of de indicator ON" op het display van de “ afstandsbediening knipperen. 2. Terwijl het controlelampje of de indicator op het display knippert, druk herhaaldelijk op op het bedieningspaneel of op op de afstandsbediening om de tijd te wijzigen. Druk en houd op de afstandsbediening ingedrukt om snel in te stellen. Op het display van het bedieningspaneel wordt de tijd met intervallen van een half uur (tot 10 uur) en vervolgens met intervallen van 1 uur (tot 24 uur) gewijzigd. 3. Eenmaal ingesteld, druk op op het bedieningspaneel of op op de afstandsbediening om te bevestigen. Het aan/uit‐controlelampje en/of de indicator stopt met knipperen. De tijd start met aftellen. “ ” 4. Het apparaat wordt automatisch ingeschakeld zodra de ingestelde tijd wordt bereikt. ... -
Page 61: Temperatuurdisplay Functie (Alleen Afstandsbediening)
De timerinstelling annuleren Druk op op het bedieningspaneel of op op de afstandsbediening. Het controlelampje op het bedieningspaneel dooft en de indicator verdwijnt van het display van de “ ” afstandsbediening. Temperatuurdisplay functie (alleen afstandsbediening) Druk herhaaldelijk op om de ingestelde of kamertemperatuur op het display van de afstandsbediening weer te geven. • Als op het display van de afstandsbediening het symbool wordt weergegeven of geen symbool voor temperatuurweergave wordt weergegeven, wordt de ingestelde temperatuur op het display van de afstandsbediening weergegeven. • Als op het display van de afstandsbediening het symbool wordt weergegeven, wordt de kamertemperatuur op het display van de afstandsbediening weergegeven. Inslaapfunctie (alleen afstandsbediening) De slaapfunctie past de ingestelde temperatuur van het apparaat aan naar gelang de warmtebehoeften van een lichaam dat in slaap valt. Druk op om de inslaapmodus in te schakelen. Het inslaapsymbool verschijnt op het display van de afstandsbediening. OPMERKING: Deze functie is ALLEEN beschikbaar in de koelmodus. ... -
Page 62: Display Van Bedieningspaneel Aan/Uit Functie (Alleen Afstandsbediening)
Display van bedieningspaneel AAN/UIT functie (alleen afstandsbediening) Als u het display van het bedieningspaneel wilt uitschakelen, druk op het RECHTER GEDEELTE van de knop . Het symbool op het display van de afstandsbediening verdwijnt. Om het display van het bedieningspaneel in te schakelen, druk opnieuw op het RECHTER GEDEELTE van de knop . Het symbool verschijnt op het display van de afstandsbediening. Vergrendelingsfunctie (alleen afstandsbediening) Druk tegelijkertijd op en om de huidige instellingen te vergrendelen en ongewenste wijzigingen te voorkomen. Eenmaal vergrendeld, reageert de afstandsbediening niet langer op bewerkingen. Het scherm van de afstandsbediening geeft het symbool weer. Om de vergrendelingsfunctie te annuleren, druk tegelijkertijd op en om opnieuw te ontgrendelen. Het symbool verdwijnt van het display van de afstandsbediening. Wifi‐functie Met deze functie kunt u de airconditioner met behulp van een smartphone bedienen. 1. Download de Ewpe Smart APP op uw smartphone of tablet in Apple App store of Google Play. 2. Schakel Wi‐Fi op uw smartphone in. 3. Druk op op het bedieningspaneel om de Wifi‐functie in of uit te schakelen. Het controlelampje brandt wanneer deze functie is ingeschakeld. Om de Wifi‐functie terug te zetten, druk en houd ... -
Page 63: De Richting Van De Luchtstroom Regelen
De richting van de luchtstroom regelen Beweeg de horizontale en verticale luchtgleuven om de luchtstroom aan te passen. Horizontale luchtgleuven Verticale ventilatiegleuven AFVOER In een omgeving met een hoge vochtigheid kan het nodig zijn om het intern waterreservoir te legen. Het display geeft "H8 weer wanneer het intern waterreservoir vol is. ” Het proces koelen/ontvochtigen wordt gestopt. Voordat het apparaat wordt ingeschakeld, kunt u de rubber plug in het onderste afvoerpunt steken of kunt u de meegeleverde afvoerslang vastmaken voor een continue afvoer. De meegeleverde afvoerslang aan het onderste afvoerpunt bevestigen: 1. Haal de rubber plug van het onderste afvoerpunt af. 2. Maak de beugel aan het onderste luchtinlaatrooster vast met behulp van de meegeleverde schroef. 3. Schroef een uiteinde van de afvoerslang over het onderste afvoerpunt en maak vervolgens vast met de slangklem. NL-16... - Page 64 4. Installeer de afvoerslang in de beugel. Maak deze vast met de slangklem en bevestig de rubber plug aan het ander uiteinde van de afvoerslang. Om het waterreservoir te legen, voer het volgende uit: 1. Schakel het apparaat uit een haal de stekker uit het stopcontact. 2. Plaats een waterbak op de vloer onder het onderste afvoerpunt. 3. Verwijder de rubber plug van de afvoer en laat het water wegstromen. • Als een afvoerslang wordt gebruikt, voer het volgende uit: 1) Haal de afvoerslang van de beugel. 2) Verwijder de rubber plug van een uiteinde van de slang. 3) Plaats de afvoerslang in de waterbak. 4. Plaats de rubber plug of afvoerslang terug, steek de stekker in het stopcontact en schakel het apparaat in. Continue afvoer Wanneer u dit apparaat voor ontvochtiging of in de koelmodus gebruikt in een ruimte met een hoge vochtigheidsgraad, sluit u de afvoerslang aan op de aansluiting voor continue drainage. 1. Verwijder de afvoerdop en verwijder vervolgens de rubber stopper van het continue afvoerpunt. NL-17...
-
Page 65: Reiniging En Onderhoud
2. Draai de meegeleverde adapter op het onderste afvoerpunt. 3. Sluit het ene uiteinde van de afvoerslang op het continue afvoerpunt en het andere uiteinde van de afvoerslang op een bestaande afvoer aan. • Zorg ervoor dat de slang niet gebogen of vervormd is. • OPMERKING: De afvoer dient zich op dezelfde hoogte of onder de uitlaat te bevinden. REINIGING EN ONDERHOUD Schakel het apparaat uit en haal de stekker uit het stopcontact voor reiniging. Maak het apparaat regelmatig schoon voor het beste resultaat. De behuizing reinigen Maak de behuizing schoon met een licht bevochtigde doek. Gebruik geen schurende of chemische schoonmaakmiddelen. NL-18 ... - Page 66 De filters reinigen Verwijder de filters. filter 2 sluithaak filter 1 • Maak de filters regelmatig schoon. Gebruik een stofzuiger of tik lichtjes op de filter om los stof en vuil van de filters te verwijderen en spoel vervolgens grondig onder stromend water. Droog de filters grondig voordat u deze opnieuw aanbrengt. OPMERKING: Gebruik de airconditioning nooit zonder de filters. Opslag • Voer al het water in het apparaat af en laat het apparaat vervolgens enkele uren op de modus Alleen ventilator werken om de binnenkant van het apparaat volledig te drogen. • Maak de filters schoon. • Bevestig de meegeleverde snoeropberghaken met behulp van de meegeleverde schroeven aan de achterkant van het apparaat. Wikkel het snoer om de haken. • Om de afstandsbediening op te bergen, verwijdert u de batterijen uit de afstandsbediening en plaatst u hem vervolgens in het batterijvak aan de bovenkant van het apparaat. • Berg het apparaat op in een droge ruimte. NL-19...
-
Page 67: Probleemoplossing
PROBLEEMOPLOSSING Probeer nooit om de airconditioning zelf te repareren of te demonteren. Probleem Mogelijke oorzaak Mogelijke oplossing Stroomuitval Zorg voor een stroomverbinding. De stekker zit niet goed in het Steek de stekker goed in het stopcontact. stopcontact. Vraag uw lokale elektricien om de De luchtschakelaar is eraf of de luchtschakelaar of zekering te De airconditioning werkt zekering is doorgebrand. vervangen. niet. Er is sprake van een storing in het Vraag uw lokale elektricien om het circuit. circuit te repareren. Nadat u het apparaat heeft Wacht gedurende 3 minuten en ingeschakeld, dient u hem direct uit schakel het apparaat weer aan. te schakelen. In direct zonlicht. Doe de gordijnen dicht. Ramen of deuren zijn open, of er Sluit ramen en deuren en verwijder De airconditioning lijkt bevindt zich een warmtebron in de de warmtebron. onvoldoende kamer. koelvermogen te Vuile filters. Maak de filters schoon. hebben. ... -
Page 68: Technische Gegevens
klantendienst. • Controleer of het apparaat in een omgeving staat met Overbelastingsbescherming voor de H3 compressor. een hoge temperatuur of hoge luchtvochtigheid. Als de omgevingstemperatuur te hoog is, dient u het apparaat uit te schakelen en te laten rusten totdat de omgevingstemperatuur onder 35°C zakt. • Controleer of de ontvochtiger en condensator geblokkeerd wordt door voorwerpen. Als dat het geval E8 Storing door overbelasting is, dient u de voorwerpen te verwijderen, het apparaat uit te schakelen en voor gebruik tot rust te laten komen. • Als er nog steeds sprake is van een storing, neem contact op met de klantendienst. • Vervang de detectieplaat door hetzelfde model. • Vervang het moederbord door hetzelfde model. JF Storing van detectieplaat (WiFi) • Als er nog steeds sprake is van een storing, neem contact op met de klantendienst. TECHNISCHE GEGEVENS Nominale koelcapaciteit (P voor koeling) 3,5kW rated Nominaal opgenomen vermogen voor koeling (P ) 1550W Nominale energie‐efficiëntieverhouding (EERd) 2,6 ... -
Page 69: Verwijdering
VERWIJDERING Als een verantwoordelijke verdeler hechten wij waarde aan het milieu. Daarom raden wij U aan om de correcte verwijderingprocedure te volgen voor uw product, verpakkingsmaterialen, en indien van toepassing, accessoires en batterijen. Dit draagt bij tot de instandhouding van natuurlijke bronnen en zorgt ervoor dat de materialen gerecycleerd worden op een manier die de gezondheid en het milieu beschermt. U moet de wetten en regels volgens voor verwijdering. Elektrische afvalproducten en batterijen moeten afzonderlijk van het huishoudelijk afval verwijderd worden wanneer het toestel het einde van de levensduur bereikt. Neem contact op met de winkel waar U het product heeft gekocht en met het plaatselijke bestuur om meer te weten over het verwijderen van afval en recyclage. De batterijen moeten verwijderd worden bij uw plaatselijk recyclagepunt. Raadpleeg de gebruiksaanwijzing om te weten hoe U de batterijen moet verwijderen voor afval. We bieden onze excuses aan voor elk ongemak dat veroorzaakt wordt door kleine onregelmatigheden in deze gebruiksaanwijzing die zich kunnen voordoen als het gevolg van productverbetering ‐en ontwikkeling. Hotline Vanden Borre De dienst na verkoop is bereikbaar van maandag tot zaterdag op +32 2 334 00 00 Hulplijn Nederland Hiervoor kunt u contact opnemen met het BCC Service Center: 0900 0555 (lokaal tarief), geopend van maandag t/m vrijdag van 9.00 tot 17.00 uur. We verontschuldigen ons voor enig ongemak veroorzaakt door kleine inconsistenties in deze gebruikershandleiding, die kunnen ontstaan door productverbetering of –ontwikkeling. 27 Darty Holdings SAS © 14 route d’Aulnay 93140 Bondy, France / 02 / 2017 NL-22... - Page 72 66129924139...
Need help?
Do you have a question about the AAC12Konnect and is the answer not in the manual?
Questions and answers