Table of Contents
Advertisement
Quick Links
ZOOMLION INTELLIGENT ACCESS MACHINERY CO.,LTD.
Add:Tengfei Road 997 , Wangcheng District, Changsha, Hunan,PRC
E-mail:awm@zoomlion.com
Open up the WeChat, Scan the QR code above; All rights reserved 2015 © Zoomlion,reserves all rights,Without the written permission of Zoomlion, the contents of any part of this sample may not be copied for any purpose.
Zip Code:410200
Tel:400-800-0157
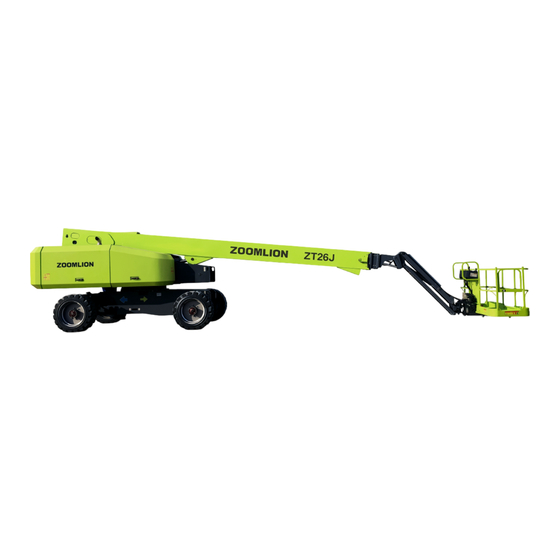
ZT26J
Service and Maintenance Manual
Advertisement
Table of Contents

Related Manuals for Zoomlion ZT26J

Summary of Contents for Zoomlion ZT26J
- Page 1 Add:Tengfei Road 997 , Wangcheng District, Changsha, Hunan,PRC Tel:400-800-0157 E-mail:awm@zoomlion.com Open up the WeChat, Scan the QR code above; All rights reserved 2015 © Zoomlion,reserves all rights,Without the written permission of Zoomlion, the contents of any part of this sample may not be copied for any purpose.
- Page 3 Service and Maintenance Service and Maintenance Manual ZT26J Service and Maintenance Manual Jul 2021 Version A...
-
Page 5: Foreword
Foreword This Service and Maintenance Manual applies to the ZT26J aerial work platform (hereinafter referred to as the AWP). This manual describes proper inspection, servicing and maintenance. Users must fully understand and apply the contents described in this manual to maximize the performance and ensure the long-term safe and efficient use. - Page 6 Foreword Symbols and their description: Danger indicates an imminently dangerous situation. If not avoided, will result in death or serious injury. Warning indicates a potential hazardous situation. If not avoided, will result in death or serious injury. Caution indicates a potential hazardous situation. If not avoided, will result in minor or moderate injury.
-
Page 7: Table Of Contents
Contents Foreword………….…………….………………………….……………………………...….……I Content………….…………….………………………….…………………………..………..…II SECTION 1 MAINTENANCE SAFETY INSTRUCTION ............ 1-1 1.1 Maintenance Personnel Duties, Requirements and Safety Equipment ........1-1 1.1.1 Duties ........................... 1-1 1.1.2 Basic requirements....................... 1-1 1.1.3 Personnel safety equipment ..................1-1 1.2 Maintenance Precautions ......................1-2 1.2.1 Precautions ........................1-2 1.2.2 Precautions in maintenance .................. -
Page 8: Content
Contents 3.1.4 Machine annual inspection ..................3-1 3.1.5 Preventive maintenance ....................3-2 3.2 Maintenance and Instruction ....................3-2 3.2.1 General Description ..................... 3-2 3.2.2 Safety and operating standards ..................3-3 3.2.3 Cleaning ........................3-3 3.2.4 Component disassembly and installation ..............3-3 3.2.5 Component disassembly and reinstallation .............. - Page 9 Contents 4.1 Tire and wheel ......................... 4-1 4.1.1 Tire inflation ........................ 4-1 4.1.2 Tire damage ......................... 4-1 4.1.3 Tire replacement ......................4-2 4.1.4 Wheel replacement ...................... 4-2 4.1.5 Wheel installation ......................4-2 4.2 Swing axle exhaust and locking test ..................4-3 4.2.1 Floating cylinder exhaust .....................
- Page 10 Contents 5.1 Platform and Jib ........................5-1 5.1.1 Load cell ........................5-1 5.1.2 Rotary actuator ......................5-2 5.1.3 Jib lifting cylinder ......................5-3 5.2 Boom Assembly ........................5-4 5.2.1 Cable ..........................5-4 5.2.2 Leveling cylinder ......................5-5 5.2.3 Lifting cylinder ......................5-6 5.2.4 Boom ...........................
- Page 11 Contents 7.1 General Introduction ....................... 7-1 7.2 Multimeter basic operation ..................... 7-1 7.2.1 Grounding ........................7-1 7.2.2 Backside detection ....................... 7-1 7.2.3 Minimum value/maximum value ................. 7-1 7.2.4 Polarity......................... 7-1 7.2.5 Range ........................... 7-2 7.2.6 Voltage measurement ....................7-2 7.2.7 Resistance measurement ....................7-2 7.2.8 Conduction test ......................
-
Page 15: Section 1 Maintenance Safety Instruction
SECTION 1 MAINTENANCE SAFETY INSTRUCTION 1.1 Maintenance Personnel Duties, Requirements and Safety Equipment 1.1.1 Duties The maintenance personnel must maintain the aerial work platform and to be responsible for the safe use and normal operation. The Maintenance and Service Manual provided by the company shall be observed and all necessary maintenance shall be carried out under the safe working system. -
Page 16: Maintenance Precautions
Check safety equipment before and after work, perform maintenance according to specified procedures or replacement if necessary. Keep inspection and maintenance records if needed. Certain safety equipment (such as helmets and seat belts) might be damaged after prolonged use and should be inspected and replaced periodically. -
Page 17: Precautions In Maintenance
keep close contact to work safely. Clean the aerial work platform before inspection or maintenance. The dust or debris on the aerial work platform not only makes the faulty components or parts difficult to find, but also can be mixed into the components or parts during operation. - Page 18 Figure 1-3 Beware of Explosion The positive and negative wires of the battery must be removed when welding to prevent the positive and negative poles of the welder from forming a loop with the vehicle body, thereby burning electrical components such as controllers and sensors. The company does not take the consequences for wrong operation.
- Page 19 If electrical, circuit or hydraulic components (valves, pumps, etc.) need to be replaced, the replaced parts should be checked and adjusted according to the data on the machine schematic. Manufacturer-approved parts must be used, especially those that affect load bearing performance and safety performance.
- Page 20 Mind battery liquid. Battery fluid contains dilute sulfuric acid. Battery fluid can cause blindness when it enters the eyes, and burns when it comes into contact with the skin. Wear goggles, protective gloves long-sleeved overalls when handling the battery. If the eyes or skin are in contact with the battery fluid, rinse immediately with plenty of water and get medical attention promptly.
- Page 21 It should always be borne in mind that all maintenance should include mandatory confirmation of normal mechanical movement. Handle hazardous wastes according to law such as oil, fuel, filter, battery, hydraulic oil, etc. Reasonable recycling of used oil, coolant or filter element to save resources and protect the environment.
-
Page 25: Section 2 Technical Parameters
SECTION 2 TECHNICAL PARAMETERS 2.1 Performance Table 2-1 Performance Platform Capacity 300/ 454kg 660/1000lb 45% (platform uphill) 45% (platform uphill) Max Travel Speed (on slope) 25% (platform downhill) 25% (platform downhill) Max Travel Speed (on side slope) Platform Height 26.2m 85ft11in Horizontal Outreach 22.7m... -
Page 26: Capacity
2.3 Capacity Table 2-3 Capacity Fuel Tank 150 L 39.6 us gal Hydraulic tank 150 L 39.6 us gal Engine Oil Capacity 2.1 us gal 2.4 Components Specification 2.4.1 Engine Table 2-4 D2.9L4 (Deutz) Engine Specification Type High pressure common rail High pressure common rail Fuel 0# NO.4 Diesel... -
Page 27: Battery
Ply Rating 10km/h(6.2mph) 0km/h(0mph) wheel) 15-625 Foam-filled 6900 kg/15212lb 10000 kg/22046lb 260± 5 kg/573± 11lb 2.6 Functional Speed Table 2-8 Functional speed Function ZT26J ZT26J Boom Lifting 80~100s 80~100s Boom Descending 110~115s 110~115s Turntable Swing (a round) 95~103s 95~103s Boom Extending... -
Page 28: Test Cautions
Platform Rotation; Platform leveling. Platform reaches extreme position, rotate the platform to reach the extreme position of another side, record the rotating time; rotate the platform to the original position, record the rotating time. Drive (stowed): choose a smooth ground with the main boom less than 12 ° and the extension length less than 1m. -
Page 29: Lubrication
Table 2-10 Special toque Requirements Torque value Torque value Instruction: Time intervals (N.m) (ftlb) Hub fastening bolt 50 hours after the first run, every 150 hours or 3 months thereafter Slew bearing bolt 100 hours after the first run, every 500 383.5 hours thereafter Slew reducer... -
Page 33: Section 3 General Introduction
SECTION 3 GENERAL INTRODUCTION 3.1 Machine Preparation, Inspection and Maintenance 3.1.1 General introduction This section provides the necessary information to the operator responsible for pre-operational inspection and safe operation. In order to obtain the longest service life and ensure safe operation, all necessary inspections and maintenance should be completed before the machine is put into use. -
Page 34: Preventive Maintenance
To ensure that safety reports are obtained, our company needs to update the ownership information of each machine. Please inform us of the current machine ownership information each time the machine annual inspection is carried out. 3.1.5 Preventive maintenance Equipment engineers should perform preventive maintenance in conjunction with prescribed inspections. Equipment engineers recognized by our company should have recognized qualifications, certificates, extensive knowledge and experience, and have received relevant training, as well as the ability and level required to maintain, repair and maintain the product models described in this manual. -
Page 35: Safety And Operating Standards
3.2.2 Safety and operating standards Safety is paramount when performing equipment maintenance. Always pay attention to weight. Never attempt to move heavy parts without mechanical assistance. Do not park heavy objects in unstable locations. Ensure that adequate support is provided when lifting. 3.2.3 Cleaning Prevent dirt or impurities from entering critical parts of the machine for longer service life. -
Page 36: Washer
cannot be rotated. If the bearing race and the steel ball (or roller) are sunken, scratched or burnt, scrap the bearing. If the bearing is still serviceable, apply a layer of oil and wrap it in clean paper (or wax paper). Do not open the reusable or new bearing packaging until you are ready to install it. -
Page 37: Lubrication And Maintenance
the battery is completely dry, apply the battery terminals with an anti-corrosion compound. 3.2.14 Lubrication and maintenance Parts and components that require lubrication and maintenance refer to the Lubrication Table in SECTION 3.3 Lubrication and Information 3.3.1 Hydraulic system Contaminants are the primary factor in invading the hydraulic system. Contaminants can invade in various ways, such as improper use of hydraulic oil, or the moisture, grease, metal shavings, sealing elements, sand, etc. - Page 38 For special environments or users with special requirements, please contact ZOOMLION or hydraulic oil manufacturers. Note: DO NOT mix oils of different brands or types, as they contain different additives which may cause negative effects. If mixing of hydraulic oils is unavoidable, permission must be obtained from the hydraulic oil manufacturer.
-
Page 39: Hydraulic Oil Replacement
and other rubber components, and the oil also evaporates and oxidizes. Add the corresponding type of hydraulic oil according to the customer's requirements before ex-factory. When the working environment temperature changes beyond the working range of the hydraulic oil, please replace other suitable types of hydraulic oil according to the actual situation. Considering the safety of the components and the efficiency of the work, it is recommended that the starting temperature of the equipment is higher than the selected hydraulic oil pour point temperature of 25 °... -
Page 40: Cylinder Drift Test
in Section 2. 3.4 Cylinder Drift Test Use the following method to determine the maximum acceptable cylinder drift. 3.4.1 Platform drift Measure drift from the platform to the ground. Raise the lower boom slightly (if equipped) and fully extend the upper boom with the platform capacity and power off. The maximum allowable drift in 10 minutes is 2 inches /5 cm. -
Page 41: Welding On The Device
Fiber bearings should be replaced in one of the following situations: Wear or separate fibers on the surface of the liner. Broken or damaged bearing bushing. The bearing has moved or rotated into the bearing housing. Debris is embedded in the surface of the bushing. The pin should be replaced when one of the following conditions is found (the pin should be properly cleaned before inspection): Wear is found in the bearing area. -
Page 42: Use Insulating Grease In Electrical Connection Locations
the grounded location and the weld zone. Violation of the above requirements may result in damage to components (Such as electronic module, rotating bearing, collector ring, etc.). 3.7 Use insulating grease in electrical connection locations Insulating silicone grease should be used for all electrical connections for the following reasons: Preventing the mechanical joint between the male and female pins from being oxidized. - Page 43 connections and repair if necessary. Check all harness connectors to ensure they are fully seated and locked. Check the ignition coil and spark plug cable for hardening, cracking, wear, separation, cracking of the dust cover, and proper meshing. Replace the spark plug at the time intervals specified in the engine manufacturer's manual. Check and confirm that all electrical components are securely connected.
- Page 44 Table 3-4 Inspection and preventive maintenance schedule Time intervals Pre- Items delivery or Every 2 Pre-start Weekly Monthly Annually daily years Boom assembly Boom weldment 1,2,4 1,2,4 Oil pipe/wire rope bracket 1,2,9,12 1,2,9,12 device Shaft pin and pin bolt limiting stopper Pulley and pulley pins Bearings Wear pad...
- Page 45 Table3-4 Inspection and preventive maintenance schedule (continuous) Time intervals Items Pre-delivery or Every 2 Pre-start Weekly Monthly Annually daily years Capacity indicator Drive brake Swing brake Boom synchronization/sequencing system Manual descent/auxiliary power Power system Engine idle, throttle and Engine fluid (engine oil, 9,11 engine coolant, diesel oil) Air/diesel filter...
- Page 46 All system functional test 21, 22 Paint and appearance Imprint check date on the frame Notifying Zoomlion machine ownership Footnote: 1. Before daily use or each shift 2. Before each sale, rental or delivery 3. Use 3 months or 150 hours, or idle for more than 3 months, or buy as a used machine 4.
-
Page 49: Section 4 Chassis And Turntable
4.1.1 Tire inflation In order to ensure the safety and normal operation, the air pressure of the pneumatic tire must be the same as the air pressure indicated on the side of the Zoomlion units or the rim sticker. 4.1.2 Tire damage For pneumatic tires, our company recommends: when any cuts or cracks in the tire are found to expose the sidewalls of the tire or the tread, take immediate action to stop using our products. -
Page 50: Tire Replacement
4.1.3 Tire replacement Our company recommends replacing the tires of the same size, grade and brand as the original tires of the machine. Please refer to our company's parts manual for the part number of the certified tire for a specific machine model. -
Page 51: Swing Axle Exhaust And Locking Test
Figure 4-2 Wheel fastening nut tightening sequence Nut tightening should be carried out in steps. Please refer to the wheel torque table and tighten the nuts in the recommended order. Table 4-1 Wheel torque table Torque application sequence First step Second step Third step 130 Nm/96ftlb... -
Page 52: Swing Axle Lock Test
Place a small bucket or bottle in front of the floating cylinder exhaust valve and insert the cleaning tube. Loosen the exhaust valve and slowly unscrew it counterclockwise. Air is exhausted from the top of the floating cylinder. Use a small bucket or bottle to catch the hydraulic oil that flows out. Close and tighten the exhaust valve at the same time. -
Page 53: Auxiliary Power System
function is disabled. As such, the unit must switch to transporting mode to continue traveling. The preset value of the tilt sensor is 3° according to the manufacturer default settings. 4.4 Auxiliary Power System In the event that the main power is not working, the auxiliary power system is used as an alternative to take the operator away from the height of the work to the safe ground. -
Page 54: Traveling Drive System
Locknut Washer Float cylinder Figure 4-4 Floating cylinder disassembly diagram 4.6 Traveling Drive System The traveling system is mainly composed of wheels, traveling reducer and traveling motor. Specifically, the four-wheel drive system consists of a variable displacement closed pump, four variable displacement piston motors, four gear reducers, and a split/flow-combining travel control valve. -
Page 55: Travel Reducer
Pin 1 Pin 3 Pin 2 Front axle weldment Front axle weldment Locknut Travel reducer Bolt 2 Wear spacer Bolt 3 Spacer Ring Steering knuckle Steering cylinder Travel motor Tire Steering linkage weldment Figure 4-6 Travel system disassembly diagram 2 4.7 Travel Reducer 4.7.1 Disassembly Place the machine on a solid level surface. -
Page 56: Installation
4.7.2 Installation Use a suitable lifting device to support the travel reducer (the travel reducer weighs approximately 50 kg/110lb). Align the mounting holes on the travel reducer with the holes of the reducer mounting plate. The travel reducer is mounted on the axle with six bolts, and the bolt torque is 400Nm//295ftlb. Connect the hydraulic line that was previously disassembled to the travel motor. -
Page 57: Rotary Motor
Mounting the traveling motor on the machine. Note: if the travel motor output shaft is not aligned, it will cause damage to the bearings and seals of the traveling motor output shaft and its surroundings. Damage to the seal can cause oil leakage. Make sure that the traveling motor output shaft is properly aligned with the mounting ring gear on the reducer. -
Page 58: Gear Oil Replacement
Check whether there are metal chips in the reducer and brake. It is best to change the oil when the oil temperature has not cooled, because it is more beneficial to drain the oil in the tank at this time. Do not mix oil. -
Page 59: Slewing Bearing
characteristics of the oil esters, which will harm the trajectory and related parts. 4.11 Slewing Bearing 4.11.1 Slewing bearing lubrication Proper lubrication is necessary for the durability of the track and gear. Lubrication cycle is determined according to the use situation and environment; it is recommending to lubricate once every 150 hours. When the unit is not used for a long time, the slewing bearing should be lubricated, and the lubrication cycle should be shorten when the unit is located in tropical climates affected by temperature irregularities or sandy or humid areas. -
Page 60: Slewing Gear Clearance Adjustment
Remove rotary bearing and connecting bolt of turntable. Lift the upper part, see Figure 2, and the weight of upper part is 10t/22046lb. Use a crane of 15t/33069lb or greater to ensure safety. Remove rotary bearing and connecting bolt of chassis. Mounting 2 eyebolt of M16, and lift away the slewing bearing and place it properly. -
Page 61: Generator
Motor Rotary reduce Adjusting Mounting Locknut bolt screw Figure 4-11 Gear clearance adjustment The replacement steps are as follows: Loose the locknut without completely unscrewing it. Loose the mounting bolt without completely unscrewing it. Adjust the adjusting bolt and measure the backlash between the slewing gear and the slewing bearing with plug... -
Page 62: Carbon Brush And Slip Ring Maintenance
The generator carbon brush and slip ring should be maintained every 500 hours of operation. More frequent maintenance may be required in adverse environments. Figure 4-13 Use a hair dryer to blow the inside of the generator every 500 hours of operation. If the unit is used in adverse environments, it should be cleaned once a month. - Page 63 Check that the carbon brush is aligned with the slip ring. Check the alignment through the air holes in the stator. The carbon brush should ride completely on the slip ring. Check the carbon brush. Remove the terminal switchboard. Check the wires. Remove the carbon brush holder assembly. Pull the carbon brush off the brush holder.
-
Page 67: Section 5 Boom And Platform
SECTION 5 BOOM AND PLATFORM 5.1 Platform and Jib 5.1.1 Load cell 5.1.1.1 Disassembly Rotary Transit base Platform actuator Protective hook Load cell Pressing plate Tray Figure 5-1 Load cell disassembly diagram a) Disconnect the wiring harness at the platform's electrical control box and load cell, disconnect the tubing at the platform valve, collect the hydraulic oil in the pipeline with a suitable container, block the port of the pipeline after the collection, and Make a mark. -
Page 68: Rotary Actuator
5.1.1.2 Inspection Check the line for wear and replace the wiring harness if necessary. Check hydraulic oil leaks and replace the line if necessary. Inspect all threaded parts for damage such as stretching, thread deformation or distortion and replace if necessary. 5.1.1.2 Installation Follow the reverse steps of disassembly. -
Page 69: Jib Lifting Cylinder
Inspect all threaded parts for damage such as stretching, thread deformation or distortion and replace if necessary. 5.1.2.3 Installation Follow the reverse steps of disassembly. The interface of the hydraulic pipe joint and balance valve before installation should be cleaned to prevent contaminants from entering the hydraulic system. A hydraulic system pipes joint equipped with a sealing device needs to replace a sealing device before the hydraulic line is connected. -
Page 70: Boom Assembly
5.2 Boom Assembly Extrusion hazard. If the lifting equipment fails to securely fix the removed parts, the disassembled parts may fall and cause personal injury and equipment damage. When removing, keep personnel away from the area near the boom. After the hydraulic line is disconnected, the port of the pipeline should be blocked immediately to prevent dust and other pollutants from entering the hydraulic system. -
Page 71: Leveling Cylinder
5.2.1.2 Inspection Check the line for wear and replace the wiring harness if necessary. Check hydraulic oil leaks and replace the line if necessary. Inspect all threaded parts for damage such as stretching, thread deformation or distortion and replace if necessary. Check the cable structure for bending, cracking, weld separation or other damage and replace the cable structure if necessary. -
Page 72: Lifting Cylinder
Use a suitable plug to block the connector of the leveling cylinder balancing valve to prevent dust and other pollutants from entering the oil line. 5.2.2.2 Inspection Inspect the shaft pin for wear, scratches, taper, ovality or other damage and replace the pin if necessary. - Page 73 Remove the pin 1 of the base boom connected to the lifting cylinder. Use suitable lifting equipment to support the luffing cylinder near the end of the pin. Use the lifting equipment to support the boom to make the boom slowly swing upward, and adjust the support of the swing cylinder at the same time.
-
Page 74: Boom
5.2.4 Boom 5.2.4.1 Disassembly Hoisting point of counter-weight Figure 5-6 Counter-weight disassembly diagram Tilt hazard. The steps of removing the boom include removing the counterweight. Failure to remove the counterweight before removing the boom assembly may cause the device to tip over. Therefore, please do not remove the boom assembly without removing the counterweight. - Page 75 Use suitable wood to support the front link (cross the wood across the turntable and place it between the turntable and the front link). Slowly lower the boom's lifting angle until the front and rear links are in contact with the wood. Do not support all the weight of the boom assembly by wood.
-
Page 76: Telescopic Cylinder
support and protect it. m) Remove the bolts of the rear link and the front link lock pin. Use lifting equipment to adjust the boom to release the pin force acting between the boom and the connecting rod. Remove the pin 2 and pin 3 that connect the connecting rod to the boom, slowly and carefully remove the boom assembly from the turntable and place it on a suitable support. - Page 77 Nut 2 Nut 1 boom retracting wire rope Wrench clamp Figure 5-8 Telescopic cylinder disassembly diagram 1 Use a suitable wrench to be clamped on the wrench, and remove the nut 2. Wire rope loosing detection Snap-gauge Mounting base boom extending wire rope Approach switch boom extending wire rope Fabrication hole 1...
- Page 78 Remove pulley cover. Remove stop pin and pin 3. Pull out the pin with a suitable tool and take out the pulley. Draw out one end of the retracting wire rope open cable joint. m) Within the scope of process hole, remove the pressing plate 3 that presses the outrigger wire rope, take out the extending wire rope to remove the support.
-
Page 79: Wire Rope Pulley Disassembly
5.2.6 Wire rope pulley disassembly 5.2.6.1 Disassembly Bolt 3 Wheel cover Pin 1 Bolt 1 Pin 2 Side slider Bolt 2 telescopic oil cylinder extending boom pulley Figure 5-10 Wire rope pulley disassembly diagram olt 1 and remove the side slider. Remove the b Remove the bolt 2 and take down the wheel cover. -
Page 80: Wire Rope And Pulley Check
When the wire rope is in a tight state, the valley break may be exposed. Check whether the wire rope is corroded. Check whether the rope is tangled or misused. Install or operate the wire rope not as required, and make the wire rope rotate around its own axis, which may cause tangling when tension the wire rope. - Page 81 5.2.7.3 12 years or 7000 hours’ replacement After 12 years or 7000 hours of use, the wire rope and pulley must be replaced compulsorily. The ropes and pulleys need to be inspected more often if: The machine is exposed to harsh environments. The boom operation is not smooth or there is abnormal noise.
- Page 82 tightening, clamp the end of the wire rope near the thread to prevent the wire rope from rotating, otherwise it will cause damage to the wire rope. Figure 5-13 Clamping the rope Install adjusting nuts on the outrigger and retracting arm ropes (if readjusting, remove the nylon sleeve lock nut).
-
Page 83: Load Cell Check
of 1 ~ 1.5m/3.28~4.92ft. Check the torque of the retracted boom rope nut 1. If the torque is less than 55Nm/40ftlb, repeat steps i and j, and check again until the torque reaches the standard. To make the torque on all 4 ropes the same, steps i and j may need to be repeated. After all wire ropes are properly tightened, install nylon sleeve lock nuts. -
Page 84: Boom Tilt Sensor Check
b) Check the platform angle sensor wires. c) Confirming that the wiring is correct, then power the unit in turntable control box. d) Check that the platform angle sensor working indicator will flash. e) Observe the platform angle value on the display of turntable electrical control box. f)... -
Page 85: Drive Speed Limit Check
b) Approach switch indicator will light up if the wire rope is not loose. Approach switch indicator will go out if the wire rope is loose. c) When the wire rope is loose, a loose alarm will be triggered. d) When the steel wire rope is loose and alarmed, the telescopic function of the operation boom is: the boom is forbidden to extend, only the turtle can retract quickly. -
Page 89: Hydraulic Filter Maintenance
SECTION 6 HYDRAULIC AND ELECTRICAL SYSTEM MAINTENANCE 6.1 Hydraulic Filter Maintenance 6.1.1 High pressure filter Figure 6-1 Ti me intervals Run for the first time for 50 hours, and the filter element should be replaced every 6 months or 500 hours of operation. -
Page 90: Return Oil Filter
6.1.3 Return oil filter Figure 6-3 Time intervals Run for the first time for 50 hours, and the filter element should be replaced every 6 months or 500 hours of operation. 6.2 Pressure Setting Low temperatures can seriously affect the accuracy of pressure gauge readings. Preheat the hydraulic system to normal operating temperature before starting the unit when testing the pressure. -
Page 91: Starting Procedure
6.3 Starting Procedure 6.3.1 Drive pump oiling Machine without hydraulic oil cooler: When filling hydraulic oil, fill it all the way to the top of the tank. This creates sufficient outlet pressure from the hydraulic tank to fill the housing that drives the pump. Excess hydraulic fluid will be used to fill the individual cylinders during start-up. -
Page 92: Fault Code
6.4 Fault code If the unit fails, please check the fault code indicated on the display of turntable control box. If the following code displays, please remove the fault condition and restart the device before continuing the device operation. Fault Code Display Figure 6- Table 6-1 Fault Code list Item... - Page 93 Table 6-1 Fault Code list(continue) Item Fault Code Description DTC_FAULT_SWING_SENSOR 22161 DTC_FAULT_LOAD_SENSOR_REDUNDANCY 14162 DTC_BOOM_ANGLE_SINGAL_REDUNDANCY 13163 DTC_BOOM_LENGTH_SENSOR_NO_RESPOND 13164 DTC_BOOM_LENGTH_SENSOR_ERROR_DETECTION 13165 Sensor DTC_LEVELING_SENSOR_COMM_ERROR 14166 DTC_BOOM_LENGTH_SENSOR_REDUNDANCY 13167 DTC_FAULT_AIR_FILTER_SENSOR 32168 DTC_FAULT_OIL_WATER_SEPARATION_SENSOR 32169 DTC_FAULT_HYDRAULIC_OIL_FILTER_SENSOR 32170 DTC_FAULT_UG_FUNCTION_SWITCH_CLOSED 22351 DTC_FAULT_PM_FUNCTION_SWITCH_CLOSED 24352 DTC_FAULT_UG_MAIN_LIFT_SWITCH_DOUBLE_POWER_ON 12353 DTC_FAULT_UG_JIB_SWITCH_DOUBLE_POWER_ON 12355 DTC_FAULT_UG_TELESCOPE_DOUBLE_POWER_ON 12356 DTC_FAULT_UG_ROTATE_SWITCH_DOUBLE_POWER_ON 22357 DTC_FAULT_UG_LEVELING_SWITCH_DOUBLE_POWER_ON...
- Page 94 Table 6-1 Fault Code list(continue) Item Fault Code Description DTC_FAULT_PM_MAIN_LIFT_JOYSTICK_MEDIUM_OFFSET 24380 DTC_FAULT_PM_DRIVE_JOYSTICK_UP_LIMIT 24381 DTC_FAULT_PM_DRIVE_JOYSTICK_DN_LIMIT 24382 DTC_FAULT_PM_DRIVE_JOYSTICK_MEDIUM_OFFSET Switch/ 24383 DTC_FAULT_PM_STEER_JOYSTICK_UP_LIMIT Handle 24384 DTC_FAULT_PM_STEER_JOYSTICK_DN_LIMIT 24385 DTC_FAULT_PM_STEER_JOYSTICK_MEDIUM_OFFSET 24386 DTC_FAULT_KEY_SWITCH 22389 DTC_DRIVE_FORWARD_VALVE_SHORT_TO_GROUND 22551 DTC_DRIVE_FORWARD_VALVE_SHORT_TO_POWER 12552 DTC_DRIVE_FORWARD_VALVE_OPEN_CIRCUIT 22553 DTC_DRIVE_REVERSE_VALVE_SHORT_TO_GROUND 22554 DTC_DRIVE_REVERSE_VALVE_SHORT_TO_POWER 12555 DTC_DRIVE_REVERSE_VALVE_OPEN_CIRCUIT 22556 DTC_DRIVE_FORWARD_VALVE_FEEDBACK_CURRENT_FAULT 22557 DTC_DRIVE_REVERSE_VALVE_FEEDBACK_CURRENT_FAULT 22558...
- Page 95 Table 6-1 Fault Code list(continue) Item Fault Code Description DTC_JIB_FLOW_VALVE_SHORT_TO_GROUND 22624 DTC_JIB_FLOW_VALVE_SHORT_TO_POWER 22625 DTC_JIB_FLOW_VALVE_OPEN_CIRCUIT 22626 DTC_MAIN_LIFT_UP_FLOW_VALVE_SHORT_TO_GROUND 22627 DTC_MAIN_LIFT_UP_FLOW_VALVE_SHORT_TO_POWER 22628 DTC_MAIN_LIFT_UP_FLOW_VALVE_OPEN_CIRCUIT 22629 DTC_MAIN_LIFT_UP_VALVE_SHORT_TO_GROUND 22633 DTC_MAIN_LIFT_UP_VALVE_SHORT_TO_POWER 12634 DTC_MAIN_LIFT_UP_VALVE_OPEN_CIRCUIT 22635 DTC_MAIN_LIFT_UP_VALVE_FEEDBACK_CURRENT_FAULT 22636 DTC_TELESCOPE_FLOW_VALVE_SHORT_TO_GROUND 22637 DTC_TELESCOPE_FLOW_VALVE_SHORT_TO_POWER 22638 DTC_TELESCOPE_FLOW_VALVE_OPEN_CIRCUIT 22639 DTC_TELESCOPE_FLOW_VALVE_FEEDBACK_CURRENT_FAULT 22640 DTC_TELESCOPE_IN_VALVE_SHORT_TO_GROUND 22641 DTC_TELESCOPE_IN_VALVE_SHORT_TO_POWER 12642 DTC_TELESCOPE_IN_VALVE_OPEN_CIRCUIT 22643...
- Page 96 Table 6-1 Fault Code list(continue) Item Fault Code Description DTC_PM_ROTATE_RIGHT_VALVE_SHORT_TO_GROUND 24664 DTC_PM_ROTATE_RIGHT_VALVE_SHORT_TO_POWER 24665 DTC_PM_ROTATE_RIGHT_VALVE_OPEN_CIRCUIT 24666 DTC_PM_LEVELING_UP_VALVE_SHORT_TO_GROUND 24667 DTC_PM_LEVELING_UP_VALVE_SHORT_TO_POWER 14668 DTC_PM_LEVELING_UP_VALVE_OPEN_CIRCUIT 24669 DTC_PM_LEVELING_DN_VALVE_SHORT_TO_GROUND 24670 DTC_PM_LEVELING_DN_VALVE_SHORT_TO_POWER 14671 DTC_PM_LEVELING_DN_VALVE_OPEN_CIRCUIT 24672 DTC_PM_LEVELING_UP_VALVE_FEEDBACK_CURRENT_FAULT 24673 DTC_PM_LEVELING_DN_VALVE_FEEDBACK_CURRENT_FAULT Valve 24674 DTC_JIB_UP_VALVE_SHORT_TO_GROUND 24675 DTC_JIB_UP_VALVE_SHORT_TO_POWER 14676 DTC_JIB_UP_VALVE_OPEN_CIRCUIT 24677 DTC_JIB_DN_VALVE_SHORT_TO_GROUND 24678 DTC_JIB_DN_VALVE_SHORT_TO_POWER 14679 DTC_JIB_DN_VALVE_OPEN_CIRCUIT...
-
Page 97: Common Faults And Solutions
6.5 Common Faults and Solutions Table 6-2 Common faults and solutions Fault Cause Solution Remove the battery or replace it with a 1. Battery exhausted new one. 2. Operation switch or handle is not 2. Return the operation switch or handle returned to neutral position to neutral position Engine... - Page 98 If you encounter any equipment failure, contact Zoomlion for timely troubleshooting. If there is no absolute understanding of the fault resolution, please contact Zoomlion or Zoomlion dealers to solve it. It is forbidden to open the electric control cabinet to change the wire.
-
Page 101: General Introduction
SECTION 7 ELECTRICAL INFORMATION AND SCHEMATIC 7.1 General Introduction This section introduces basic electrical information and schematics for locating and correcting most operational problems that may arise. If problems that are not listed in this section, or problems that cannot be corrected by the listed solutions, occur, you should obtain authoritative technical guidance before performing maintenance. -
Page 102: Range
signal is connected, and that the lead of the other port is connected to the positive signal. 7.2.5 Range M = mega = 1,000,000 * (displayed number). k = thousand = 1,000 * (displayed number). m = milli = (displayed number) /1,000. μ= micro = (displayed number) /1,000,000. -
Page 103: Conduction Test
of resistance (very low resistance). The circuit power must be turned off before testing the resistor. Disconnect each component from the circuit before testing. If the multimeter cannot automatically adjust the range, set the correct range (refer to the multimeter operation manual). -
Page 104: Deutsch Connector
Set the expected current range of the multimeter. Verify that the multimeter leads and jacket are properly connected within the current range of your choice. If the multimeter cannot automatically adjust the range, set the correct range (refer to the multimeter operation manual). -
Page 105: Dt/Dtp Series Connector Disassembly
7.3.2 DT/DTP Series Connector Disassembly Figure 7-6 DT/DTP contact removal When disassembling, use a non-toothed nose pliers or hook line to pull the wedge locker vertically. Use a screwdriver to remove the retaining finger from the contact, release the retaining finger, and gently pull the wire to remove the contact. -
Page 106: Hd30/Hdp20 Series Connector Removal
Push the contacts straight into the retaining ring until they are obstructed. Pull gently to confirm that the connector is fully locked. Locking fingers Contact Unlocked position Contact locked in position Figure 7-8 HD/HDP lock contact position Note: for unused wire cavities, a sealing plug should be inserted to achieve complete isolation from the environment. -
Page 107: Electrical Schematics
7.4 Electrical Schematics Figure 7-11 Electrical Schematics (Deutz Engine) 7- 7... - Page 108 Figure 7-12 Electrical Schematics (Cummins Engine) 7- 8...
- Page 109 Figure 7-13 Electrical Schematics 7- 9...
- Page 110 Figure 7-14 Electrical Schematics 7- 10...
- Page 111 Figure 7-15 Electrical Schematics 7- 11...
- Page 112 Figure 7-16 Electrical Schematics 7- 12...
- Page 113 Figure 7-17 Electrical Schematics 7- 13...
-
Page 114: Hydraulic Schematics
7.5 Hydraulic Schematics Figure 7-18 Hydraulic Schematics 7- 14... - Page 115 Figure 7-19 Hydraulic Schematics 7- 15...
Need help?
Do you have a question about the ZT26J and is the answer not in the manual?
Questions and answers