Table of Contents
Advertisement
Quick Links
Advertisement
Table of Contents

Related Manuals for Osprey RC2


Summary of Contents for Osprey RC2
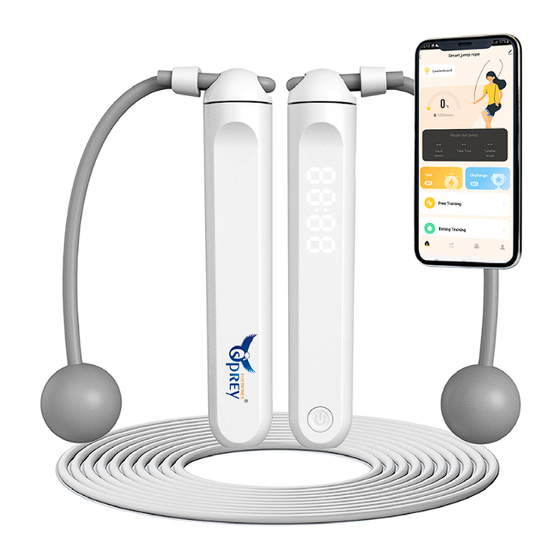
- Page 1 OSPREY ELECTRONICS SMART JUMP ROPE ospreyelectronics.io...
- Page 3 Thank you for purchasing Osprey Electronics Smart Jump Rope! To ensure safety and avoid any property damage, please read this manual carefully and keep it for future reference. ospreyelectronics.io...
-
Page 4: Table Of Contents
Content I. PACKAGE CONTENT ........04 II. DEVICE PARTS ........... 05 III. PREPARATION ..........07 IV. DEVICE INSTRUCTION ........08 A . Button Instruction ..........08 B . Device Operation ...........09 C . App Connection/Operation ......11 V. JUMP ROPE ASSEMBLY AND ROPE LENGTH GUIDELINE .............. 25 A. Rope Length Guideline ........25 B. -
Page 5: Package Content
I. PACKAGE CONTENT Handles x2 pcs Rope x1 pcs Cordless Balls x2 pcs OSPREY ELECTRONICS SMART JUMP ROPE (RC2-WHITE) User Manual x1 pcs Storage Bag x1 pcs Charging cable x1 pcs ospreyelectronics.io... -
Page 6: Device Parts
II. DEVICE PARTS ① Top cover ② Type-C charging port ③ Main housing ④ Power button ⑤ Mode shift button ospreyelectronics.io... - Page 7 Product name Osprey Electronics Smart Jump Rope Model Color White App Compatibility Smart Life- Smart Living Handle Dimension 149 x27mm (5.86 x1.06 inch) Rope dimension 3 meter (9.8 ft), 5mm (0.19 inch) Material ABS, PVC Input Voltage 5V, 200mAh Maximum record 9999 Battery Capacity 300 mAh Connector Type Type-C Power Supply Rechargeable Li-ion Battery Working Tempera- 10 ~45 °C ture ospreyelectronics.io...
-
Page 8: Preparation
III. PREPARATION A smartphone or tablet with Bluetooth function. • Download the “Smart Life- Smart Living” app on App Store or Google Play store. • Open the “Smart Life- Smart Living” app and register for an account or sign in directly if you already have an account. • Fully charge your Osprey Electronics Smart Jumping Rope before using. (Full charge: “- - - -” Led light; battery reduce every 25%, a “-“ will be reduced, and the low battery will display ”Lo”) App installation via this QR code for both Android and iOS operation systems. Google Play App Store ospreyelectronics.io... -
Page 9: Device Instruction
IV. DEVICE INSTRUCTION A. Button Instruction a. Hold the Power button for 2 seconds, Display “88.88” means power is on successfully. b. Hold the Power button for 3 seconds, Display “OFF” means power is off successfully. c. Short press the Power button 2 times to reset data to 0. d. When the jump rope enters the standby mode, press the Power button to activate it. ospreyelectronics.io... -
Page 10: Device Operation
B. Device Operation 1. Free Training Mode a. Once the jump rope is powered on, the Free Training mode will be automatically activated. b. Start to jump and the jumping number will be shown on the display. (If left idle for 3 minutes, the jump rope will enter the standby mode and the data will be auto- matically saved on the jump rope or synced to the app if the connection is successful. Then the jump rope will shut down 20 seconds later). Short press the Mode but- ton to change between the exercise time and skipping number mode. c. To reset or to manually save the data to the jump rope, short press the Mode Button. The data will be synced to the app if the connection is successful. d. When start or finish jumping, change between exer- cise time and jumping number mode by short press the Mode button. 2. Time Training Mode a. Hold the Power button for 3 seconds to turn on the device. b. Press the Mode button to select jumping time from 1.00- 3.00 on the handle-LED display. (Each short beef equals 1 minute. You can select up to 59 minutes and 59 seconds on the app). - Page 11 the target. The display will automatically show the jumping number (flashing intermittently). The data will be automatically saved to the jump rope or synced to the app if the connection is successful. To stop during the set time or to manually save the data to the jump rope, press and hold the Mode button and the data will be synced to the app if the connection is successful. During the set time, if the jump rope is left idle for less than 3 minutes, the display will show the skip- ping number when the time countdown is over. During the set time, if the jump rope is left idle for more than 3 minutes, the display will show “--:--” after 3 min- utes idle time (a short beep) and the data will be automat- ically saved to the jump rope or synced to the app if the connection is successful. The jump rope will shut down...
-
Page 12: App Connection/Operation
C. App Connection/Operation 1. App Connection a. Connect your mobile phone to home wireless network. b. After the jump rope is turned on, it enters Bluetooth pairing connection mode by default. c. Choose Smart Life App on your smart phone. d. After you log in, go to the homepage of the App, select “+” and “Add Device”. ospreyelectronics.io... - Page 13 d. The app will search for smart devices available and add the device. e. Select “Done” after the device connects successfully. ospreyelectronics.io...
- Page 14 2. App Operation For the first-time user, fill out the below information: a. Choose your b. Fill out your Height and Weight. Gender. ospreyelectronics.io...
- Page 15 a. Leaderboard: Choose b. You will see the Activity “Join” or “Not Join”. Page. Leaderboard: Your ranking information will be shared with other users. ospreyelectronics.io...
- Page 16 For more setup, choose “Settings” at the top right corner screen. ospreyelectronics.io...
- Page 17 4. Setting Training Modes 4.1 Free Training Mode a. Choose “Free Training” on the “Activity Page”. Choose “Go” to start jumping. b. Choose “Pause” to take a break. Choose “Start” to resume training. ospreyelectronics.io...
- Page 18 c. Long press to “Start” for 3 seconds to end the mode. If your jumping number is less than 10, the data will not be recorded. You can click “Quit” to stop training. If your jumping number is more than 10, you will see a screen like this. ospreyelectronics.io...
- Page 19 If you want to share your record with your friends, choose “share” in the top right corner screen. ospreyelectronics.io...
- Page 20 4.2 Timing Training Mode a. Choose “Timing Training” on the “Activity Page”. b. Click “Set up” to select your time and “Confirm”. ospreyelectronics.io...
- Page 21 c. Click “Go” to start time countdown. The countdown time will show on the handle-LED display. ospreyelectronics.io...
- Page 22 d. Click “Pause” to take a break. Click “Start” to resume. e. Long press to “Start” for 3 seconds to end the Time Training mode. If your jumping number is less than 10, the data will not be recorded. You can click “Quit” to stop training. ospreyelectronics.io...
- Page 23 4.3 Counting Training Mode a. Choose “Counting Training” on the “Activity Page”. b. Choose “Set up” and “Go” to start the number count- down. The countdown jumping number will show in handle-LED display. ospreyelectronics.io...
- Page 24 c. Choose “Quit” to end or “Continue” if you want to continue practicing. Then confirm to get your jumping data. (If less than 10, your jumping number will not be recorded) 4.4 Setting Test Mode a. Choose “Test” icon on b. Choose “Finish” to end the left of “Activity Page” your test mode. to set your test goal. ospreyelectronics.io...
- Page 25 4.5 Setting Challenge Mode b. Choose “Chal- a. Choose c. When finish- lenge” to start. “Challenge” icon ing the chal- on the “Activity lenge, you will Page” to enter see this screen the “Challenge above. Task”. Choose your suitable levels from LV.1, LV2, LV.3… ospreyelectronics.io...
-
Page 26: Jump Rope Assembly And Rope Length Guideline
V. JUMP ROPE ASSEMBLY AND ROPE LENGTH GUIDELINE A. Rope Length Guideline a. Straighten the rope to your armpits (as shown). Try jumping and check whether the rope length is suitable. b. Follow the chart below to adjust the rope length. OPTIMAL JUMP ROPE LENGTH CHART Your Height Rope Length Your Height Rope Length 6'1"(185cm) 9'1" 5'5"(165cm) 8'4" 4'7"(140cm) 7'5" ospreyelectronics.io... -
Page 27: Jump Rope Assembly
B. Jump Rope Assembly 1. Rope passes through the closed round hole of the buckle first, and then through the hole on the top cover of the handle. 2. Rotate the rope and pass through the hole on the other side of the cover on the top of the handle. 3. When the rope is inserted into or passed through the hole of the buckle, one handle and rope assembly finish. The fixed position of the buckle can be adjusted according to your own usage habits. Just complete the assembly of the handle and rope on the other side as instructed. Repeat the same procedure to install the cordless balls. VI. -
Page 28: Warranty, Support And Service
all the time. b. Keep the product out of the reach of young children. c. Carefully evaluate your condition before jumping and do a warm-up exercise. d. If you feel shortness of breath or any discomfort, slow down and take a break. e. Do not keep the jump rope near a heat- source or in a wet area, which may result in malfunction and battery loss. f. Bending or twisting the jump rope may break the external and/or internal parts of the product. g. Use a dry cloth when wiping the handle. Do not use strong chemical agents to clean the jump rope, which may cause discoloring or corrosion of the exterior part. Do not use it outdoors in rain. It is recommended to grip the handle of the rope with the Mode Button facing upward for easy reading of the LCD. VII. - Page 29 Products free and clear of liens, security interests or en- cumbrances by any party claiming by, through or under Seller. SELLER HEREBY DISCLAIMS AND CUSTOMER HEREBY WAIVES ANY AND ALL OTHER ORAL OR WRITTEN WARRANTIES IN RESPECT OF THE PROD- UCTS, EXPRESS OR IMPLIED, INCLUDING, WITHOUT LIMITATION, THE WARRANTIES OF MERCHANT ABILITY AND FITNESS FOR A PARTICULAR PURPOSE. SELLER EXPRESSLY DISCLAIMS ANY AND ALL OTHER WARRANTIES UNLESS EXPRESSLY MADE IN WRIT- ING AND SIGNED BY AN OFFICER OF SELLER. Seller’s liability shall be limited, at Seller’s option, to repair or replacement of non-conforming Products or refund of the purchase price. The foregoing sets forth Seller’s entire obligation and liability to Customer in respect of the Products, and Customer accepts the same as its entire right and sole remedy in relation to any breach by Seller of these Terms and Conditions. IN NO EVENT OR CIRCUMSTANCE WHATSOEVER SHALL SELLER BE LIABLE FOR ANY CONSEQUENTIAL, INCIDEN- TAL, INDIRECT, EXEMPLARY, PUNITIVE OR SPECIAL DAMAGES OF ANY TYPE OR NATURE EVEN IF SELLER HAS REASON TO KNOW OF THE POSSIBILITY OF SUCH DAMAGES. SELLER’S TOTAL LIABILITY ARISING OUT OF OR IN ANY WAY RELATED TO THE PROD- UCTS, WHETHER BASED IN CONTRACT, WARRANTY, TORT (INCLUDING NEGLIGENCE), LIABILITY, OR ANY OTHER CAUSE OF ACTION, SHALL IN NO EVENT EXCEED THE PURCHASE PRICE ACTUALLY PAID BY ospreyelectronics.io...
-
Page 30: Return And Refund Policy
CUSTOMER FOR THE PRODUCTS TO WHICH SUCH LIABILITY RELATES. C. Return and Refund Policy The situations below do not fit the Return and Refund Policy • Intended damage or abuse. • Inappropriate storage (drop-down or soaking in water). • User modify or repair. • Using loss. • Force majeure damage (Natural disasters). The batteries are not in the warranty. For assistance, please contact: Email: support@ospreyelectronics.io Phone: +1.469.409.2818 Website: ospreyelectronics.io ospreyelectronics.io...
Need help?
Do you have a question about the RC2 and is the answer not in the manual?
Questions and answers