
Summary of Contents for WARMHOMETECH EVI NT-9IISE
- Page 1 Monoblok House heating and cooling heat pump ( NT-9IISE NT-12IISE NT-17IISE NT-22IISE ) Full DC EVI Technology Inverter Compressor INSTALLATION AND OPERATION MANUAL...
-
Page 3: Table Of Contents
Dear user: Thank you for using our Air to Water heat pump! This manual is for you to understand the installation, operation and maintenance of this unit, and to provide important safety information. Please read all contents of this manual before installing and using this unit.Please keep this manual in a safe place for reference. - Page 4 WARNING Do not use means to accelerate the defrosting process or to clean, other than those recom- mended by the manufacturer. The appliance shall be stored in a room without continuously operating ignition sources(for example: open flames, an operating gas appliance or an operating electric heater. Do not pierce or burn.
-
Page 5: Caution & Warning
In case of refrigerant leakage:... - Page 6 (10)
- Page 8 (10)
- Page 9 Air source heat pump winter anti-freezing measurements: NT-17IISE / NT-22IISE NT-9IISE / NT-12IISE...
-
Page 11: Safe Instructions
1.Safety instructions 1.1 Installation Precautions Please make sure that you have at least read the "safety instructions" chapter of this manual before using the air source unit of our company. The "safety instructions" provides very important safety tips and key points of unit use. Please make sure that you follow the instructions to ensure personal safety and normal operation of the unit. - Page 12 The unit shall use independent power supply to avoid sharing the same circuit with other electrical appliances; It is recommended to use separate lines and circuit break- ers with leakage protection. The unit belongs to class I electrical appliances. The power supply must have a reli- able grounding wire.
-
Page 13: Specifications
2.Specifications 2.1Performance data Model NT-9IISE NT-12IISE NT-17IISE NT-22IISE Power supply V/Ph/Hz 380-415V,3N~,50Hz Heating/Cooling/Inverter Featurers Boost/Eco Functions Refrigerant Capacity(kw) 9.10 12.00 16.80 22.00 Heating: Power input(kw) 2.74 3.57 4.86 5.90 (Air 7/6°C Inlet/Outlet COP ( W/W ) 3.32 3.36 3.46 3.73 water 40/45°C) 7.00 8.00... -
Page 14: Dimensions
2.2 Dimensions NT-9IISE/12IISE ( unit:mm ) 1002 NT-17IISE/22IISE ( unit:mm ) 1043... -
Page 15: Exploded View
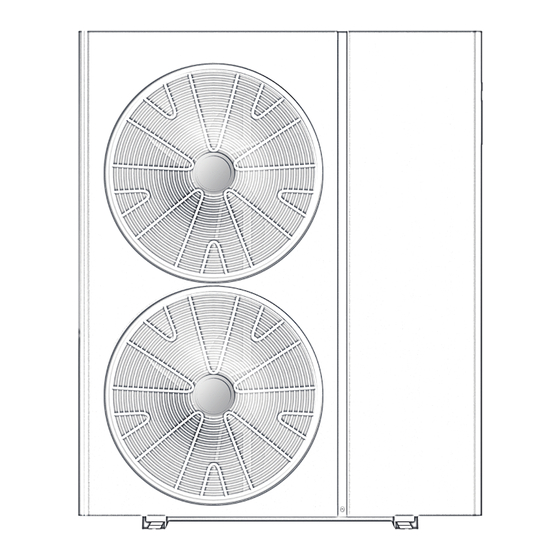
2.3 Exploded view NT-9IISE/12IISE Components Components Components Air outlet grill Auxiliary electric heater Compressor Front panel PHE outlet pipe Economizer Axial fan blade Water switch Vertical bracket DC fan motor Water pump Reactor Motor bracket Right panel Electric control Front right panel Plastic baffle Top panel Chassis... - Page 16 NT-17IISE/22IISE Components Components Components Air outlet grill Right panel Top panel Front panel Plastic baffle Electric control Axial fan blade PHE components Reactor DC fan motor Water pump Expansion tank Motor bracket PHE inlet pipe Economizer Front right panel PHE outlet pipe Vertical bracket Chassis Auxiliary electric heater...
-
Page 17: Installation And Connection
3.Installation and connection Notice Installation in the following places may lead to machine failure (if unavoidable, please consult the relevant dealer): Where there is mineral oil such as cutting oil. In places where the air contains more salt, such as the seaside. In hot spring areas and other places where corrosive gases such as sulfur gas exist. - Page 18 *Improper self installation may lead to water leakage,electric leakage, fire, unit falling and other accidents. Air Inlet >30cm >30cm Air outlet >100cm >200cm (Installation clearance) (Fastened with bolts) (Ground clearance)
-
Page 19: General Applications
3.3 General Applications : 3.3.1 Heating only function This application is recommended for using heating (floor/radiator/fan coil) only purposes. - Page 20 Remark: 1. The water divider and water collector are used for water distribution when multiple end-use heating equipments are installed at the same time. 2. After connected to the linkage signal line, each individual thermostat can control the oper- ation or shutdown of the heat pump. If didn't connect to the linkage signal line, the heat pump will operate until the shutdown conditions of the heat pump are met (whether the end-use heating is using or not).
- Page 21 3.3 General Applications : 3.3.2 Heating + hot water function This application is recommended for using heating (floor/radiator/fan coil) and DHW purposes with a low cost of installation.
- Page 22 Remark: 1. The water divider and water collector are used for water distribution when multiple end-use heating equipments are installed at the same time. 2. After connected to the linkage signal line, each individual thermostat can control the oper- ation or shutdown of the heat pump. If didn't connect to the linkage signal line, the heat pump will operate until the shutdown conditions of the heat pump are met (whether the end-use heating is using or not).
- Page 23 3.3 General Applications : 3.3.3 Heating + hot water function This application is recommended for using heating (floor/radiator/fan coil) and DHW purposes with needs of a high DHW temperature.
- Page 24 Remark: 1. The water divider and water collector are used for water distribution when multiple end-use heating equipments are installed at the same time. 2. After connected to the linkage signal line, each individual thermostat can control the oper- ation or shutdown of the heat pump. If didn't connect to the linkage signal line, the heat pump will operate until the shutdown conditions of the heat pump are met (whether the end-use heating is using or not).
- Page 25 3.3 General Applications : 3.3.4 Heating + hot water function (Solar Panel-optional) This application is recommended for using heating (floor/radiator/fan coil) and DHW purposes with a solar panel heating source.
- Page 26 Remark: 1. The water divider and water collector are used for water distribution when multiple end-use heating equipments are installed at the same time. 2. After connected to the linkage signal line, each individual thermostat can control the oper- ation or shutdown of the heat pump. If didn't connect to the linkage signal line, the heat pump will operate until the shutdown conditions of the heat pump are met (whether the end-use heating is using or not).
- Page 27 3.3 General Applications : 3.3.5 Heating + hot water function (Solar Panel-optional) This application is recommended for using heating (floor/radiator/fan coil) and high temperature DHW purposes with a solar panel heating source.
- Page 28 Remark: 1. The water divider and water collector are used for water distribution when multiple end-use heating equipments are installed at the same time. 2. After connected to the linkage signal line, each individual thermostat can control the oper- ation or shutdown of the heat pump. If didn't connect to the linkage signal line, the heat pump will operate until the shutdown conditions of the heat pump are met (whether the end-use heating is using or not).
-
Page 29: Electrical Wiring
Remark: * The installation diagram is for reference only! Before installation, please consult the technicians of relevant disciplines to design an appropriate construction scheme according to the site. * The accessories required for installation shall be purchased according to the actual construction. -
Page 30: Wire System Connection And Wiring Diagrams
3.5 Wire system connection and wiring diagrams The machine is provided with a terminal connecting the indoor temperature controller, which is convenient for the indoor temperature controller to automatically control the startup and shutdown of the machine. 1) Remove the jumper on the “LS” terminal block. 2) Connect the output signal line of the indoor temperature controller to the “LS”... -
Page 32: Operation And Use
4. Operation and Use 4.1 Display interface introduction ℃ ℃ 10 11 12 Power On/Off Fault indicator Cooling mode Mode Water pump indicator Heating mode Time Lock Powerful mode Timer On/Off Energy saving mode Time display Set indicator Down Four-way valve Inlet water temperature icon Fan indicator Outlet water temperature... - Page 33 Locked during operation state ℃ ℃ ℃ ℃ Long press for 5 seconds Lock indicator disappears 1.Lock: The screen will be locked when press“ ” for 5 seconds, or there is no operation for 60 seconds(Purpose: to prevent children from playing). And the screen will display “ ”...
- Page 34 4.2.3 Switching the operating mode ℃ ℃ ℃ ℃ step 1 step 2 ℃ ℃ Make sure the screen is unlocked , in the main interface, step 1 : Press “ ” for 3 seconds to enter the working mode of the machine. step 2 :...
- Page 35 4.2.4 Temperature adjustment flicker ℃ ℃ ℃ ℃ step 1 step 2 ℃ ℃ step 3 step 1 : In the unlocked main interface,press the“ ” key or “ ” . step 2 : The water inlet temperature icon will flash, press the “ ”...
- Page 36 step 1 : In the main interface, press “ ” key to enter the real-time clock setting interface, the digits in the hour part will flash, press the “ ” key or “ ” key to set the hour of the real-time clock. step 2 :...
- Page 37 Step 1: Setting up the first group of timer . Long press “ ” for 5 seconds, when “ ” lights up, it enters the start time setting for the first group of timer . Step 2: “Hours” digits flashing, press “ ”...
- Page 38 4.2.8 Parameter query and setting Warning: “ ” is used to set the key parameters of the heat pump, which is specially operated by certified technicians. The machine might be damaged if an end user operate this function. “P”parameter query and setting Step 1: Press “...
- Page 39 “C”parameter query “ ” Parameter browse , press to enter the parameter query ℃ Code Description Scope Unit Outdoor ambient temperature ℃ Outside coil temperature ℃ Exhaust temperature ℃ Return air temperature ℃ Reserve ℃ Reserve ℃ Inside coil temp (after throttle) ℃...
-
Page 40: Error Codes And Troubleshooting
Code Description Scope Unit Aux EEV open degree Heat pump current Compressor current DC FAN1 Speed Compressor target frequency DC FAN2 Speed Master control software version Driver software version version Wire controller software version 4.3 Error codes and troubleshooting 4.3.1 When the machine displays the following code,the machine may be in a protected or faulty state.You can troubleshoot according to the following suggestions. - Page 41 Code Description Possible causes Inspection and troubleshooting connection failure between control main Program board and controller Please contact the supplier connection failure between driver and main Program board After throttle temperature sensor failure The water temperature is too high Check whether the water temperature sensor is installed in during heating place Check the leakage position, repair it, re-vacuum and charge...
-
Page 42: Maintenance And Inspection
4.3.3. The fan is not running. 5. Maintenance and Inspection 6. Warranty Thank you for purchasing our heat pump. To be announced by local agent/distributor. For detailed warranty policy please contact local agent/distributor directly.
Need help?
Do you have a question about the EVI NT-9IISE and is the answer not in the manual?
Questions and answers