Table of Contents
Advertisement
Quick Links
Advertisement
Table of Contents

Summary of Contents for Zerova DB Series
- Page 2 DB Series DC 180kW Power Cabinet Charger User Manual & Installation Instructions Copyright © 2022 Zerova technology Zerova technology reserves the right to update the manual without any notice.
- Page 3 Please visit the official website to obtain the latest version of user manual and firmware before installation. Website: https://www.zerovatech.com/...
-
Page 4: Table Of Contents
CONTENT 1. Basic User Interface ............ 2 2. Specification ..................3 2.1 Product Specification ..............3 3. Installation Instruction................. 6 3.1 Before Installation ................. 6 3.2 Grounding and Safety Requirement .......... 7 3.3 Unpack the Charger ..............9 3.4 Recommended Tools for Installation and Inspection ... 12 3.5 Installation Procedure ............... - Page 5 Document Vision: Version Editor Date Remark From Design Team 3. 2023 Released...
-
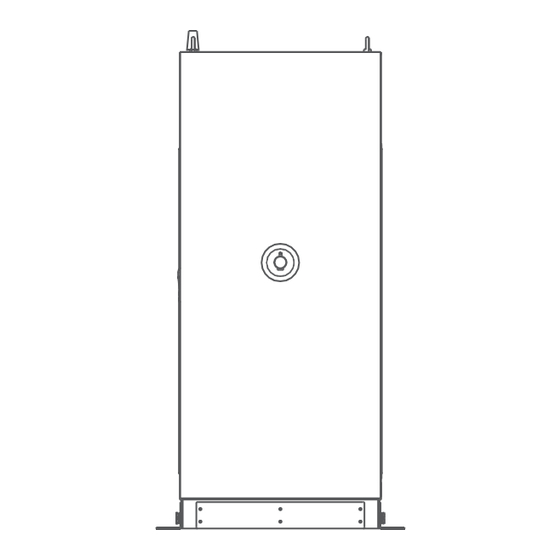
Page 6: Basic User Interface
1. Basic User Interface Antenna for Wi-Fi & 3G/4G Emergency Stop... -
Page 7: Specification
2. Specification 2.1 Product Specification Model Name DBWU182XXXseries Voltage Rating 1Φ277Vac (+10%, -15%) Max. Input Current 10.75A Electrical Distribution 1P+ N+ PE (Wye configuration) Power Grid System TN/TT INPUT Frequency 50/60Hz Max. Input Power 2.53KVA Power Factor > 0.99 Efficiency >... - Page 8 Standby Power < 100W External Ethernet, Wi-Fi and 3G/4G Communication Internal CAN / RS485, Ethernet Input Protection OVP, OCP, OPP, UVP,, SPD Output Protection OCP, OVP, LVP, OTP, IMD Internal Protection OTP, DC Contactor Detection, Fuse Detection Load Management OCPP 1.6 JSON,OCPP 2.0 core profile Display None User Interface &...
- Page 9 Rack Dimensions (mm) Direction of cooling Airflow Air In Air Out...
-
Page 10: Installation Instruction
3. Installation Instruction 3.1 Before Installation • Read all the instructions before using and installing this product. • Do not use this product if power cable or charging cable have any damage. • The product is without enclosure for ingress protection, please keep the product under clean and adaptive circumstance after un-packed. -
Page 11: Grounding And Safety Requirement
3.2 Grounding and Safety Requirement • The product must be connected to a grounded, metal, permanent wiring system. Connections shall comply with all applicable electrical codes. Recommend the ground resistance be less than 10 Ω . • Ensure no power is connected at all times when installing, servicing, or maintaining the charger. - Page 12 3.2.1 Service Wiring • Ground Connection Always connect the Neutral at the service to Earth Ground. If ground is not provided by the electrical service then a grounding stake must be installed nearby. The grounding stake must be connected to the ground bar in the main breaker panel and Neutral connected to Ground at that point.
-
Page 13: Unpack The Charger
3.3 Unpack the Charger • The product is Direct current (DC) charger, the packing design passed the packaging simulation test, if the packaging is damaged cause by overturning, falling or external impact during transportation, it may cause the product damage or defects. - Page 14 STEP 1. Please disassemble the shipping crate as follows: STEP 2. Please remove the cardboard box and the protective internal packaging as follows:...
- Page 15 STEP 3. Remove the 4 fixing screws. Note To use lifting eye bolts to move the EVSE, please apply 6mm (1/4 inches) diameter steel wire rope to the four eye bolts as following picture. (Make sure to tighten the eye bolts before lifting.)
-
Page 16: Recommended Tools For Installation And Inspection
3.4 Recommended Tools for Installation and Inspection 3.4.1 Recommended Tools for Installation Type Description 8mm² or 8 AWG, Cable x 3 (L, N, PE) With Ring terminal for M5 screw ( Inner AC Input Cable diameter > 5mm, Outer diameter < 12mm) Recommend to use 600V, 75 °... - Page 17 CHAdeMO 200A, GB/T 250A- Conductor cross section: 3/0AWG (95mm²) at least, Cable x2 (DC+x1 ,DC-x1) With Ring terminal for M16 screw ( Inner diameter > 16mm, Outer diameter < 51mm ; thick type) Transport Forklift or crane Philips Screwdriver No. 2 and 3 Shifting Wrench 8"...
-
Page 18: Installation Procedure
3.5 Installation Procedure 3.5.1 Build Concrete Base STEP 1. 1. Build 1090mm x 750mm x 200mm concrete base in advance; Φ 140mm conduit for input , Φ 100mmx2 conduit for output DC cable, Φ 32mm for communication cable (Ethernet)and 1 ” drain pipe. 2. - Page 19 M12 Male stud L40 x 4 L Plate (M12 Stainless steel expansion screw x3) Ethernet line=>1.2 ” From power cabinet DC in =>5 ” Single phase AC -220V =>1.2 ” DC out EV charging cabinets = 4 ” (Left Gun) DC out EV charging cabinets = 4 ”...
- Page 20 *Must use CAT6A FTP RJ45 Plug . output-Ethernet Length > 2500mm Input-Ethernet Length > 2500mm PE Length > 500mm PE Length > 120mm AC cable Length > 900mm DC cable(Input) Length > 500mm DC cable(Right Gun) Length > 500mm DC cable(Left Gun) Length > 500mm *30A NFB for capacitive load and 30mA RCD type A is recommended to use on power distribution box.
- Page 21 STEP 2. 1. Use forklift or crane to lift the EVSE on concrete or metal base. To use lifting eye bolts to move the EVSE, please apply 6mm (1/4 inches) diameter steel wire rope to the four eye bolts as following picture. (Make sure to tighten the eye bolts before lifting.)
- Page 22 STEP 3. 2. Use expansion screws to fix the EVSE on the base through these 6 PCS M12 expansion bolts. Back:90CM Front:120CM Both:90CM 2-1 suggestive reserving space per regulations Front side: 120cm Back side :90cm Both sides:90cm...
- Page 23 STEP 4. 3. Cable connections Power Distrbution DC Battery GUN1/2 DC power cable(1000V) Output-Ethernet cable(shielding) AC(L/N) Input-Ethernet cable(Shielding)
- Page 24 NOTE: • The maximum DC voltage would be 825Vdc, the DC power cable be used should be able to withstand at least 1000V and required safe ampere capacity. • Please note and confirm that all installation assemblies must comply with national safety standard and codes.
- Page 25 STEP 5. 3-1 Connect the PE wire-Green with yellow to Grounding position of EVSE ; fasten the input power wires to input terminal block of EVSE .Connect DC+ and DC- wire. AC Break DC+(UP) N PE DC-(DOWN) AC IN: N AC IN: L1 PE:Yellow/Green...
- Page 26 STEP 6. 3-2 Prepare the Charging cable, DC+ & DC- 2 cables with ring terminals for M16 screw, PE cable with ring terminal for M6 screw. 3-3 Connect the charging cable #1~#2 from power dispenser to output terminal socket #1~#2. Gun1 DC+ Gun1 DC- Gun1 DC-...
- Page 27 STEP 7. 3-4 Connect Ethernet cable from hub of power cabinet to power dispenser.
- Page 28 4. Pull AC power cables to power distribution box, Neutral should be shorted with ground point to meet TN-S grounding system. 5. Connect DC+/DC- 2 line wires and to 2 poles of No Fuse Breaker in DC battery. Connect the Protective Earth wire (Green/Yellow) to ground point of power distribution box.
- Page 29 3.5.2 Screw torque requirement table Screw in Metric Screw Screw Stell Steel Steel Aluminum Aluminum size type Inch-Lbs Kgf-Cm Kgf-Cm M2*0.4 Machine 3~4.77 3.5~5.5 0.34~0.54 3~4.5 0.34~0.44 M2.5*0.45 Machine 3~4.77 3.5~5.5 0.34~0.54 3~4.5 0.34~0.44 M3*0.5 Machine 5.5~9 6.5~10.5 0.64~1.04 5.2~8.4 0.51~0.82 M3.5*0.6 Machine 8.5~13...
-
Page 30: Installation Inspection & Commissioning
3.6 Installation Inspection & Commissioning 3.6.1 Environmental Check Item Status Remark Ambient Temperature Ambient Humidity Sunshade Rain canopy Air circulation/Drafty Dust level Flood measures Car Bumper or Bollard Anti-vandalism measures 3.6.2 External Infrastructure Readiness & Check Item Status Remark Input wirings & terminals Key &... - Page 31 3.6.3 EVSE Check – Static (Non-Powered) Item Status Remark Outlook No dent,rust ,scratch Labeling & Warning signs Package (accessory) list Inner wiring & connection Refer 3.5.2 Screw torque table Robustness of input wirings WARNING: Improper connection of the EVSE grounding conductor can result in a risk of electric shock.
- Page 32 3.6.6 EVSE Check –System Power Button Item Status Remark Set the rated load state, press the emergency stop button, the charger should be cut off output immediately. 1. The charger stops Emergency stop charging and alarm when Recovery from Emergency stop press the emergency stop button.
-
Page 33: Charger And Network Setting
4. Charger and Network Setting 4.1 Wi-Fi Network Setting • Laptop with RJ45 interface. • Connect RJ45 cable from Laptop to charger ’ s RJ45 port. • Setup parameters in the Webservice. RJ45 • Input RJ45 connector port is for engineer use for maintance. - Page 34 Step 3. 192.168.1.10 SET -> Network. UPGRADE OTHER LANGUAGE ystem System Charging Network Backend Step 4. 192.168.1.10 Select Wi-Fi Module Network Select Wi-Fi modes and fill in SSID and Password Network Status according to your application, if not required, just Ethernet keep default.
-
Page 35: 4G Setting
4.2 3G/4G Setting 4.2.1 SIM Card Installation Step 1. Open the right door. And you can see the SIM Card 3G/4G/Wi-Fi module inside the cabinet. Step 2. Please disable the PIN on the SIM card before inserting it into the SIM card slot. The chip side should be facing downward and its notch is oriented as shown in the left picture. - Page 36 4.2.2 Setting and Enable 3G/4G Module. Step 1. 192.168.1.10 • Please contact your SIM provider to get the login https://192.168.1.10 APN, PPP ID and password. Account admin *Note: PPP ID and password maybe options depend on your SIM provider. Password 1231231238 •...
-
Page 37: Time Setting
4.3 Time Setting Automatic setting : The time will be adjusted automatically when the charger connects to internet. Time server : • time.windows.com • cn.ntp.org.cn • tock.stdtime.gov.tw Note:Firewall and network environment may influence the time server connection Manual setting : Step 1. - Page 38 Step 4. 192.168.1.10 SET -> Network. UPGRADE OTHER LANGUAGE ystem System Charging Network Backend Step 5. 192.168.1.10 System Click "System information". System Information Version Information Step 6. 192.168.1.10 Click system date time. System Click the calendar button on the right to set System Information the current time.
-
Page 39: Maintenance
5. Maintenance 5.1 Status Codes (V0.48) • The detail of status code please refer user manual of dispenser. Status Code Description 011001 CHAdeMO output fuse blew 011002 CCS output fuse blew 011003 GB output fuse blew 011004 RCD/CCID self-test fail 011005 AC input contactor 1 welding 011006... - Page 40 Status Code Description 011029 CCS module broken 011030 GBT module broken 011031 PSU module broken 011032 RCD/CCID module broken 011033 Maximum Output Current setup error 011034 Shutter fault 011035 Ble module broken 011036 Rotary switch fault 011037 CCS liquid chiller water level fault 011038 Chiller temperature sensor broken 011039...
- Page 41 Status Code Description 012220 System CCS output OCP 012221 System GB output OVP 012222 System GB output OCP 012223 System ambient/inlet OTP 012224 System critical point OTP 012225 PSU ambient/inlet OTP 012226 PSU critical point OTP 012227 Aux. power module OTP 012228 Relay board/smart box OTP 012229...
- Page 42 Status Code Description 012252 Door open 012253 System fan decay 012254 Fail to create share memory 012255 CSU initialization failed 012256 AC Ground Fault 012257 MCU self-test Fault 012258 Relay self-test Fault 012259 CHAdeMO groundfault detection timeout (GFD) 012260 CCS groundfault detection timeout (GFD) 012261 GB groundfault detection timeout (GFD) 012262...
- Page 43 Status Code Description 012284 Self test Failed due to communication of CCSboard failure 012285 Self test Failed due to AC Contact failure 012286 Self test Failed due to communication of PSU failure 012287 Self test Failed due to Model name is none match 012288 CCS output UVP 012289...
- Page 44 Status Code Description 012316 Psu Fault : Ac Power Limit 012317 Psu Fault : Dcdc Eeprom Fault 012318 Psu Fault : Pfc Eeprom Fault 012319 Psu Dcdc Over Voltage 012320 System CHAdeMO output UCP 012321 System CCS output UCP 012322 System GBT output UCP 012323 System Chiller output OTP...
- Page 45 Status Code Description 013601 Charging Time's up 013602 Replace system air filter 013603 Reach to CHAdeMO max. plugging times. 013604 Reach to CCS max. plugging times. 013605 Reach to GB max. plugging times. 013606 Reach to AC max. plugging times. 013607 CSU fimrware update fail 013608...
- Page 46 Status Code Description 023703 AC: pilot fault 023704 CHAdeMO: battery malfunction 023705 CHAdeMO: no charging permission 023706 CHAdeMO: battery incompatibility 023707 CHAdeMO: battery OVP 023708 CHAdeMO: battery UVP 023709 CHAdeMO: battery OTP 023710 CHAdeMO: battery current difference 023711 CHAdeMO: battery voltage difference 023712 CHAdeMO: shift position 023713...
- Page 47 Status Code Description 023734 CHAdeMO: req current more than limit 023735 CHAdeMO: re capability bms eqr current exceed 023736 CHAdeMO: charge remaining count done 023737 CCS_EVCC_EVErrorCode_FAILED_RESSTemperatureInhibit 023738 CCS_EVCC_EVErrorCode_FAILED_EVShiftPosition 023739 CCS_EVCC_EVErrorCode_FAILED_ChargerConnectorLockFault 023740 CCS_EVCC_EVErrorCode_FAILED_EVRESSMalfunction 023741 CCS_EVCC_EVErrorCode_FAILED_ChargingCurrentdifferential 023742 CCS_EVCC_EVErrorCode_FAILED_ChargingVoltageOutOfRange 023743 CCS_EVCC_EVErrorCode_FAILED_ChargingSystemIncompatibility 023744 CCS_EVCC_EVErrorCode_FAILED_EmergencyEvent 023745 CCS_EVCC_EVErrorCode_FAILED_Breaker 023746...
- Page 48 Status Code Description 023765 CCS_SECC_ResponseCode_FAILED_CertificateExpired 023766 CCS_SECC_ResponseCode_FAILED_CertificateNotYetValid 023767 CCS_SECC_ResponseCode_FAILED_CertificateRevoked 023768 CCS_SECC_ResponseCode_FAILED_NoCertificateAvailable 023769 CCS_SECC_ResponseCode_FAILED_CertChainError 023770 CCS_SECC_ResponseCode_FAILED_CertValidationError 023771 CCS_SECC_ResponseCode_FAILED_CertVerificationError 023772 CCS_SECC_ResponseCode_FAILED_ContractCanceled 023773 CCS_SECC_ResponseCode_FAILED_ChallengeInvalid 023774 CCS_SECC_ResponseCode_FAILED_WrongEnergyTransferMode 023775 CCS_SECC_ResponseCode_FAILED_WrongChargeParameter 023776 CCS_SECC_ResponseCode_FAILED_ChargingProfileInvalid 023777 CCS_SECC_ResponseCode_FAILED_TariffSelectionInvalid 023778 CCS_SECC_ResponseCode_FAILED_EVSEPresentVoltageToLow 023779 CCS_SECC_ResponseCode_FAILED_PowerDeliveryNotApplied 023780 CCS_SECC_ResponseCode_FAILED_MeteringSignatureNotValid 023781 CCS_SECC_ResponseCode_FAILED_NoChargeServiceSelected 023782 CCS_SECC_ResponseCode_FAILED_ContactorError CCS_SECC_ResponseCode_FAILED_ 023783 CertificateNotAllowedAtThisEVSE 023784...
- Page 49 Status Code Description CCS_SECC_ResponseCode_FAILED_OEM_SubCA2_ 023794 CertificateRevoked CCS_SECC_ResponseCode_FAILED_OEM_RootCA_ 023795 CertificateRevoked 023796 CCS_SECC_ResponseCode_FAILED_MO_Prov_CertificateRevoked CCS_SECC_ResponseCode_FAILED_MO_SubCA1_ 023797 CertificateRevoked CCS_SECC_ResponseCode_FAILED_MO_SubCA2_ 023798 CertificateRevoked CCS_SECC_ResponseCode_FAILED_MO_RootCA_ 023799 CertificateRevoked 023800 CCS_SECC_ResponseCode_FAILED_CPS_Prov_CertificateRevoked CCS_SECC_ResponseCode_FAILED_CPS_SubCA1_ 023801 CertificateRevoked CCS_SECC_ResponseCode_FAILED_CPS_SubCA2_ 023802 CertificateRevoked CCS_SECC_ResponseCode_FAILED_CPS_RootCA_ 023803 CertificateRevoked 023804 CCS_SECC_ResponseCode_FAILED_reserved_1 023805 CCS_SECC_ResponseCode_FAILED_reserved_2 023806 CCS_SECC_ResponseCode_FAILED_reserved_3 023807 CCS_SECC_ResponseCode_FAILED_reserved_4 023808 CCS_SECC_ResponseCode_FAILED_reserved_5 023809 CCS_SECC_TIMEOUT_SLAC_TT_EVSE_SLAC_init...
- Page 50 Status Code Description CCS_SECC_TIMEOUT_SLAC_CM_VALIDATE_REQ_2ND CM_SLAC_ 023819 MATCH_REQ 023820 CCS_SECC_TIMEOUT_SLAC_reserved_3 023821 CCS_SECC_TIMEOUT_SLAC_reserved_4 023822 CCS_SECC_TIMEOUT_SLAC_reserved_5 023823 CCS_SECC_TIMEOUT_SLACC_SDP_UDP_TT_match_join 023824 CCS_SECC_TIMEOUT_SLACC_SDP_TCP_TT_match_join 023825 CCS_SECC_TIMEOUT_SLACC_SDP_TP_amp_map_exchange 023826 CCS_SECC_TIMEOUT_SLACC_SDP_TP_link_ready_notification 023827 CCS_SECC_TIMEOUT_SLACC_SDP_reserved_1 023828 CCS_SECC_TIMEOUT_SLACC_SDP_reserved_2 023829 CCS_SECC_TIMEOUT_SLACC_SDP_reserved_3 023830 CCS_SECC_TIMEOUT_SLACC_SDP_reserved_4 023831 CCS_SECC_TIMEOUT_SLACC_SDP_reserved_5 CCS_SECC_TIMEOUT_V2G_Msg_Performance_Time_ 023832 SupportedAppProtocolRes CCS_SECC_TIMEOUT_V2G_Msg_Performance_Time_ 023833 SessionSetupRes CCS_SECC_TIMEOUT_V2G_Msg_Performance_Time_ 023834 ServiceDiscoveryRes CCS_SECC_TIMEOUT_V2G_Msg_Performance_Time_ 023835 ServicePaymentSelectionRes...
- Page 51 Status Code Description CCS_SECC_TIMEOUT_V2G_Msg_Performance_Time_ 023842 WeldingDetectionRes CCS_SECC_TIMEOUT_V2G_Msg_Performance_Time_ 023843 SessionStopRes 023844 CCS_SECC_TIMEOUT_V2G_Sequence_Time 023845 CCS_SECC_TIMEOUT_V2G_ReadyToCharge_Performance_Time CCS_SECC_TIMEOUT_V2G_CommunicationSetup_Performance_ 023846 Time CCS_SECC_TIMEOUT_V2G_CableCheck_Performance_Time (Output 023847 short circuit) 023848 CCS_SECC_TIMEOUT_V2G_CPState_Detection_Time 023849 CCS_SECC_TIMEOUT_V2G_CPOscillator_Retain_Time 023850 CCS_SECC_TIMEOUT_V2G_PreCharge_Performace_Time 023851 CCS_SECC_TIMEOUT_V2G_reserved_2 023852 CCS_SECC_TIMEOUT_V2G_reserved_3 023853 CCS_SECC_TIMEOUT_V2G_reserved_4 023854 CCS_SECC_TIMEOUT_V2G_reserved_5 023855 CCS_CAN_TIMEOUT_TP_GET_EV_TARGET_INFO 023856 CCS_CAN_TIMEOUT_TT_GET_EV_TARGET_INFO 023857 CCS_CAN_TIMEOUT_TP_GET_EV_BATTERY_INFO 023858 CCS_CAN_TIMEOUT_TT_GET_EV_BATTERY_INFO...
- Page 52 Status Code Description 023871 CCS_CAN_TIMEOUT_TP_DOWNLOAD_FINISH 023872 CCS_CAN_TIMEOUT_TT_DOWNLOAD_FINISH 023873 CCS_CAN_TIMEOUT_TP_ISOLATION_STATUS 023874 CCS_CAN_TIMEOUT_TT_ISOLATION_STATUS 023875 CCS_CAN_TIMEOUT_TP_CONNECTOR_INFO 023876 CCS_CAN_TIMEOUT_TT_CONNECTOR_INFO 023877 CCS_CAN_TIMEOUT_TT_RTC_INFO 023878 CCS_CAN_TIMEOUT_TP_RTC_INFO 023879 CCS_CAN_TIMEOUT_TP_EVSE_PRECHARGE_INFO 023880 CCS_CAN_TIMEOUT_TT_EVSE_PRECHARGE_INFO 023881 CCS_CAN_TIMEOUT_MSG_Sequence 023882 CCS_CAN_MSG_Unrecognized_CMD_ID 023883 CCS_SECC_DIN_Msg_Decode_Error 023884 CCS_SECC_DIN_Msg_Encode_Error 023885 CCS_SECC_ISO1_Msg_Decode_Error 023886 CCS_SECC_ISO1_Msg_Encode_Error 023887 CCS_SECC_ISO2_Msg_Decode_Error 023888 CCS_SECC_ISO2_Msg_Encode_Error 023889 CCS_SECC_CP_State_Error 023890 CCS_SECC_Unexpected_60V_Before_Charing_Error...
- Page 53 Status Code Description 023908 GBT_WAIT_GROUNDFAULT_TIMEOUT 023909 GBT_ADC_MORE_THAN_10V 023910 GBT_ADC_MORE_THAN_60V 023911 GBT_CHARGER_GET_NORMAL_STOP_CMD 023912 GBT_CHARGER_GET_EMERGENCY_STOP_CMD 023913 GBT_ISOLATION_RESULT_FAIL 023914 GBT_MOTHER_BOARD_MISS_LINK 023915 GBT_OUTPUT_VOLTAGE_MORE_THAN_LIMIT 023916 GBT_REQ_CURRENT_MORE_THAN_LIMIT 023917 GBT_OUTPUT_VOLTAGE_MORE_THAN_10_PERCENT 023918 GBT_OUTPUT_VOLTAGE_DIFF_BCS_5_PERCENT 023919 GBT_STOP_ADC_MORE_THAN_10V 023920 ERROR_CODE_GBT_BMS_BROAA_NO_VOLTAGE_TIMEOUT 023921 ERROR_CODE_GBT_BMS_BROAA_TO_BRO00_ERROR 023930 GBT_CEM_BHM_TIMEOUT 023931 GBT_CEM_BRM_TIMEOUT 023932 GBT_CEM_BCP_TIMEOUT 023933 GBT_CEM_BRO_TIMEOUT 023934 GBT_CEM_BCL_TIMEOUT 023935 GBT_CEM_BCS_TIMEOUT...
- Page 54 Status Code Description 023947 GBT_BEM_BEM_OTHER_TIMEOUT 023950 GBT_BST_SOC_GOAL 023951 GBT_BST_TOTAL_VOLTAGE_GOAL 023952 GBT_BST_CELL_VOLTAGE_GOAL 023953 GBT_BST_GET_CST 023954 GBT_BST_ISOLATION 023955 GBT_BST_OUTPUT_CONNECTOR_OTP 023956 GBT_BST_COMPONEN 023957 GBT_BST_CHARGE_CONNECTOR 023958 GBT_BST_OTP 023959 GBT_BST_OTHER 023960 GBT_BST_HIGH_V 023961 GBT_BST_CC2 023962 GBT_BST_CURRENT 023963 GBT_BST_VOLTAGE 023964 GBT_GET_BST_NO_REASON 023970 GBT_BSM_CELL_OVER_VOLTAGE 023971 GBT_BSM_CELL_UNDER_VOLTAGE 023972 GBT_BSM_OVER_SOC 023973 GBT_BSM_UNDER_SOC...
- Page 55 Status Code Description 033901 disconnected from backend through WiFi 033902 disconnected from backend through 3G/4G 033903 Remote start charging by backend 033904 Remote stop charging by backend 033905 Remote reset by backend 041004 RCD/CCID self-test fail 041005 AC input contactor 1 welding 041006 AC input contactor 1 driving fault 041007...
- Page 56 Status Code Description 042209 PSU L1 input UVP 042210 PSU L2 input UVP 042211 PSU L3 input UVP 042212 System L1 input drop 042213 System L2 input drop 042214 System L3 input drop 042223 System ambient/inlet OTP 042224 System critical point OTP 042225 PSU ambient/inlet OTP 042226...
- Page 57 Status Code Description 042263 PSU Duplicate ID Psu Fault : Output Short Circuit 042264 042265 PSU Discharge Abnormal 042266 PSU Dc Side ShutDown 042267 PSU Failure Alarm 042268 PSU Protection Alarm 042269 Psu Fault : Fan Fault 042270 PSU Input UVP 042271 PSU Input OVP 042272...
- Page 58 Status Code Description 042300 System AC L3 output OCP 042301 System AC L2 output Circuit Short 042302 System AC L3 output Circuit Short 042304 disconnected from dispenser 042305 Meter communication timeout 042306 The dip switch of the PSU may be incorrect 042307 Psu Fuse Burn-Out 042308...
- Page 59 Status Code Description 043617 SMR fimrware update fail 043618 RFID module fimrware update fail 043619 configured by USB flash drive 043620 configured by backend 043621 configured by webage 043622 disconnected from Internet through Ethernet 043623 disconnected from Internet through WiFi 043624 disconnected from Internet through 3G/4G 043625...
-
Page 60: General Maintenance
5.2 General Maintenance • The DC Fast Charger is cooled by forced air. Please keep charger in a ventilated location and do not block the air vents of the DC Fast Charger. • Please clean or replace the air filters regularly to ensure the DC Fast Charger works properly. - Page 61 Note: • Before switching off main breaker to begin maintenance, please record the status code number on the LCD monitor. • After maintenance door opened or NFB of charger turned off the charger is still hazardous. Only visual inspection can be operated. •...
-
Page 62: Replacement Kits And Accessories
5.3 Replacement Kits and Accessories The DC EVSE offers the following replacement kits and accessories. Replacement Kit List Emergency Stop Button 30kW DC PSU CEG1K0100G Control & Supervisory Unit Surge Protection Device (SPD) MW Aux. Power HEP-1000-24A MW Aux. Power HEP-185-24A MW Aux. - Page 63 Warranty Exclusions: • Damage or rendered non-functional as a result of power surges, lighting, earthquake, fire flood, pest damage, abuse, accident, misuse, negligence or failure to maintain the product or other event beyond our reasonable control or not arising from normal operating condition.Cosmetic or superficial defect, dents, marks or scratches after use.
-
Page 64: Appendix - Package List
Appendix - Package list Item Description Remark EVSE User manual OQC Report Key of cabinet Waterproof Plastic Bolts CAT9A FTP RJ45 Plug M16 X L40 screws assembly... - Page 65 Manufacturer Contact Info Sticker...
Need help?
Do you have a question about the DB Series and is the answer not in the manual?
Questions and answers