
Summary of Contents for SOPREMA Essertec KS-G18
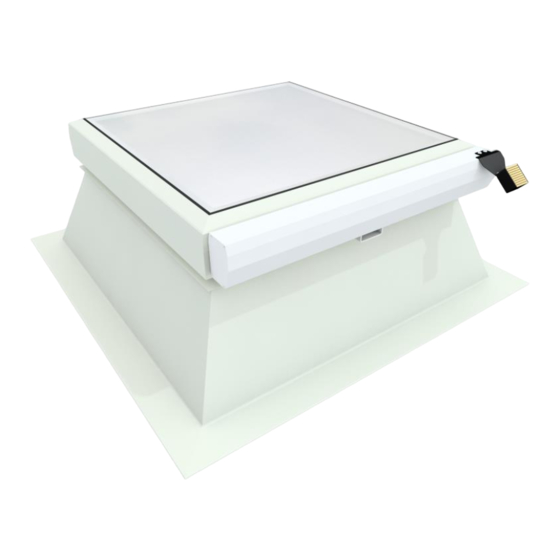
- Page 1 MONTAGEANLEITUNG ASSEMBLY INSTRUCTIONS ESSERTEC außenliegender Kettenschubantrieb KS-G18 ESSERTEC external chain drive KS-G18 ® ® essertop & essersky Stand: 02/2023 Art.-Nr.: 00240181...
- Page 2 Vorbemerkung Preliminary note Die Beachtung der nachstehenden Montageanleitung Obeying following installation instructions gewährleistet eine optimale Funktion und eine lange guarantees ideal operation and a long working life. Lebensdauer. Bitte Lieferumfang auf Vollständigkeit Please check that the deliverables are complete and und Beschädigungen prüfen.
-
Page 3: Vorbereitung Zur Montage
Vorbereitung zur Montage Preparation for installation Achtung: N.B.: Die Kette (2) soll sich, ohne seitlichen Druck auf The chain (2) should lift the dome without lateral den Motor und den Flügelbock (1) ein- und pressure on engine or hinge bracket (1). ausfahren lassen. - Page 4 Elektrischer Anschluss Electrical connection 300 mm 230 V Solo + Regensensor 500 mm 24 V Solo ESSERTEC außenliegender Kettenschubantrieb KS-G18...
- Page 5 300 mm 230 V Synchro/ Tandem 500 mm 24 V Synchro/ Tandem ESSERTEC außenliegender Kettenschubantrieb KS-G18...
- Page 6 Kettenschubantrieb Chain drive 11+12 Stück Bezeichnung Art.-Nr.: KS 300 KS 500 Kettenschubantrieb Nach Typ Anschlagwinkeleinheit 00239964 Gewindestift 5x78,5 00166994 Mutter M5 00166994 Bohrschraube 4,8x32 T25 00219353 Schneidschraube M5x10 00062504 Linsenschraube 3,9x16 PH 00062101 Konsole 00239968 00239969 Messingscheibe 00167207 Senkschraube M8x16 00167207 Wetterschutzgehäuse Teil 1 00237800 00237801...
- Page 7 Abmessungen der Beschläge/Kettenschubantriebe Measurements of the fittings/chain drives 300mm Hub 230V 500mm Hub 24V Montage am Aufsetzkranz Installation on upstand 1. Anschlagwinkel positionieren 3. Halter für Anschlussdose positionieren Position connecting angle Position console for junction box 2. Anschlagwinkel mittig verschrauben 4.
- Page 8 Montage am Rahmen Installation on the frame 1. Konsole und Gehäuse vormontieren 5. Loch für Kabel bohren Premount console and housing Drill hole for cable 2. Motorkonsole an Mittelpunkt ausrichten 6. Kabel durch Loch führen Align console with the central hole Put cable through the hole 3.
- Page 9 Zusammenbau Assembly 1. Lichtkuppel/Flachdachfenster schließen 4. Gehäuse schließen Premount console and housing Close the housing 2. Motor einhängen 5. Gehäusedeckel verschrauben Connect motor with bracket Screw on housing lids Montage Regensensor Installation rain sensor *bei einem KS 300 230V solo *with a KS 300 230V solo 3.
- Page 10 Montage Regensensor Installation rain sensor Stück Bezeichnung Art.-Nr.: Bohrschraube 4,8x32 T25 00219353 Sensorkonsole 00166072 Regensensor Linsenkopfschraube ISO 7049 Kreuzschlitz 2,9x19 Tülle 00064153 Steckerpaar Schrumpfschlauch groß Schrumpfschlauch klein Kabelklammer 00064272 ESSERTEC außenliegender Kettenschubantrieb KS-G18...
- Page 11 Montage Regensensor Installation rain sensor 1. Regensensor vormontieren 5. Gehäuse schließen Premount rain sensor Close the housing 2. Kabelklemmen unter den Motor kleben 6. Gehäusedeckel verschrauben Glue cable clamps on the motor Screw on housing lids 7. Kabeldurchführung bohren 3. Stecker abschrauben auf beiden Seiten Drill cable penetration Demount plug on both sides Außen...
- Page 12 12. Schlauch einschrumpfen 9. Stecker anschrauben auf beiden Seiten Shrink shrinking tube Mount plug on both sides 10. Schrumpfschlauch über Stecker 13. Kabel mit Klemmen unter Motor fixieren ziehen Fix cable with clips under the motor Pull over shrinking tube 11.
- Page 13 Abmessungen der Beschläge/Kettenschubantriebe Measurements of the fittings/chain drives tandem version 300mm Hub 230V Tandem NL [cm] L [mm] 500mm Hub 24V Tandem 1200 1200 1200 Montage am Aufsetzkranz Tandem Installation on upstand tandem version 1. Anschlagwinkel positionieren 3. Halter für Anschlussdose positionieren Position connecting angle Position console for junction box 2.
- Page 14 Montage am Rahmen Tandem Installation on the frame tandem version 1. Konsole und Gehäuse vormontieren 5. Loch für Kabel bohren Premount console and housing Drill hole for cable 2. Konsole und Gehäuse vormontieren 6. Kabel durch Loch führen Premount console and housing Put cable through the hole Glas 3.
- Page 15 7c. Kabelkanal festkleben (ggf. kürzen) 8c. Kabel in den Kabelkanal hineindrücken Glue on cable duct Lay cable in the duct 8a. Kabel in den Kabelkanal hineindrücken 8d. Kabel in den Kabelkanal hineindrücken Lay cable in the duct Lay cable in the duct 8b.
- Page 16 Zusammenbau Assembly 1. Lichtkuppel/Flachdachfenster schließen 4. Gehäusedeckel verschrauben Premount console and housing Screw on housing lids 2. Motor einhängen 5. Kabel in Anschlussdose führen Connect motor with bracket Put the cables in the box 3. Gehäuse schließen Close the housings ESSERTEC GmbH •...
Need help?
Do you have a question about the Essertec KS-G18 and is the answer not in the manual?
Questions and answers