Table of Contents
Advertisement
Available languages
Available languages
Quick Links
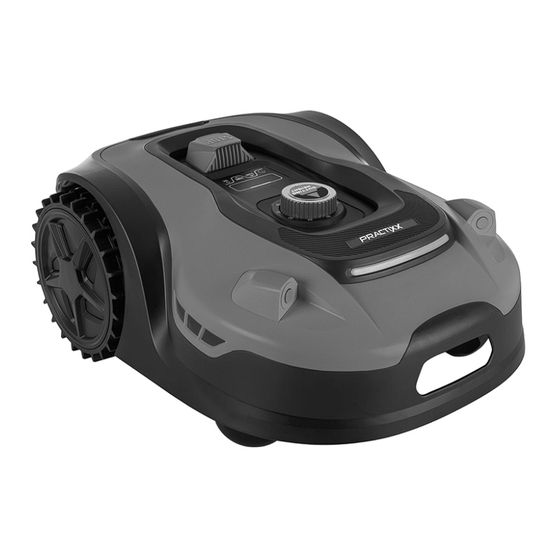
RASENMÄHROBOTER PX-RRM-2000WI
DE
RASENMÄHROBOTER PX-RRM-2000Wi
Bedienungs- und Sicherheitshinweise
Originalbetriebsanleitung
GB
ROBOT MOWER PX-RRM-2000Wi
Operating and Safety Instructions
Translation of the original operating instructions
FR
ROBOT TONDEUSE PX-RRM-2000Wi
Consignes d'utilisation et de sécurité
Traduction du mode d'emploi original
http://www.practixx.com/de/service
DE
GB
FR
Advertisement
Chapters
Table of Contents

Subscribe to Our Youtube Channel
Related Manuals for PRACTIXX PX-RRM-2000WI

Summary of Contents for PRACTIXX PX-RRM-2000WI
- Page 1 RASENMÄHROBOTER PX-RRM-2000WI RASENMÄHROBOTER PX-RRM-2000Wi Bedienungs- und Sicherheitshinweise Originalbetriebsanleitung ROBOT MOWER PX-RRM-2000Wi Operating and Safety Instructions Translation of the original operating instructions ROBOT TONDEUSE PX-RRM-2000Wi Consignes d'utilisation et de sécurité Traduction du mode d’emploi original...
- Page 2 Klappen Sie vor dem Lesen die Seite mit den Abbildungen aus und machen Sie sich anschließend mit allen Funktionen des Gerätes vertraut. Before reading, unfold the page with the illustrations and then familiarise yourself with all the functions of the unit. Avant de lire, dépliez la page des illustrations et familiarisez-vous ensuite avec toutes les fonctions de l’appareil.
- Page 3 PRODUKTBESCHREIBUNG / DESCRIPTION OF THE PRODUCT...
- Page 4 Ladestation/Base Ladestation Base...
- Page 5 Falsch! Richtig! Wrong! Correct! Max. Steigung von 35% Max. slope of 35% 100 cm Länge / Length...
- Page 6 Grünes Licht an Grünes Licht blinkt Green light on Green light flashing LED light status illustrate Action LED light status illustrate Action Confirm that the power cord is Confirm that the power cord is co Not turn on There is no power Not turn on There is no power to the charger and that the charg...
- Page 8 www.practixx.com...
- Page 9 Das Produkt entspricht den geltenden europäischen Richtlinien. Batterien und Akkus dürfen nicht in den Hausmüll. „POWER ON/OFF“-Taster (An-/ Aus-Taster) Start-Taster / Wahl-Taster (nach oben) Home-Taster (zurück zur Ladestation) / - Wahl-Taster (nach unten) OK-Taster PIN-Code Einstellung Datum/Uhrzeit Einstellung Super-Link 2 | DE www.practixx.com...
- Page 10 WiFi (W-Lan) Bluetooth In dieser Bedienungsanleitung haben wir Stellen, die Ihre Sicherheit betreffen, mit m Achtung! diesem Zeichen versehen. DE | 3 www.practixx.com...
-
Page 11: Table Of Contents
Aufbau / Vor Inbetriebnahme ............ 10 In Betrieb nehmen / Einstellungen ..........13 Reinigung .................. 17 Transport ................... 17 Lagerung/Winterschlaf .............. 17 Wartung / Update ..............17 Entsorgung und Wiederverwertung .......... 19 Störungsabhilfe / Fehlercodes ..........20 Konformitätserklärung ............... 68 4 | DE www.practixx.com... -
Page 12: Einleitung
Ihres Landes sind die für den Betrieb von Gefahren unterrichtet sein. baugleichen Maschinen allgemein anerkannten tech- Veränderungen an der Maschine schließen eine Haf- nischen Regeln zu beachten. tung des Herstellers und daraus entstehende Schä- den gänzlich aus. DE | 5 www.practixx.com... -
Page 13: Sicherheitshinweise
Verwendungsarten sind nicht zulässig. Die Anwei- WER ON/OFF-Taste aus, bevor Sie eine Blockie- sungen des Herstellers hinsichtlich Betrieb/War- rung entfernen. Prüfen Sie das Produkt auf Schä- tung sind genau einzuhalten. den, bevor Sie es wieder in Betrieb nehmen. 6 | DE www.practixx.com... - Page 14 Lufttemperatur zwischen 18 °C und 25 °C liegt. Umzäunungen von Viehweiden o. ä. Laden Sie den Akku nicht bei Lufttemperaturen unter 5 °C oder über 40 °C. Diese Anweisungen sind wichtig, da dies ernsthafte Schäden am Ak- ku vermeiden kann. DE | 7 www.practixx.com...
- Page 15 Sie, dass Ihre Maschine optimale Leistungen • Bewahren Sie die Originalproduktbeschreibung erbringt. zum späteren Nachschlagen auf. • Halten Sie Ihre Hände vom Arbeitsbereich fern, • Entsorgen Sie das Produkt ordnungsgemäß. wenn die Maschine in Betrieb ist. 8 | DE www.practixx.com...
-
Page 16: Technische Daten
6. Technische Daten m WICHTIG: Das Ladegerät ist ausschließlich zum Laden des Mähroboter Produkttyps PX-RRM-2000Wi geeignet. Spannung 20 V Geräusch & Vibration Leerlaufdrehzahl n 2300 min m Warnung: Lärm kann gravierende Auswirkungen Schnittbreite 22 cm auf Ihre Gesundheit haben. Übersteigt der Maschi- Schnitthöhe... -
Page 17: Aufbau / Vor Inbetriebnahme
Meter Fläche, ohne Hindernisse Um Schäden am Produkt zu verhindern, muss ein Hindernis von min. 15 cm Höhe zwischen o.ä., befindet. (Abbildung 3) dem Begrenzungsdraht (11) und Gewässern/ Hängen/Böschungen und/oder öffentlichen Stra- ßen sein. 10 | DE www.practixx.com... - Page 18 Vertikutierer zu verwenden, ist es zwingend er- der Außenkante, bis Sie den Punkt mit der kürzes- forderlich den Begrenzungsdraht (11) zu vergra- ten Distanz (mindestens jedoch 0,8 m) zwischen ben. der Außenkante und dem Hindernis erreicht ha- ben. DE | 11 www.practixx.com...
- Page 19 LED 2 leuchtet nicht Wi-Fi nicht verbunden. Starten Sie die Ladestation neu. leuchtet grün Wi-Fi verbunden. LED 3 leuchtet nicht Super-Link nicht verbunden. Docken Sie den Mäher erneut an. leuchtet grün Super-Link verbunden. blinkt grün Super-Link verbindet. 12 | DE www.practixx.com...
-
Page 20: In Betrieb Nehmen / Einstellungen
(2) zeigt auf Zahlen außerhalb des Drehknopfes. Hier können Sie die aktuell eingestellte Schnitthöhe Elektrischer Anschluss in 5 mm Schritten ablesen. Der installierte Elektromotor ist betriebsfertig ange- schlossen. Der Anschluss entspricht den einschlägi- gen VDE- und DIN-Bestimmungen. DE | 13 www.practixx.com... - Page 21 • Stellen Sie mit den „START“-, „HOME“- und „OK“ - tion (10). Tasten den richtigen Monat und Tag ein. (Standardmäßig mäht der Roboter von Montag bis • Zuletzt wird die Uhrzeit angezeigt (z.B. 13:25). Freitag von 09:00 - 15:00 Uhr.) 14 | DE www.practixx.com...
- Page 22 9.6 App-Steuerung • Nach dem Bestätigen der vierten Ziffer mit der „OK- Der Mähroboter PX-RRM-2000Wi kann per App Taste“ ist die neue Startzeit gespeichert. Auf dem bedient werden. Die App ist in den jeweiligen App- Display erscheint der Schriftzug „IdLE“.
- Page 23 In dieser Funktion können Sie auch einstellen, an drücken Sie die „HOME“-Taste (Pfeil-Taste nach welchen Tagen die Rasenkanten gemäht werden sol- unten). Um im Menü nach oben zu gelangen, len. drücken Sie die „START“-Taste (Pfeil-Taste nach oben). 16 | DE www.practixx.com...
-
Page 24: Reinigung
Messer (7) tauschen. 12. Lagerung/Winterschlaf m ACHTUNG! Es müssen immer alle Messer (7) gleichzeitig ge- Ihr Mäher bereitet Ihnen länger Freude, wenn er Win- tauscht werden. Der Austausch einzelner Messer (7) terschlaf halten darf. ist nicht erlaubt. DE | 17 www.practixx.com... - Page 25 Verbinden Sie Ihren Roboter mit Ihrem W-Lan. der Titelseite. Die Software kann aktualisiert werden, sobald eine neue Version verfügbar ist. (Die aktuellste Software- version finden sie auf unserer Homepage.) Die Software kann mittels USB oder über die App aufgespielt werden. 18 | DE www.practixx.com...
-
Page 26: Entsorgung Und Wiederverwertung
• Diese Aussagen gelten nur für Geräte, die in den Ländern der Europäischen Union installiert und verkauft werden und die der Europäischen Richt- linie 2012/19/EU unterliegen. In Ländern außerhalb der Europäischen Union können davon abweichen- de Bestimmungen für die Entsorgung von Elektro- und Elektronik-Altgeräten gelten. DE | 19 www.practixx.com... -
Page 27: Störungsabhilfe / Fehlercodes
3. Entfernen Sie die Gegenstände und drehen Sie den Mäher. 4. Stellen Sie den Mäher in einen Bereich mit kurzem Gras. 5. Drücken Sie die „START“- und dann die „OK“-Taste. Hindernissen- Sensor-Trigger nicht 1. Tritt der Fehler weiterhin auf, kontaktieren Sie Ihren Fachhändler. wiederhergestellt 20 | DE www.practixx.com... - Page 28 5. Ist die Temperatur zu niedrig, warten sie bis die Temperatur höher als 5°C liegt. 6. Starten Sie den Mäher neu. 7. Tritt der Fehler weiterhin auf, ersetzen Sie den Akku. 8. Tritt der Fehler weiterhin auf, kontaktieren Sie Ihren Fachhändler. DE | 21 www.practixx.com...
- Page 29 9. Andere Ansprüche, als die oben genannten, können nicht geltend gemacht werden. Die Garantiebedingungen gelten nur in der jeweils aktuellen Fassung zum Zeitpunkt der Reklamation und können ggf. unserer Homepage (www.practixx.com) entnommen werden. Bei Übersetzungen ist stets die deutsche Fassung maßgeblich.
- Page 30 Do not throw primary batteries or rechargeable batteries away with household waste. “POWER ON/OFF” button (on/off button) Start button / Select button (up) Home button (back to charging station) / - Select button (down) OK button PIN code setting Date/Time setting Super-Link GB | 23 www.practixx.com...
- Page 31 WiFi (WLAN) Bluetooth m Attention! We have marked points in this operating manual that impact your safety with this symbol. 24 | GB www.practixx.com...
- Page 32 Starting up / adjustments ............33 Cleaning ..................36 Transport ................... 37 Storage/Hibernation ..............37 Maintenance / Update ............... 37 Disposal and recycling .............. 38 Troubleshooting / fault codes ............ 39 Declaration of conformity ............68 GB | 25 www.practixx.com...
-
Page 33: Introduction
The safety, operating and maintenance specifications occur due to a failure to observe this manual and the of the manufacturer, as well as the dimensions speci- safety instructions. fied in the technical data, must be observed. 26 | GB www.practixx.com... -
Page 34: Safety Instructions
• Children are not allowed in the working area dur- • Do not place any objects on the housing or the ing operation. charge station of the product. GB | 27 www.practixx.com... - Page 35 • If liquid leaks, wash the battery with water / neu- mal room temperature (20 °C ± 5 °C). traliser. • When disposing of batteries, keep batteries of dif- m In the event of eye contact, consult a doctor. ferent electrochemical systems separate from each other. 28 | GB www.practixx.com...
-
Page 36: Technical Data
• Residual risks can be minimised if the “Safety In- Charging station IPX4 structions” and the “Intended Use” together with the Power supply IP67 operating manual as a whole are observed. Total weight (net) approx. 11.0 kg GB | 29 www.practixx.com... -
Page 37: Unpacking
(11). Take care when trimming edges near which This battery charger is suitable exclusively for charg- the boundary wire (11) is located. ing the product type: PX-RRM-2000Wi. 8.1 Setting up / correct position of the charging Noise & vibration station (10) m Warning: Noise can have serious effects on your health. - Page 38 (12) must be reduced boundary surface that can come into contact accordingly. with the mower or blades and damage them. - there are no plants on the boundary area that should not be mown. GB | 31 www.practixx.com...
- Page 39 LED 2 Does not illuminate Wi-Fi not connected. Re-start the charging station. Illuminates green Wi-Fi connected. LED 3 Does not illuminate Super-Link not Dock the mower again. connected. Illuminates green Super-Link connected. Flashes green Super-Link connecting. 32 | GB www.practixx.com...
-
Page 40: Starting Up / Adjustments
The customer‘s mains connection as well as the ex- The robotic lawnmower is not switched off, it has only tension cable used must also comply with these reg- been stopped. Always use the “POWER ON/OFF” ulations. button to switch the robotic lawnmower off. GB | 33 www.practixx.com... - Page 41 • Press and hold the “START” and “OK” buttons si- multaneously for at least 3 seconds. • The display shows the set start time, e.g. 13:25, with the first digit flashing. 34 | GB www.practixx.com...
- Page 42 • Use the “START” and “HOME” buttons to select the desired digit and confirm with the “OK” button. The PX-RRM-2000Wi robotic lawnmower can be op- • Proceed as described in paragraph 2-4 above. erated via app. The app is available in the respective •...
-
Page 43: Cleaning
Put on protective gloves before cleaning the rotating mowing. blade carrier. After the second charging process, it does the same in accordance with the set % number for zone 2, etc. We recommend that you clean the product directly after every use. 36 | GB www.practixx.com... -
Page 44: Transport
Before carrying out maintenance work, switch the product off with the -button. • To install/remove the battery, place the robotic lawnmower (1) on a workbench with the underside facing upwards. (We recommend a soft base to avoid damage to the housing). GB | 37 www.practixx.com... -
Page 45: Disposal And Recycling
Wearing parts*: Blade (7), screws (8), boundary wire trical device upon request from the end-user. Get in (11), wire pegs (12). contact with the manufacturer’s customer service. * may not be included in the scope of delivery! 38 | GB www.practixx.com... -
Page 46: Troubleshooting / Fault Codes
2. Ensure that the charging station is properly connected to the battery Mower outside the charger and charger is connected to a suitable power supply. working area 3. Make sure that the boundary wires have been clamped correctly and re- place them if necessary. GB | 39 www.practixx.com... - Page 47 2. If the error still occurs, contact your specialist dealer. 1. Switch the mower off. The cutting area lies 2. Change the boundary lines/reduce the mowing area to the specified area. outside the boundary 3. Switch the mower on. Press “START” and then “OK”. 40 | GB www.practixx.com...
- Page 48 5. If the temperature is too low, wait until the temperature is higher than 5°C. 6. Re-start the mower. 7. If the error still occurs, replace the battery. 8. If the error still occurs, contact your specialist dealer. GB | 41 www.practixx.com...
- Page 49 Bouton « POWER ON/OFF » (bouton marche/arrêt) Bouton de démarrage/bouton de sélection (vers le haut) Bouton Home (retour à la station de charge)/bouton de sélection (vers le bas) Bouton OK Réglage du code PIN Réglage de la date/l’heure Super-Link 42 | FR www.practixx.com...
- Page 50 WiFi (W-Lan) Bluetooth Dans la présente notice d’utilisation, tous les points qui concernent votre sécurité sont m Attention ! signalés par ce pictogramme. FR | 43 www.practixx.com...
- Page 51 Structure/avant mise en service ..........50 Mise en service/réglages ............53 Nettoyage .................. 57 Transport ................... 57 Stockage/hivernage ..............57 Maintenance/mise à jour ............57 Élimination et recyclage ............59 Dépannage/codes d’erreur ............60 Déclaration de conformité ............68 44 | FR www.practixx.com...
-
Page 52: Introduction
Dans ce cas, l‘utilisateur/ d‘âge minimum requis. opérateur est le seul responsable. Une utilisation conforme consiste également à res- pecter les consignes de sécurité, ainsi que les ins- tructions de montage et les consignes d‘utilisation de la notice d’utilisation. FR | 45 www.practixx.com... -
Page 53: Consignes De Sécurité
• Il est interdit de modifier la conception d’origine du • Ce produit doit être débranché du réseau d’électri- produit. L’utilisateur assume les risques liés aux cité avant le retrait de la batterie. modifications effectuées. 46 | FR www.practixx.com... - Page 54 à 5 °C ou su- périeures à 40 °C. Ces instructions sont impor- tantes et permettent d’éviter d’endommager sé- rieusement la batterie. FR | 47 www.practixx.com...
- Page 55 électrique à cause de l’encras- présente notice d’utilisation. Vous garantirez ainsi à sement. votre machine des performances optimales. • Maintenez vos mains à distance de la zone de tra- vail lorsque la machine est en cours de fonction- nement. 48 | FR www.practixx.com...
-
Page 56: Caractéristiques Techniques
6. Caractéristiques techniques m IMPORTANT : Le chargeur est uniquement conçu pour charger le Robot-tondeuse produit de type PX-RRM-2000Wi. Tension 20 V Bruits et vibrations Vitesse de rotation à vide n 2300 min m Avertissement : Le bruit peut avoir des consé-... -
Page 57: Structure/Avant Mise En Service
(10). (Figure 3) m ATTENTION ! Pour éviter d’endommager le produit, un obs- tacle d’au moins 15 cm de hauteur doit être po- sé entre le câble périphérique (11) et les plans d’eau/pentes/talus et/ou les routes. 50 | FR www.practixx.com... - Page 58 • Posez le câble périphérique (11) jusqu’à l’obstacle en suivant le chemin le plus court. • Posez le câble périphérique (11) à une distance de 30 cm ou 8 cm (voir point 8.3.1) autour de l’obstacle. FR | 51 www.practixx.com...
- Page 59 Redémarrez la station de charge. lumière verte Connecté au Wi-Fi. LED 3 ne s’allume pas Pas connecté au Super- Remettez la tondeuse sur son socle. Link. lumière verte Connecté au Super- Link. lumière verte Connexion au Super- clignotante Link. 52 | FR www.practixx.com...
-
Page 60: Mise En Service/Réglages
La flèche située sur le bouton rotatif de réglage de la hauteur de coupe (2) montre des chiffres situés hors du bouton. Vous pouvez y lire la hauteur de coupe actuellement réglée par incréments de 5 mm. FR | 53 www.practixx.com... - Page 61 également, en fonction du plan de tonte paramétré, • Réglez l’année avec les boutons « START », rester sur la station de charge (10). « HOME » et « OK », comme pour le réglage du code PIN. 54 | FR www.practixx.com...
- Page 62 « OK ». 9.6 Commande via l’application • Procédez comme indiqué ci-dessus pour les Le robot-tondeuse PX-RRM-2000Wi peut être com- chiffres 2-4. mandé depuis une application. L’application est dis- • Lorsque le quatrième chiffre a été confirmé avec ponible sur les stores pour Android et iOS.
- Page 63 Pour remonter vers le haut du me- Cette fonction vous permet également de paramétrer nu, appuyez sur la touche « START » (touche les jours de tonte des bordures de la pelouse. fléchée vers le haut). Choisissez la fonction souhaitée. 56 | FR www.practixx.com...
-
Page 64: Nettoyage
(2 jeux de lames de 3 lames sont fournis.) à un atelier spécialisé pour le faire examiner. Utilisez uniquement des lames d’origine du fabricant. Le robot-tondeuse (1) ne doit pas être mis en service (Réf. 7913001601) avant d’avoir pris cette mesure. FR | 57 www.practixx.com... - Page 65 7913001601 m REMARQUE Le robot doit être connecté au ré- Pos. 8 3913001001 seau WLAN pour pouvoir effectuer une mise à Pos. 11 Câble périphérique 7913001702 jour (automatique) via l’application. Pos. 12 Broches pour câble 7913001701 58 | FR www.practixx.com...
-
Page 66: Élimination Et Recyclage
• En cas de livraison d’un nouvel appareil électro- nique à un consommateur privé par le fabricant, le fabricant peut accepter de reprendre l’appareil électronique usagé gratuitement sur demande de l’utilisateur final. Pour en être sûr, contactez le ser- vice client du fabricant. FR | 59 www.practixx.com... -
Page 67: Dépannage/Codes D'erreur
4. Mettez la tondeuse dans une zone où la pelouse est basse. 5. Appuyez sur le bouton « START » puis sur la touche « OK ». Système de déclenchement 1. Si l’erreur se reproduit, contactez votre revendeur. du capteur d’obstacle pas réinitialisé 60 | FR www.practixx.com... - Page 68 5. Si la température est trop basse, attendez que la température dépasse de la batterie 5 °C. 6. Redémarrez la tondeuse. 7. Si l’erreur se reproduit, remplacez la batterie. 8. Si l’erreur se reproduit, contactez votre revendeur. FR | 61 www.practixx.com...
- Page 69 www.practixx.com...
- Page 70 图 图 纸 纸 发 发 布 布 电 电 动 动 开 开 发 发 部 部 通用件登记 底图总号 客户编码 原厂编码 设计 签 字 校对 审核 日 期 工艺 www.practixx.com...
- Page 71 借通用件登记 图 图 纸 纸 发 发 布 布 旧底图总号 客户编码 电 电 动 动 开 开 发 发 部 部 原厂编码 设计 签 字 校对 审核 日 期 工艺 www.practixx.com...
- Page 72 登记 图 图 纸 纸 发 发 布 布 电 电 动 动 开 开 发 发 部 部 总号 客户编码 版本号 材 质 原厂编码 颜色/表面处理 设计 字 标准化 校对 阶 审核 期 工艺 批准 页 www.practixx.com...
- Page 73 用件登记 底图总号 客户编码 原厂编码 设计 签 字 校对 审核 期 工艺 www.practixx.com...
- Page 74 www.practixx.com...
-
Page 75: Konformitätserklärung
Art.-Bezeichnung: RASENMÄHROBOTER PX-RRM-2000Wi mit Ladestation, Akku und Netzteil 16. Vyhlásenie o zhode Article name: ROBOT MOWER PX-RRM-2000Wi with charging station, battery and power supply Nom d’article: ROBOT TONDEUSE PX-RRM-2000Wi avec station de recharge, batterie et unité 16. Megfelelőségi nyilatkozat d’alimentation électrique 39130039969 Art.-Nr. - Page 76 Stand der Informationen · Status of the information · État des informations : Update: 11/2023 · Ident.-No.: 39130039969...
Need help?
Do you have a question about the PX-RRM-2000WI and is the answer not in the manual?
Questions and answers