Table of Contents
Advertisement
Quick Links
Advertisement
Table of Contents

Subscribe to Our Youtube Channel
Related Manuals for WandererAstro WandererRotator Mini

Summary of Contents for WandererAstro WandererRotator Mini
- Page 1 WandererAstro WandererRotator Mini User Manual...
-
Page 2: Table Of Contents
WandererAstro Contents 1.Introduction 2.Installation and use 2.1 ASCOM drivers installation 2.2 Connect the Rotator (take N.I.N.A. as an example) 2.3 Configure Phd2 2.4 Set backlash compensation 2.5 Set reverse 2.6 Set zero 3.Firmware upgrade 4.De-rotation 5.FAQs... -
Page 3: Introduction
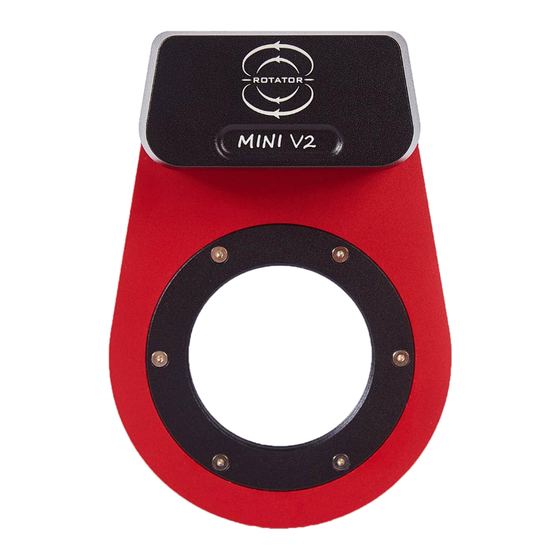
The WandererRotator Mini is the most low profile rotator in its class and rotates at up to 4.5 degrees per second. In addition, WandererRotator Mini has very high positioning accuracy. With 1142 steps per degree, its resolution can reach up to 0.005 degrees, which provides the possibility of accurate de-rotation. - Page 4 Steps per degree 1142 steps Clear aperture Material Aluminum alloy Threaded interface Both sides M54 female threaded The WandererRotator Mini V2 has the same appearance and size as the old model, as shown in Figure 3. Figure 3 Dimension of WandererRotator Mini...
-
Page 5: Installation And Use
USB power supply is sufficient. It is recommended to use WandererBox series powerboxes or a well powered USB hub. The USB port of the PC or ordinary hub may not provide enough current. For the WandererRotator Mini V2, 12V power must be plugged in. -
Page 6: Connect The Rotator (Take N.i.n.a. As An Example)
WandererAstro Among them, WandererRotators-All-in-one (1).exe and WandererRotators-All-in-one (2).exe are drivers with different IDs but the same function, and their purpose is to meet the requirements of running two rotators on one PC at the same time. If you only use one rotator, you only need to download WandererRotators-All-in-one(1). -
Page 7: Configure Phd2
WandererAstro Figure 7 Please pay attention that if you connect your Rotator to WandererRotators-All-in-one(1), it must also be connected to WandererRotators-All-in-one(1) the next time you connect. Since the mechanical position of the rotator is saved in the ASCOM driver, if you wrongly select WandererRotators-All-in-one(2), then the rotator will incorrectly read the mechanical position saved in driver 2.If you want to replace the drive that the rotator is connected to, please move... - Page 8 WandererAstro Figure 8 Figure 9 After connecting the rotator, perform a calibration for the first time. Then , even after the rotator is rotated by a certain angle, the guiding should still be fine. If it doesn't work , try checking "reverse sign of angle"...
-
Page 9: Set Backlash Compensation
WandererAstro 2.4 Set backlash compensation The default backlash compensation is 0.5 degrees, and no adjustment is required under normal circumstances. However, if it is found that the rotator rotates several times but the angle solved does not change during imaging, the backlash compensation needs to be increased. -
Page 10: Firmware Upgrade
WandererAstro 3.Firmware upgrade Download the firmware upgrade tool (Figure 11) and the firmware file with the suffix .hex from the official website (Figure 12). For detailed methods, please refer to the guidance in the firmware upgrade tool. Note that the firmware for V2 and for old model are common. -
Page 11: Rotation
WandererAstro 4.De-rotation WandererRotator Mini supports de-rotation for altazimuth mounts or Dobs users, which can play a major role in planetary photography, as well as longer exposures in deep sky photography. 4.1 Install Wanderer Console WandererRotator Mini needs to be controlled via the Wanderer Console to perform de-rotation. - Page 12 WandererAstro Figure13 4.2 Enter the target coordinates The Wanderer Console also needs to know the right ascension and declination coordinates of the target you are shooting to complete the de-rotation. You can manually enter the target's coordinate (Figure 14), or you can synchronize the target's coordinates from the Stellarium.
- Page 13 WandererAstro Figure15 Figure16 4.3 Start de-rotation When everything is ready, click “Start de-rotation” . The rotator will first rotate a small angle (about 1 degree) to ensure that the backlash is eliminated, and then start de-rotation. The de-rotation rate will be refreshed in real time , and you don’t need to perform other operations.
-
Page 14: Faqs
WandererAstro 5.FAQs Q : Why the rotator does not response, or loss control after one operation and has to be reconnected to be able to regain control? A:This is the phenomenon of insufficient USB power supply, which only occurs to the old model that is powered by USB.
Need help?
Do you have a question about the WandererRotator Mini and is the answer not in the manual?
Questions and answers