Table of Contents
Advertisement
Available languages
Available languages
Advertisement
Table of Contents

Related Manuals for ASTARITE Alpha


Summary of Contents for ASTARITE Alpha
- Page 1 Astarite Alpha Manual Handleiding - Bedienungsanleitung - Manual...
-
Page 2: Table Of Contents
Thank you! Thank you for purchasing the Astarite Alpha Smart Projector, an excellent choice! Everyone from the Astarite team wishes you a lot of fun, cozy nights and successful presentations with your new projector. Please carefully read the user's guide. After reading, keep this manual together with the warranty card in a safe place. -
Page 3: English
Be very careful in handling and maintenance of the projector. Please, read this user's guide carefully to prevent any malfunction. Warning The Astarite Alpha is a high-intensity light source. Please do not stare or look directly into the light source. Environment warning This projector is only suitable for altitudes below 2000 meters and non-thermal climate. -
Page 4: Names Of The Projector Parts
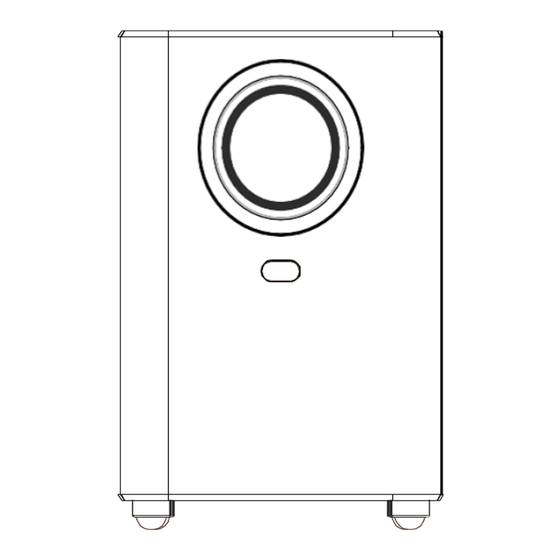
1.2. Names of the projector parts Front side Backside... -
Page 5: Casting & Bluetooth
1.3. Casting & Bluetooth Casting & screen mirroring To share/cast the screen of your phone or another device to the projector, please first switch the cast-function on in the projector. Follow the following steps: 1. Turn on the projector. 2. Connect the projector to the same WiFi-network as the device from which you want to cast. 3. -
Page 6: Connections & Remote Control
1.4. Connections & remote control Connections Build-in connections *Note: to switch between different input sources, please use the signal input source on the remote control (see next page). - Page 7 Remote control Attention Do not drop or trample the remote control. Do not spill any kind of liquid on the remote control. Do not place the remote control near a heat source, in direct sunlight or in a damp room.
-
Page 8: Installation And Configuration
1.5. Installation and configuration Focus adjustment Place the projector perpendicular to the projection screen or a (white) wall. Turn the lens focusing dial to adjust the image to a clear projection. Keep on turning until the image is focused correctly on the projection screen or on the wall. -
Page 9: Projection Distance And Size
1.6. Projection distance and size Screen size Screen Size Projection distance INCH Width x Height Feet 60” 152,4 1,32 x 0,78 1,75 5,75 72” 182,9 1,56 x 0,93 2,15 7,05 84” 213,4 1,83 x 1,10 2,50 8,20 100” 254,0 2,20 x 1,32 2,80 9,20 120”... -
Page 10: Zoom & Keystone Correction
1.7. Zoom & keystone correction Zoom function The zoom function can be used to reduce the screen size to 80%. Follow the steps below to use this function: 1. Navigate to settings via the navigation bar at the top of the screen. 2. -
Page 11: Maintenance And Cleaning
Handle the projector with care. Bumps or drops may affect the performance of the product. The Astarite Alpha is not waterproof and can suffer water damage when the projector comes into contact with water. Water damage can lead to a short circuit or electric shock. So do not place the projector near water, splashes, objects containing water (such as vases or drinking glasses) or other liquids. - Page 12 Cleaning the ventilation Warning Clean the ventilation inlet and outlet regularly. Otherwise, there is the risk of your projector overheating. At least every 10.000 hours of projecting. Cleaning the ventilation is very important! When not done regularly de ventilation inlet and outlet will be full with dust.
-
Page 13: Nederlands
Wees zeer voorzichtig bij het hanteren en onderhouden van de beamer. Lees deze gebruikershandleiding aandachtig door om storingen te voorkomen. Waarschuwing De Astarite Alpha is een lichtbron met een hoge intensiteit. Staar of kijk niet rechtstreeks in de lichtbron. Milieuwaarschuwing Deze beamer is alleen geschikt voor hoogtes onder de 2000 meter en een niet-thermisch klimaat. -
Page 14: Onderdelen Van De Beamer
2.2. Onderdelen van de beamer Voorkant Achterkant... -
Page 15: Casten & Bluetooth
2.3. Casten & Bluetooth Casten en schermspiegeling Om het scherm van uw telefoon of een ander apparaat naar de beamer te delen/casten, schakelt u eerst de cast-functie in de beamer in. Volg hiervoor de volgende stappen: 1. Zet de beamer aan 2. -
Page 16: Connecties & Afstandsbediening
2.4. Connecties & afstandsbediening Connecties Ingebouwde connecties *Opmerking: om tussen verschillende invoerbronnen te schakelen, gebruikt u de “input selectie” knop op de afstandsbediening (zie volgende pagina). - Page 17 Afstandsbediening Waarschuwing Laat de afstandsbediening niet vallen en sta er niet op. Mors geen vloeistof op de afstandsbediening. Plaats de afstandsbediening niet in de buurt van een warmtebron, in direct zonlicht of in een vochtige ruimte.
-
Page 18: Installatie En Configuratie
2.5. Installatie en configuratie Scherpstellen van het beeld Plaats de beamer loodrecht op het projectiescherm of een (witte) muur. Draai aan de scherpstelknop van de lens om het beeld af te stellen op een heldere projectie. Blijf draaien totdat het beeld goed op het projectiescherm of op de muur is scherpgesteld. -
Page 19: Projectie-Afstand En Beeldgrootte
2.6. Projectie-afstand en beeldgrootte Beeldgrootte diagonaal Beeldgrootte Projectie afstand INCH Breedte x Hoogte Feet 60” 152,4 1,32 x 0,78 1,75 5,75 72” 182,9 1,56 x 0,93 2,15 7,05 84” 213,4 1,83 x 1,10 2,50 8,20 100” 254,0 2,20 x 1,32 2,80 9,20 120”... -
Page 20: Zoom & Keystone Correctie
2.7. Zoom & keystone correctie Zoomfunctie De zoomfunctie kan worden gebruikt om de schermgrootte tot 80% te verkleinen. Volg de onderstaande stappen om deze functie te gebruiken: 1. Navigeer naar instellingen via de navigatiebalk bovenaan het scherm. 2. Open “Projection image settings” (projectie instellingen). 3. -
Page 21: Onderhoud En Schoonmaak
Ga zorgvuldig om met de beamer. Stoten of vallen kunnen van invloed zijn op de prestaties van het product. De Astarite Alpha is niet waterdicht en kan waterschade oplopen wanneer de beamer in contact komt met water. Waterschade kan leiden tot kortsluiting of elektrische schokken. Plaats de beamer dus niet in de buurt van water, spetters, objecten waar water in zit (zoals een vazen of drinkglazen) of ander vloeistof. - Page 22 De ventilatie schoonmaken Waarschuwing Reinig de ventilatie-inlaat en -uitlaat regelmatig. Anders bestaat het risico dat uw beamer oververhit raakt. Minimaal elke 10.000 uur projecteren. Het reinigen van de ventilatie is erg belangrijk! Wanneer dit niet regelmatig gebeurt, zullen de ventilatie-inlaat en -uitlaat vol zitten met stof. Hierdoor kan de interne temperatuur van de beamer stijgen, waardoor uw beamer defect kan raken.
-
Page 23: Deutsch
Seien Sie bei der Handhabung und Wartung des Projektors sehr vorsichtig. Bitte lesen Sie diese Bedienungsanleitung sorgfältig durch, um Fehlfunktionen zu vermeiden. Warnung Der Astarite Alpha ist eine hochintensive Lichtquelle. Bitte starren oder schauen Sie nicht direkt in die Lichtquelle. Umgebungswarnung Dieser Projektor ist nur für Höhen unter 2000 Metern und nicht-thermisches Klima... -
Page 24: Namen Der Projektor Teile
3.2. Namen der Projektor Teile Vorderseite Rückseite... -
Page 25: Casting & Bluetooth
3.3. Casting & Bluetooth Casting & Bildschirmspiegelung Um den Bildschirm Ihres Telefons oder eines anderen Geräts mit dem Projektor zu teilen/zu übertragen, schalten Sie bitte zuerst die Cast-Funktion im Projektor ein. Befolgen Sie die folgenden Schritte: 1. Schalten Sie den Projektor ein. 2. -
Page 26: Anschlüsse & Fernbedienung
3.4. Anschlüsse & Fernbedienung Verbindungen Eingebaute Anschlüsse *Hinweis: Um zwischen verschiedenen Eingangsquellen umzuschalten, verwenden Sie bitte die Signaleingangsquelle auf der Fernbedienung (siehe nächste Seite). - Page 27 Fernbedienung Warnung Lassen Sie die Fernbedienung nicht fallen und zertrampeln Sie sie nicht. Verschütten Sie keine Flüssigkeiten auf der Fernbedienung. Stellen Sie die Fernbedienung nicht in die Nähe einer Wärmequelle, in direktes Sonnenlicht oder in einem feuchten Raum.
-
Page 28: Installation Und Konfiguration
3.5. Installation und Konfiguration Fokuseinstellung Stellen Sie den Projektor senkrecht zur Projektionsleinwand oder einer (weißen) Wand auf. Drehen Sie das Fokussierrad des Objektivs, um das Bild auf eine klare Projektion einzustellen. Drehen Sie weiter, bis das Bild auf der Projektionswand oder an der Wand richtig fokussiert ist. Draufsicht auf den Projektor... -
Page 29: Projektionsabstand Und -Größe
3.6. Projektionsabstand und -größe Bildschirmdiagonale Bildschirmgröße Projektionsabstand INCH Breite x Höhe Feet 60” 152,4 1,32 x 0,78 1,75 5,75 72” 182,9 1,56 x 0,93 2,15 7,05 84” 213,4 1,83 x 1,10 2,50 8,20 100” 254,0 2,20 x 1,32 2,80 9,20 120”... -
Page 30: Zoom & Trapezkorrektur
3.7. Zoom & Trapezkorrektur Zoom-Funktion Mit der Zoomfunktion kann die Bildschirmgröße auf 80 % verkleinert werden. Führen Sie die folgenden Schritte aus, um diese Funktion zu verwenden: 1. Navigieren Sie über die Navigationsleiste oben auf dem Bildschirm zu den Einstellungen. 2. -
Page 31: Wartung Und Reinigung
Gehen Sie vorsichtig mit dem Projektor um. Stöße oder Stürze können die Leistung des Produkts beeinträchtigen. Der Astarite Alpha ist nicht wasserdicht und kann Wasserschäden erleiden, wenn der Projektor mit Wasser in Kontakt kommt. Ein Wasserschaden kann zu einem Kurzschluss oder Stromschlag führen. - Page 32 Lüftung reinigen Warnung Reinigen Sie den Belüftungseinlass und -auslass regelmäßig. Andernfalls besteht die Gefahr, dass Ihr Projektor überhitzt. Mindestens alle 10.000 Projektierstunden. Die Reinigung der Lüftung ist sehr wichtig! Wenn Sie dies nicht regelmäßig tun, sind Ein- und Auslass der Entlüftung voller Staub. Dies kann dazu führen, dass die Innentemperatur des Projektors ansteigt, was zu einer Fehlfunktion Ihres Projektors führen kann.
Need help?
Do you have a question about the Alpha and is the answer not in the manual?
Questions and answers