Table of Contents
Advertisement
Quick Links
Advertisement
Table of Contents

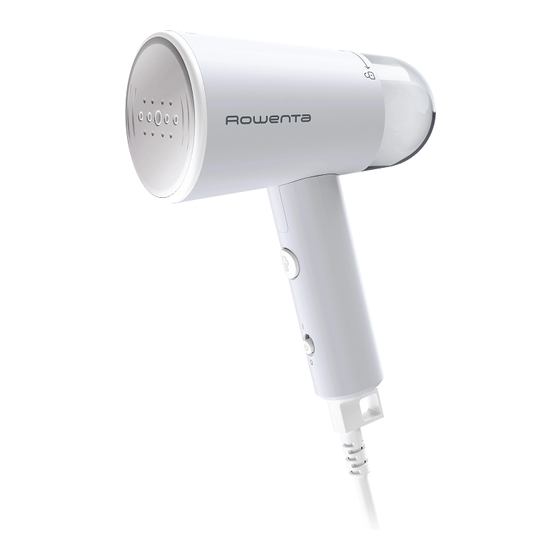
Summary of Contents for Rowenta DR1011U1
- Page 1 DR10XX www.rowenta.com www.rowenta.ca...
-
Page 2: Important Safety Instructions
• The surfaces which are marked with this sign Important safety instructions means the steam head is very hot during the use of the appliance. Do not touch this surface before the When using your appliance, basic precautions should appliance has completely cooled down. always be followed, including the following: •... - Page 3 • Burns could occur from touching hot metal or plastic • The appliance must not be used if it has been dropped, parts, hot water or steam. Exercise care when you if there are visible signs of damage or if it is leaking. empty a steam appliance.
-
Page 4: Instrucciones De Seguridad Importantes
• Utilice el aparato solamente para su uso previsto. Instrucciones de seguridad • Para reducir el riesgo de contacto con el agua caliente que sale de las aberturas de vapor, examine el aparato importantes antes de cada uso, manteniéndolo alejado del cuerpo Cuando utilice el aparato, deberá... - Page 5 • Será necesaria una estrecha vigilancia de cualquier • Deberá colocar el aparato sobre una superficie estable. aparato que sea utilizado por niños o cerca de ellos. Si el artefacto viene equipado con una base, cuando • No deje el aparato desatendido mientras esté lo coloque encima de ella, asegúrese que la superficie conectado o cuando todavía esté...
-
Page 6: Instructions Importantes De Sécurité
• Afin de réduire les risques de contact avec de l’eau brûlante sortant des orifices à vapeur, vérifiez l’appareil Instructions importantes de sécurité avant chaque utilisation en l’éloignant de votre corps Lorsque vous utilisez un appareil électrique, veuillez et en actionnant le bouton d’émission de vapeur. respecter des précautions de sécurité... - Page 7 • Une surveillance attentive est nécessaire lorsque • L’utilisation d’accessoires autres que ceux fournis par le l’appareil est utilisé par ou à proximité d’enfants. fabricant n’est pas recommandée et peut entraîner un • Ne laissez pas l’appareil sans surveillance lorsqu’il est incendie, une électrocution ou des blessures corporelles.
- Page 8 PRODUCT DESCRIPTION / DESCRIPCIÓN DEL PRODUCTO / DESCRIPTION DU PRODUIT 1. EN Water tank inlet cap 6. EN Steam button Tapa de la entrada del depósito de agua Botón de vapor Bouchon du réservoir d’eau Bouton d’émission de vapeur 2. EN 7.
- Page 9 BEFORE USE / ANTES DE USAR / Fill the water tank with water to the AVANT L’UTILISATION limit of max level (See section «what water to use»). Always unfold the steam head until Llena el depósito de agua hasta el is locked before any use of the nivel máximo (consulte el apartado appliance.
- Page 10 As steam is very hot: never attempt Align the dot marking on the brush to remove creases from a garment with the dot marking on the appliance while it is being worn, always hang and make sure the thick brush is garments on a clothes hanger.
- Page 11 USE / MODO DE USO / For optimal use, pass the steam jets over UTILISATION your garment from top to bottom. Tips: Check the fabric’s label for Plug-in the appliance. recommendations. We recommended that you test acrylic, nylon or other synthetic Switch on the appliance.
- Page 12 Be sure to follow the information on Wait for an hour for your appliance to the label of your garment. cool before storing. wool - laine silk - soie Asegúrate de seguir la información de Espere una hora a que se enfríe el synth.
- Page 13 ANTI CALC / DESCALCIFICACIÓN / ANTI CALCAIRE Close the water inlet cap. Return the water tank to its place on the appliance, make sure it is completely in place. Anti-calc operation can be done if you notice your appliance performance Cierre la tapa de la entrada de agua.
- Page 14 Close the water inlet cap. Return Rinse the water tank. Once rinsed, fill the water tank to its place on the the water tank with 100% water. appliance. Make sure the water tank is Close the water inlet cap. fully set in place. Enjuaga el depósito de agua.
- Page 15 Wait at least 25 seconds before CLEANING pressing the steam button. The light will switch off when the product is ready. Press the steam button. Wait an hour for the appliance to Allow the appliance to run until the completely cool down. water tank has completely emptied.
-
Page 16: Troubleshooting
RESOLUCIÓN DE PROBLEMAS TROUBLESHOOTING PROBLEMA CAUSAS POSIBLES SOLUCIONES PROBLEM POSSIBLE CAUSES SOLUTIONS No hay vapor. El aparato no está enchufado o no Compruebe que el aparato está está encendido. enchufado correctamente y está There is no steam. The appliance is not plugged in, or Check that your appliance is correctly encendido. -
Page 17: Guide De Dépannage
GUIDE DE DÉPANNAGE PROBLÈME CAUSES POSSIBLES SOLUTIONS Il n'y a pas de vapeur. L'appareil n'est pas branché à Vérifiez que votre appareil est l'alimentation ou n’est pas mis en correctement branché et mis en marche. marche. Ensuite, attendez environ 15 secondes pour que la vapeur soit disponible. - Page 18 1820011482...


Need help?
Do you have a question about the DR1011U1 and is the answer not in the manual?
Questions and answers