
Summary of Contents for SIBER PREMIUM HRV EVO 3
- Page 1 Certificación en proceso SIBER HRV 3 & 4 3 & 4 3 PR & 4 PR 3 PR & 4 PR Installation and User Manual...
-
Page 2: Table Of Contents
11 SMART CONNECTIVITY ............................11.1 MODBUS - RS485 ................................... 11.2 KNX - EVO CONNECT ................................11.3 ETHERNET BRIDGE - SIBER EVO APP ......................... 12 MAINTENANCE .................................................... 12.1 MAINTENANCE OF THE FILTERS (FOR THE USER) 12.2 MAINTENANCE OF THE HEAT EXCHANGER (FOR THE INSTALLER) ............ -
Page 3: Delivery
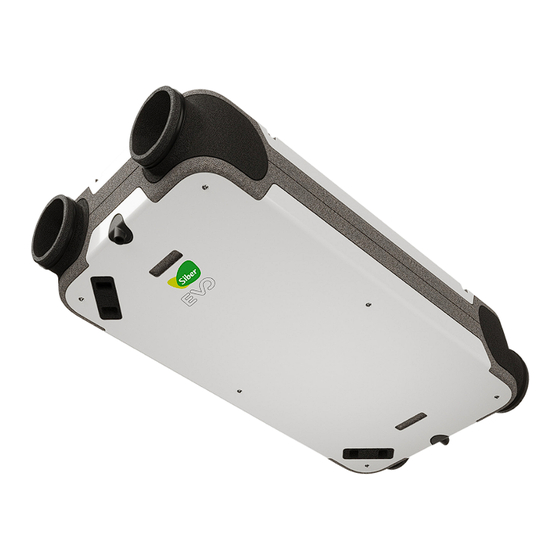
Before starting to install the Double Flow VMC Unit with Thermal Energy Recovery, you must check that it is complete and intact upon delivery. The contents of the VMC SIBER EVO 3&4 Unit are: VMC unit: • HRV EVO 3&4: Thermal Energy Recovery with standard core or •... -
Page 4: Optional Accessories Siber Evo 3&4
SIBER 3&4 / INSTALLATION MANUAL 1.2 OPTIONAL ACCESSORIES SIBER EVO 3&4 DESCRIPTION IMAGE CODE G4 FILTER COARSE 65% DF34FG4 F7 FILTER ePM1 55% DF34FF7 G4 + F7 FILTER COARSE 65% - ePM1 55% DF34FG4F7 CARBON FILTER DF34FCA F9 FILTER ePM1 80%... -
Page 5: Application
2 APPLICATION The SIBER EVO 3&4 unit is a Double Flow Controlled Mechanical Ventilation Unit with Thermal Energy Recovery with a performance of up to 95%, a maximum ventilation capacity of 300 m /h for the SIBER HRV/ERV EVO 3 and a maximum capacity of 400 m /h for the SIBER HRV/ERV EVO 4, with low energy consumption fans for both units. -
Page 6: Model
Maximum Ventilation flow (m SIBER® HRV EVO 3&4 PR and ERV EVO 3&4 PR The 1.000 W thermal power preheater, fitted as standard on these models and installed on the outdoor air inlet connection, raises the temperature of the air entering the unit to 10ºC, protecting its ventilation recovery core in cold climates. -
Page 7: Characteristic Curves
3.2 CHARACTERISTIC CURVES SIBER EVO 3 ® HRV EVO 3 Airflow Min Airflow 1 Airflow 2 Airflow 3 Airflow Max Q(m3/h) Flow (m Low DP Medium DP High DP Work points Work points FLOW (m PRESSURE (Pa) POWER (W) SFP (W/l/s) 0.58... - Page 8 SIBER 3&4 / INSTALLATION MANUAL SIBER EVO 4 ® Flow (m Low DP Medium DP High DP Work points Work points FLOW (m PRESSURE (Pa) POWER (W) SFP (W/l/s) 86.4 1.13 1.46 1.58 1.73 1.67 1.97 2.41 2.12 2.31 2.52...
-
Page 9: Connections And Dimensions
3.3 CONNECTIONS AND DIMENSIONS SIBER EVO 3&4 STANDARD VERSION LEGEND* Expulsion of stale air Fresh air supply to the home Fresh air intake f rom outside Extraction of stale air f rom inside the home Electrical connection Condensate drain connection... -
Page 10: Exploded View Of The Unit
SIBER 3&4 / INSTALLATION MANUAL 3.4 EXPLODED VIEW OF THE UNIT SIBER HRV/ERV EVO LEGEND High-performance filters Low-consumption motors Temperature sensors High-performance heat exchanger 100% automatic bypass Orientable condensate drain Electrical connections Preheater (*) (*) Only included as standard on the following models:... -
Page 11: Operation
4.3 ANTI-ICE SAFETY To prevent ice from forming on the heat exchanger when there are very low temperatures outside, the SIBER EVO 3&4 is equipped with smart anti-icing protection. The thermostatic sensors measure the temperatures in the heat exchanger and, if necessary, a progressive imbalance is established in the automatic equipment. -
Page 12: Installation
Installation instructions for the SIBER EVO 3&4 unit. 5.2 POSITION OF THE UNIT The SIBER EVO 3&4 can be fixed directly to the wall or ceiling using the fixing brackets included for this purpose. Important! For correct installation of the unit [see also section 2.1]. -
Page 13: Ceiling Mounting
5.3 CEILING MOUNTING Important! For correct installation of the unit on the ceiling [see also sections 2.1, 5.2 and 7]. By default, the unit comes with the silent block hooks fitted on the long side. To change them to the short side, follow the steps below: Unscrew the silent block hooks Change the silent block hooks to the short side, maintaining the same direction. -
Page 14: Wall Mounting
SIBER 3&4 / INSTALLATION MANUAL Loosen the wing nuts and leave Place on top of the guide and Tighten the wing nuts 1 cm of space slide until it engages with the threaded rod. 1 cm 5.4 WALL MOUNTING Important! For correct installation of the unit on the ceiling [see also sections 2.1, 5.2 and 7]. - Page 15 Screw the silent block hooks into the new position. Drill the marked surface and screw the fixing brackets into the oval holes. Long side Short side The fixing brackets must be spaced 630 mm apart on the long sides (standard version) and 1,195 mm apart on the short sides.
-
Page 16: Nozzle Orientation
SIBER 3&4 / INSTALLATION MANUAL 6 NOZZLE ORIENTATION To change the default direction of the nozzles, follow the steps below: Remove the filter covers Unscrew the outer cover Remove the outer cover and the front polypropylene from Unscrew the nozzle from the back... - Page 17 Lift the nozzle Turn the nozzle Screw the nozzle back on from the back Fit the outer and inner covers of the unit Screw the outer cover on Replace the filter covers...
-
Page 18: Condensate Drain Connection
If the condensate is drained in another way and any unintended event occurs in after-sales related to condensate drainage, Siber is exempted from any liability and it will be the responsibility of the installation company that has carried out the installation to resolve any issue and bear any associated costs. -
Page 19: Changing The Filters
8 CHANGING THE FILTERS Remove the filter cover. Pull the filter out. Place the new filter in the slot and press it in. Replace the filter covers... -
Page 20: Electrical Connection
SIBER 3&4 / INSTALLATION MANUAL 9 ELECTRICAL CONNECTION 9.1 CONNECTION TO THE POWER SUPPLY The electrical installation must correctly comply with the corresponding standards. Warning! The fans and the control circuit will operate at 230 V. If handling or maintenance work is carried out, the unit must be disconnected from the mains. - Page 21 Alimentación fan 1 Power supply for fan 1 Alimentación fan 2 Power supply for fan 2 Alimentación Power Reset button Botón reset eléctrica supply Alimentación Preheating Comunicación PC PC communication precalentamiento power supply (**) Sin uso Not used Selector 3V 3 V selector Sin uso Not used...
-
Page 22: Monitor Your Home - Wireless Sensors/Controls
It measures the indoor humidity in humid rooms and sends its measurements via RF (radio frequency) to the Siber EVO 3&4 unit. The unit will be able to react and vary the appropriate ventilation flow in order to ensure the indoor air quality according to the information from the sensor. -
Page 23: Smart Connectivity
(Modbus - RS485) to translate the information collected by the gateway (Modbus - RS485) and send it via cable to the BMS. It collects information from Siber EVO 3&4 units and compatible wireless sensors and controls ) that are linked to this ventilation unit. -
Page 24: Ethernet Bridge - Siber Evo App
Control and regulation of the unit's speeds. • Monitoring of the home's CO and relative humidity. The Siber EVO 3&4 unit collects information from compatible wireless sensors and controls ( » DFPULS4B, DFEVOCTRL, ) via radio frequency. DFEVOCO2 and DFEVOHR... -
Page 25: Maintenance
12 MAINTENANCE 12.1 MAINTENANCE OF THE FILTERS (FOR THE USER) It is recommended to check the filters every three months. Attention! The filters must be cleaned every six months and must be The equipment must never be operated without filters replaced at least once a year. -
Page 26: Maintenance Of The Heat Exchanger (For The Installer)
SIBER 3&4 / INSTALLATION MANUAL 12.2 MAINTENANCE OF THE HEAT EXCHANGER (FOR THE INSTALLER) Remove the filter cover. Pull the filter out. Unscrew the outer cover Remove the outer cover and the front polypropylene from Unscrew and remove the left support... - Page 27 Put the heat exchanger back into position Insert the support bracket and screw it back on Fit the outer and inner covers of the unit. Screw the outer cover on Replace the filters Replace the filter covers...
-
Page 28: Exploded View And Description
SIBER 3&4 / INSTALLATION MANUAL 12.3 EXPLODED VIEW AND DESCRIPTION Description of the SIBER EVO 3&4 Orientable nozzles Ø 160 4 units Front cover 1 unit Front polypropylene 1 unit Bypass valve 1 unit Bypass valve motor 1 unit Low-consumption fan... -
Page 29: Warranty Certificate
WARRANTY CERTIFICATE CERTIFICADO DE GARANTÍA All Siber products are carefully tested and are covered by warranty for a period of 36 months from the date of purchase, in accordance with current legisla�on. These rights, as provided for in the aforemen�oned legisla�on, may only be asserted with respect to the seller. - Page 30 Offices - Logistics Centre Logistics Centre - Factory - R&D&i Centre Factory - Training Centre Siber Zone, S.L.U. reserves the right to make any technical Showroom - Training Centre Academic/practical demolab modification to the equipment and elements without prior notice.
Need help?
Do you have a question about the PREMIUM HRV EVO 3 and is the answer not in the manual?
Questions and answers