Table of Contents
Advertisement
Available languages
Available languages
Quick Links
. . . . . . . . .3
OWNER'S MANUAL &
INSTALLATION
USING THE AIR CONDITIONER
Controls . . . . . . . . . . . . . . . . . . . . . . . . . . . . . .5
INSTRUCTIONS
Remote Control . . . . . . . . . . . . . . . . . . . . . . .5
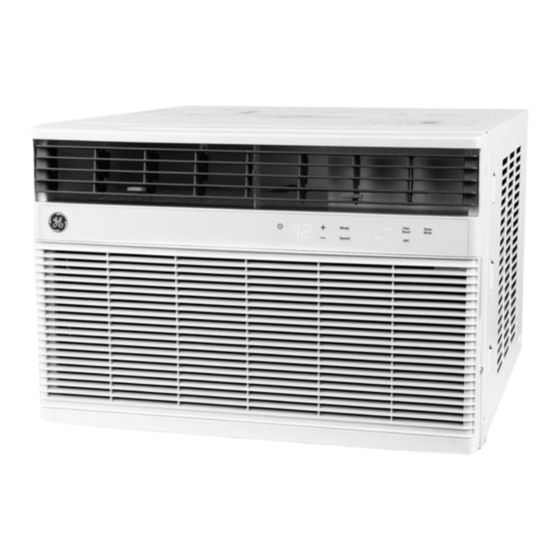
AWGH08WWF
. . . . . . . . . . .7
AWGH12WWF
. . . . . . . . . . . . . . . . . . .8
. . . . . . . . . . . . . . . . . . . . . . 14
. . . . . . 16
CONSUMER SUPPORT
Warranty . . . . . . . . . . . . . . . . . . . . . . . . . . . . 19
Consumer Support . . . . . . . . . . . . . . . . . . . 20
Before you begin
Record the GE module number and
password for wifi setup. To locate this
information, see page 14.
GE Module Number #____________
Password #____________________
Write the model and serial
numbers here:
Model # _________________
Serial # _________________
You can find the rating label on the
side of the air conditioner.
GE is a trademark of the General Electric Company. Manufactured under trademark license.
49-5000854 Rev. 0 09-23
Advertisement
Chapters
Table of Contents

Related Manuals for GE AWGH08WWF


Summary of Contents for GE AWGH08WWF
-
Page 1: Table Of Contents
Write the model and serial numbers here: Model # _________________ Serial # _________________ You can find the rating label on the side of the air conditioner. GE is a trademark of the General Electric Company. Manufactured under trademark license. 49-5000854 Rev. 0 09-23... - Page 2 THANK YOU FOR MAKING GE APPLIANCES A PART OF YOUR HOME. Whether you grew up with GE Appliances, or this is your first, we’re happy to have you in the family. We take pride in the craftsmanship, innovation and design that goes into every GE Appliances product, and we think you will too.
-
Page 3: Safety Information
IMPORTANT SAFETY INFORMATION READ ALL INSTRUCTIONS BEFORE USING THE APPLIANCE WARNING For your safety, the information in this manual must be followed to minimize the risk of fire, electric shock or personal injury. If the receptacle does not match the plug, the described in this Owner’s Manual. - Page 4 IMPORTANT SAFETY INFORMATION READ ALL INSTRUCTIONS BEFORE USING THE APPLIANCE HOW TO CONNECT ELECTRICITY Do not, under any circumstances, cut or remove the third Have the wall outlet and circuit checked by a qualified (ground) prong from the power cord. For personal safety, electrician to make sure the outlet is properly grounded.
-
Page 5: Controls
Controls Features and appearance will vary. Lights beside the touch pads on the air conditioner control panel Power indicate the selected settings. Speed Mode Filter Sleep Mode Cool Fan Eco Heat Reset Mode Delay Speed Auto Low Med High Air Conditioner Controls Remote Control 1. - Page 6 Using the Air Conditioner Control Panel Lights On/Off Feature This air conditioner has a control panel lights on/off To turn this feature off, press and hold the Sleep pad, feature where its lights will turn off when there is no on the unit, for 5 seconds.
-
Page 7: Care And Cleaning
Using the Air Conditioner Air Direction Push the top or bottom side of the outlet air duct to direct air up or down. Care and Cleaning Grille and Case Turn the air conditioner off and remove the plug from the To clean, use water and a mild detergent. -
Page 8: Installation Instructions
Level Scissors or knife ELECTRICAL REQUIREMENTS The AWGH08WWF model requires 115V 5-15P, protected with a time-delay fuse or circuit breaker. The AWGH12WWF requires 230V 6-20P, protected with a time-delay fuse or circuit breaker. - Page 9 Installation Instructions PARTS INCLUDED (Appearance may vary) Foam Seal Top Mounting Rail (may be installed Side Curtain already) Frame Side Curtain Right Left ON/OFF MODE Conditioner Power Bottom Seal and SPEED Side Seals (3) Speed DELAY Mode TEMP/TIME TEMP/TIME Delay Window Lock Installation Bracket...
- Page 10 • The electrical outlet must be within reach of the power cord. • Follow the dimensions in the table and illustration for your model. Models AWGH08WWF ” min ”-39” AWGH12WWF Save these screws for later use.
- Page 11 Installation Instructions 4. PREPARE THE AIR CONDITIONER 5. PREPARE WINDOW FOR INSTALLATION A. Install the top mounting rail with 4 Type A screws from the outside of the case. A. Measure the width of the window opening. B. Mark the center line on the inside windowsill. Mounting rail Bottom...
- Page 12 Installation Instructions 6 INSTALL OUTER CASE IN 6 INSTALL OUTER CASE IN WINDOW WINDOW (continues) A. Place outer case in window. Lower sash until D. Thread nut onto bolt, then thread the bolt into it rests behind front flange of top mounting rail. the triangle bracket as shown in the figure Bottom mounting rail must rest behind window below.
- Page 13 Installation Instructions 7. COMPLETE INSTALLATION 8. RETURN CHASSIS TO THE OUTER CASE A. Insert the foam seal behind the top of the lower window sash and against the glass of the upper A. Once the case is securely attached to the window.
-
Page 14: Wifi Setup
WiFi Connectivity: For assistance with the appliance or the appliance network connectivity, please call 1-800-220-6899. All connected appliance data is held in strict accordance with the GE Appliances Connected Data Privacy Policy. Visit geappliances.com/privacy/privacy_policy_connected to view this policy. Questions about SmartHQ Get answers you need about setting up WiFi appliances and connecting to your home network in our support articles. - Page 15 WiFi Setup REGULATORY INFORMATION • Reorient or relocate the receiving antenna. • Increase the separation between the equipment and FCC/IC Compliance Statement: receiver. This device complies with Part 15 of the FCC Rules. • Connect the equipment into an outlet on a circuit different from that to which the receiver is connected.
-
Page 16: Troubleshooting Tips
Troubleshooting Tips...Before you call for service Save time and money! Review the charts on the following pages first and you may not need to call for service. Problem Possible Causes What To Do Air conditioner The air conditioner • Make sure the air conditioner plug is pushed completely does not start is unplugged into the outlet. - Page 17 Troubleshooting Tips...Before you call for service Save time and money! Review the charts on the following pages first and you may not need to call for service. Problem Possible Causes What To Do Water drips outside Excessively hot and • This is normal. humid weather Water drips indoors The air conditioner is not...
- Page 18 Notes 49-5000854 Rev. 0...
-
Page 19: Warranty
Appliances Authorized Servicer is not available, you may be responsible for a trip charge or you may be required to bring the product to an Authorized GE Appliances Service location for service. In Alaska, the limited warranty excludes the cost of shipping or service calls to your home. -
Page 20: Consumer Support
Have a question or need assistance with your appliance? Try the GE Appliances Website 24 hours a day, any day of the year! You can also shop for more great GE Appliances products and take advantage of all our on-line support GEAppliances.com... - Page 21 # de Modelo _____________ # de Serie _______________ Puede encontrar estos números en una etiqueta en el costado del acondicionador de aire. GE es una marca registrada de General Electric Company. Fabricado bajo licencia de marca. 49-5000854 Rev. 0 09-23...
- Page 22 GRACIAS POR HACER QUE GE APPLIANCES SEA PARTE DE SU HOGAR. Ya sea que haya crecido usando GE Appliances, o que ésta es su primera vez, nos complace tenerlo en la familia. Sentimos orgullo por el nivel de arte, innovación y diseño de cada uno de los electrodomésticos de GE Appliances, y creemos que usted también.
-
Page 23: Seguridad
INFORMACIÓN IMPORTANTE DE SEGURIDAD LEA TODAS LAS INSTRUCCIONES ANTES DE USAR Para su seguridad, siga las instrucciones de este manual a fin de minimizar riesgos de ADVERTENCIA incendio, descargas eléctricas o heridas personales. como se describe en el Manual del Propietario. mismo deberá... - Page 24 INFORMACIÓN IMPORTANTE DE SEGURIDAD LEA TODAS LAS INSTRUCCIONES ANTES DE USAR CÓMO CONECTAR LA ELECTRICIDAD Contrate a un electricista calificado para que controle el tomacorriente y el circuito eléctrico para asegurar que el enchufe esté electrodoméstico debe estar adecuadamente conectado a tierra. correctamente conectado a tierra.
- Page 25 Controles control del acondicionador de aire indicarán los ajustes Power seleccionados. Speed Mode Filter Sleep Mode Cool Fan Eco Heat Reset Mode Delay Speed Auto Low Med High Controles de aire acondicionado Control Remoto Controles 1. Tecla de Power (Encendido) gradualmente cambie las configuraciones en un período Apaga y prende el acondicionador de aire.
- Page 26 Controles Función de Luces Encendidas/ Apagadas del Panel de Control Este acondicionador de aire cuenta con una función de panel Para desactivar esta función, mantenga presionada la tecla de control de luces encendidas/ apagadas, donde dichas Sleep luces se apagarán cuando no haya actividad en los controles unidad emitirá...
-
Page 27: Uso Del Acondicionador De Aire
Uso del Acondicionador de Aire Dirección del Aire izquierda y la derecha. Presione el lado superior o inferior del conducto de la salida de aire para direccionar el aire hacia arriba o abajo. Cuidado y limpieza Parrilla y Caja Apague el acondicionador de aire y retire el enchufe del tomacorriente antes de limpiar. -
Page 28: Instrucciones De Instalación
Tijeras o cuchilla REQUISITOS ELÉCTRICOS El modelo AWGH08WWF requiere 115 V 5-15P, protegido con un fusible retardado o un disyuntor. El AWGH12WWF requiere 230 V 6-20P, protegido con un fusible de retardo o un disyuntor. - Page 29 Instrucciones de instalación PARTES INCLUIDAS (La apariencia puede variar) Sellador de Riel de Montaje Superior Gomaespuma Marcos de la Cortinas derecho dejado Acondicionador de aire ON/OFF Power MODE Sellado Inferior y Sellados SPEED Speed DELAY Mode TEMP/TIME TEMP/TIME Delay Soporte de Soporte de Control Remoto Ventana...
- Page 30 Instrucciones de instalación 1. REQUISITOS PARA LA VENTANA 3. PREPARE EL ACONDICIONADOR DE AIRE • Estas instrucciones son para una ventana estándar A. Retire los 2 tornillos que se encuentran a cada lado proceso para otros tipos de ventanas. de la caja. Guarde los mismos para su uso posterior. •...
- Page 31 Instrucciones de instalación 4. PREPARE EL ACONDICIONADOR 5. PREPARE LA VENTANA PARA LA DE AIRE INSTALACIÓN A. Mida el ancho de la abertura de la ventana. A. Instale el riel de montaje superior con 4 tornillos Tipo A, desde la parte exterior de la caja. B.
- Page 32 Instrucciones de instalación 6. INSTALE LA CAJA EXTERNA EN 6. INSTALE LA CAJA EXTERNA EN LA VENTANA LA VENTANA D. Enrosque la tuerca en el tornillo, luego enrosque el hasta que se apoye detrás de la pestaña frontal del tornillo en el soporte triangular, como se muestra en riel de montaje superior.
- Page 33 Instrucciones de instalación 7. INSTALACIÓN COMPLETA 8. REGRESE EL CHASIS A LA CAJA EXTERNA A. Inserte el sello de gomaespuma detrás de la parte superior del marco de la ventana y contra el vidrio de la ventana superior. a la ventana, vuelva a instalar el acondicionador de de aire y deslizar el mismo sobre la caja.
-
Page 34: Configuración Wifi
Configuración WiFi GE Appliances SmartHQ (Para clientes en Estados Unidos) conectado, y para saber qué aplicaciones de electrodomésticos conectados funcionarán con su teléfono inteligente, visite GEAppliances.com/connect Cómo Funciona Appliances acondicionador de aire para sala. para ajustar el acondicionador de aire según lo desee. - Page 35 Configuración WiFi INFORMACIÓN REGULATORIA • Reoriente o reubique la antena receptora. • Aumente la separación entre el equipo y el receptor. Declaración de Cumplimiento con FCC/ • Conecte el equipo a un tomacorriente de un circuito diferente al tomacorriente al cual se encuentra conectado el receptor. •...
-
Page 36: Solucionar Problemas
Solucionar problemas ¡Ahorre tiempo y dinero! Primero revise los cuadros que aparecen en las siguientes páginas y es posible que no necesite solicitar reparaciones. Problema Causas posibles Qué hacer El acondicionador de El acondicionador de aire está Cerciórese de que el acondicionador de aire está enchufado aire no enciende desconectado totalmente en el tomacorriente. - Page 37 Sonidos de operación normales la humedad es alta. Esta característica de diseño ayuda a remover la humedad y mejora la eficiencia. lado externo de la unidad. condensador. Puede reducir este ruido retirando el enchufe de agua de la sub-base. El retiro del enchufe reducirá la Eficiencia Energética de la unidad. NOTA: 49-5000854 Rev.
- Page 38 Notas 49-5000854 Rev. 0...
-
Page 39: Garantía
Autorizado del Servicio Técnico de GE Appliances, usted será responsable por el costo de un viaje o se podrá requerir que traiga el producto a una ubicación del Servicio Técnico de GE Appliances Autorizado para recibir el servicio. En Alaska, la garantía limitada excluye el costo de envío o llamadas del servicio técnico a su hogar. -
Page 40: Soporte Al Cliente
GEAppliances.com/register Servicio Programado El servicio de reparación de expertos de GE Appliances está a sólo un paso de su puerta. ¡Conéctese a través de Internet GEAppliances.com/service.htm o llame al Garantías Extendidas Adquiera una garantía extendida de GE Appliances y aprenda sobre descuentos especiales que están disponibles mientras su...
Need help?
Do you have a question about the AWGH08WWF and is the answer not in the manual?
Questions and answers