
Summary of Contents for Artesia Pro a3
- Page 1 ASSEMBLY GUIDE Micro Grande Digital Piano EASY ASSEMBLY GUIDE IF YOU HAVE ANY QUESTIONS OR PROBLEMS PLEASE CALL OUR TOLL FREE HELPLINE 888-998-9848 D O N O T R E T U R N TO T H E S TO R E...
-
Page 2: What's Included
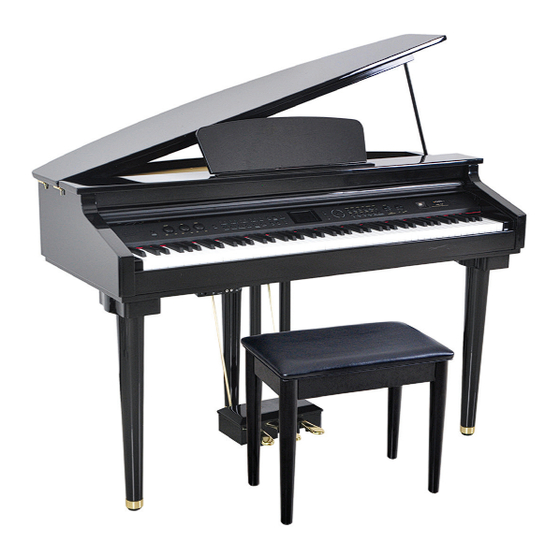
Unboxing Your Piano What’s Included A. Piano Body B. Lyre C. Lyre Support Rods x 2 D. Legs x 3 E. Leg and Lyre bolts F. Lyre Support Rod Screws x 8 G. Wrench H. Screwdriver I. Washers x 8 Not pictured: Thumb Drive/Song Library Documentation, Bluetooth Receiver,... - Page 3 Piano Assembly Continued 2. Leaving piano on its side, attach the top leg, and the rear leg as shown. PLEASE NOTE DO NOT ATTACH BOTTOM LEG AT THIS POINT. 3. Attach Lyre supports to the lyre and 3. Attach the lyre and the legs using the piano body as shown.
- Page 4 Piano Assembly Continued 4. Position a pillow or thick blanket so that the lyre assembly will rest upon it when the piano is turned upright PLEASE NOTE At least 2-3 people are needed to complete the assembly. DO NOT CONTINUE WITHOUT HELP. lift and rotate the piano in a tipping motion to the upright position.
- Page 5 Piano Assembly Continued PLEASE NOTE At least 2-3 people are needed to complete the assembly. DO NOT CONTINUE WITHOUT HELP. 6. With 1-2 people holding the piano upright, With someone lifting the front of the piano, remove the blanket or towel you used in step 4 7.
- Page 6 Piano Bench Assembly 10 . To assemble the bench, insert the threaded leg rod through the metal bracket (located on all four corners underneath of the padded top). Secure each leg with a locking washer and nut, then tighten with the wrench provided as shown in the picture below.
Need help?
Do you have a question about the a3 and is the answer not in the manual?
Questions and answers