Advertisement
Quick Links
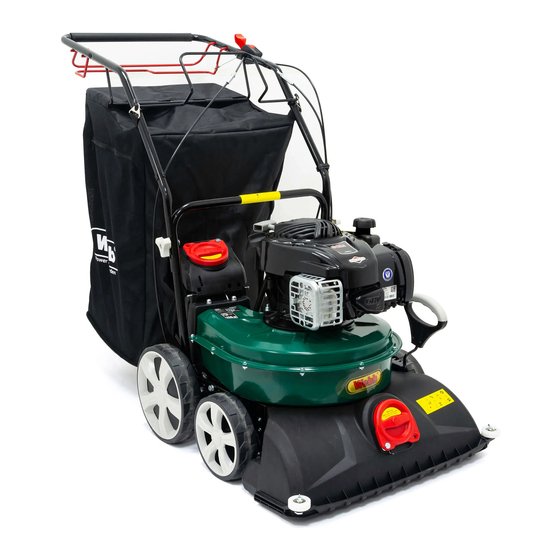
Designed to
WEWBVAC
PETROL WALK BEHIND VACUUM
& BLOWER
Product Number: 1938267001
en
- ORIGINAL INSTRUCTIONS
ASSEMBLY REQUIRED
MINIMUM TWO PERSONS
Service & Support: 01793 333212
Before use please read & understand this manual; paying particular attention to the safety instructions before use.
Incorrect use of the product could put the operator or machine in danger.
Whilst every effort has been made to ensure the accuracy of information contained in this manual, our policy of continuous
improvement determines the right to make modifications without prior warning.
Images are used for illustration purposes only.
Perform
Advertisement

Related Manuals for Webb WEWBVAC

Summary of Contents for Webb WEWBVAC
- Page 1 Designed to Perform WEWBVAC PETROL WALK BEHIND VACUUM & BLOWER Product Number: 1938267001 - ORIGINAL INSTRUCTIONS ASSEMBLY REQUIRED MINIMUM TWO PERSONS Service & Support: 01793 333212 Before use please read & understand this manual; paying particular attention to the safety instructions before use.
- Page 2 INSTRUCTION MANUAL INSTRUCTION MANUAL...
- Page 3 • • “ ” • •...
- Page 4 INSTRUCTION MANUAL INSTRUCTION MANUAL...
- Page 5 Read and understand the owner’s manual and labels affixed to the Read & understand operator’s manual — — — — — —...
- Page 6 INSTRUCTION MANUAL INSTRUCTION MANUAL...
- Page 8 INSTRUCTION MANUAL INSTRUCTION MANUAL inspect for damage. Replace with the original equipment manufacture’s (O.E.M.) parts only, listed in this manual. “Use of parts which do not meet the original equipment s performance and compromise safety!” (O.E.M.) parts only, listed in this manual. “Use of compromise safety!”...
- Page 10 INSTRUCTION MANUAL INSTRUCTION MANUAL 58 cm (23”)
- Page 12 INSTRUCTION MANUAL INSTRUCTION MANUAL...
- Page 14 INSTRUCTION MANUAL INSTRUCTION MANUAL...
- Page 16 INSTRUCTION MANUAL INSTRUCTION MANUAL...
- Page 18 INSTRUCTION MANUAL INSTRUCTION MANUAL insufficient oil, will not be covered by the manufacturer’s warranty. manufacturer’s warranty.
- Page 20 INSTRUCTION MANUAL INSTRUCTION MANUAL...
-
Page 21: Stopping The Engine
STOPPING THE ENGINE Move the throttle to the stop position IMPORTANT: Any accessory cassette fitted will rotate for a few seconds after the motor is switched off. Never attempt to stop the cassette yourself. In the event that the cassette strikes an object, immediately switch off the machine and wait for the cassette to come to a complete stop. -
Page 22: Guide Wheel
INSTRUCTION MANUAL INSTRUCTION MANUAL GUIDE WHEEL During Normal speed (3.4km/h). Impact at an angle of less than 45 degrees and to fixed hard objects. The guide wheel will rub against a hard object, causing the direction of travel to change. Thereby avoiding the hard object and preventing the machine from being damaged. - Page 23 HOSE TELESCOPIC HANDLE Telescopic handle of the hose can be adjusted for different handle heights. Push the lock pin in with your thumb, adjusting the height of the handle, up or down to the required height. HOSE BLOWER The accessory hose can be fitted to the machine, to enable leaves and debris to be blown to a safe vacuum area.
- Page 24 INSTRUCTION MANUAL INSTRUCTION MANUAL Open the rear hose cover. Align the end of the hose connector with the rear hose inlet. Insert the hose connector. Rotate the hose connector clockwise, to lock. NOTE: Please understand the parameters of the hose before use. NOTE: When working, try to straighten the hose and work it to ensure maximum suction and wind speed.
- Page 25 BRUSH OR SCARIFIER CASSETTE SCARIFIER - Only to be used on the lawn! The cassette rotates and combs the lawn or aerates the slightly mossy areas. The removed moss is conveyed into the collector. During aeration the surface of the ground is scratched; this improves water drainage and facilitates the absorption of oxygen.
- Page 26 INSTRUCTION MANUAL INSTRUCTION MANUAL ACCESSORY CASSETTE ROTATION Please assemble the accessory cassette, according to the Accessories section of this manual. After starting the engine, pull the roller lever up to the top handle. SELF-PROPELLED After starting the machine, pull the roller lever up to the top handle. Then pull the self-propelled lever up to the top handle.
-
Page 27: Collection Bag
COLLECTION BAG Assemble the collection bag, as per the Assembly section of this Instruction Manual. During machine use, the debris collected by the machine may cause the venting holes of the collection bag to become blocked or cause the air to return when the collection bag is full. Should this occur, open the side vent zip’s of the collection bag to allow ventilation and also check if the bag is full. - Page 28 INSTRUCTION MANUAL INSTRUCTION MANUAL COLLECTION BAG PRECAUTIONS NOTE: When encountering backflow, please check: if the venting hole of the collecting bag is blocked. Whether the collection bag is full. Stop the machine and check if the collection bag interface is blocked. NOTE: When loading and unloading the collection bag, please make sure the machine has been turned off.
- Page 29 Attach the plug washer, thread the plug in by hand to prevent cross-threading. compressed. If you are mounting an old one, you should only screw 1/8-1/4 more thread.
- Page 30 INSTRUCTION MANUAL INSTRUCTION MANUAL •...
- Page 31 • • • • carburetor, which is not covered by the machines manufacturer’s warranty.
- Page 32 INSTRUCTION MANUAL INSTRUCTION MANUAL...
- Page 34 INSTRUCTION MANUAL INSTRUCTION MANUAL...
- Page 36 INSTRUCTION MANUAL INSTRUCTION MANUAL This Service Book is provided with your Webb, to help you look after your purchase to our recommendations and enable you to take advantage of the conditional manufacturer domestic warranty*. Present this service book to your authorised Webb repair dealer, whenever a service or a warranty appraisal is required.
- Page 37 2. Period of Warranty - valid from 1 January 2020 parts, which are of original manufacture. Webb (excludes Dynamic, Legacy & Heritage), 2 year conditional warranty from the original date of sale to the fi rst domestic user. All claims must be accompanied by evidence of the date of purchase, such as a Sales Receipt showing that the prod- Webb (Dynamic, Legacy &...
-
Page 38: Warranty
It is the owner’s responsibility to ensure that their Webb machine is maintained at specifi c intervals. Any approved Webb service dealer can undertake a service, which are specialised in our products and will be aware of your particular machine and any technical updates which will save valuable time &... - Page 39 Your servicing Webb approved dealer will stamp & date the below relevant sections, when the correct service actions have been completed. PLEASE ENSURE THE SERVICE BOOK IS AVAILABLE FOR THE DEALER, DURING SERVICE WORK. 1st Service Your servicing Webb approved dealer will stamp & date the below relevant sections, when the correct service actions have been completed.
-
Page 40: Service Record
Service Record INSTRUCTION MANUAL INSTRUCTION MANUAL INSTRUCTION MANUAL 48 Months 60 Months Date Date 72 Months 84 Months Date Date 96 Months 108 Months Date Date 120 Months 132 Months Date Date... - Page 41 Email From time to time Webb, its associated companies, authorised dealers or third parties working on our behalf may wish to contact you regarding our products, services, off ers or just opinions, which may be used for marketing, research or analysis purposes.
- Page 42 Notes INSTRUCTION MANUAL INSTRUCTION MANUAL...
- Page 43 Notes...
- Page 44 INSTRUCTION MANUAL Service & Support: cs@webbgardenpower.co.uk Webb, Murdock Road, Dorcan Swindon, Wiltshire SN3 5HY...
Need help?
Do you have a question about the WEWBVAC and is the answer not in the manual?
Questions and answers