Advertisement
SPECIAL SEBO PRODUCT FEATURES
Your SEBO DISCO ultra-high-speed suction polisher is a high quality, reliable, innovative product that has been developed and made in Germany with the most modern technology. The 2,000 rpm disc speed combined with an appropriate floor maintenance product creates a protective floor coating with a high gloss finish. By using the floor polisher at regular intervals, it will protect your hard floors against cracks, dirt and dampness and will retain the value and beauty of the surface. An important feature is its ability to "monitor" the resistance of the floor pad against the floor, so that the proper height is consistently maintained. In addition, the machine has warning systems and automatic shut-off capabilities that are designed to alert the user to machine problems that, if ignored, will damage the machine or diminish performance.
Your SEBO DISCO'S five most unique features are:
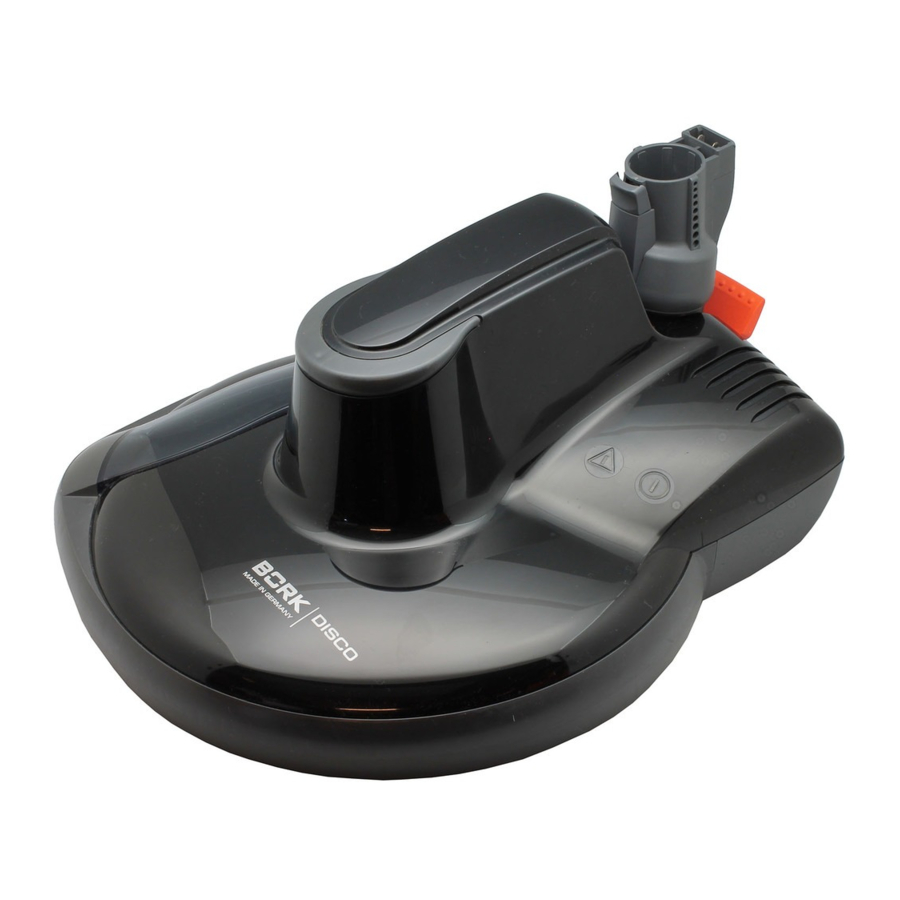
- Automatic Pad Height Adjustment. The SEBO DISCO adjusts the floor pad automatically to the appropriate floor height. The torque of the rotating floor pad is constantly measured ensuring optimal performance on hard floor surfaces.
![]()
- Rotating Swivel Neck. The 90º vertical and 180º horizontal turning swivel neck allows the SEBO DISCO to move with ease around furniture and into tight spaces
![]()
- Bumper Guards and Rolling Castors. The SEBO DISCO has two soft bumpers to protect your furniture and walls against scratches and scuffing. The DISCO head glides on three rubber-coated castors that will not mark your flooring. At the rear are two 360º flexible castors which are fixed on a solid steel shaft. The castor in the center supports and stabilizes the head. The flexible castors along with the turning swivel neck assure smooth maneuverability.
![]()
- Stationary Use Protection. When the machine has its handle in the upright-locked position, it is designed to disengage from the floor by raising the height of the floor pad. The pad will stop spinning. An operating machine should not stand stationary on the floor for inappropriate periods of time. If the floor pad should come in contact with carpet, the pad will raise from the floor and stop spinning.
- Bag Full or Clog Warning – Auto Shut-Off. If the polisher or vacuum's air flow pathway becomes restricted due to a full bag or the existence of a clog, the red LED light located on top of the DISCO will illuminate. If the user ignores this warning for approximately 30 seconds, the machine will shut off. The user should turn the switch off, unplug the machine and immediately insert a new bag or remove the clog (to remove a clog, refer to the Clog Removal section). If the user restarts the machine without having solved the problem, the red LED light will again illuminate and the machine will shut off in 30 seconds.
![]()


IDENTIFICATION OF PARTS

- Bumper
- Suction duct access cover
- Bumper
- Release button
- Swivel neck
- Head release button
- Foot pedal
- Clog/overload warning light
- Power indication light
- Support castor
- Seal
- Castor
- Floor pad
- Pad retainer
ASSEMBLY

Fit the floor pad (13) to the pad retainer (14), using the notches as a guide for correct position. Press the pad down onto the pad retainer (14) until it locks in place. See figure 1.

Press the retainer tabs (15) in using your thumb and forefinger and turn the pad clockwise until it locks into place again. See figure 2
To attach the DISCO to your SEBO FELIX, C3.1 or K3: place the DISCO on the floor with the swivel neck (5) upright. Hold the vacuum vertically and Insert the suction opening of the FELIX (16) or the electric telescopic tube (17) of your C3.1 or K3 into the swivel neck of the head. Push firmly and evenly downward until the head release button (6) snaps into the locked position. See figure 3.

To attach the DISCO to your central vac wand: Use the SEBO adapter (#18, figure 4 - part # 2780 AM)

OPERATING INSTRUCTIONS
Preparing The Floor
Remove as much furniture as possible, and cover any left in place.
First Cleaning:
- Vacuum the floor thoroughly to remove grit and debris.
![]()

- Mop the floor.
![]()

- Apply floor maintenance product. Ensure that the floor is completely dry before proceeding to step 4.
![]()

- Polish the floor.
![]()

- Vacuum the floor thoroughly before using the SEBO DISCO for the first time, ensuring it is completely free of debris, such as grit.
- Add some floor maintainer to the water, as per the instructions, if required, and clean the floor with a mop. Wait for the floor to dry completely before proceeding to step 3.
- Apply an appropriate floor maintenance product* in accordance with the instructions. Before polishing the floor, ensure that the floor is completely dry then proceed to step 4.
- Move the SEBO DISCO slowly over the floor similar to how you would use your vacuum cleaner.
Intermediate Maintenance:
Regular polishing of the coating will maintain an even finish and will ensure a longer lasting bright appearance of the floor. Vacuum the floor first, before using the polisher, to remove dirt and dust.
NOTE: Vacuum the floor surface THOROUGHLY before using the polisher. Grit and debris left on the floor can cause damage. Always inspect the pad before use - any grit that becomes embedded in the pad can damage your floor.
Floor Suitability
* Please refer to the maintenance guide of the manufacturers of your floors for recommended maintenance and floor maintainers.
| Suitable | Limited Suitability | Unsuitable** |
| Marble, Granite, Terazzo Linoleum, Vinyl, Thermoplastic | Sealed wood floor with water resistant finish Wooden floor - unsealed or oiled Porous natural stone, e.g. slate Laminate with water resistant finish | Cork Porous tile, e.g. terracotta Cushion vinyl |
** Please note that damage may occur if used on these types of floors.

The quality, condition, coating, texture, age and manufacturing technique of all floor surfaces vary. Therefore, machines with rotating pads, including your SEBO DISCO, may damage some floor surfaces. Some types of hardwood floors, cushion vinyl, cork and porous stone or tile are particularly vulnerable to damage by rotating brushes or pads. When possible, consult the materials supplied by your floor's manufacturer for information on proper upkeep and cleaning. To ensure that your new SEBO DISCO is compatible with your floor, please test the polisher on each type of flooring surface in a small inconspicuous area to determine if any damage occurs. If damage occurs, stop using the polisher immediately!
Starting The Machine - Figures 5 & 6
Before turning on your vacuum cleaner with the DISCO attached, make sure that the vacuum handle is in its upright locked position and that you have a firm hold on the handle grip to keep the machine from moving forward.
Make sure that the ON/OFF Switch (19) of your SEBO FELIX (figure 5) or SEBO C3.1 or K3 (figure 6) is in the OFF position.
Switch Position
O = OFF
I = ON
Release the power cord from the cord hook or reel and plug the polarized power cord into a 120 volt outlet located near the floor.
Press the power switch to the ON position.

Operating the Machine - Figures 7 & 8
NOTE: The SEBO DISCO has a soft-start system, so there may be a slight delay before it operates.
When the machine is switched on with the handle in the upright locked position, Figure 7 the DISCO pad will automatically raise from the floor and will stop spinning. To release the polisher from the upright locked position, press down on the foot pedal (7) and lower the handle into the normal operating position. The DISCO pad will automatically lower to the appropriate height and will start spinning.
When finished, switch the machine off and remain holding the vacuum cleaner firmly until the floor pad stops rotating. Then, return the handle to its upright, locked position.

LED Display - Figure 9
The green LED light (9) indicates that the floor polisher is powered on and operational.
If the air flow pathway becomes restricted due to a clog or a full bag, the red LED light (8) will illuminate and the machine will shut off. If this occurs, turn the power switch off, unplug the machine and immediately check for clogs in the DISCO head (see "Clog Removal"). If no clog is found, check for clogs in the vacuum cleaner or for a full dust bag. Refer to your vacuum cleaner owner's manual.

MAINTENANCE
 Always unplug machine from the outlet before dismantling any part of the machine!
Changing the Floor Pad - Figures 10, 11 & 12

Check the floor pad regularly for sharp and abrasive materials such as grit, grains of sand, etc. If necessary, change the pad.
To change the floor pad, press the retainer tabs (15) inward using your thumb and forefinger. Rotate the pad (13) counter clockwise (figure 10). Lift the floor pad out.
To insert a new pad, fit the floor pad (13) to the pad retainer (14), using the notches as a guide for correct position. Press the pad down onto the pad retainer (14) until it locks in place. Next, press the retainer tabs (15) in using your thumb and forefinger and turn the pad clockwise until it locks into place again (figure 12).
Use only genuine SEBO replacement floor pads to ensure performance, longevity and safety.
The underside of the machine should be cleaned regularly.

CLOG REMOVAL
Always unplug vacuum from outlet before removing any clogs!
Clogs in the Floor Pad - Figure 13
If a clog is indicated, check the pad area (20) first. Remove the pad (see instructions above). Check both sides for debris.

Clogs in the Suction Duct - Figure 14
To check the suction duct (21), push the release button (4) and remove the suction dust cover (2). Inspect the passage for debris.

Clogs in the Swivel Neck - Figure 14
To check for a clog in the swivel neck (5), remove the head by pressing the release button (6). Pull the vacuum out of the swivel neck. Clean out pathway.
NOTE: If your SEBO vacuum cleaner has a clog, please refer to the vacuum cleaner owner's manual.
TROUBLE-SHOOTING GUIDE
Always unplug vacuum from outlet before dismantling any part of the machine!
| PROBLEM | REASON | SOLUTION |
Does not turn on |
|
|
|
| |
|
| |
|
| |
|
| |
Red LED light is illuminated and machine shuts off |
|
|
|
| |
|
| |
|
| |
|
| |
Does not pick up |
|
|
|
| |
|
| |
| Check your FELIX, C3.1 or K3 canister owner's manual for more trouble-shooting problems and solutions. | ||
DISCO SCHEMATIC AND PARTS LIST
Power Head
White (Ice Blue) Machine
- 3204 GWSE Power head cover - white
- 3205 TG Suction duct access cover
- 3258 DG Swivel neck support
- 3226 DG Turning swivel neck
- 0876 Wiring for swivel neck
- 2947 DG Cover
- 2950 ER Bearing segments
- 1737 DG Release button
- 2952 DG Button cover, TS-neck
- 2945 DG Swivel neck slide
- 2951 DG Socket cover, TS-neck
- 01027 ER Screw F 3,9x9,5 DIN 7981
- 2954 Swivel neck bearing
- 3257 ER Swivel neck support L.H.
- 3238 Switch lever
- 2938 ER Axle
- 3252 ER Motor 120V cpl.
- 05141 S Pair of carbon brushes
- 3222 Motor pulley
- 01016 ER Screw sts 4x16-T20
- 3245 Internal cable
- 3242 ER Printed circuit board 120V
- 0107 ER Screw C 2,9x13,
- 2937 OR Foot pedal
- 3201 DG Chassis HSB
- 3254 DG Guide roll
- 0102 ER Screw F 3,9x13 DIN 7981
- 3268 ER Sealing strip
- 3221 Drive belt
- 3220 ER Center castor
- 01033 ER Screw M 10 x 25 DIN 7991
- 3202 DG Belt drive cover
- 3231 ER02 SEBO floor pad
Orange (Fun) Machine Exception
1 3204 VOSE Power head cover - orange
Black (Onyx) Machine Exception
1 3204 SWSE Power head cover - black
# 9430 AM DISCO Ice Blue (White)
# 9431 AM DISCO Fun (Orange)
# 9433 AM DISCO Onyx (Black)

TECHNICAL DETAILS
| Motor | 200 watts |
| Body weight | 8.5 lbs |
| Motor protection | electronic cut-out |
| Working width | 12 in. |
| Revolution speed | 2,000 rpm |
| Floor height adjustment | automatic sensor control |
IMPORTANT SAFETY INSTRUCTIONS
READ ALL INSTRUCTIONS BEFORE USING THIS MACHINE
When using an electrical appliance, basic precautions must always be followed. The use of the machine is at your own risk. The manufacturer/supplier is not liable for any injury or damage caused by incorrect usage of the machine. Always check the cleaning and maintenance instructions of your floor manufacturer.
SAVE THESE INSTRUCTIONS.
The quality, condition, coating, texture, age and manufacturing technique of all floor surfaces vary. Therefore, machines with rotating pads, including your SEBO DISCO, may damage some floor surfaces. Some types of hardwood floors, cushion vinyl, cork and porous stone or tile are particularly vulnerable to damage by rotating brushes or pads. When possible, consult the materials supplied by your floor's manufacturer for information on proper upkeep and cleaning. To ensure that your new SEBO DISCO is compatible with your floor, please test the polisher on each type of flooring surface in a small inconspicuous area to determine if any damage occurs. If damage occurs, stop using the polisher immediately!

To reduce the risk of fire, electric shock, injury or damage:
- The SEBO DISCO is for use only with SEBO C3.1, K3 or FELIX vacuums or central vac units with adapter. Do not use with any other manufacturer's vacuum cleaners.
- Do not leave machine while plugged in. Unplug from outlet when not in use and before servicing.
- Do not use outdoors or on inappropriate surfaces, e.g. stone or concrete.
- Do not use on uneven floors.
- Do not use on soft vinyl floors which are not stuck down as they could be sucked off the floor and damaged.
- The SEBO DISCO is for polishing dry hard floors only. Do not use on wet surfaces.
- Before using the machine, vacuum the floor thoroughly. Flooring may be damaged if particles of dirt are not removed before polishing.
- Do not leave machine standing in one place with polisher turned on. Damage may occur.
- Do not touch the floor pad or drive while the machine is operating.
- Do not use DISCO without floor pad. Do not use without vacuum filter bag and/or filters in place.
- Do not use near small children or pets. Do not allow to be used as a toy. Use of this product by children should always be supervised by an adult.
- Use only as described in this manual.
- Do not use with a damaged cord or plug. If vacuum or head is not working as it should, has been dropped, damaged, left outdoors, or dropped into water, take it to a SEBO service center.
- Do not pull or carry by cord, use cord as a handle, close a door on cord, or pull cord around sharp edges or corners. Do not run over cord. Keep cord away from heated surfaces.
- Do not unplug by pulling on cord. To unplug, grasp the plug – not the cord.
- Do not plug in if switch is in the "I" (ON) position.
- Do not use outlets above counters to plug in vacuum – damage to items in the surrounding area could occur.
- Always carry the polisher over steps and sills.
- Do not handle plug or vacuum handle with wet hands.
- Do not put any object into polisher openings. Do not use machine with any openings blocked. Keep openings free of lint, hair, and anything that may reduce air flow.
- Do not wash or reuse floor pad. Do not reuse vacuum filter bags or wash the filters.
- Do not remove any screws from the DISCO.
- Do not run the DISCO over anything that is burning or smoking, such as cigarettes, matches, or hot ashes.
- Turn off all machine controls before unplugging.
- Use extra care when using on stairs.
- Do not use machine to vacuum up flammable or combustible liquids such as gasoline or use in areas where they may be present.
- Machines can cause a fire when operated near flammable vapors or materials. Do not operate this vacuum near flammable fluids, dust or vapors.
- Maintenance and repairs must be done by qualified personnel.
- This machine should only be operated with SEBO floor pads and replacement parts. The use of non-genuine parts will waive the warranty for this product and could pose a serious safety risk.
- Do not use DISCO head as a step.
- Keep hair, loose clothing, fingers, and all parts of body away from vacuum openings and moving parts. Do not place fingers or other body parts under vacuum unless it is unplugged.
- Do not place the DISCO head over rug or carpet edges. Do not use on carpet.
- The vacuum has a manual reset thermal protector. The protector is reset by switching off the vacuum. The thermal protector needs some time to cool down after switching off! Check the vacuum for air blockages or mechanical failures before switching on.
- Store the machine in a dry place at room temperature. When the machine is not in use, you should wrap the cord on the cable hooks.
- Any other servicing should be performed by an authorized service representative.
Documents / ResourcesDownload manual
Here you can download full pdf version of manual, it may contain additional safety instructions, warranty information, FCC rules, etc.
Advertisement

Need help?
Do you have a question about the DISCO and is the answer not in the manual?
Questions and answers